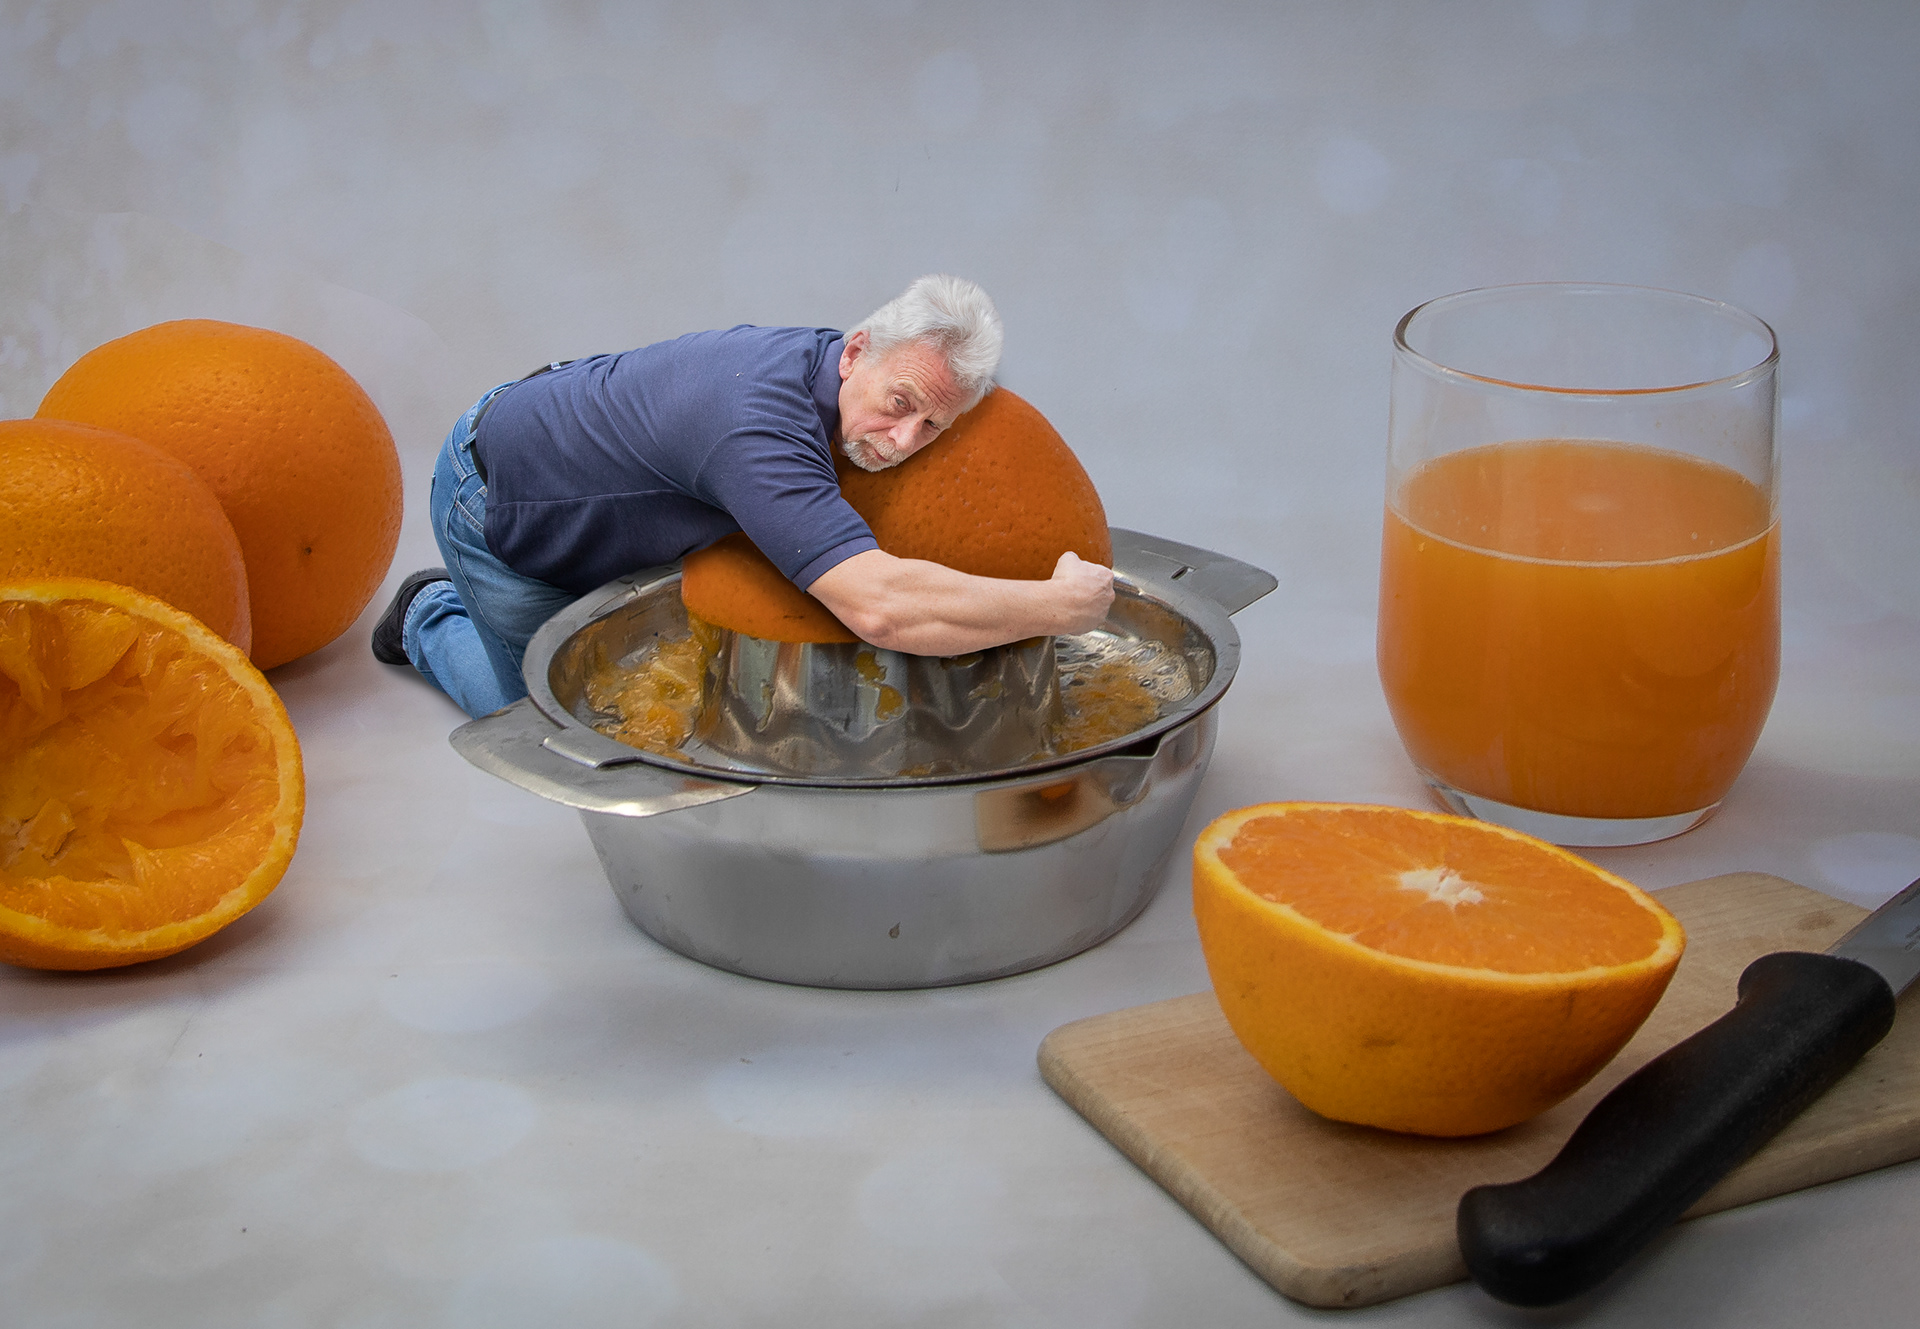
Each different Diminutive Dave image gets a different treatment, but the general process is the same for all - here I shall use the one where he is squeezing an orange as an example.

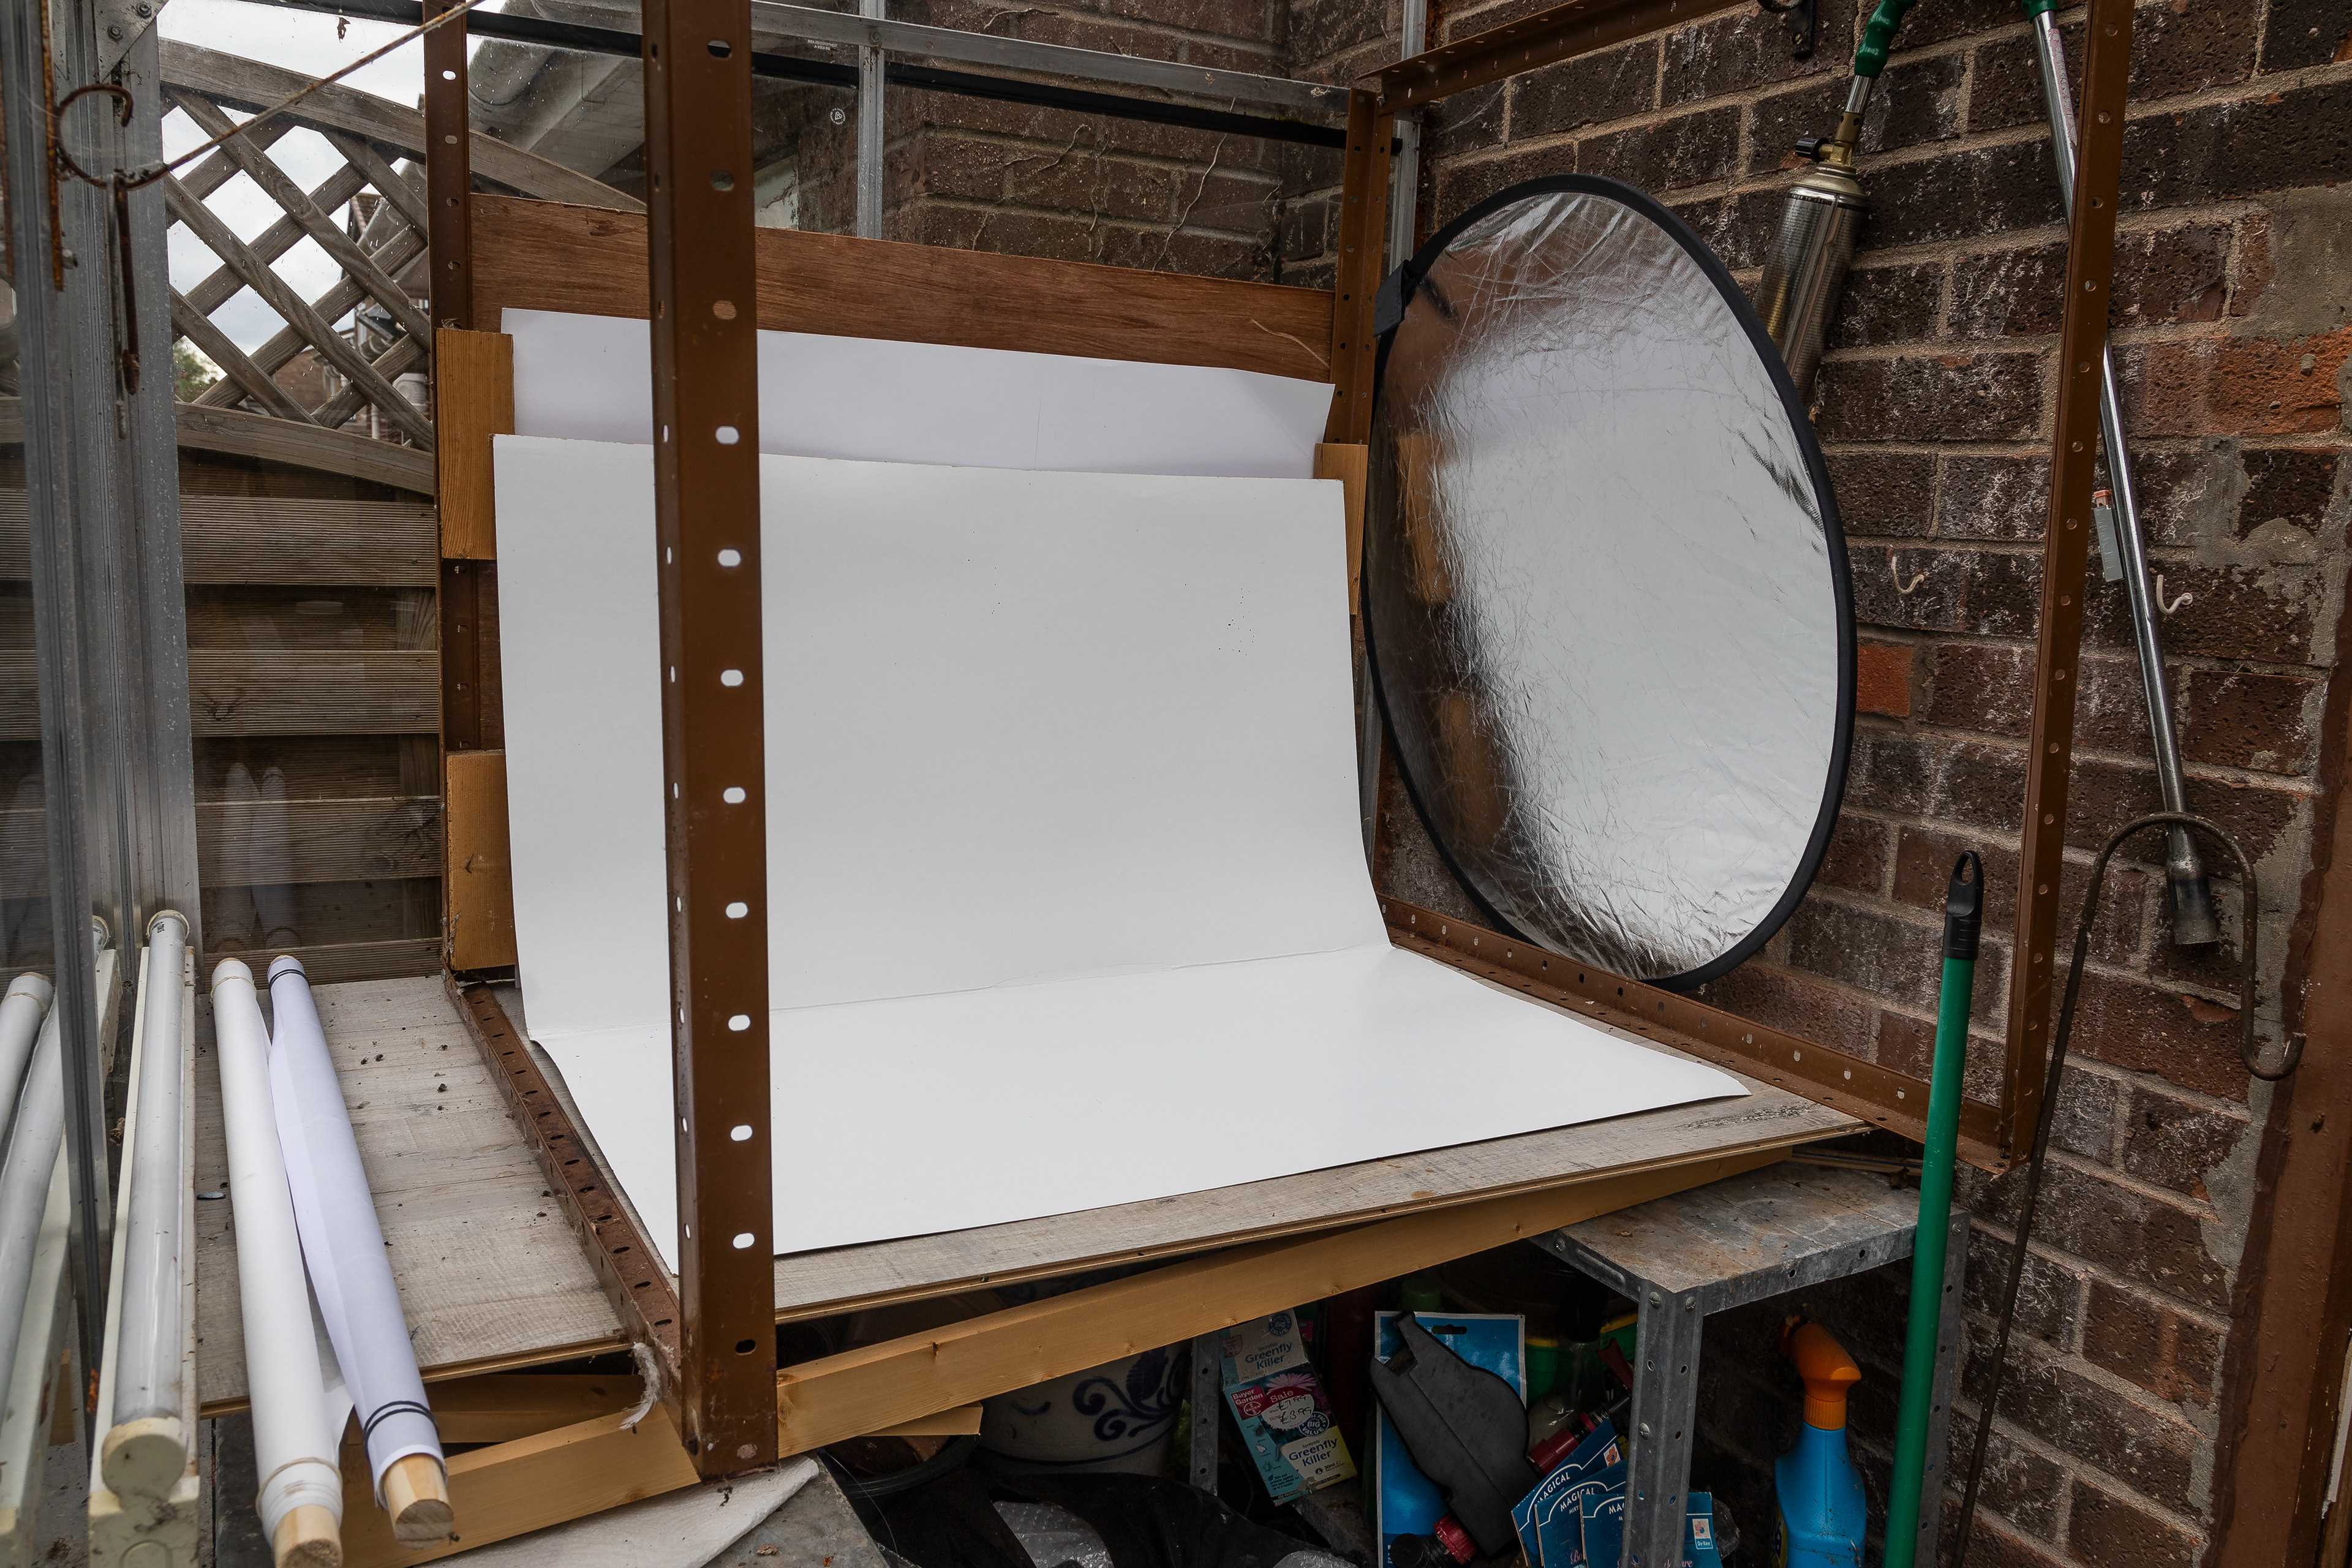
Earlier in the spring I converted my small greenhouse into a table-top studio and bought myself a few different backdrops.
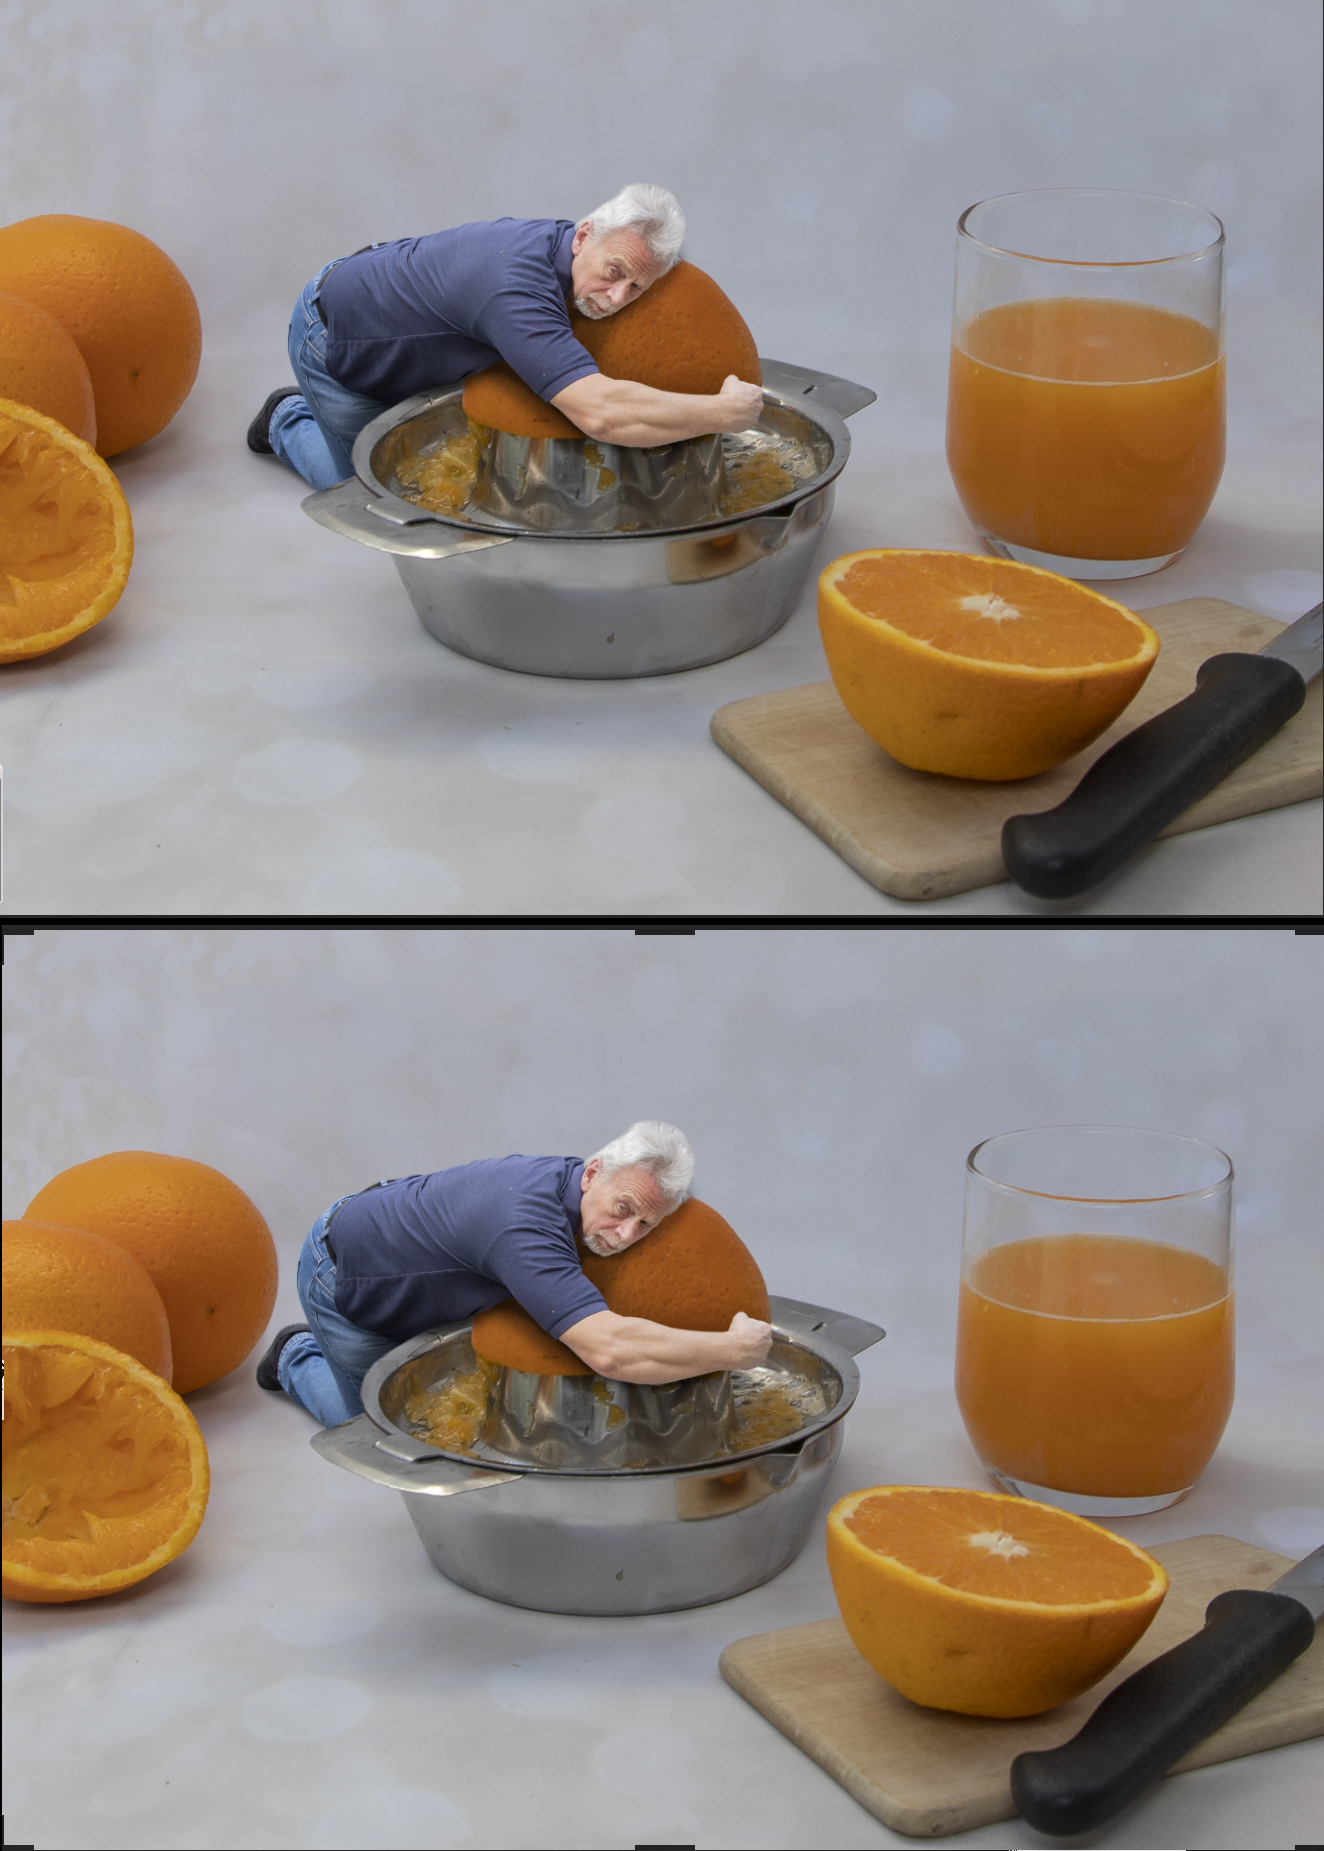
For every Diminutive Dave image, I start with the background, in this case the orange being squeezed. Each image obviously has slightly different stages to go through, depending on what DD is doing in the picture.
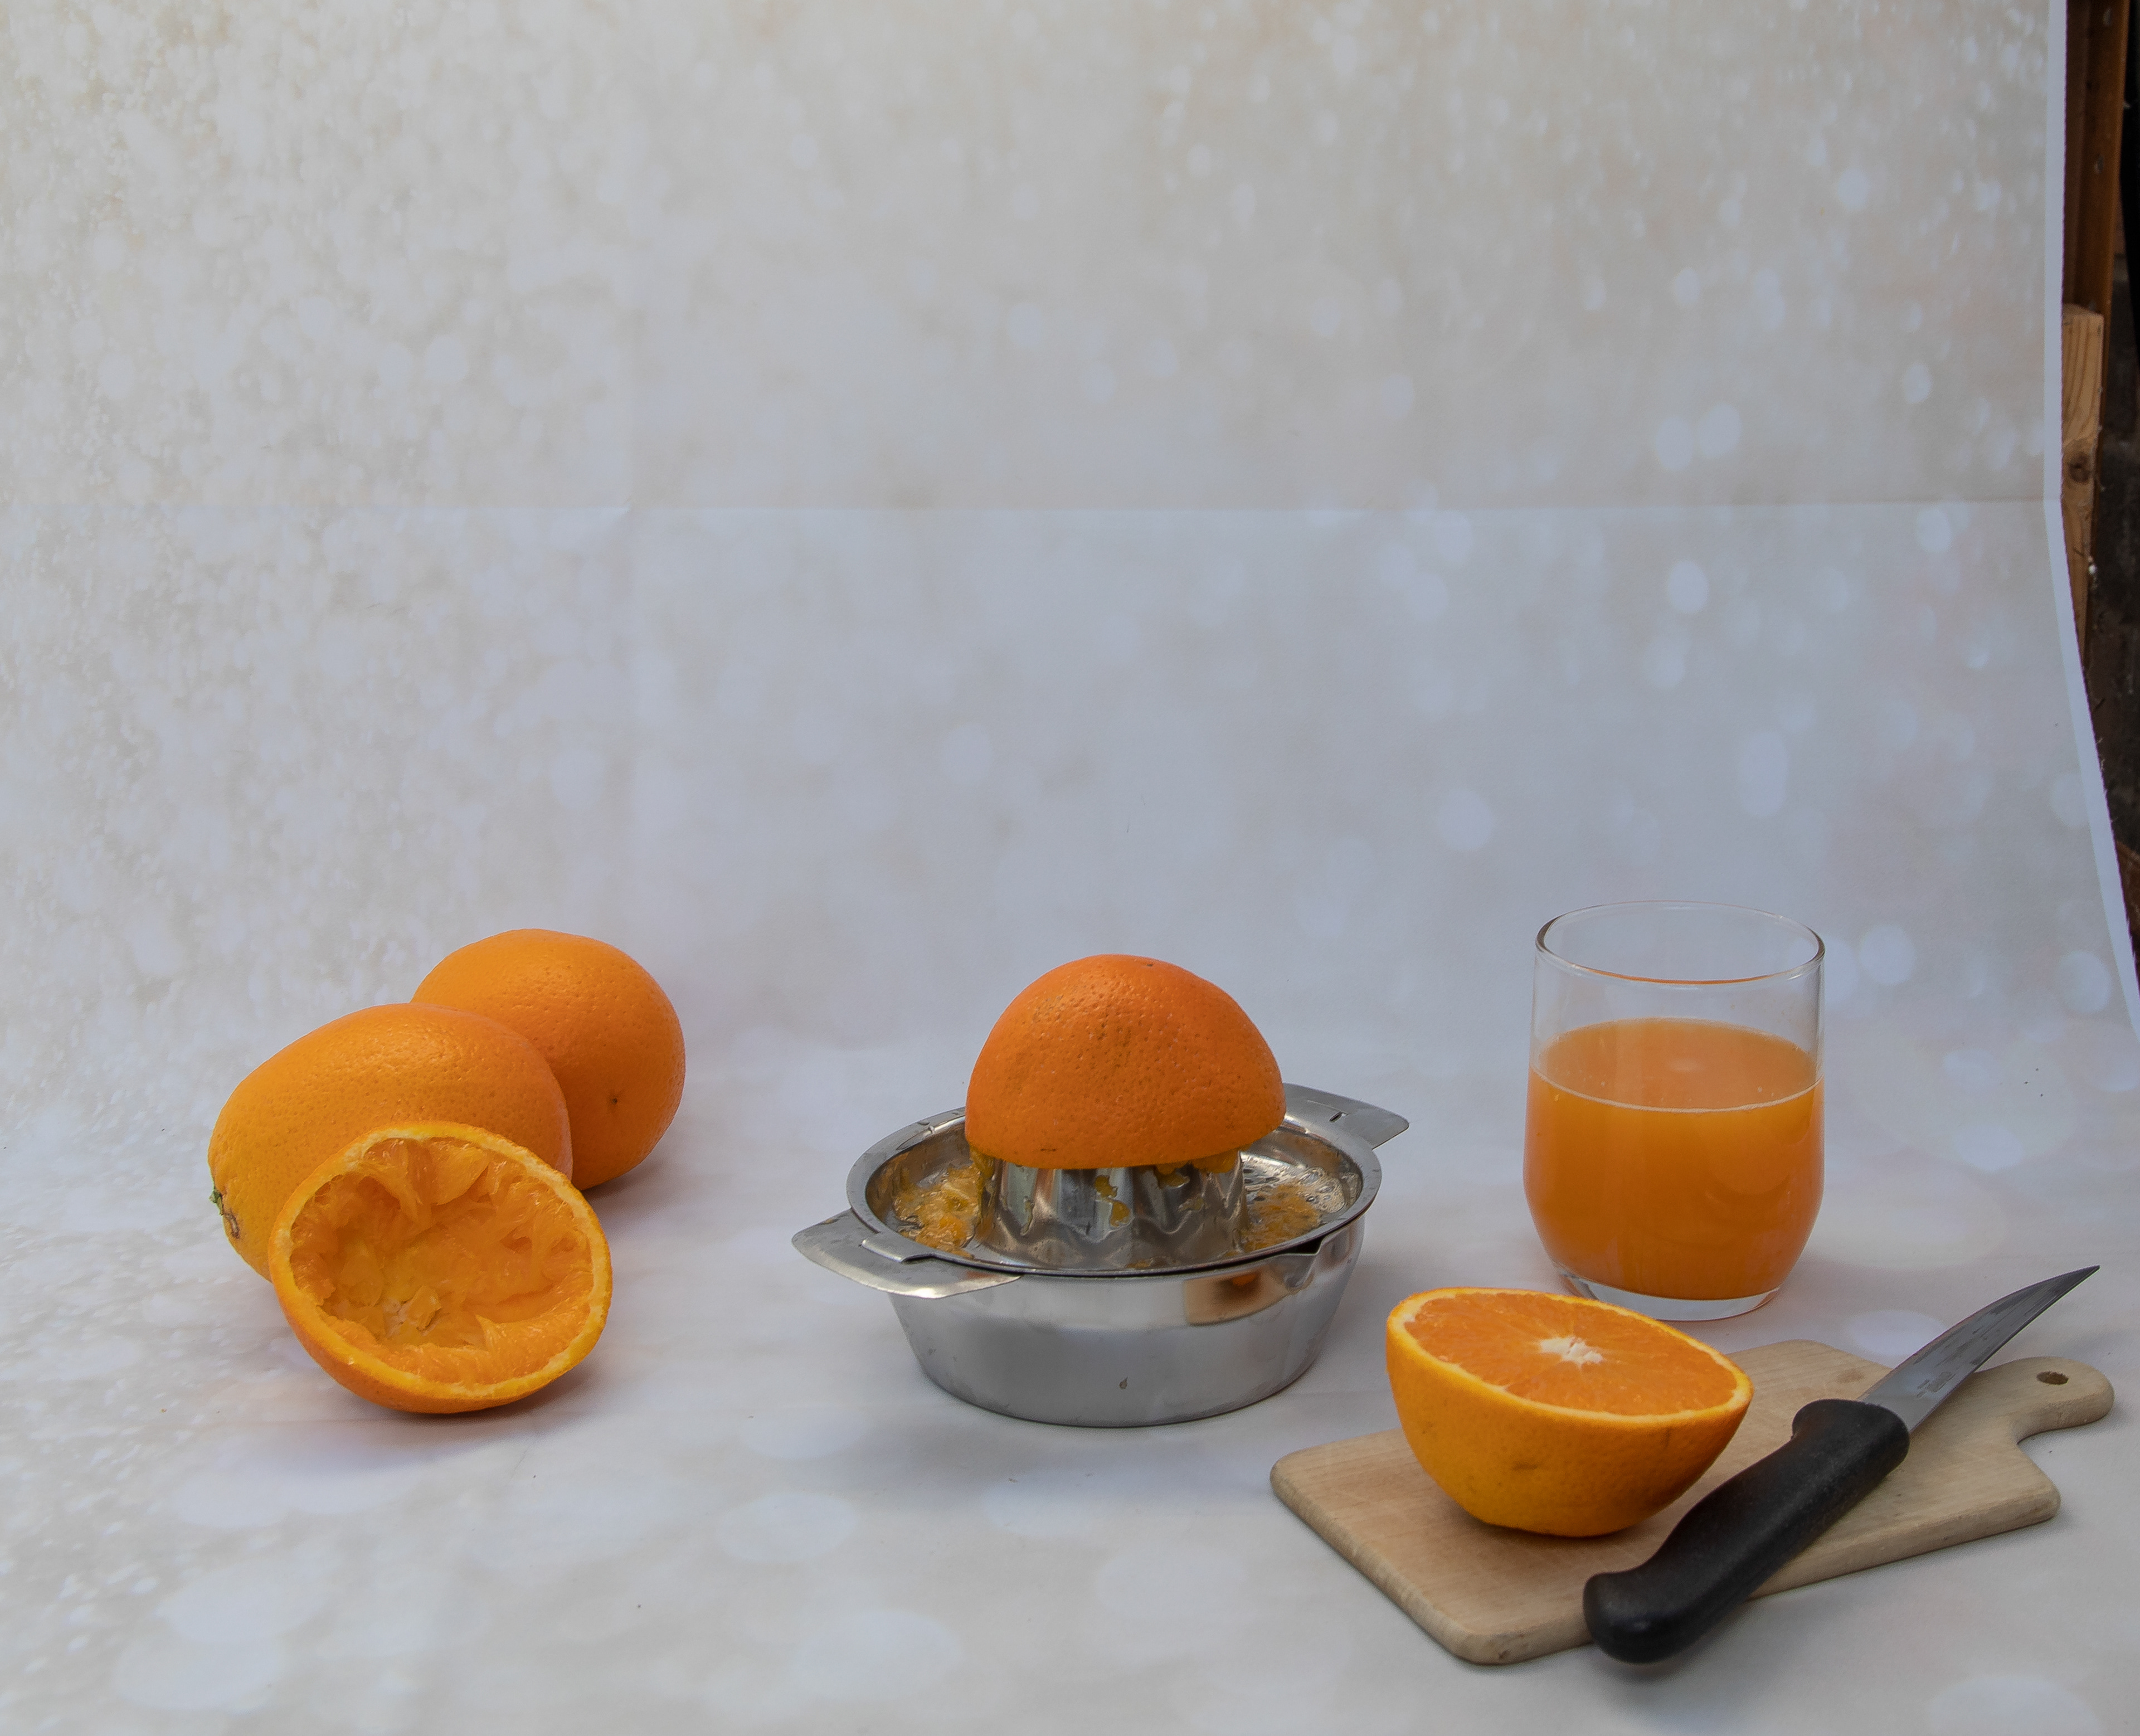
I try to add a few associated props without crowding the image, and also being mindful of where I would like DD to stand.
David and I then study the image and work out which angle he has to be to the camera (vertically and horizontally), and if he needs to have something to sit on or, as in this instance hold on to. We try to find an item that roughly corresponds to the shape / size of what he will be doing in the picture (here the chair acts as an orange).
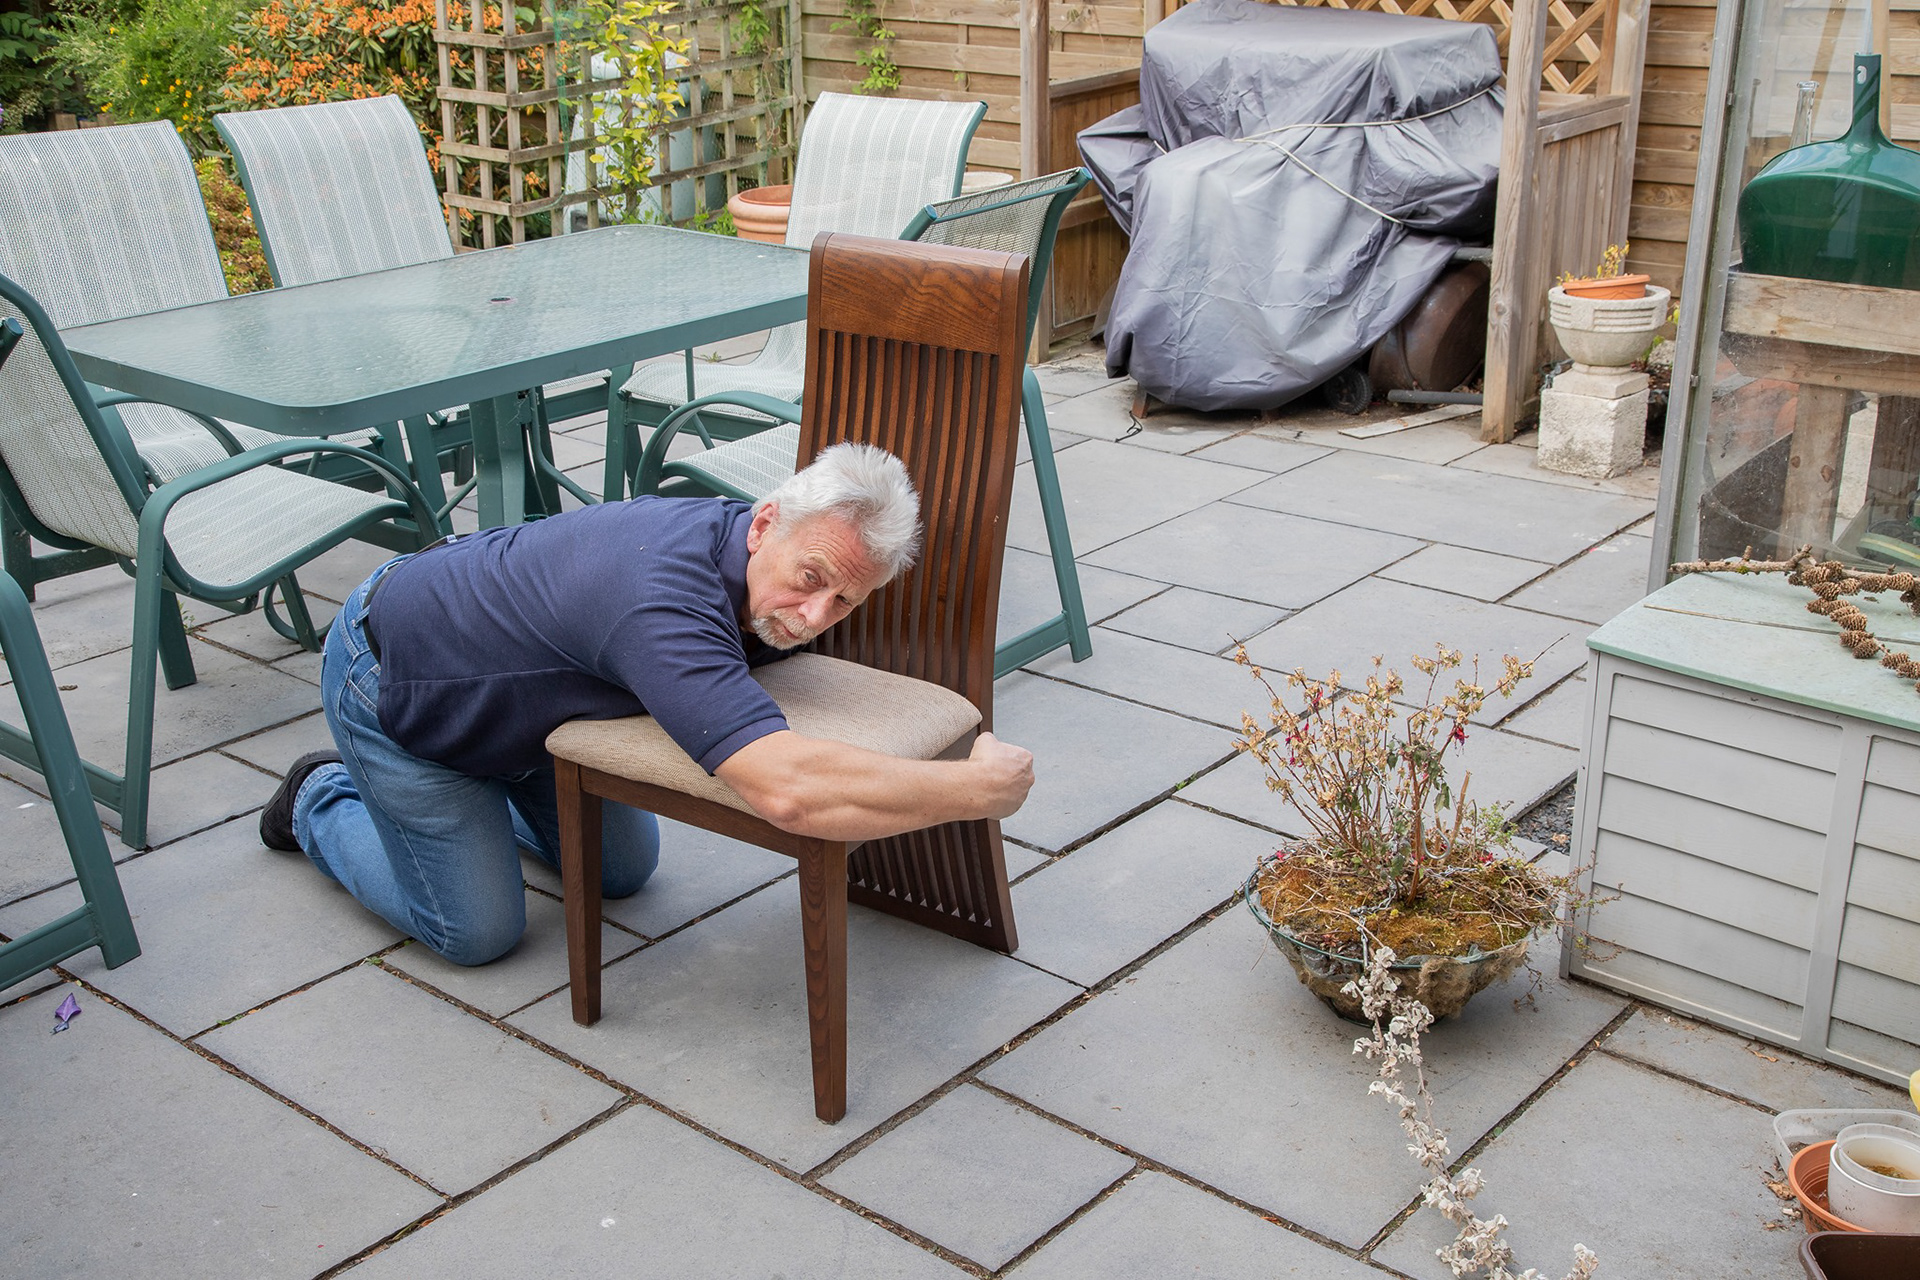
I always try to ensure I use the same aperture on the photo of David as I did on the background, as well as making sure I take it in similar lighting conditions.
Using the Quick Mask tool in Photoshop, I very roughly select David, and then copy and paste him into the background so that I can see if he is the right fit. Often I have to re-take his picture at this stage, because he may be facing in the wrong direction, not leaning over enough, too low or too high etc.
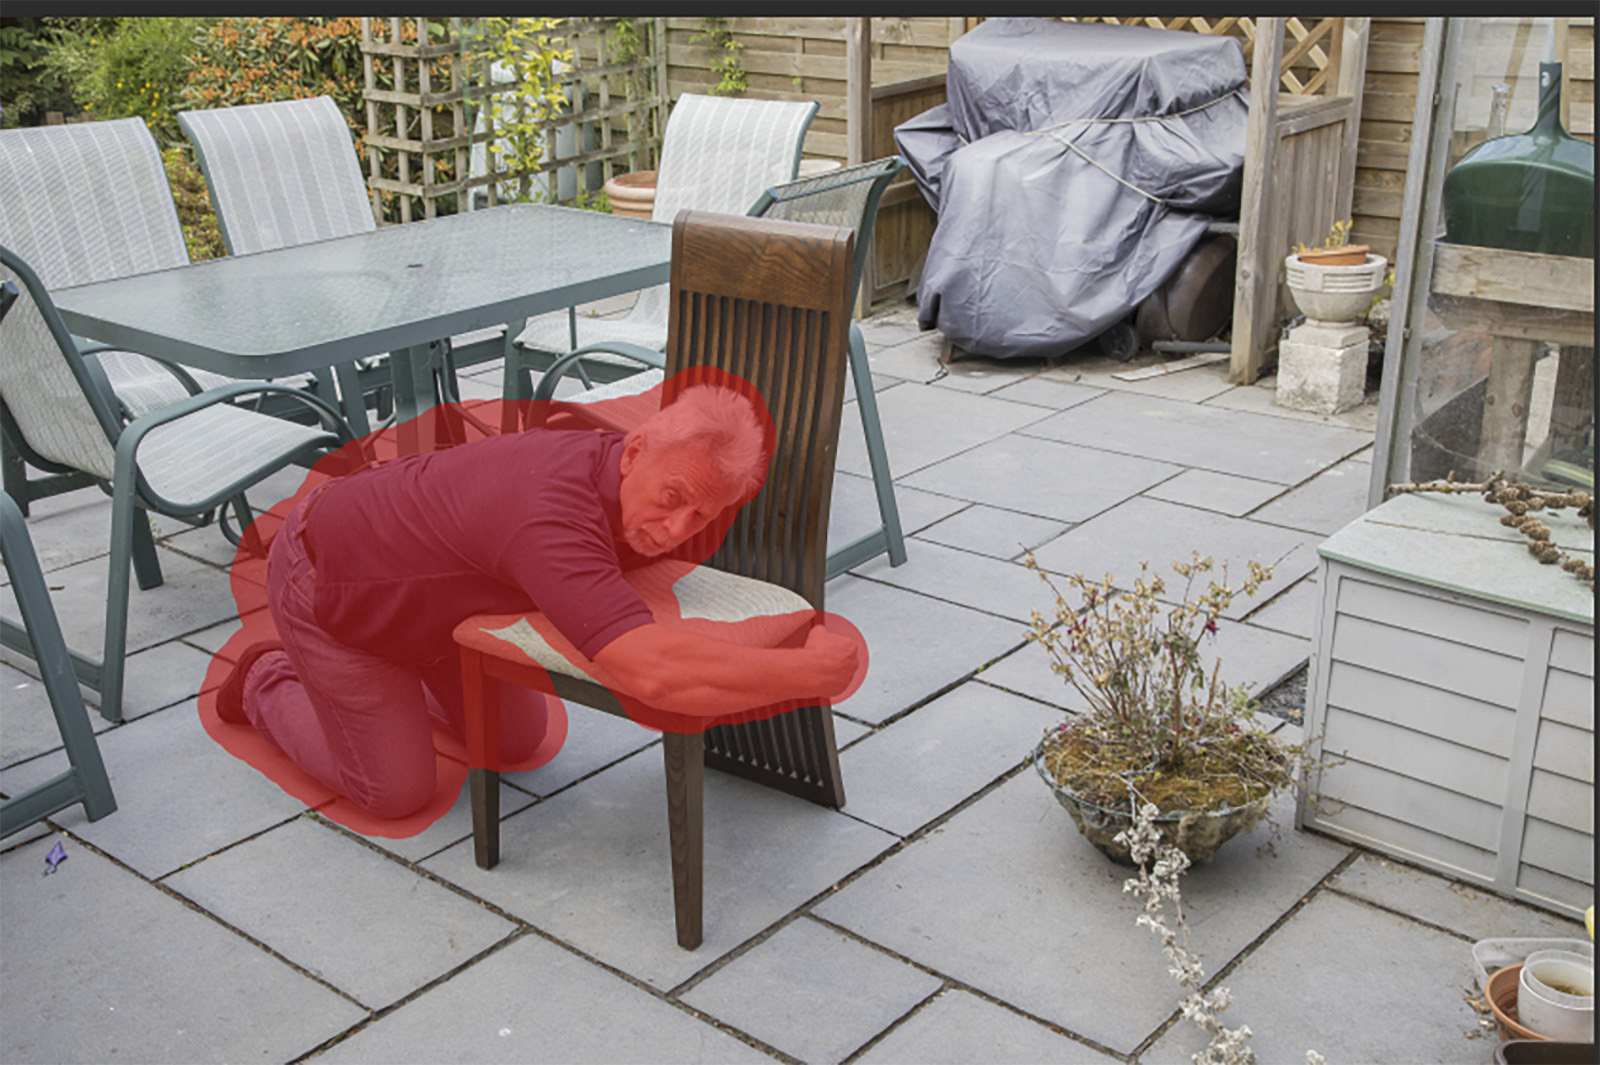
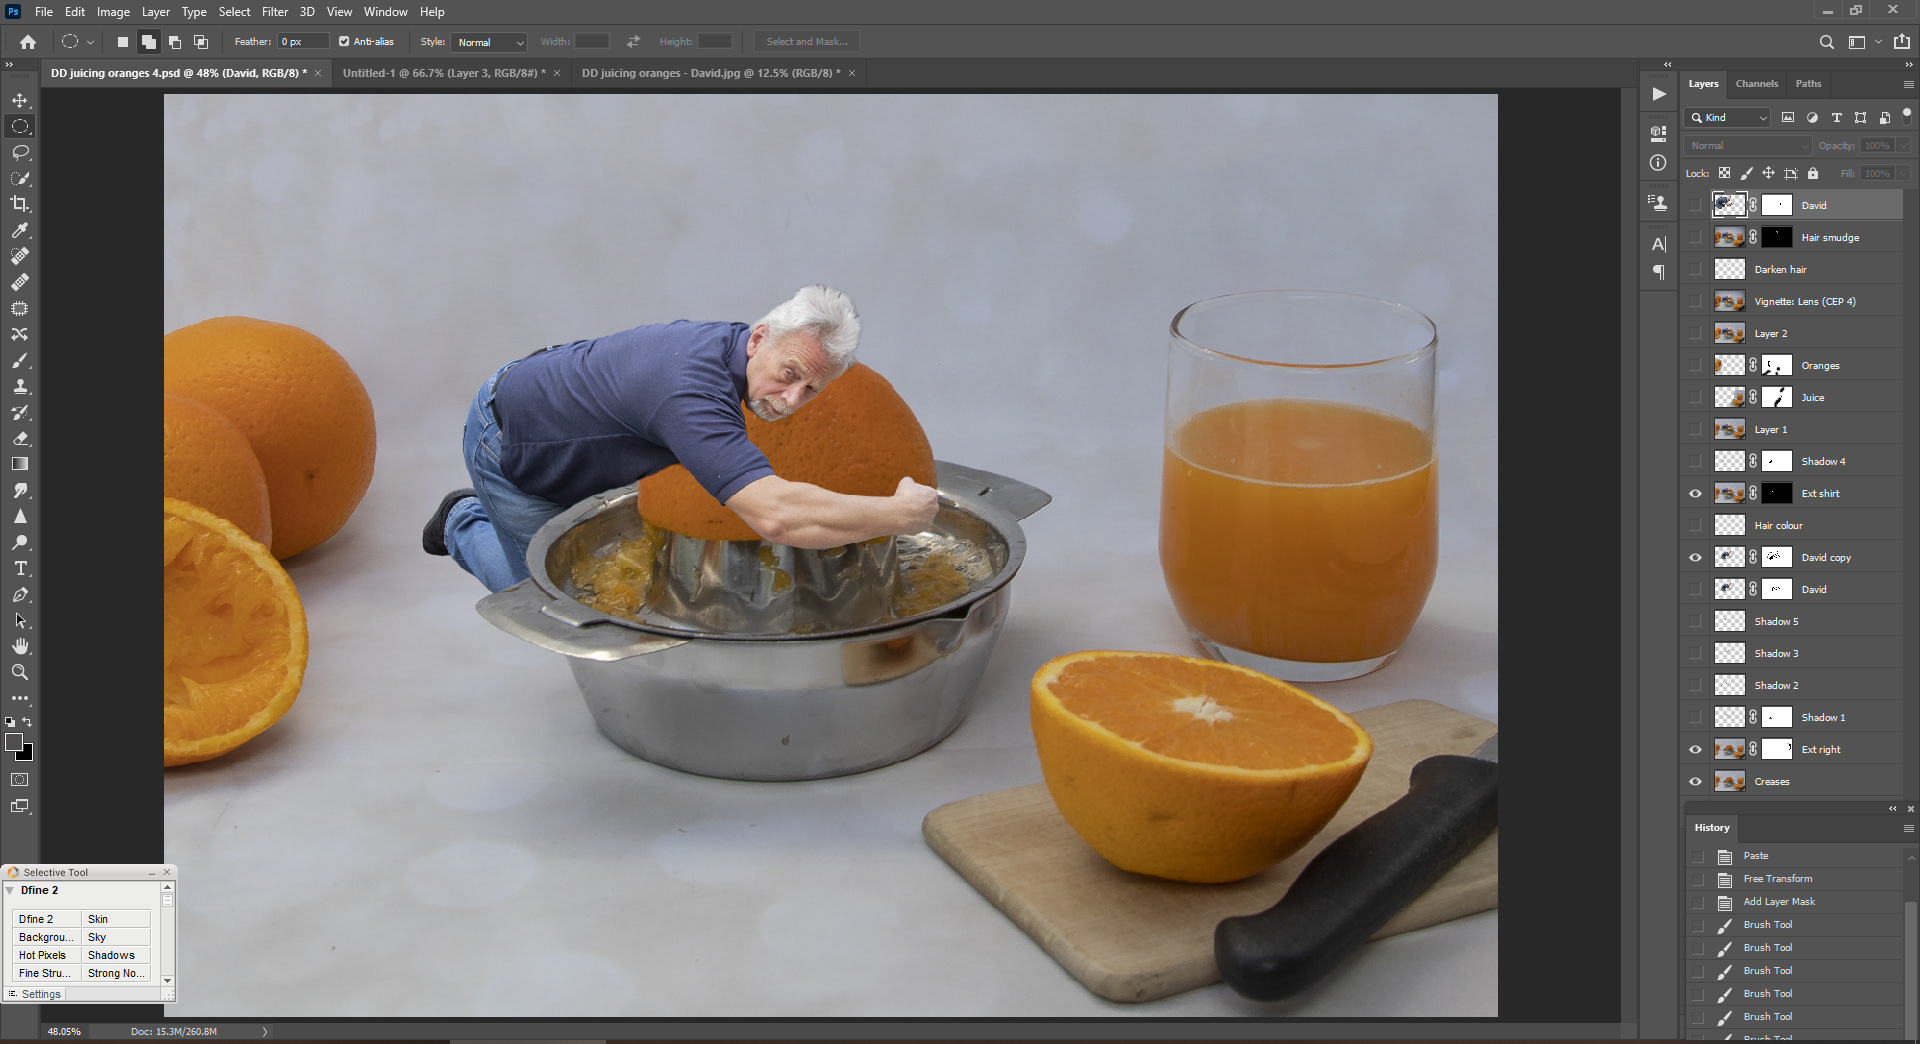
As you can see in the image below, he fits quite nicely around the orange, so no need to retake this. Sometimes, if an arm or leg is at a slightly wrong angle, and maybe marginally too short, I will use the Puppet Warp tool in Photoshop to manipulate him into place.
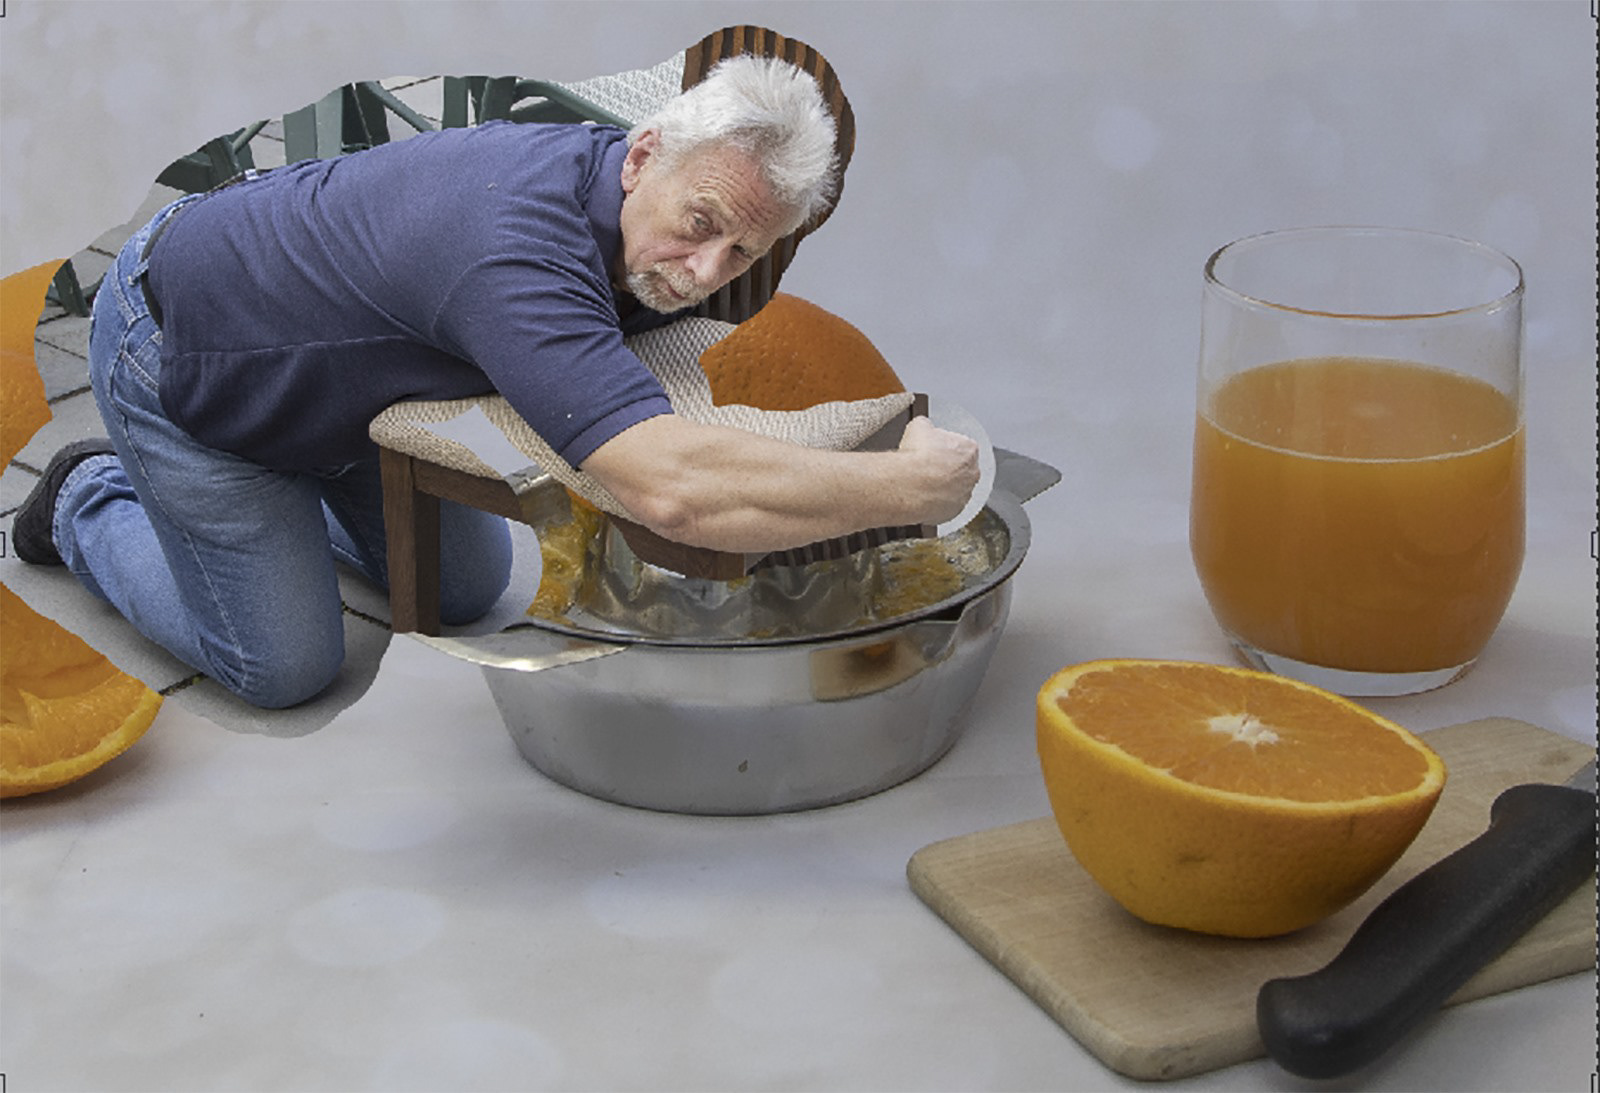
The next step is to add a layer mask to the David layer (I always try to name my layers as I find it easier should I have to go back to one of them later). Enlarging the image to 400%, I carefully and painstakingly erase the area outside David using a black brush at around 15 pixels (sometimes going right down to 1 pixel) at 75% hardness. I rarely change the hardness of the brush; instead I increase the size (making it softer in the process), or decrease, which makes the brush appear harder.
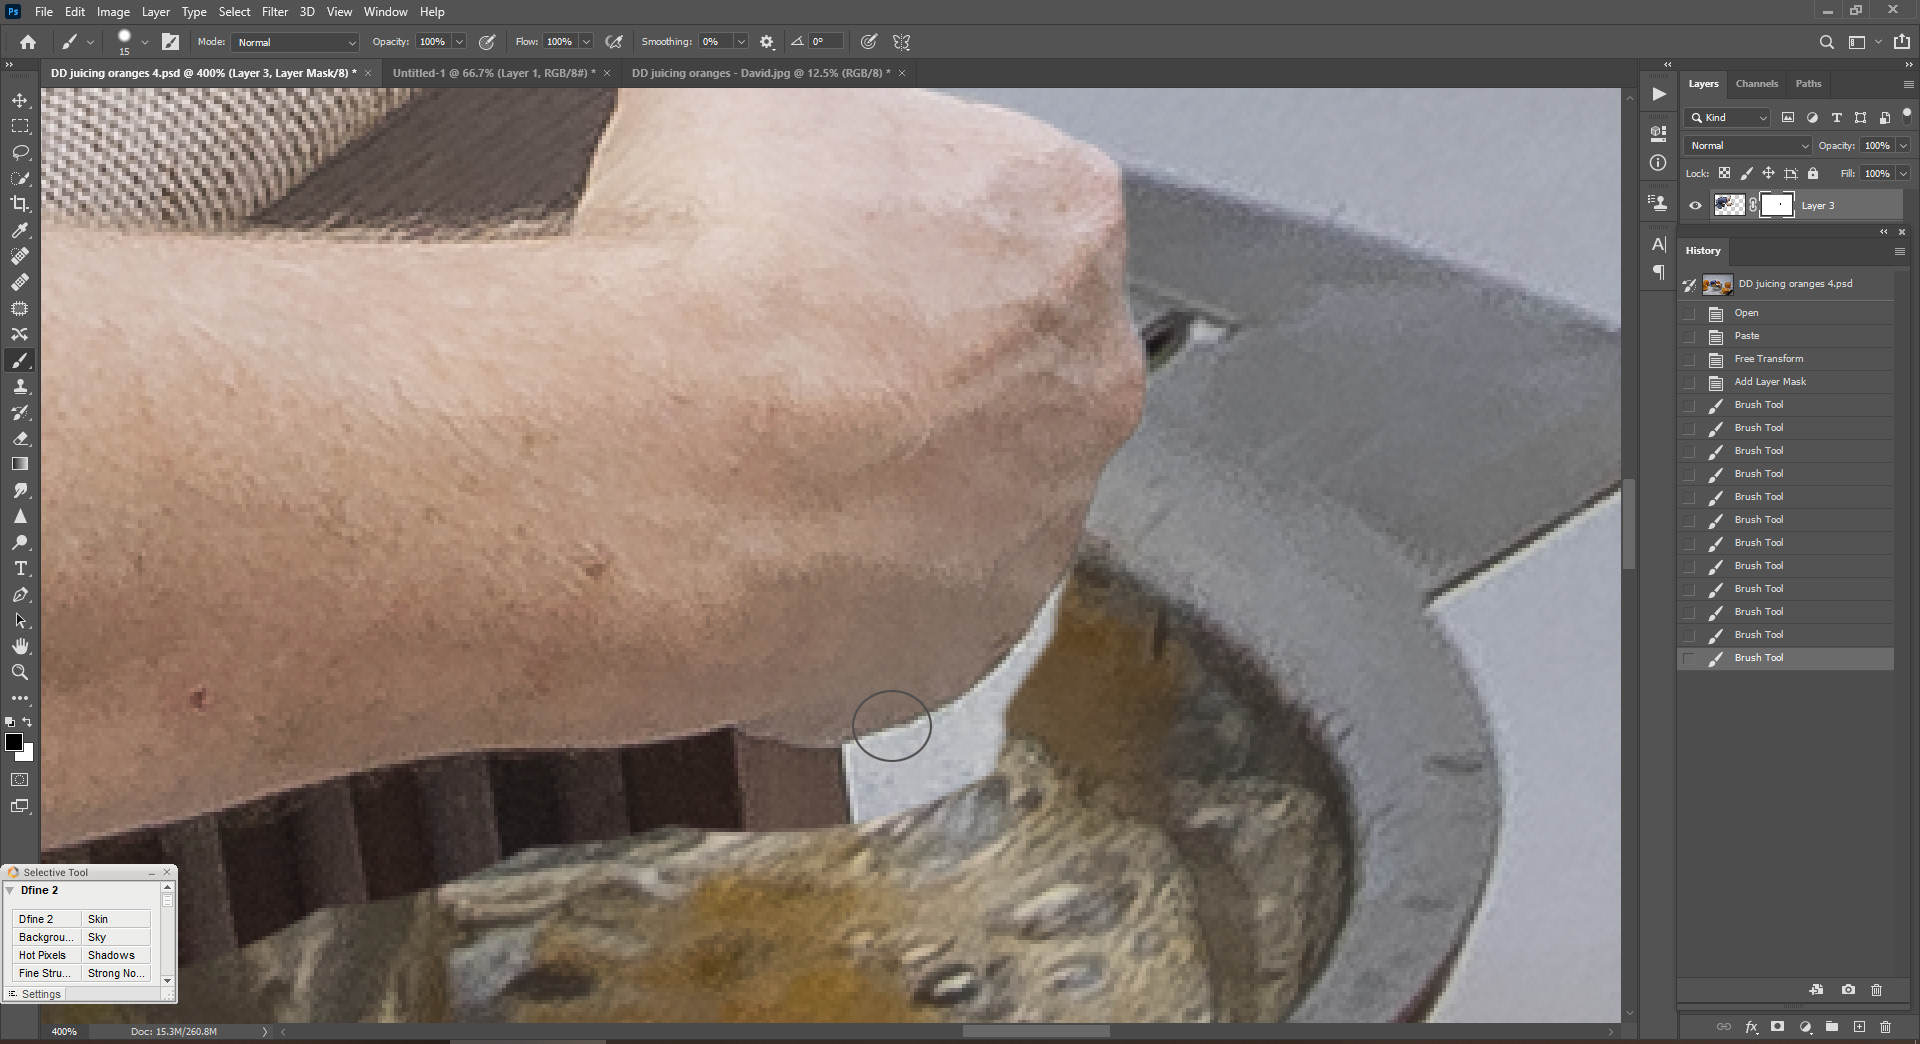
At this stage I only roughly go around his hair with a soft brush – more on the hair later.
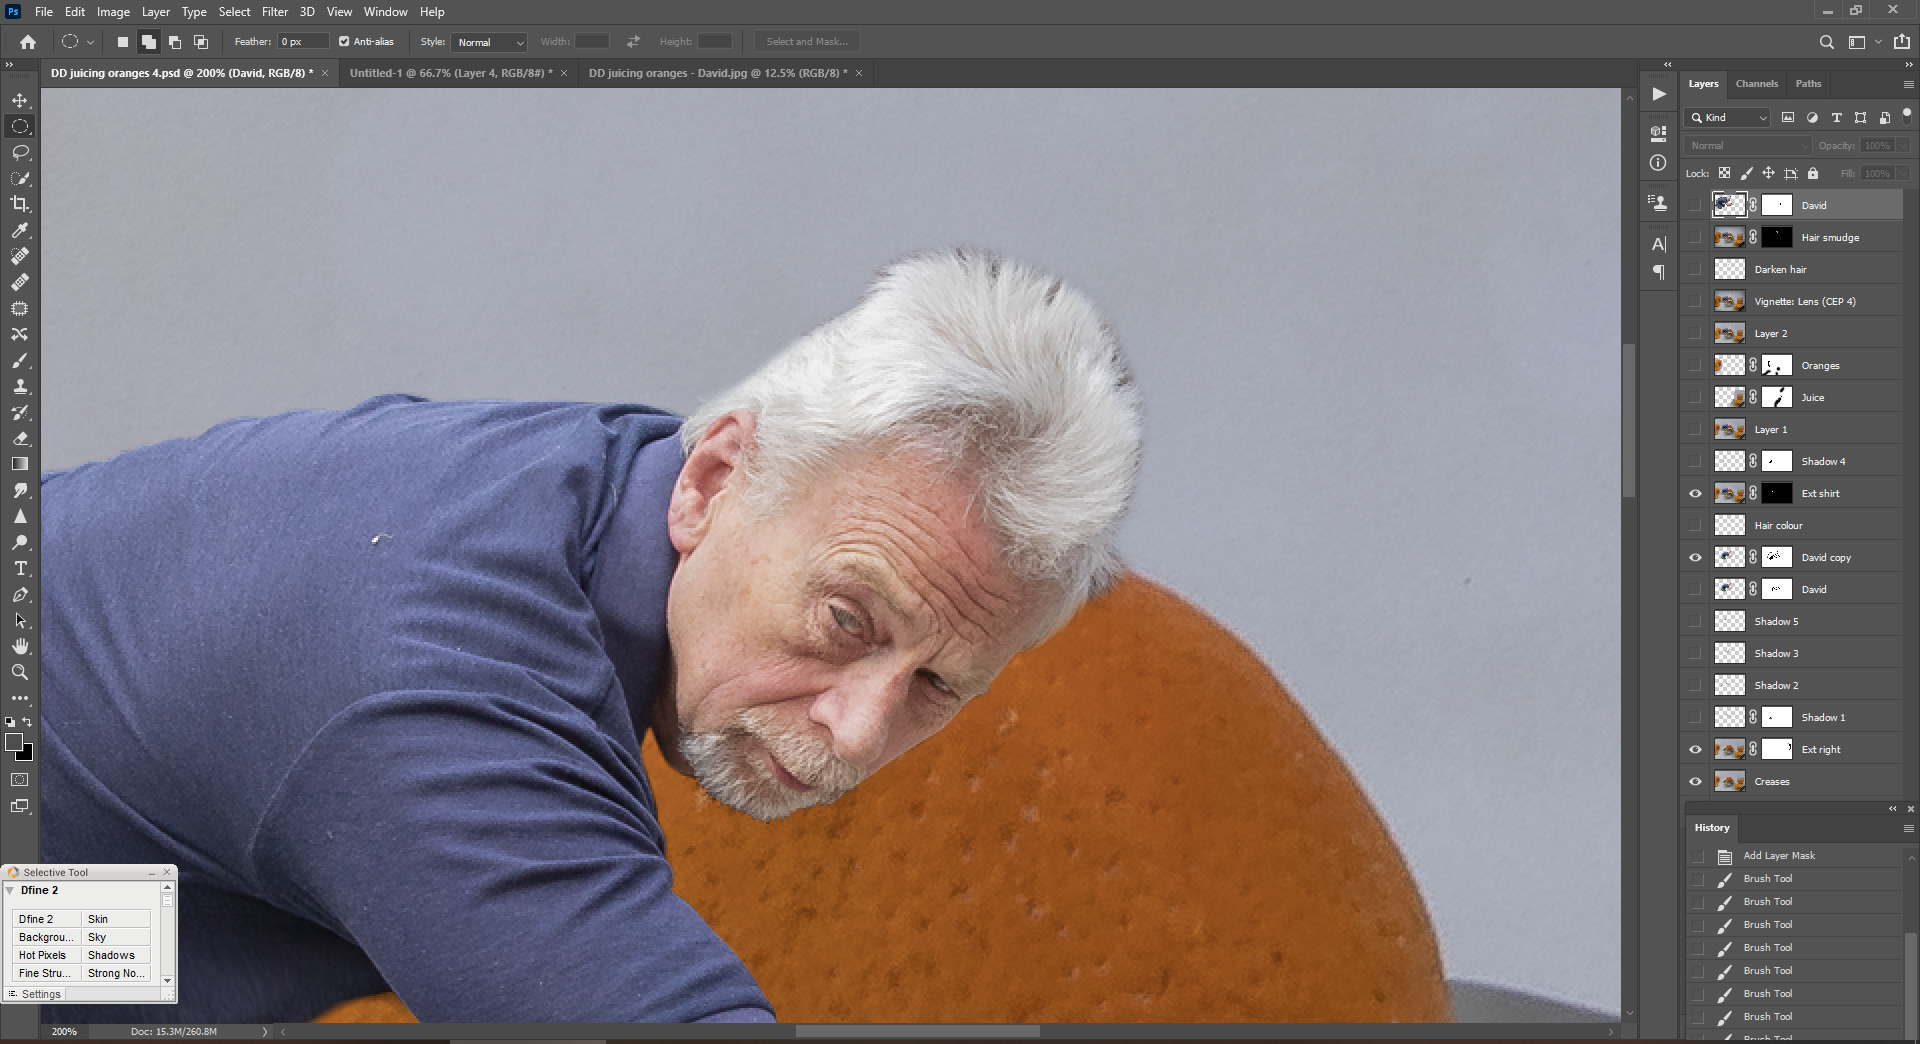
Once I am left with a clean image of just David, I have to examine him to see what else needs doing. On this image, there are a couple of things that need seeing to as far as DD is concerned – his hair and his torso next to the orange where the chair was.

(On the right you can see the number of layers this final image was made up of)
The first thing I do is extend the shirt to fit, using a combination of Liquify and Clone tools.
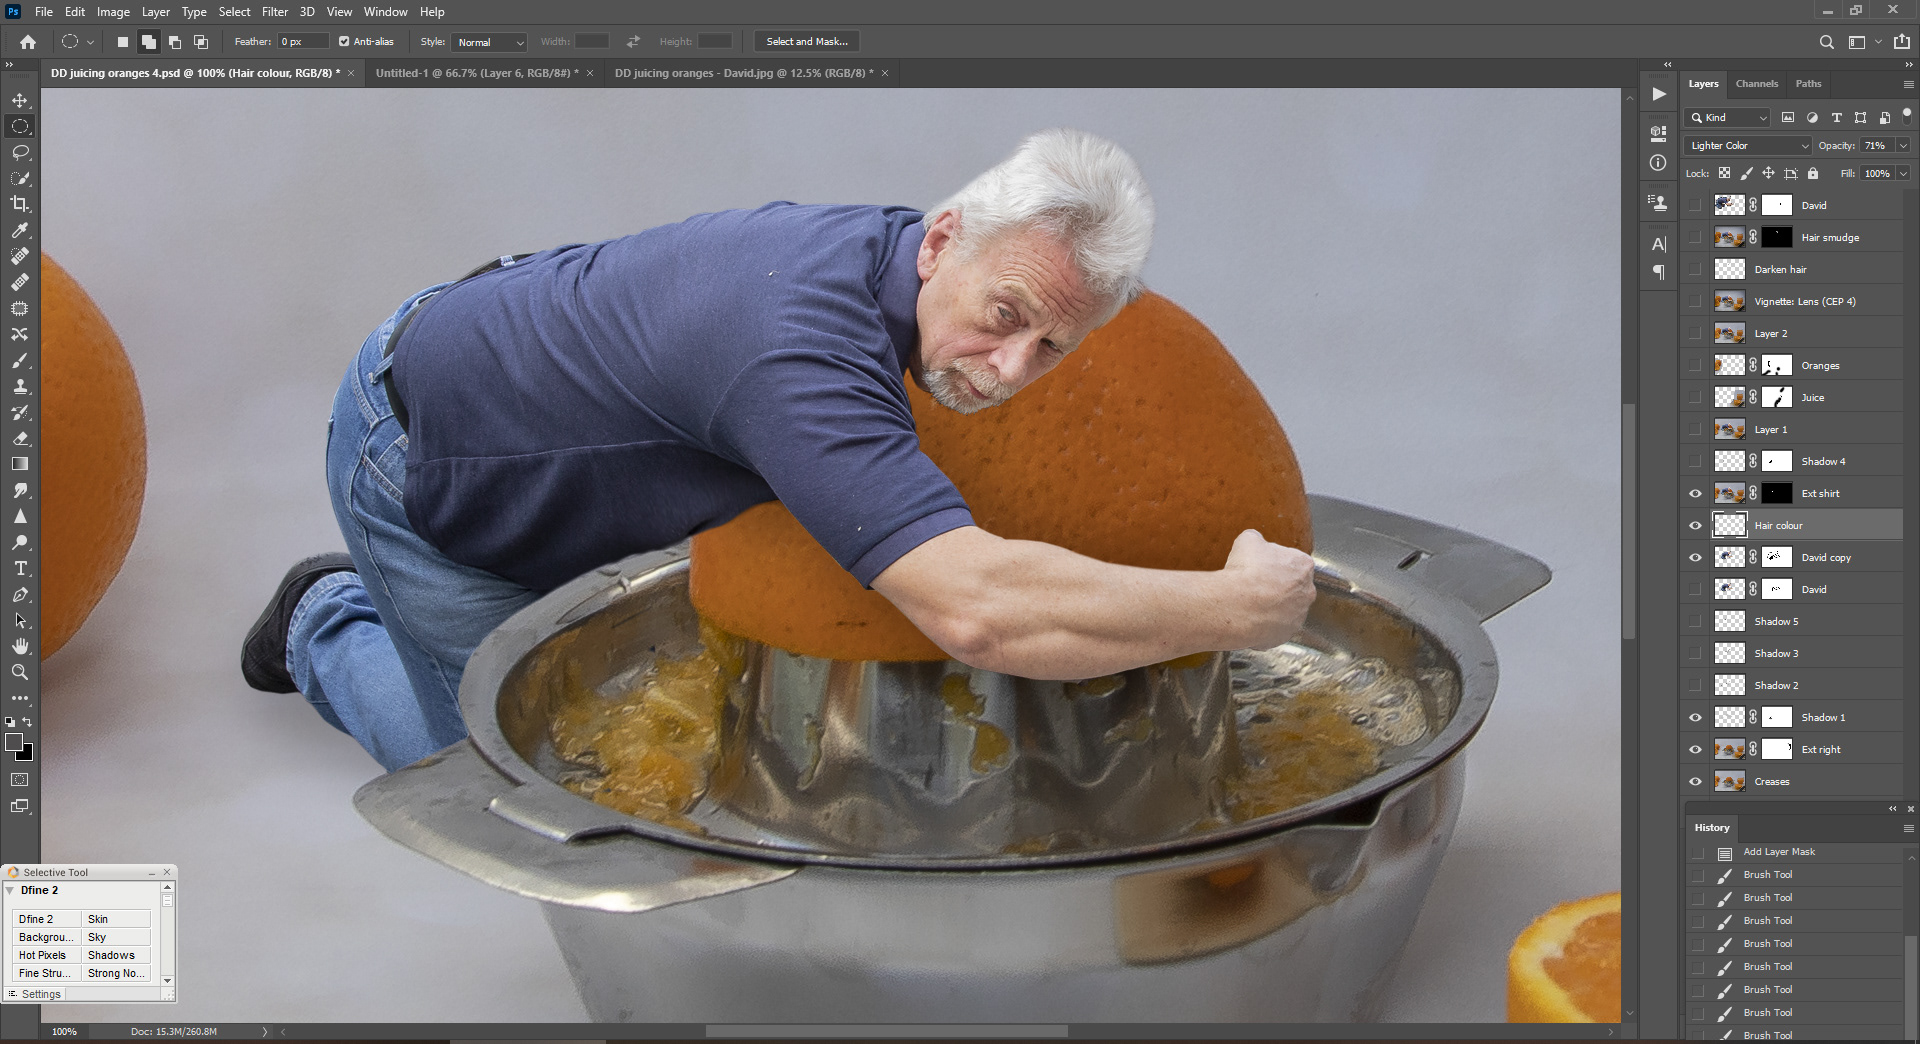
As you can see, the background behind his hair was quite dark, so looks all wrong here. I will be doing more to his hair later, but the fist thing I do is to create a new blank layer with a Blending Mode of Lighter Colour. Using the paint brush and holding down the ALT key to create a colour picker, I select a grey colour ever so slightly darker than the end bits of his hair and literally paint in the area. Because of the blending mode, only those bits that are darker than my grey colour will be affected, which in this case is just the background.
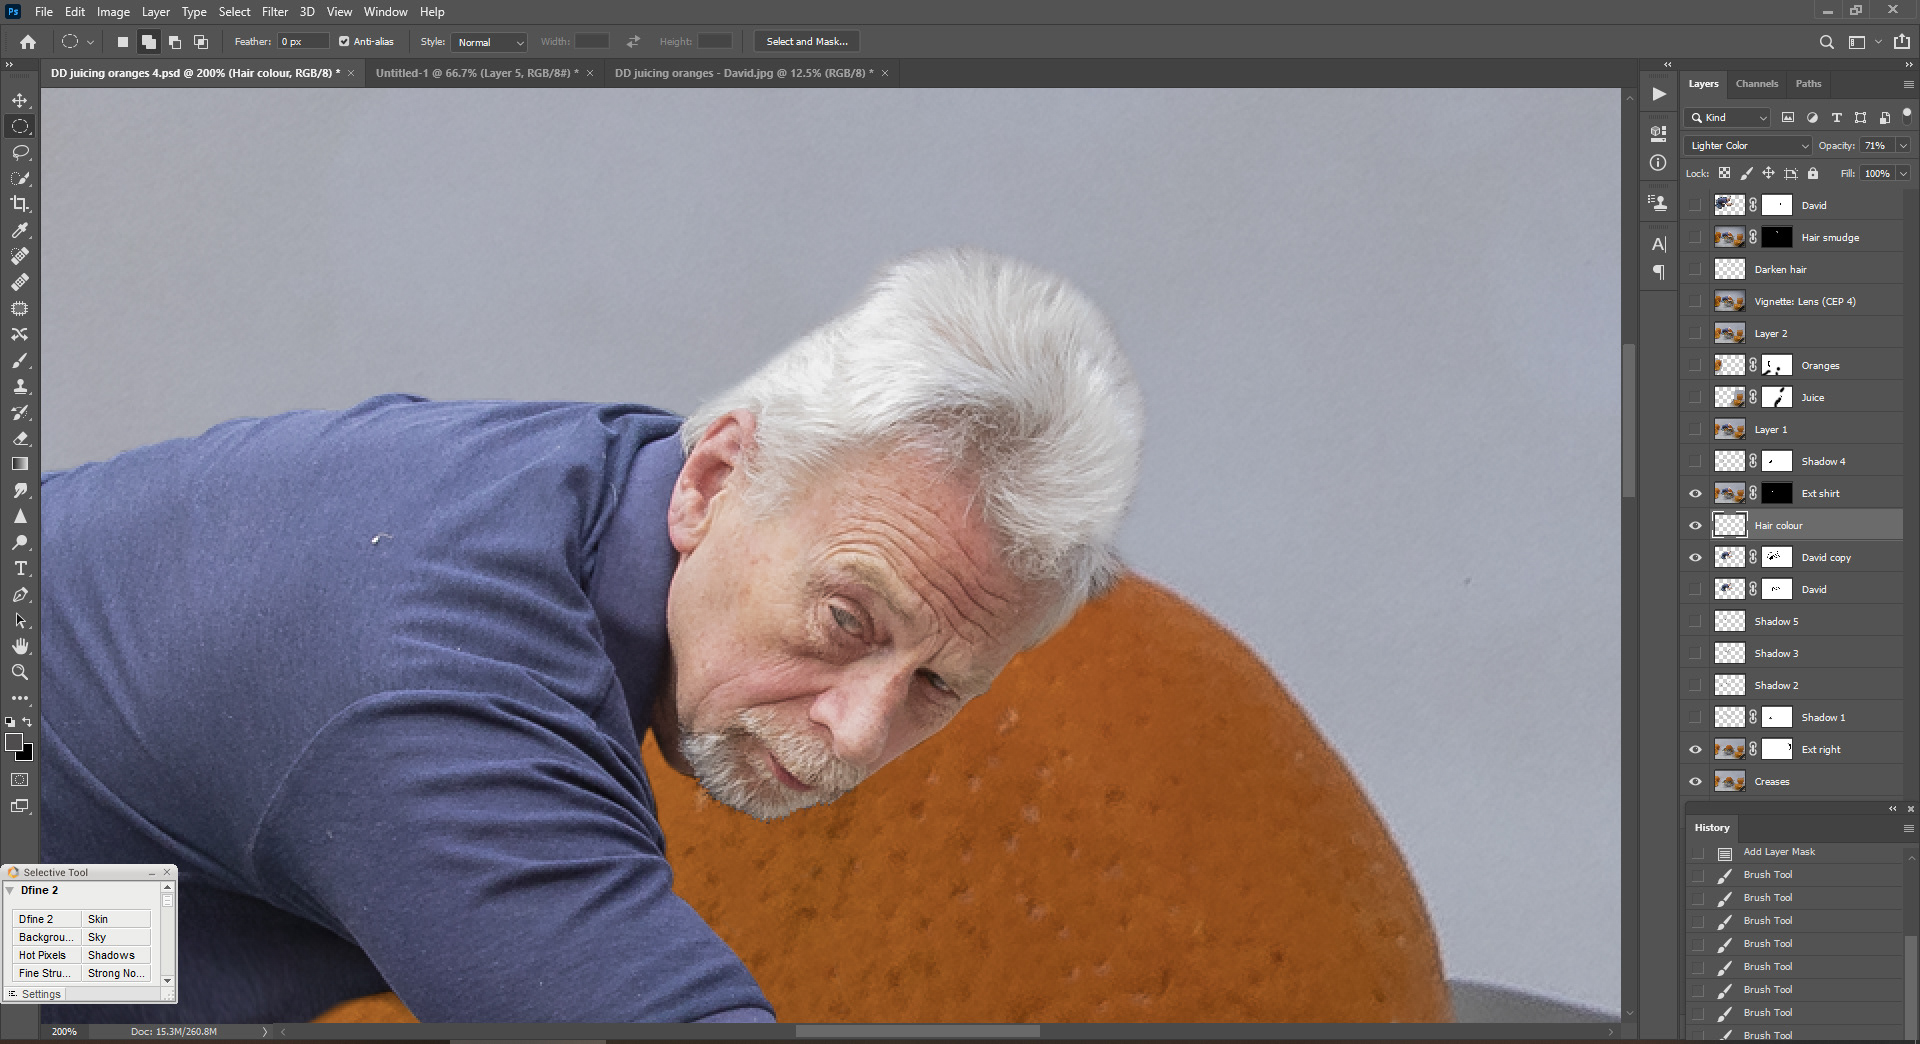
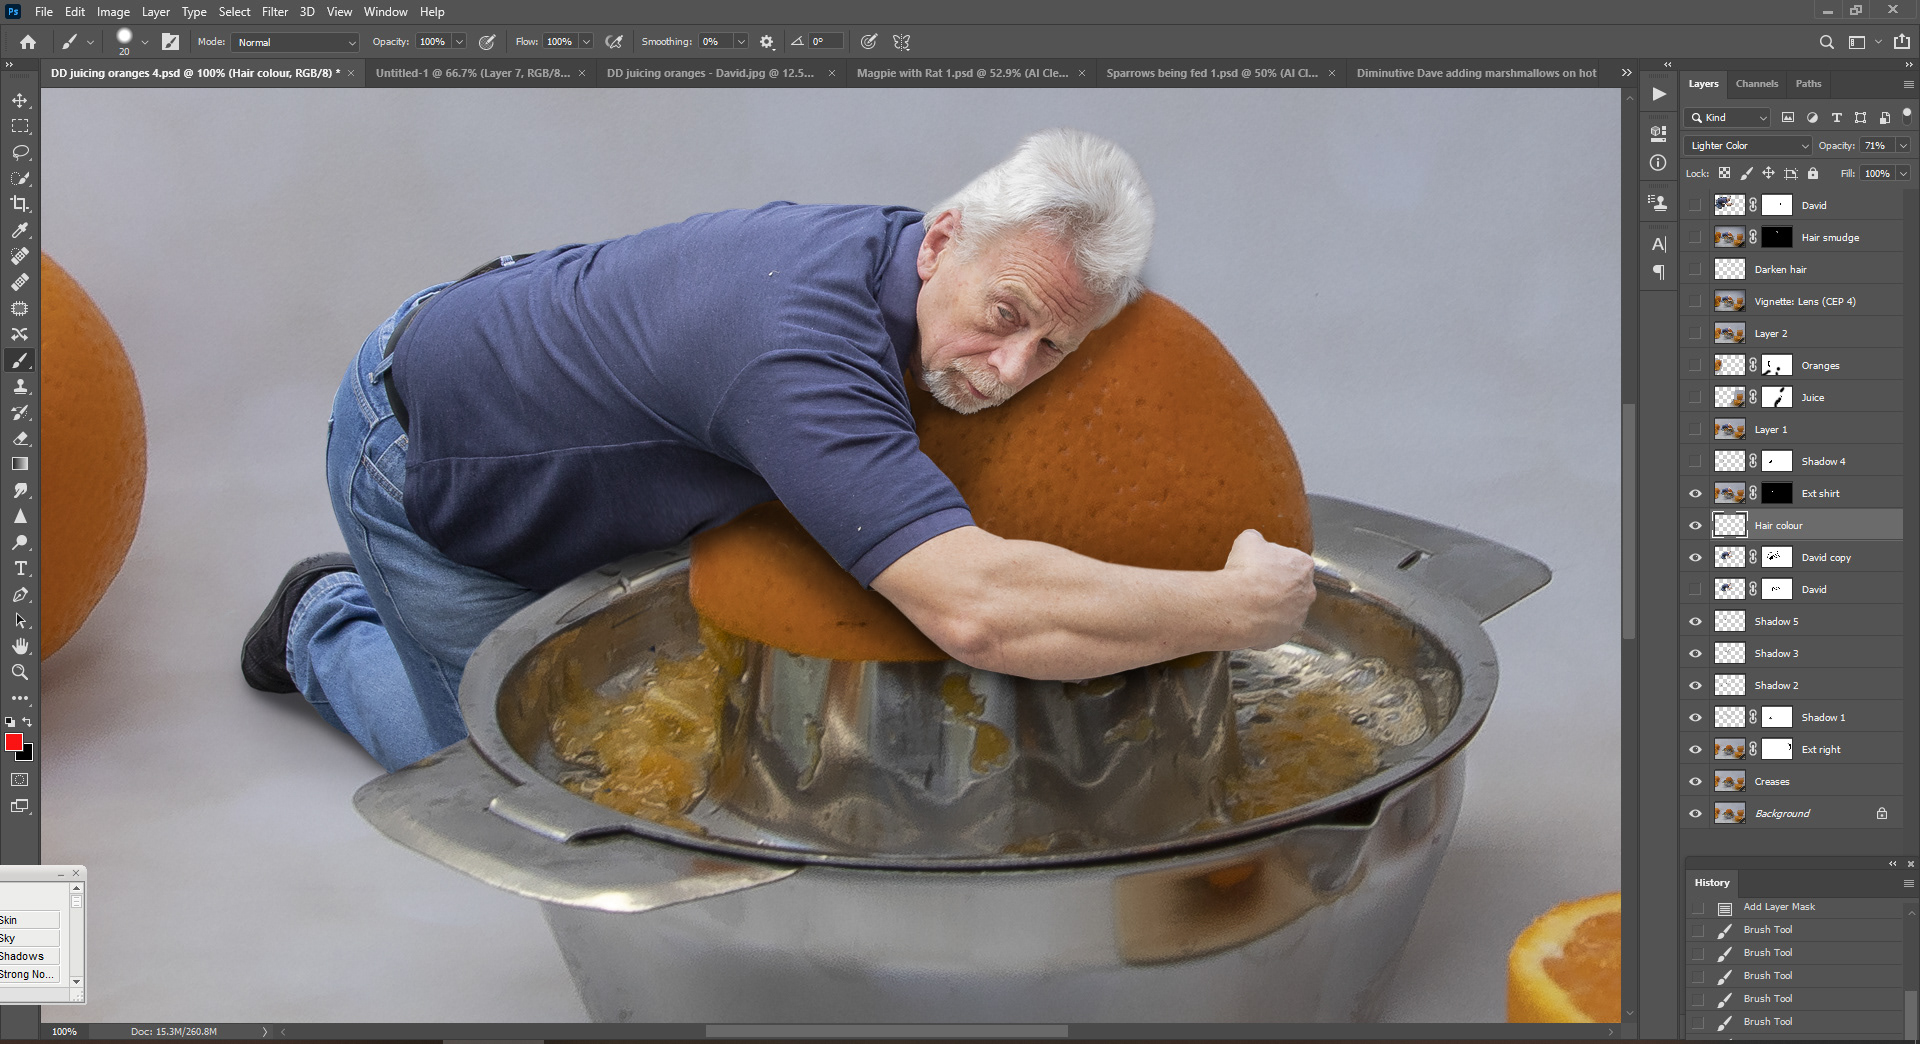
This is what it looks like after I have painted it.
Next I create the shadows. Without them it just looks like he is superimposed onto the picture.
For the shadows, less is more. On a new layer with the Multiply Blending Mode – making sure the new layer is underneath the David layer - I use a smallish soft brush with a pale grey colour to paint in shadows under his head, arms and legs.
I use three of even four different layers, different shades of grey and different size brushes to get the right look to match the shadows on the original background in terms of angle and intensity. Because the Shadow layers are under the David layer, I do not need to add a layer mask and rub anything out here.
The next shadow is the one behind the metal juicer. Here I have to make sure my new layer (multiply blending mode again) is above the David layer before painting in the shadow with a soft pale grey brush. I subsequently add a layer mask and carefully rub out any of the shadow that is over the juicer with a small hard (75%) brush.
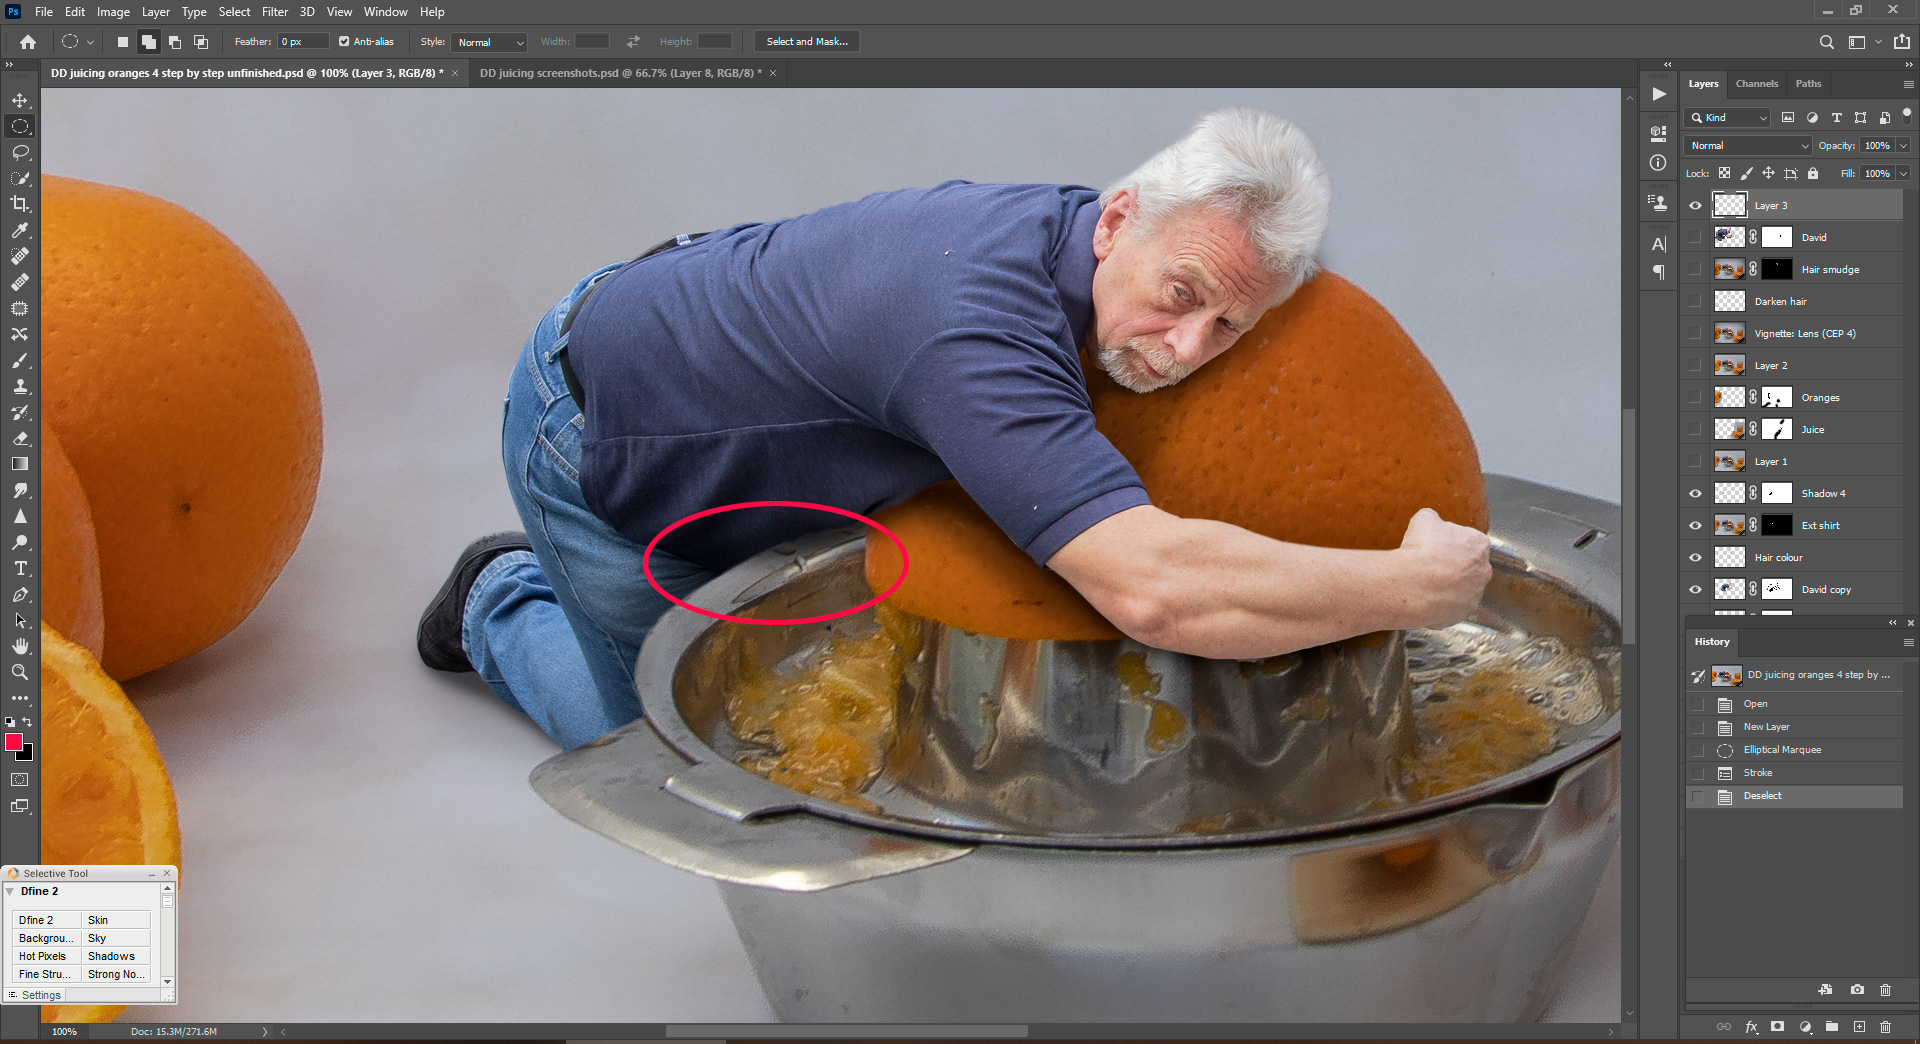
Looking at the image now, I realise that the juice and orange on the right is too far away, I would like to have it nearer the juicer. I should have got this right at the time of taking the photo, but it is easily rectified in Photoshop by using the Content Aware Move Tool and dragging it across to where I want it.

I do the same with the oranges the other side.
Unhappy with the highlights in his hair, I create a new layer with Multiply Blending Mode, and use a soft brush with a very pale grey to paint over the offending area, adjusting (lowering) the Opacity to achieve the desired result.
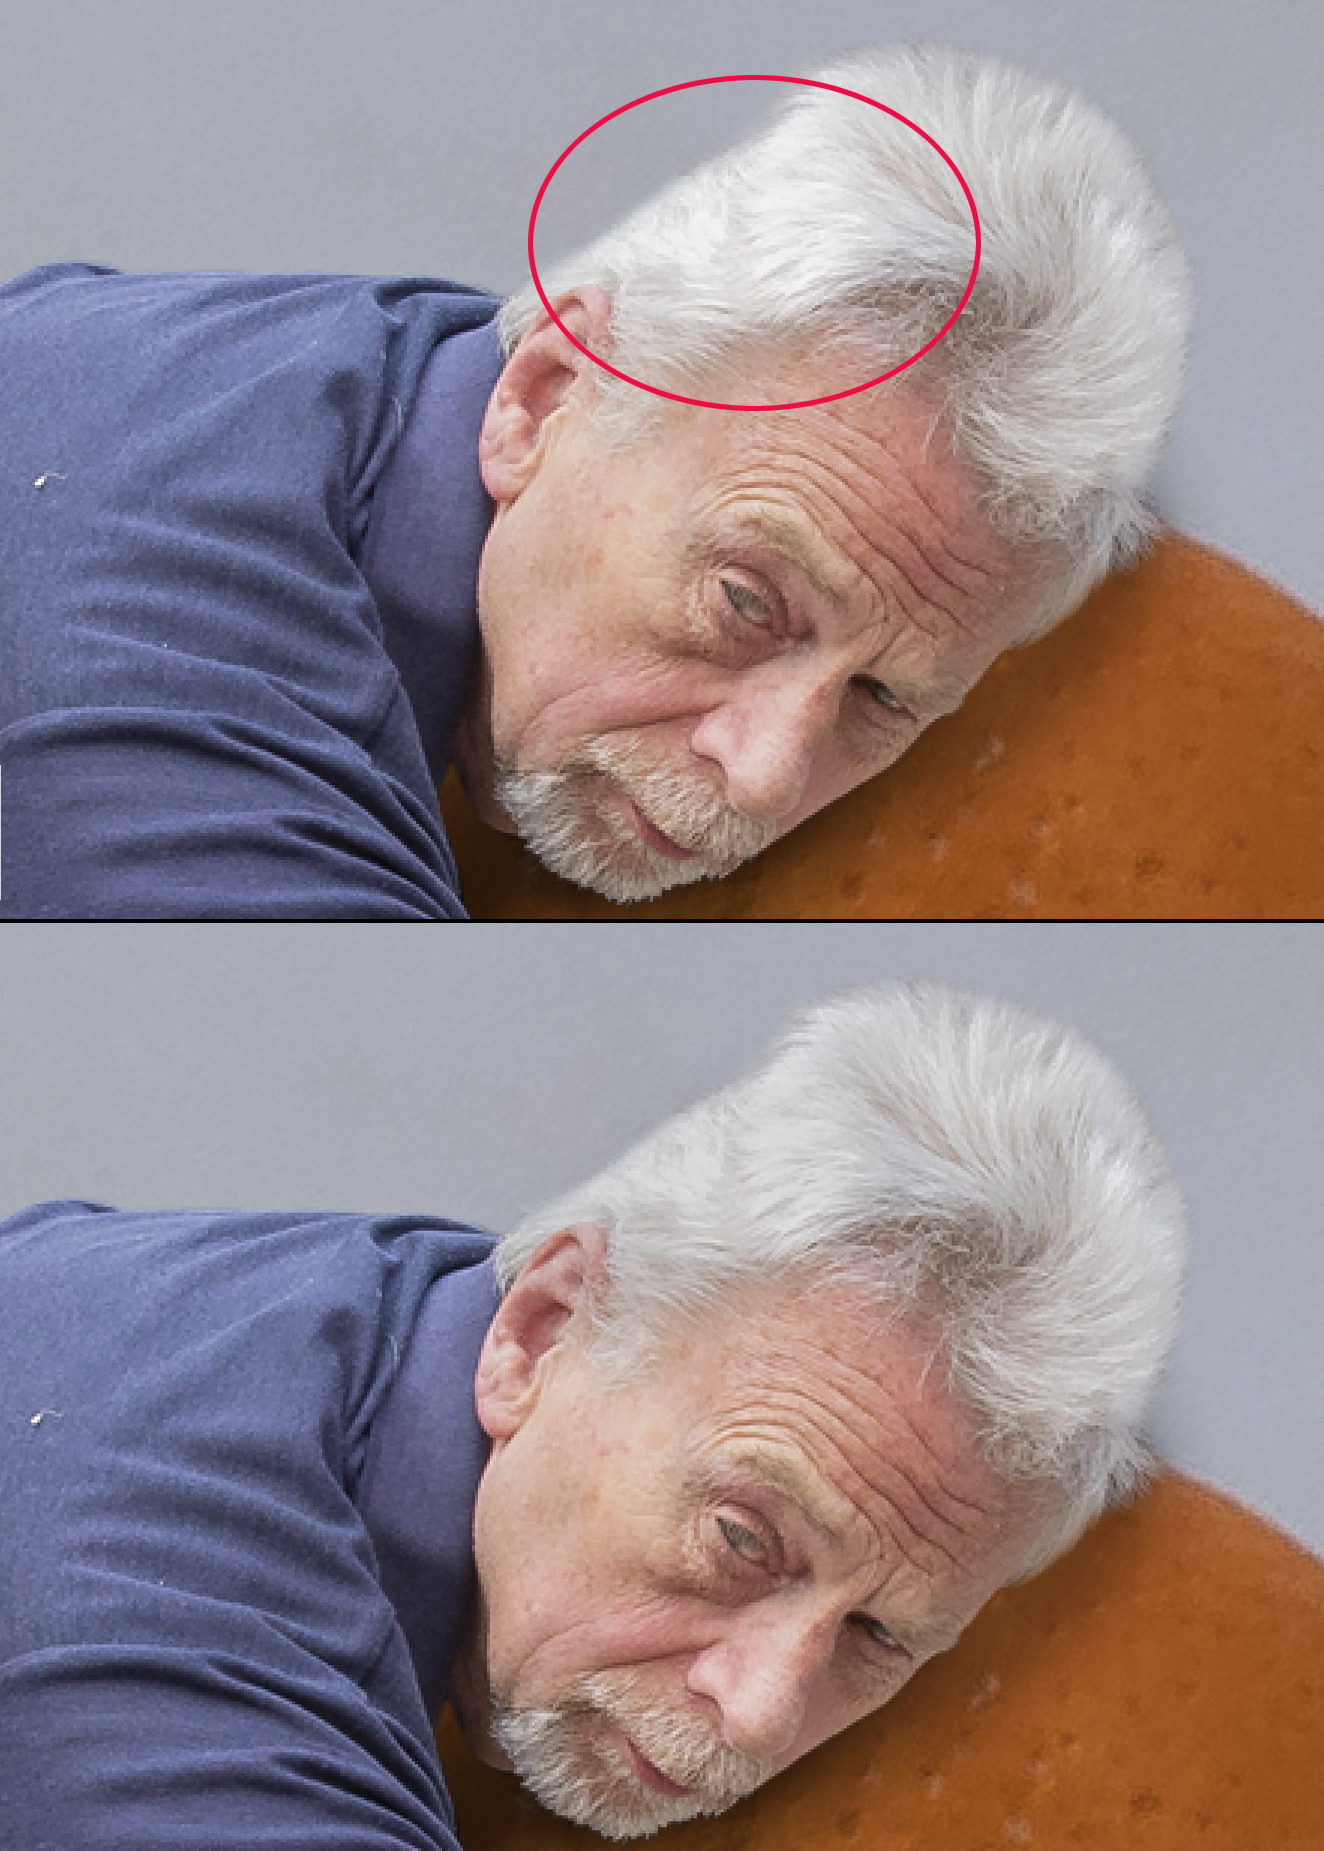
To make his hair more natural looking, I create a Snapshot by pressing Shift+Ctrl+Alt+E, and using the smudge tool on 1 pixel and 0% hardness, I 'pull out' individual strands of hair all across the edge of his head. I try to do different lengths and angles, referring back to his original photo for accuracy.
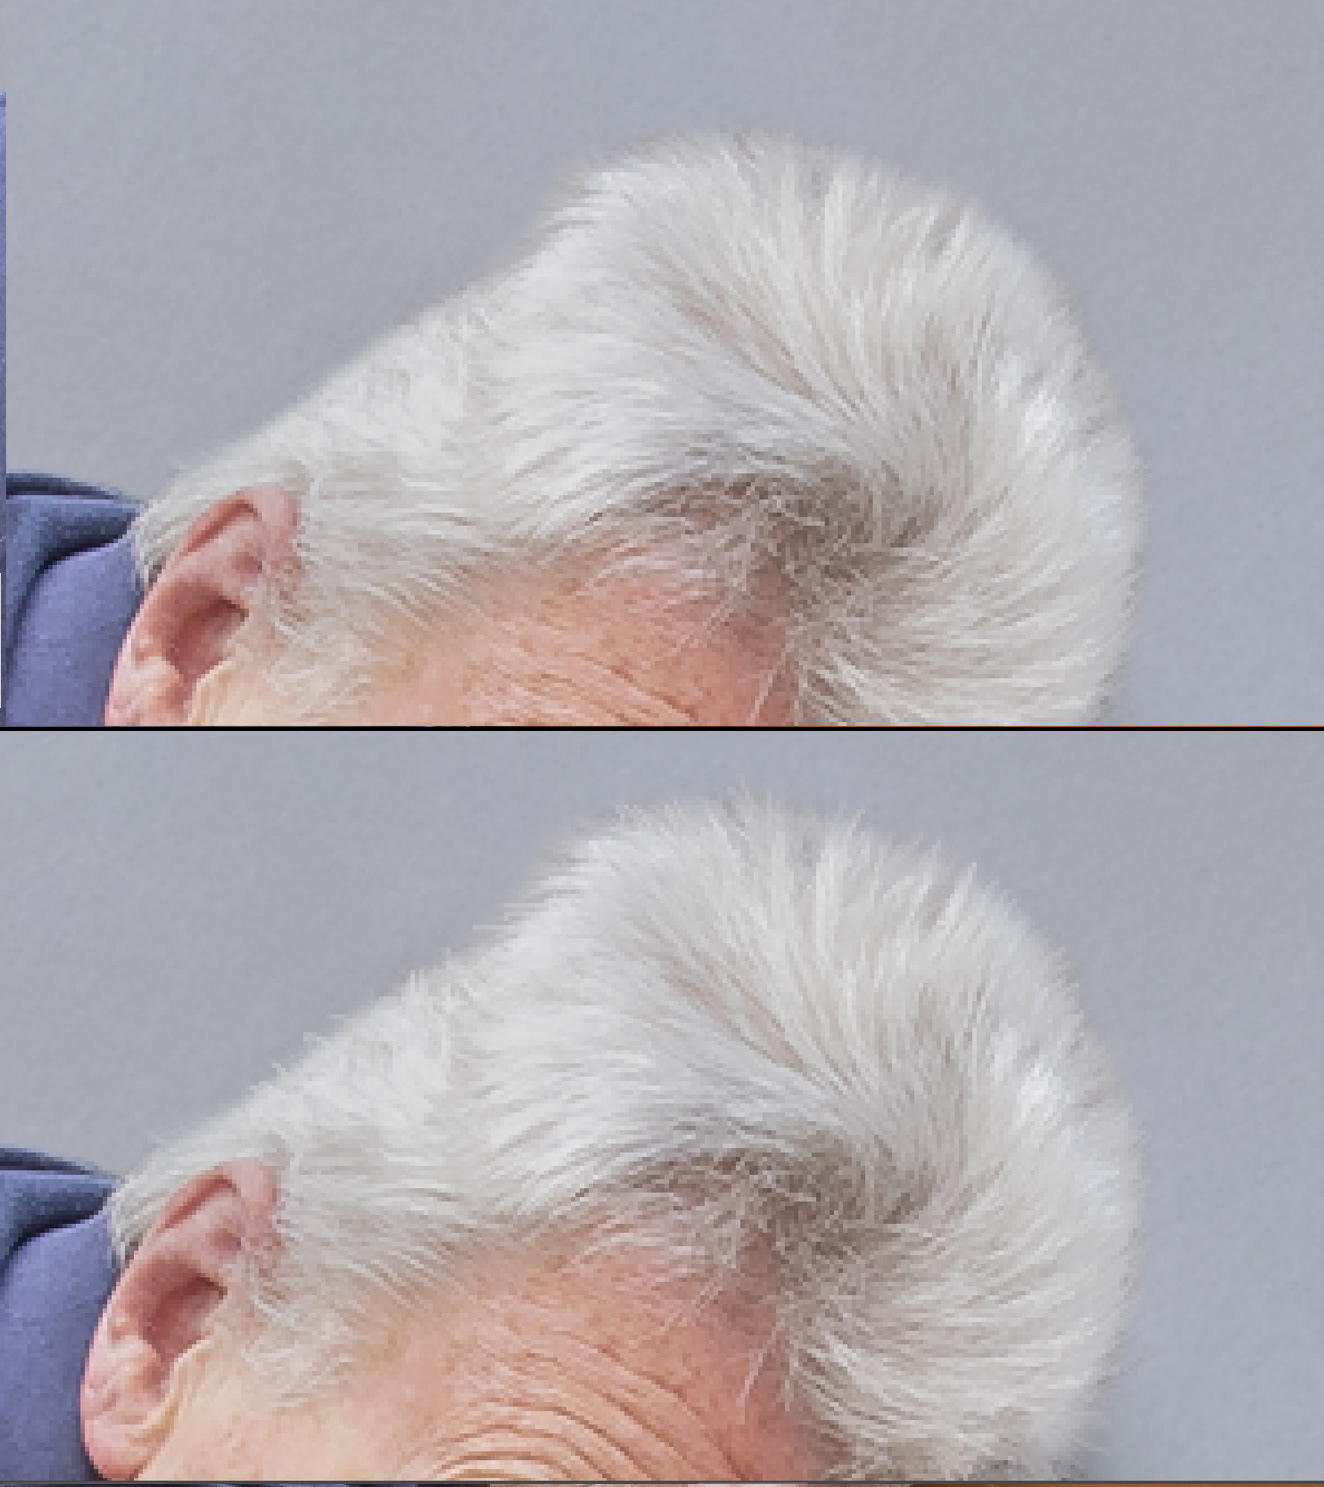
At this stage I usually add a layer mask to the Smudge layer and invert it by pressing Ctrl+i. The smudging will now have disappeared, but by using a white brush I then paint the small strip that I smudged so I can bring it back again. This is only necessary if I want to make any other changes to the rest of the photo at a later stage.
To finish the image off, I use the Nik Colour Efex Pro 4 Photoshop plug-in, to add a gentle vignette to the image. But before doing so, I have to add another snap-shot of the entire image, as the Nik Collection will only work on the layer immediately below, which in this case is just the juice being moved. I do that by pressing Shift+Ctrl+Alt+E. Once I have the vignette in place, I delete the Snapshot layer.

And there you have it!