Container
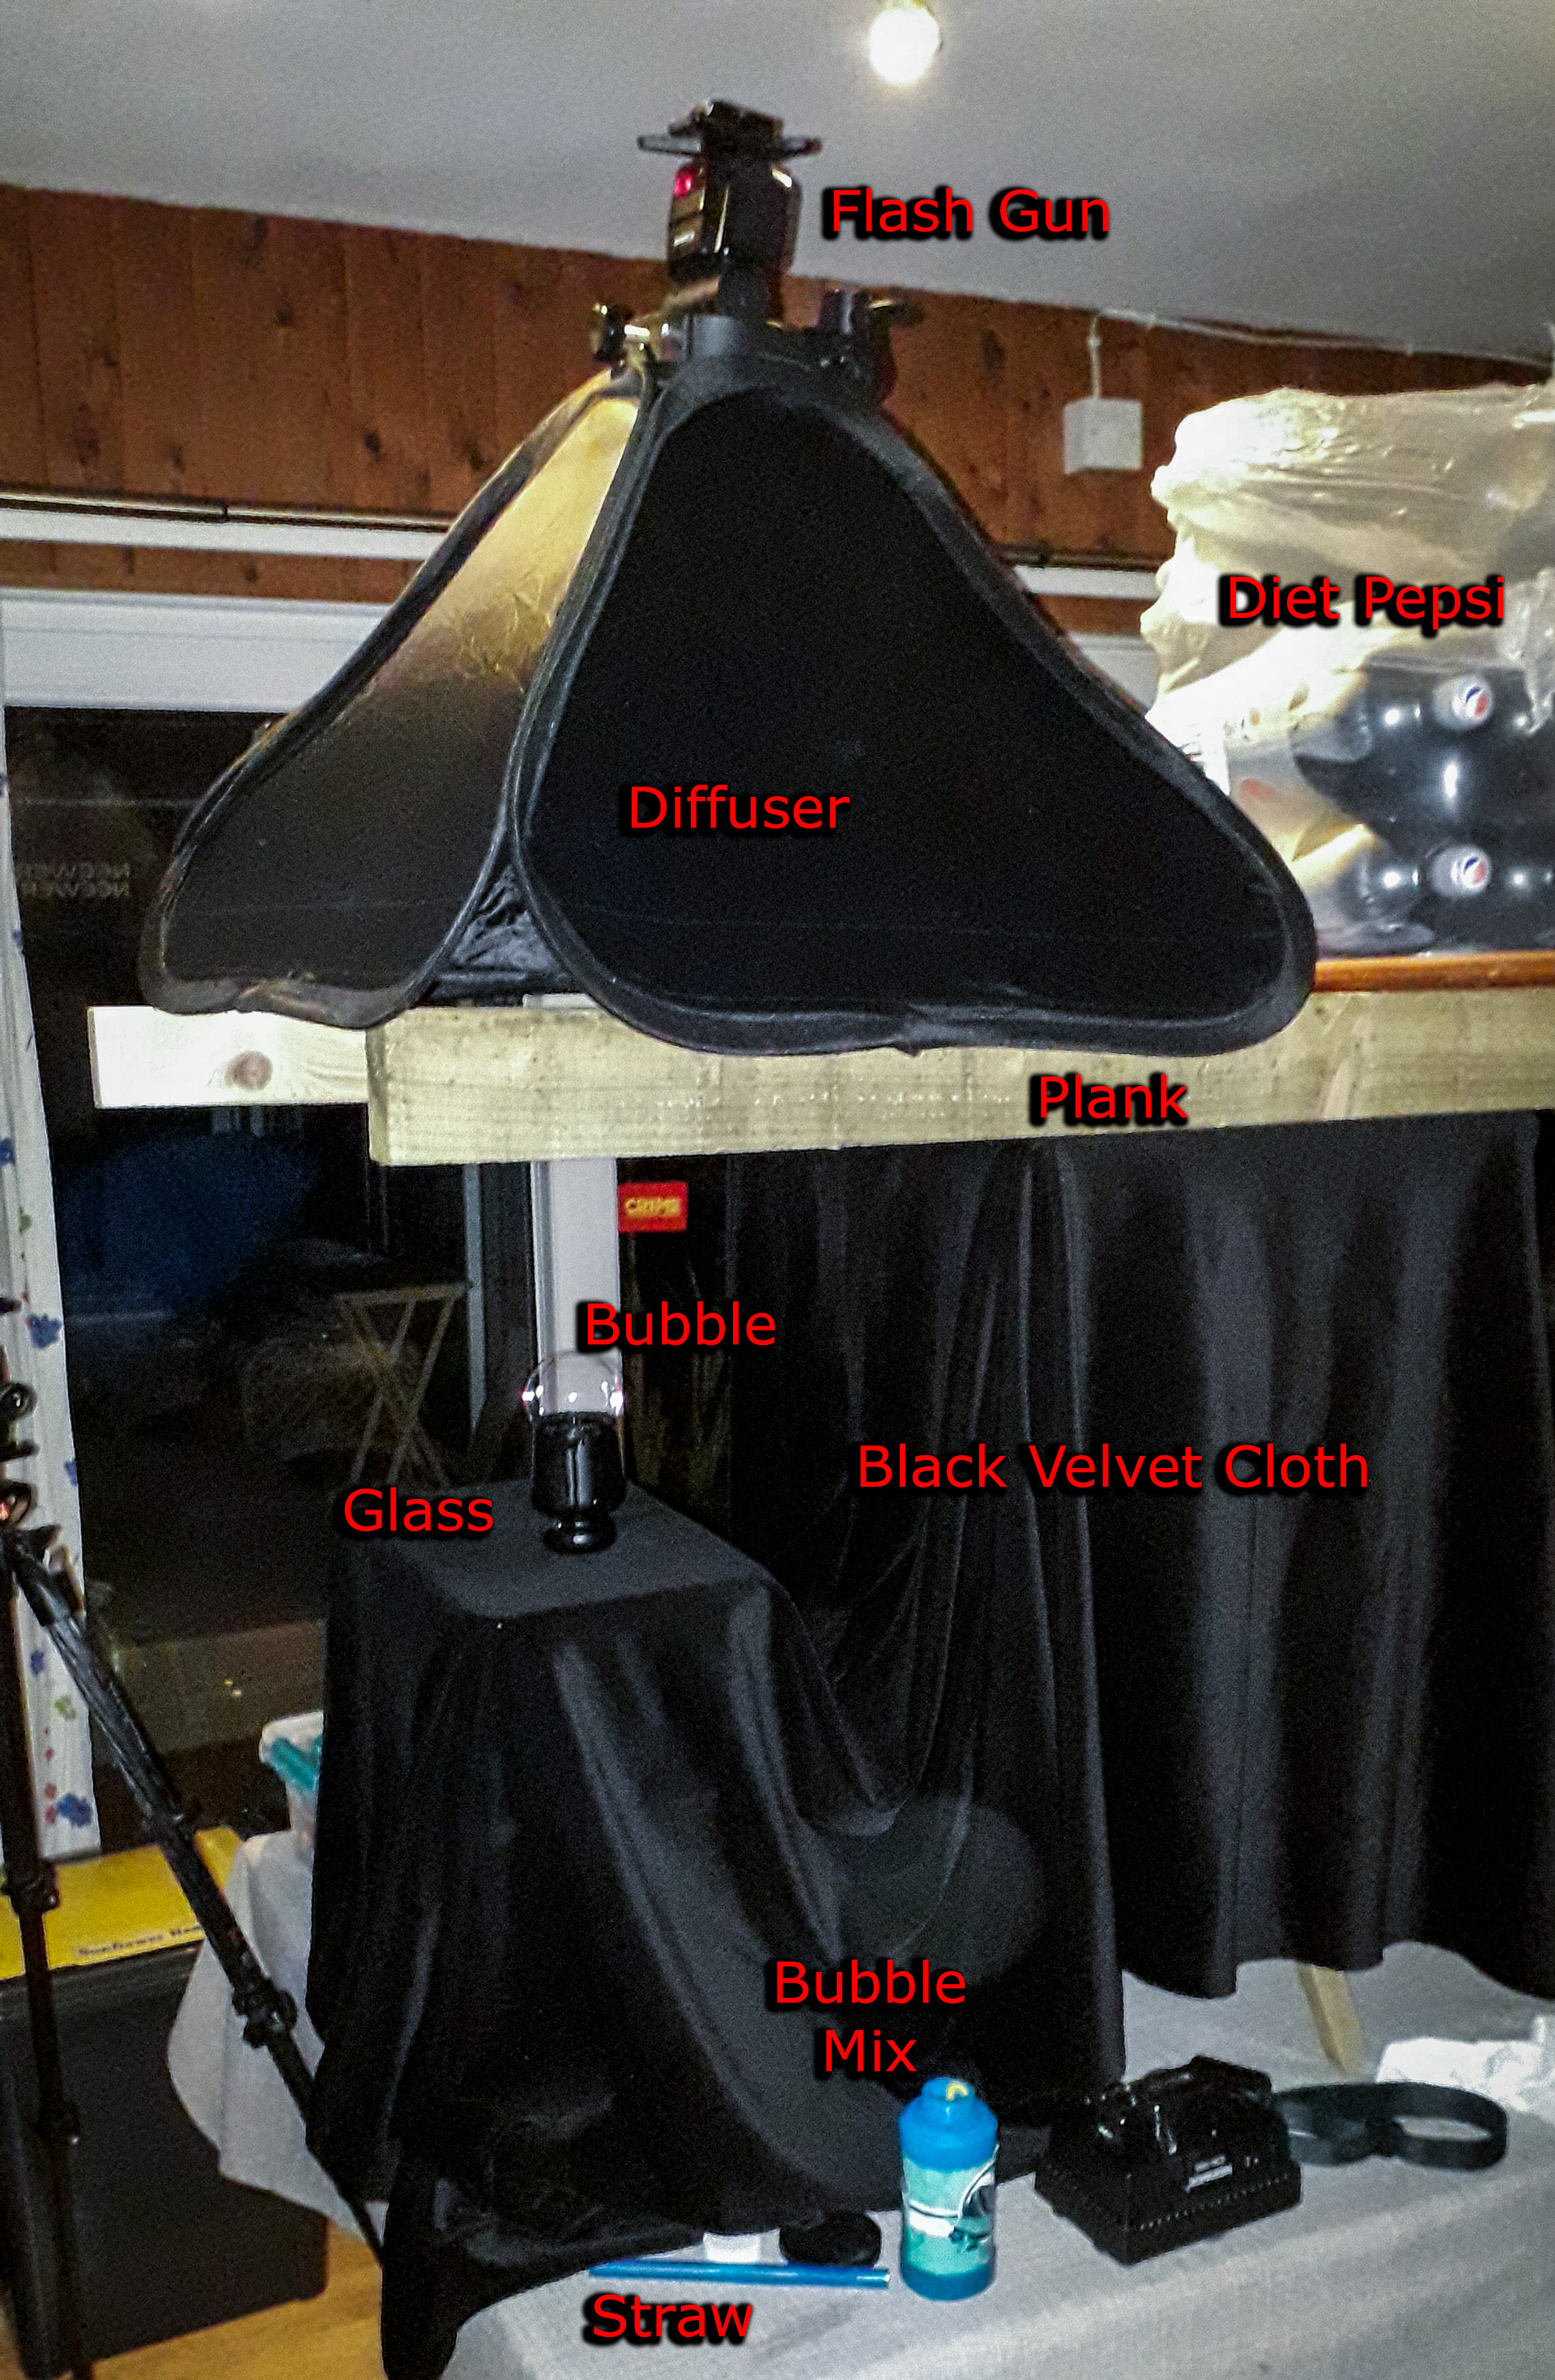
First things first: the receptacle. I hunted around the house to see if I would find a suitable dish, and finally settled on this small glass (one of 12 we received as a wedding gift 43 years ago); which I sprayed with some matt black paint.

Background
I placed a small foldable table on top of my dining table and draped a black velvet cloth over that to provide the background. Although I do have a small light tent complete with a black insert, I prefer to work with my trusty old cloth, as velvet is great for absorbing light.
I brought the level of the glass up higher by placing some boxes underneath the black cloth.
Flash
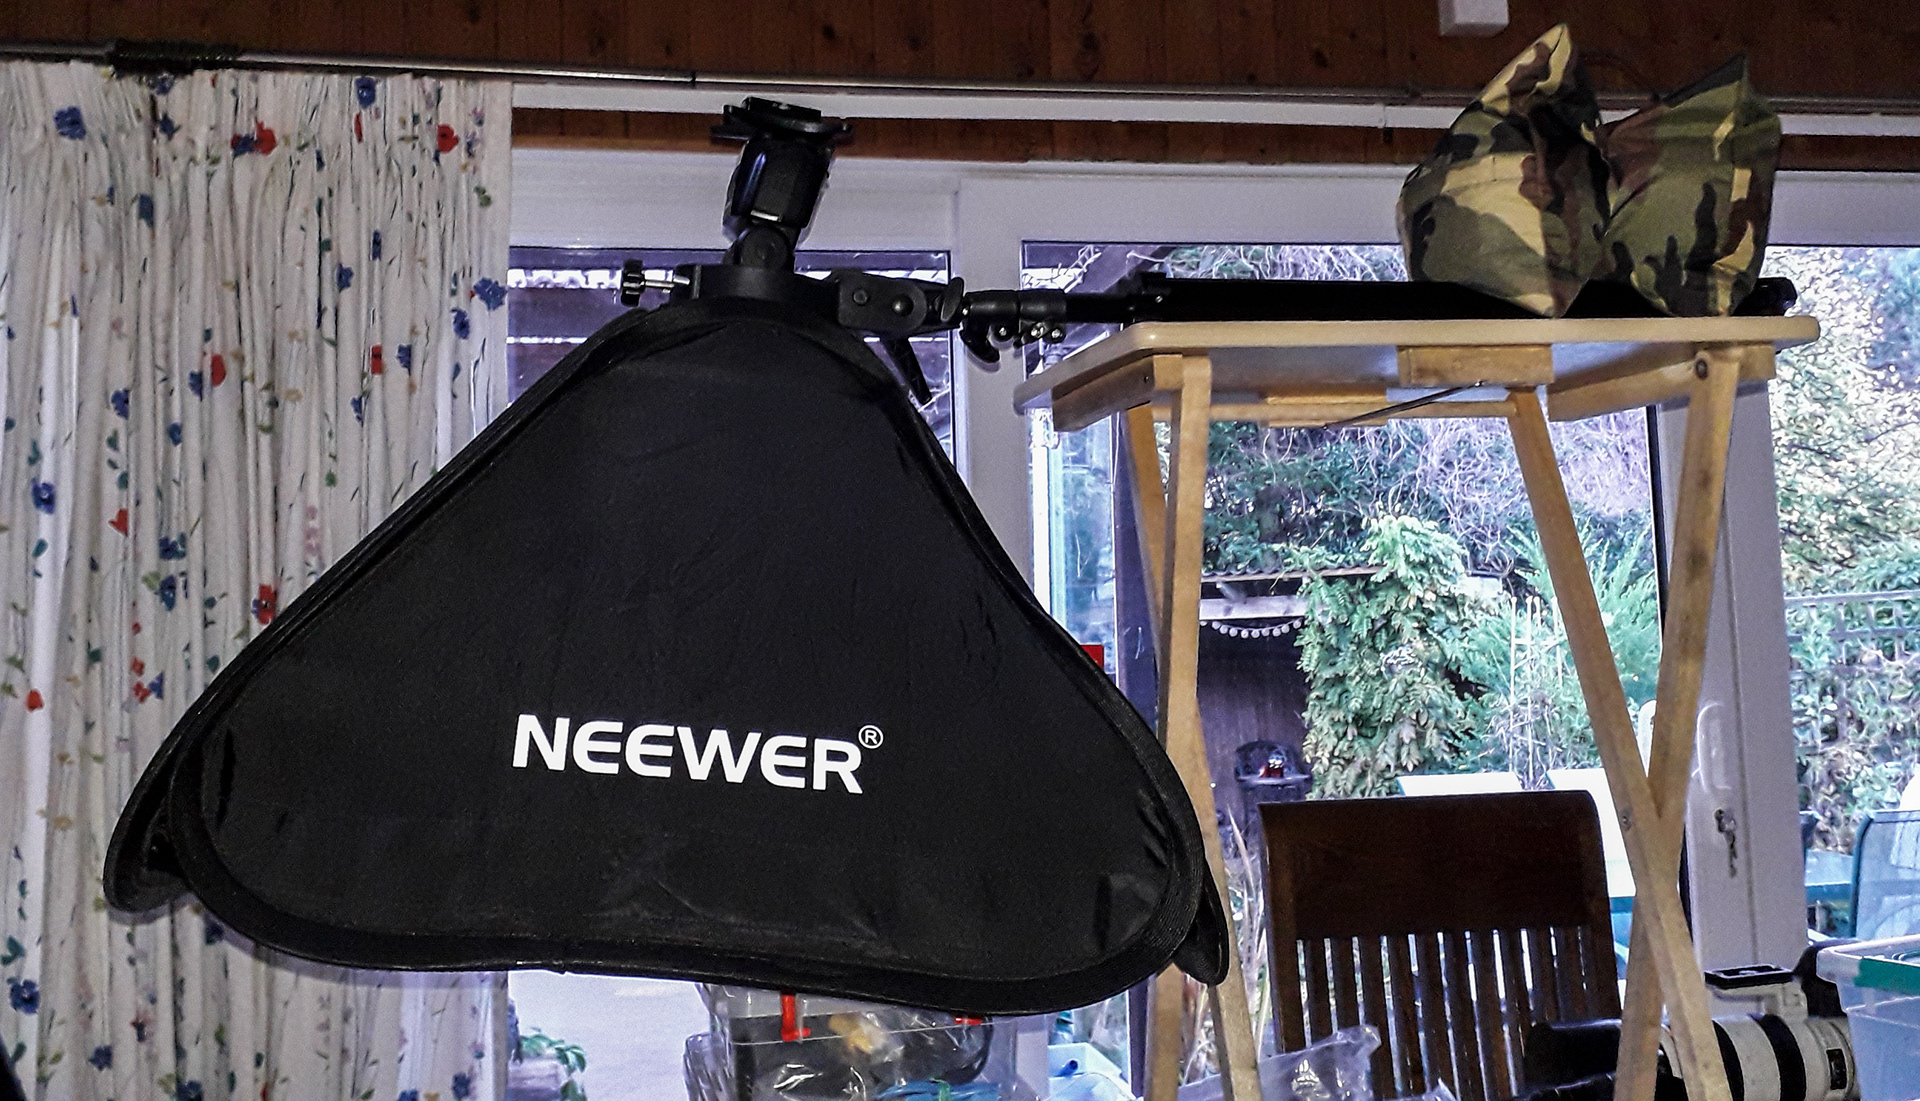
I set up my off-camera flash with a medium sized light box attached. How to secure it in a position facing directly down onto the subject proved to be a bit of a conundrum, as I don't have a boom arm. Initially I thought I'd use my tripod as a boom arm, but the weight of the soft box and flash kept toppling it over, and I struggled to weigh down the tripod with a counterbalance.
A couple of planks resting on top of the table did the trick, with the softbox just sitting on top of the wood. Again I needed a counter-balance: enter four large bottles of Diet Pepsi.
Ambient light
Not wanting to add extra reflections on the bubbles from any stray light, I switched all the room lights off.
Camera set-up
Using a Canon EOS 5DIV with a Sigma 105mm f/2.8, I started with settings of ISO 100, 1/125 and f/22, but played with that a little as I went along. I left the WB on AUTO. The flash gun was set to Manual and 1:1. I finally settled on ISO 250 with the other settings unchanged.
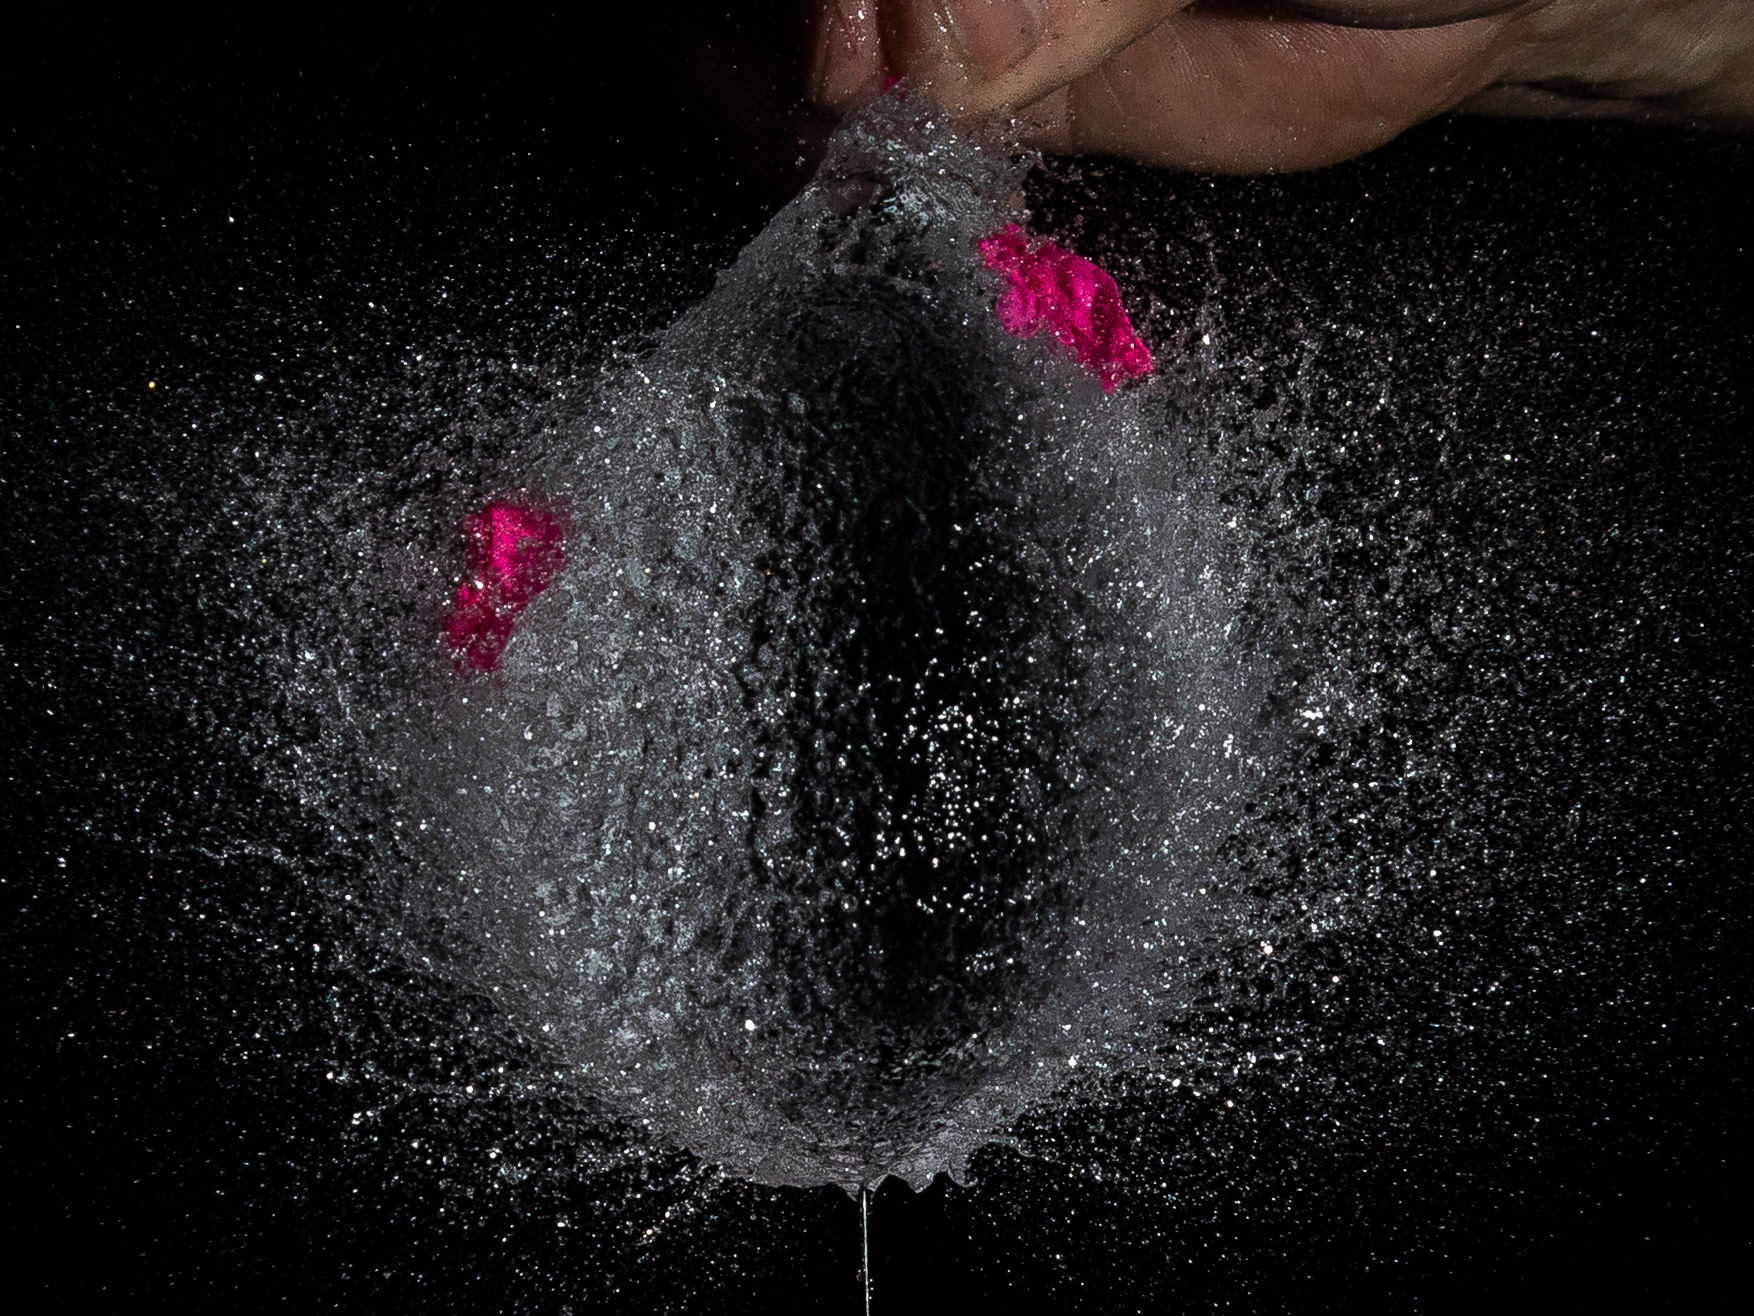
Bubbles
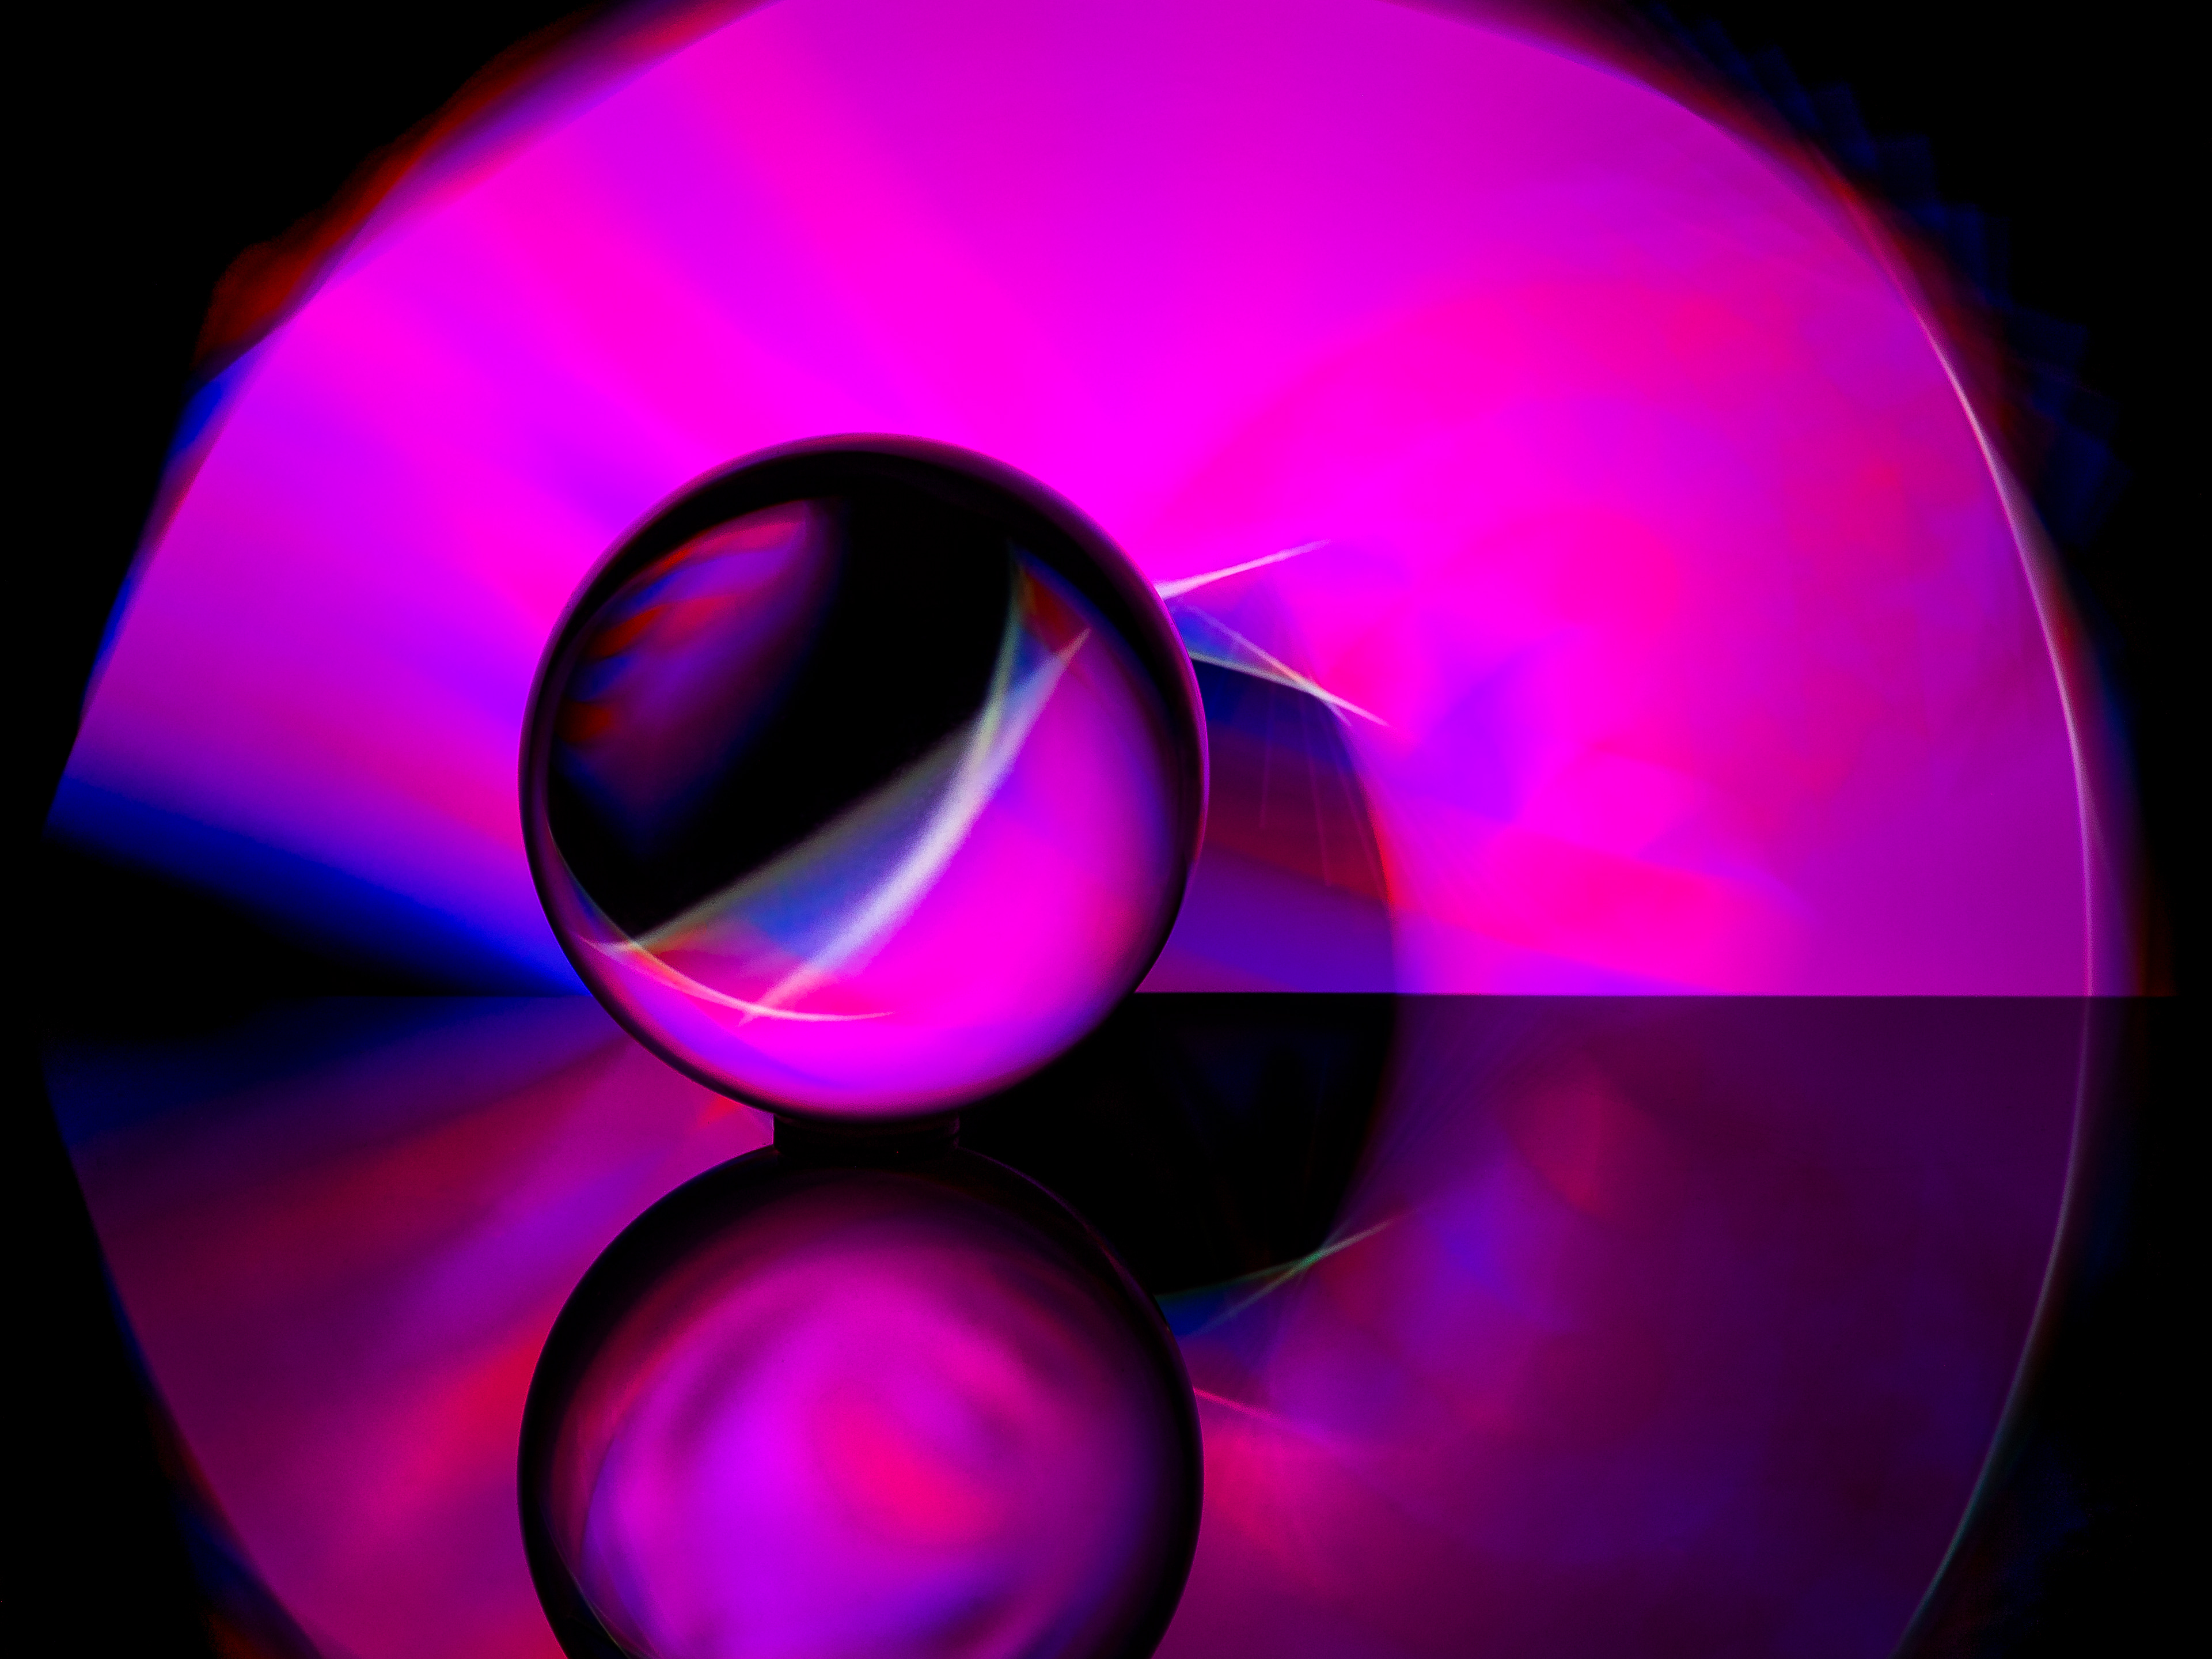
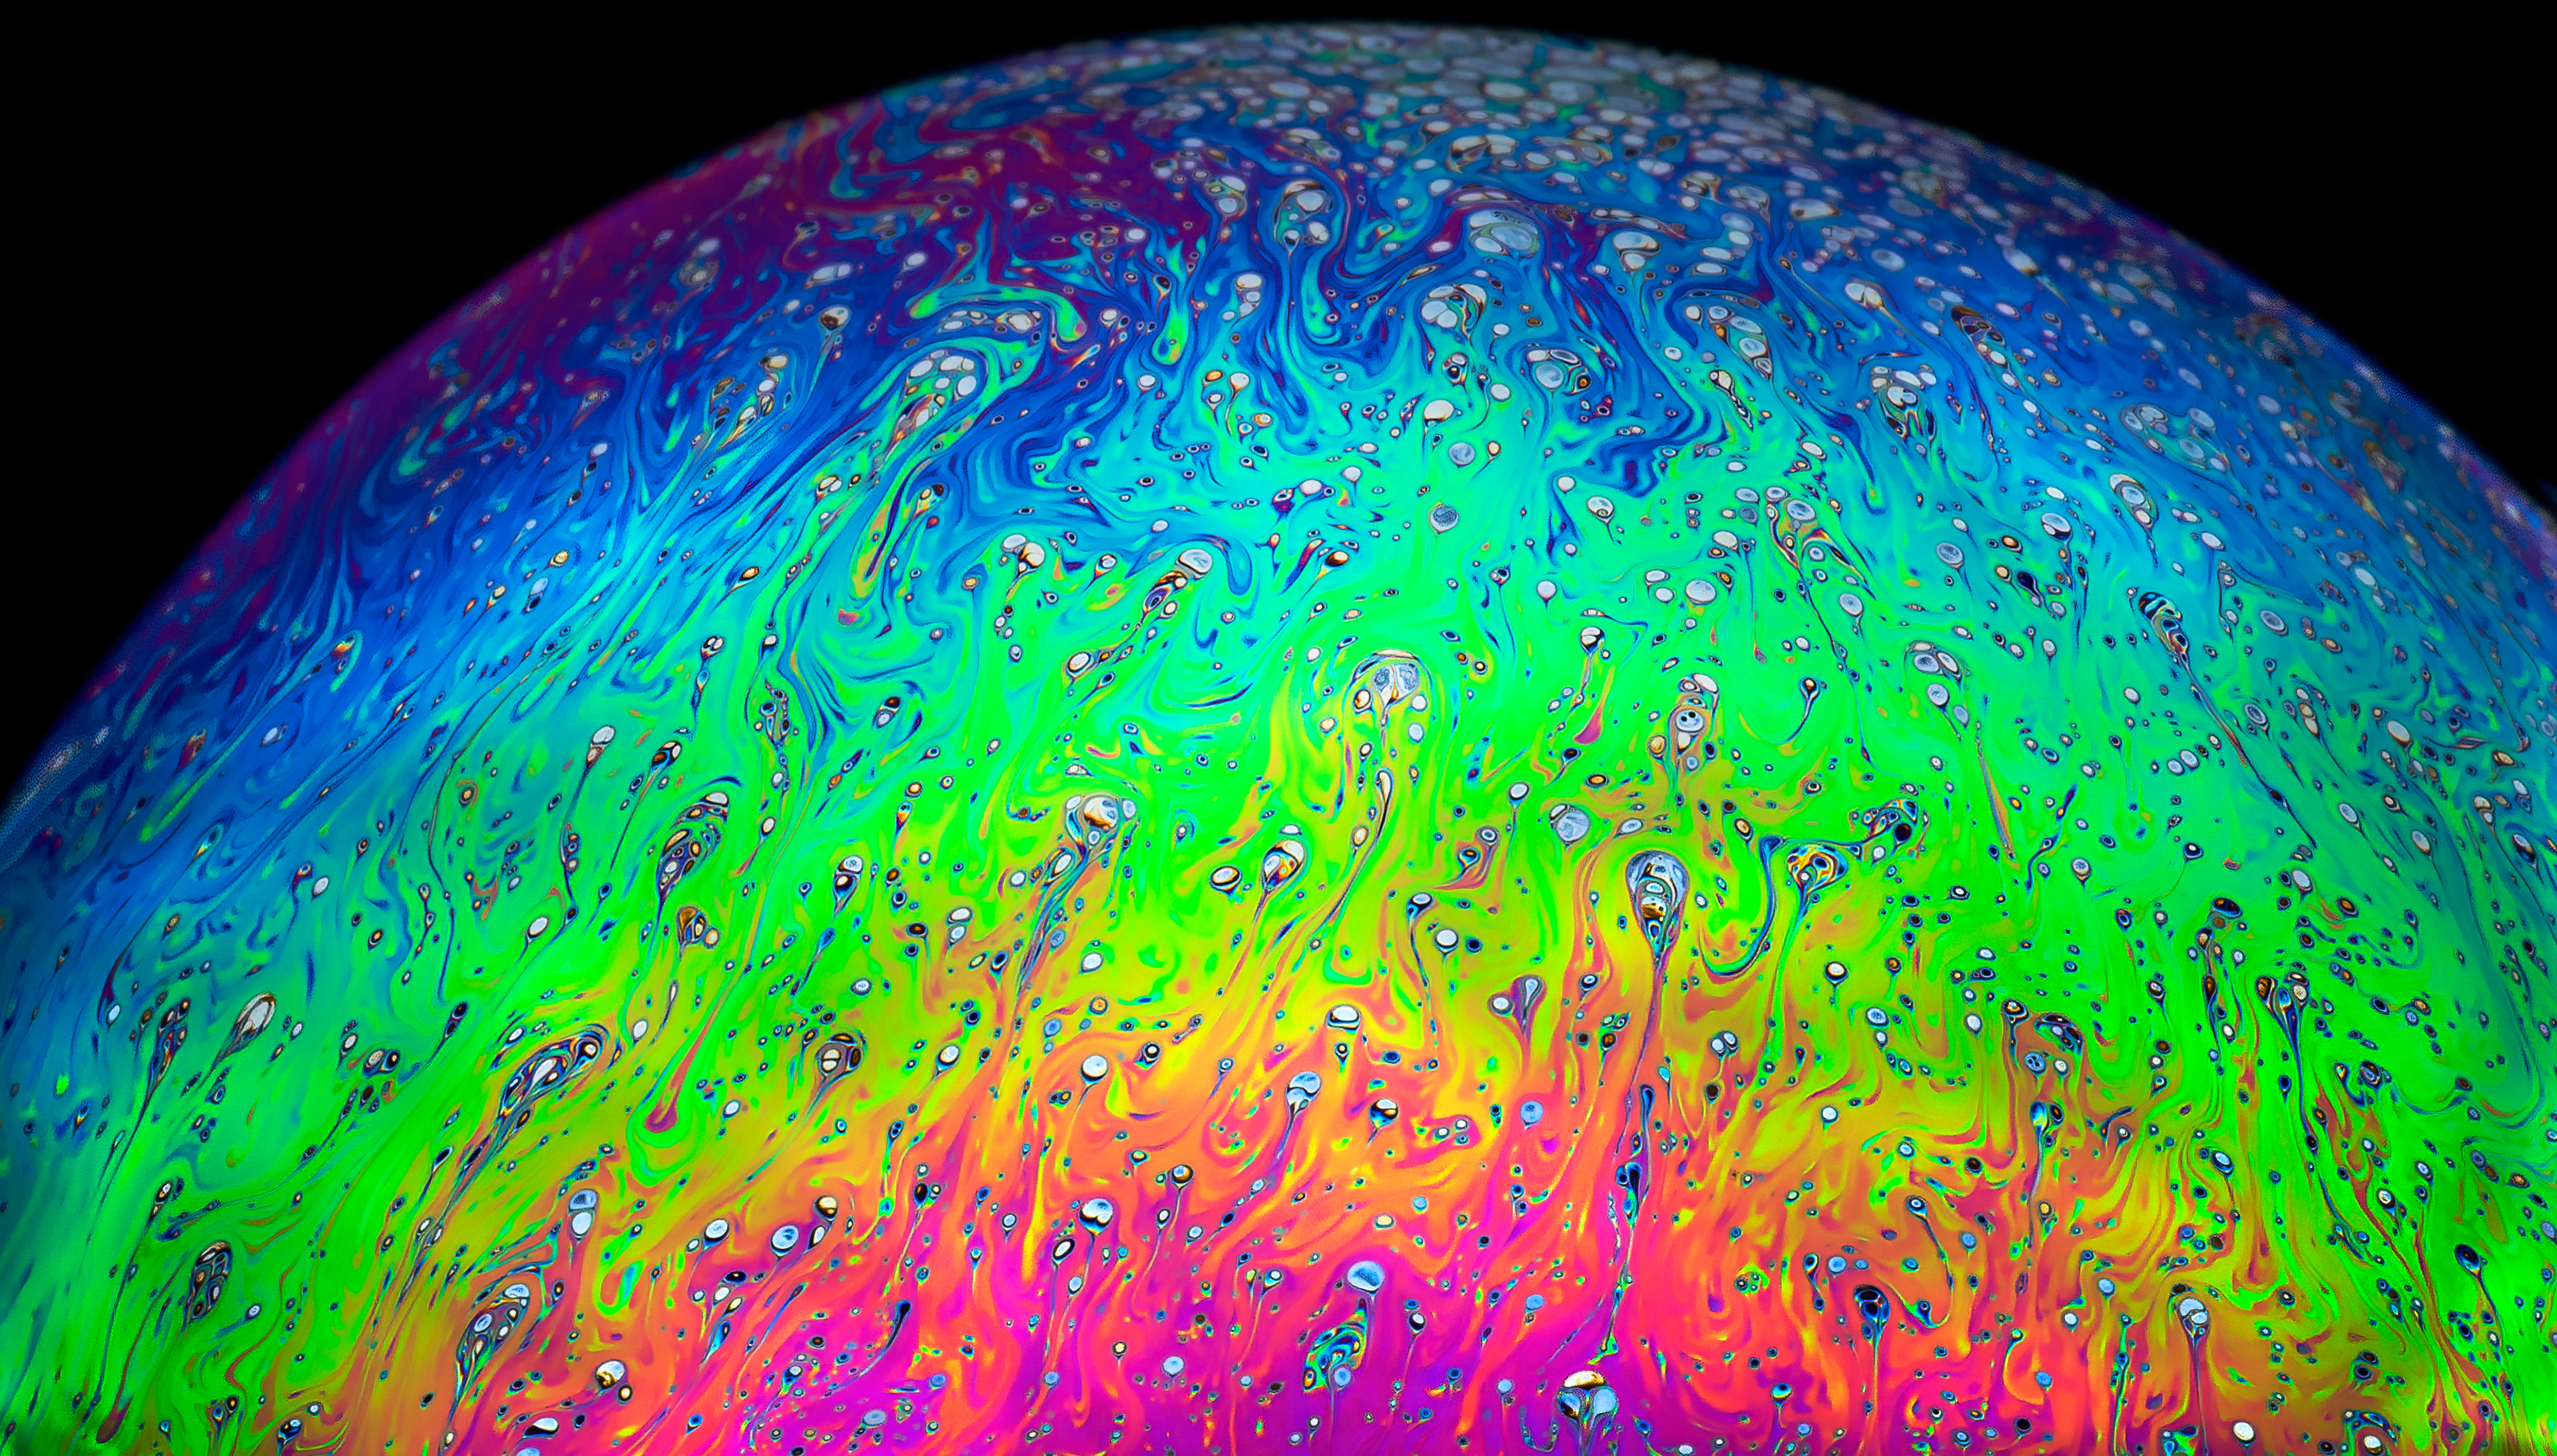
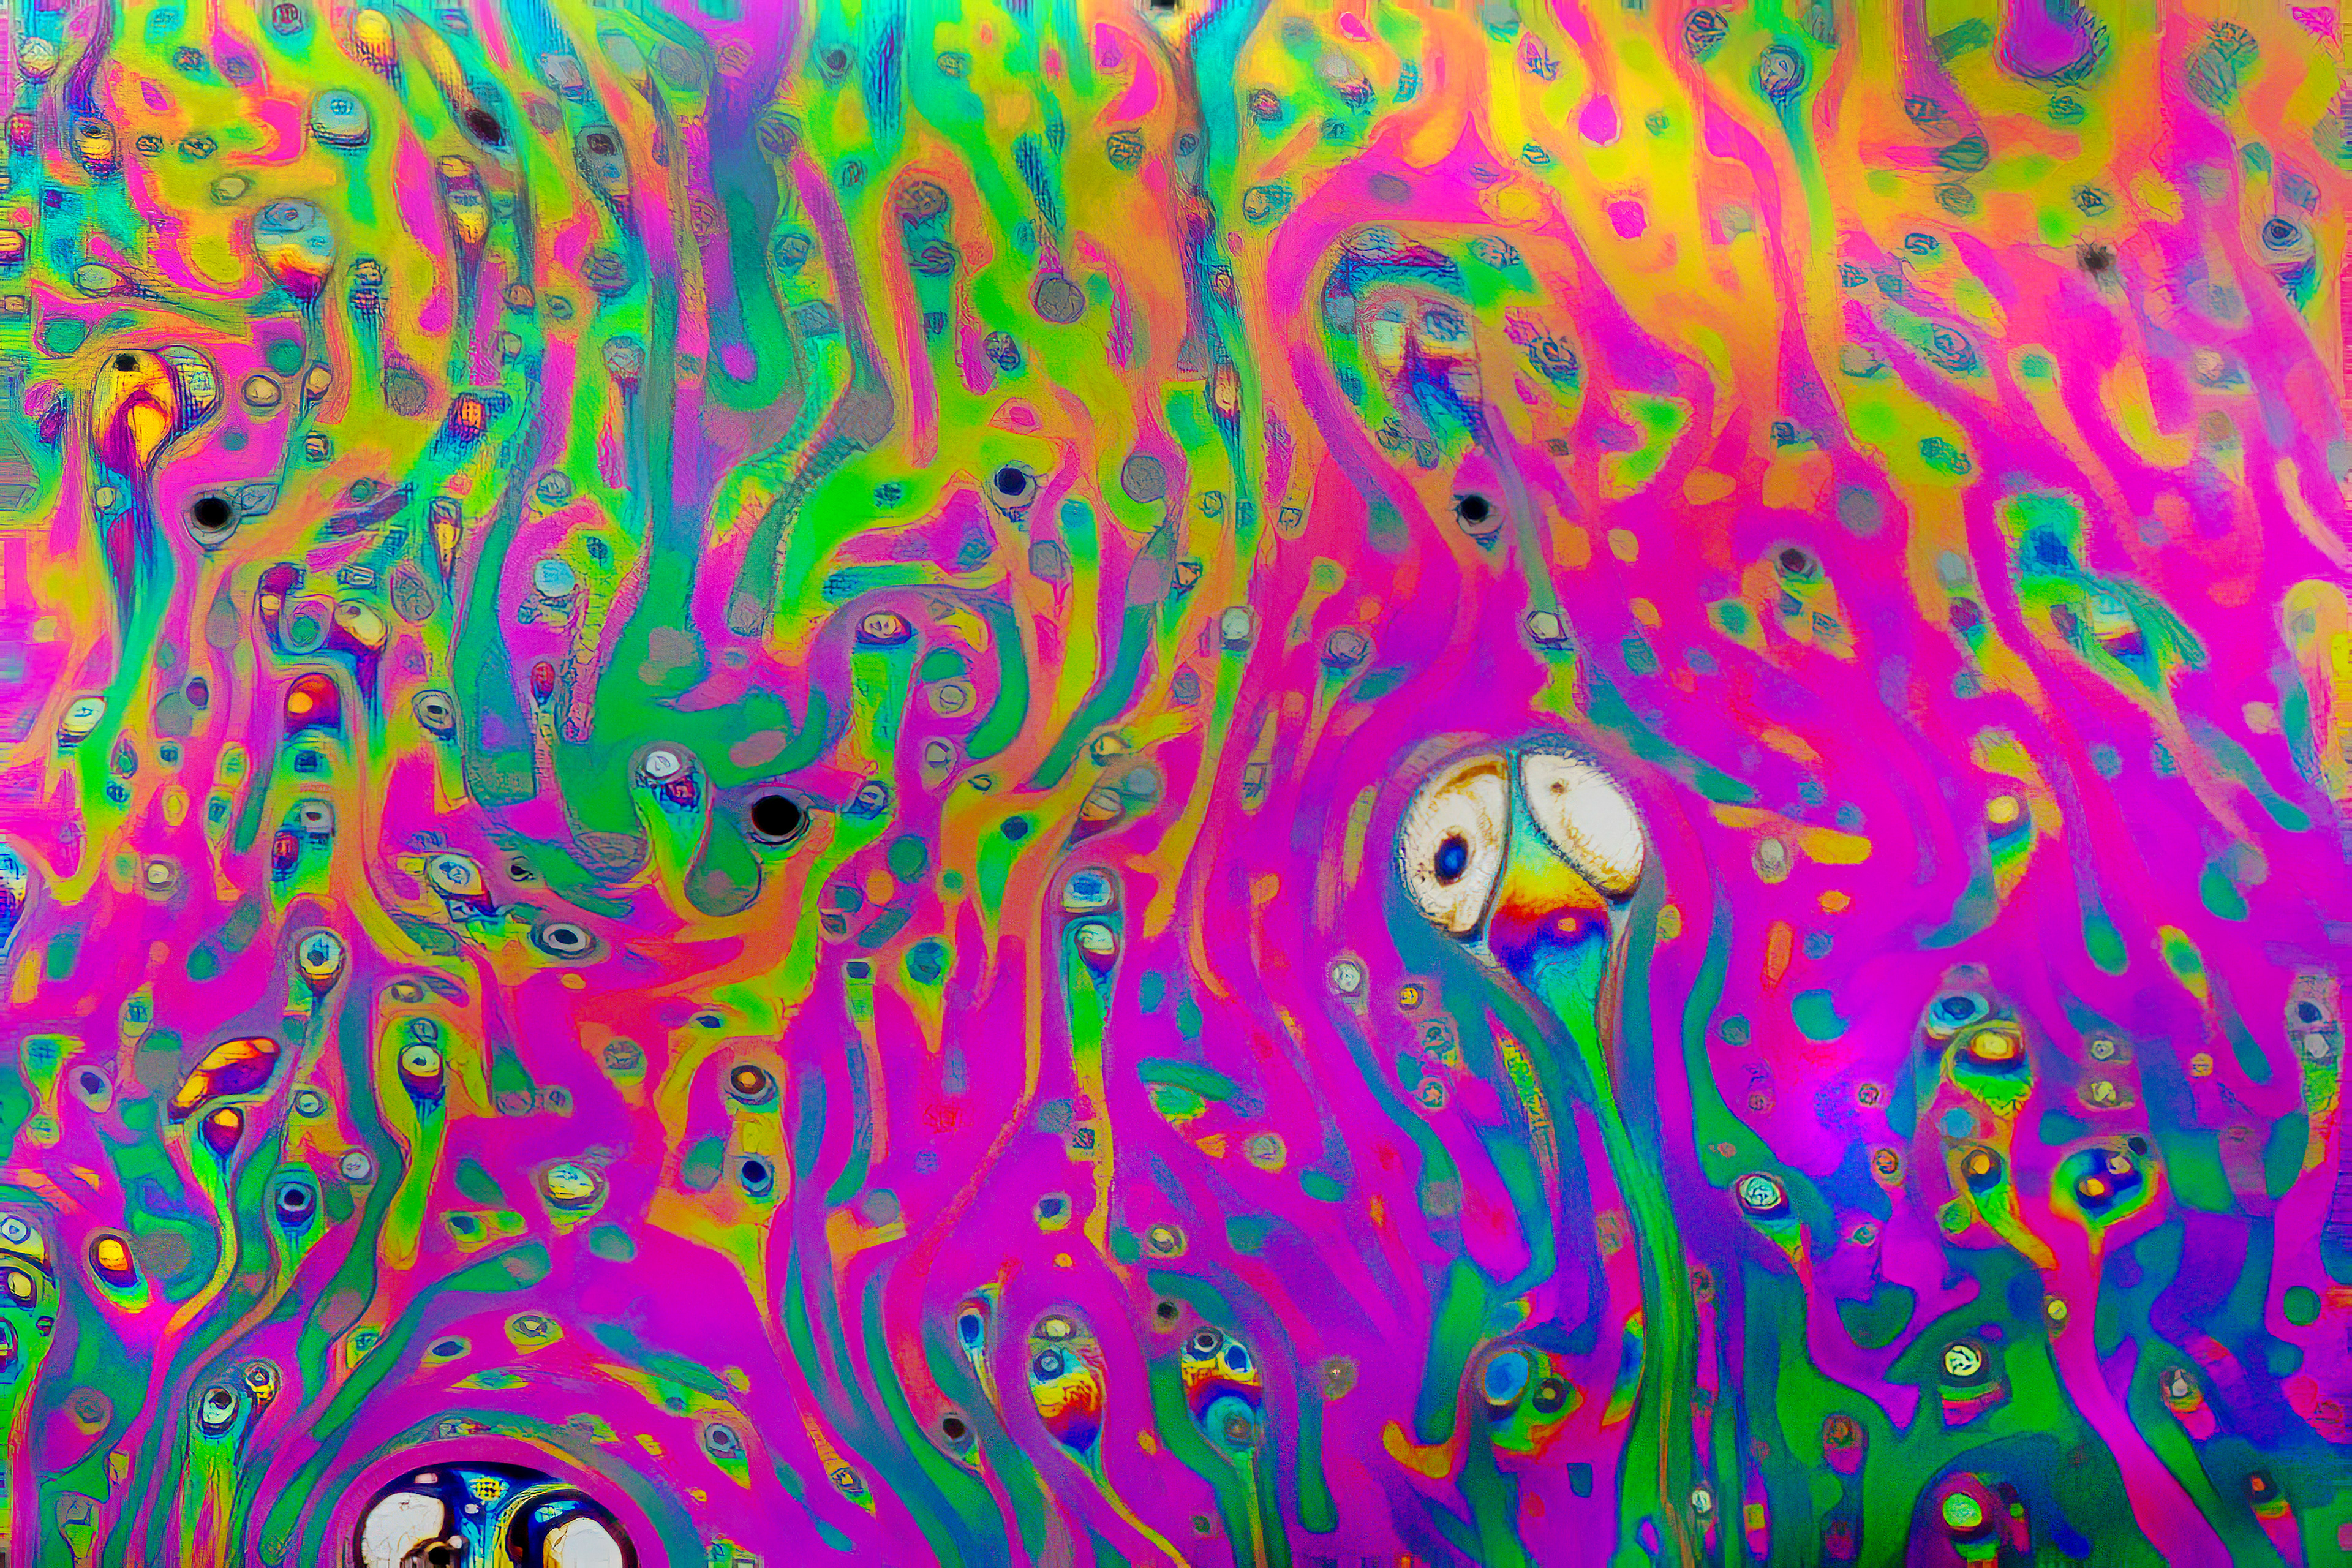
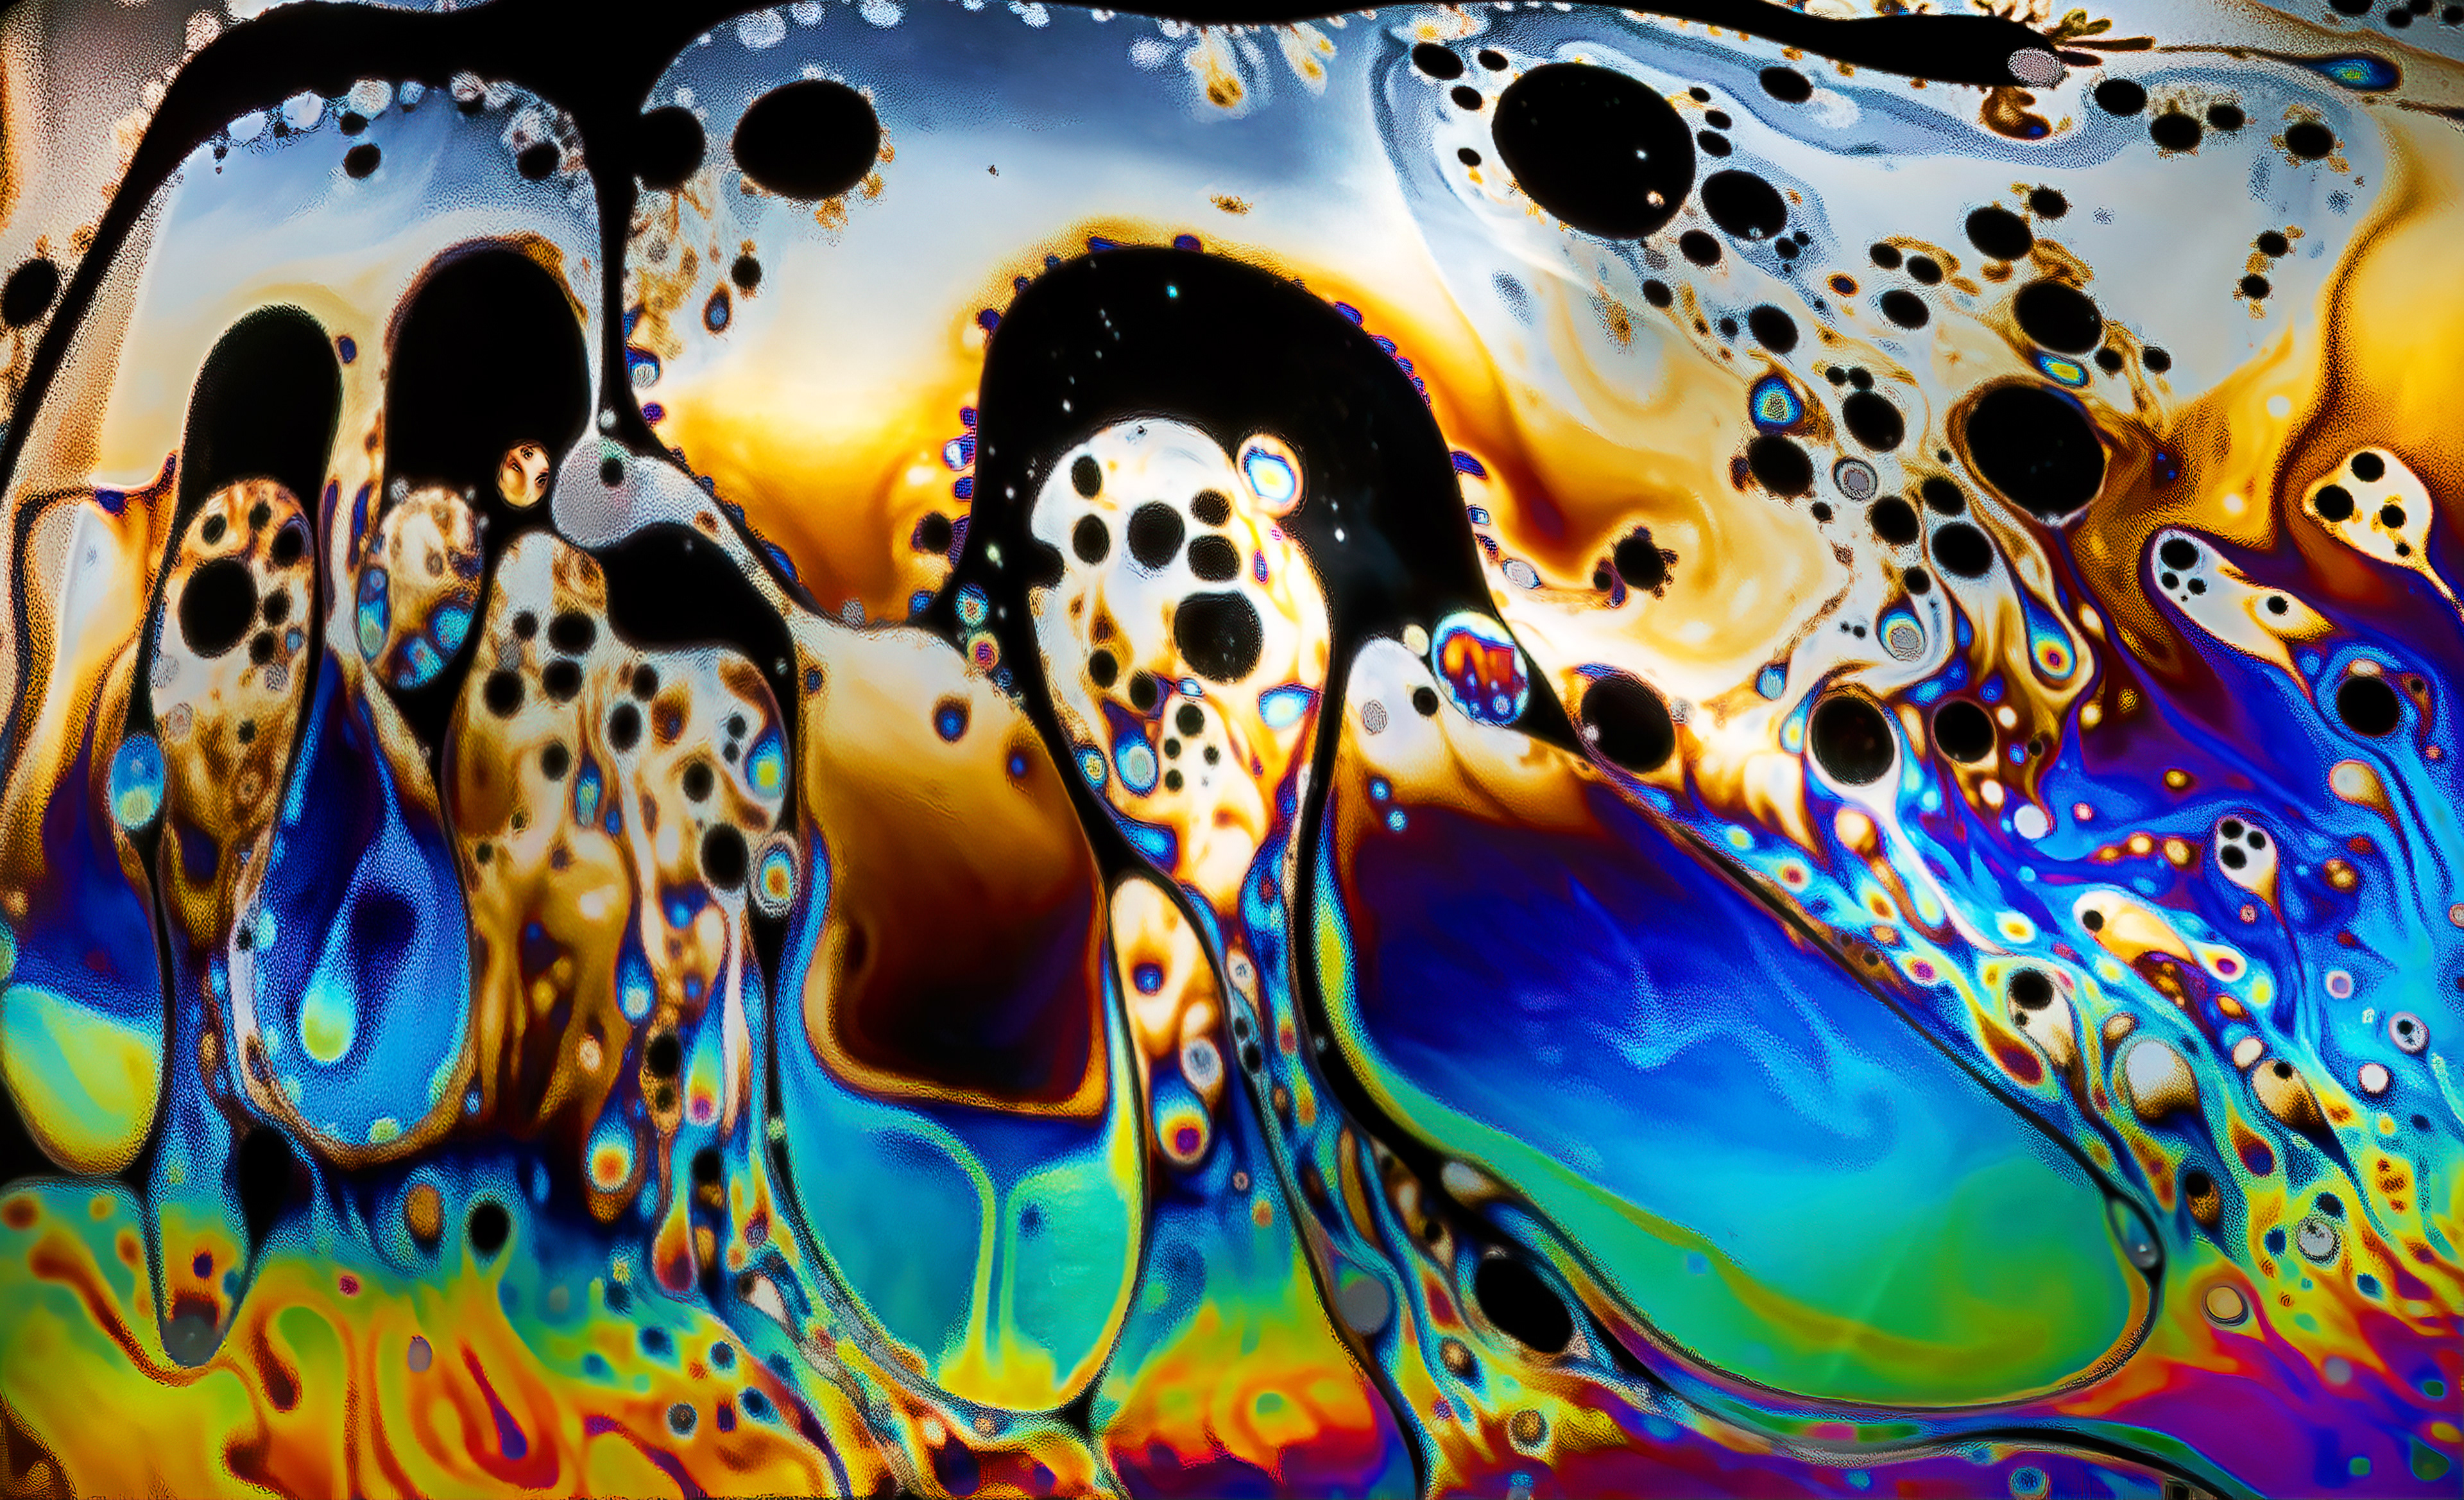
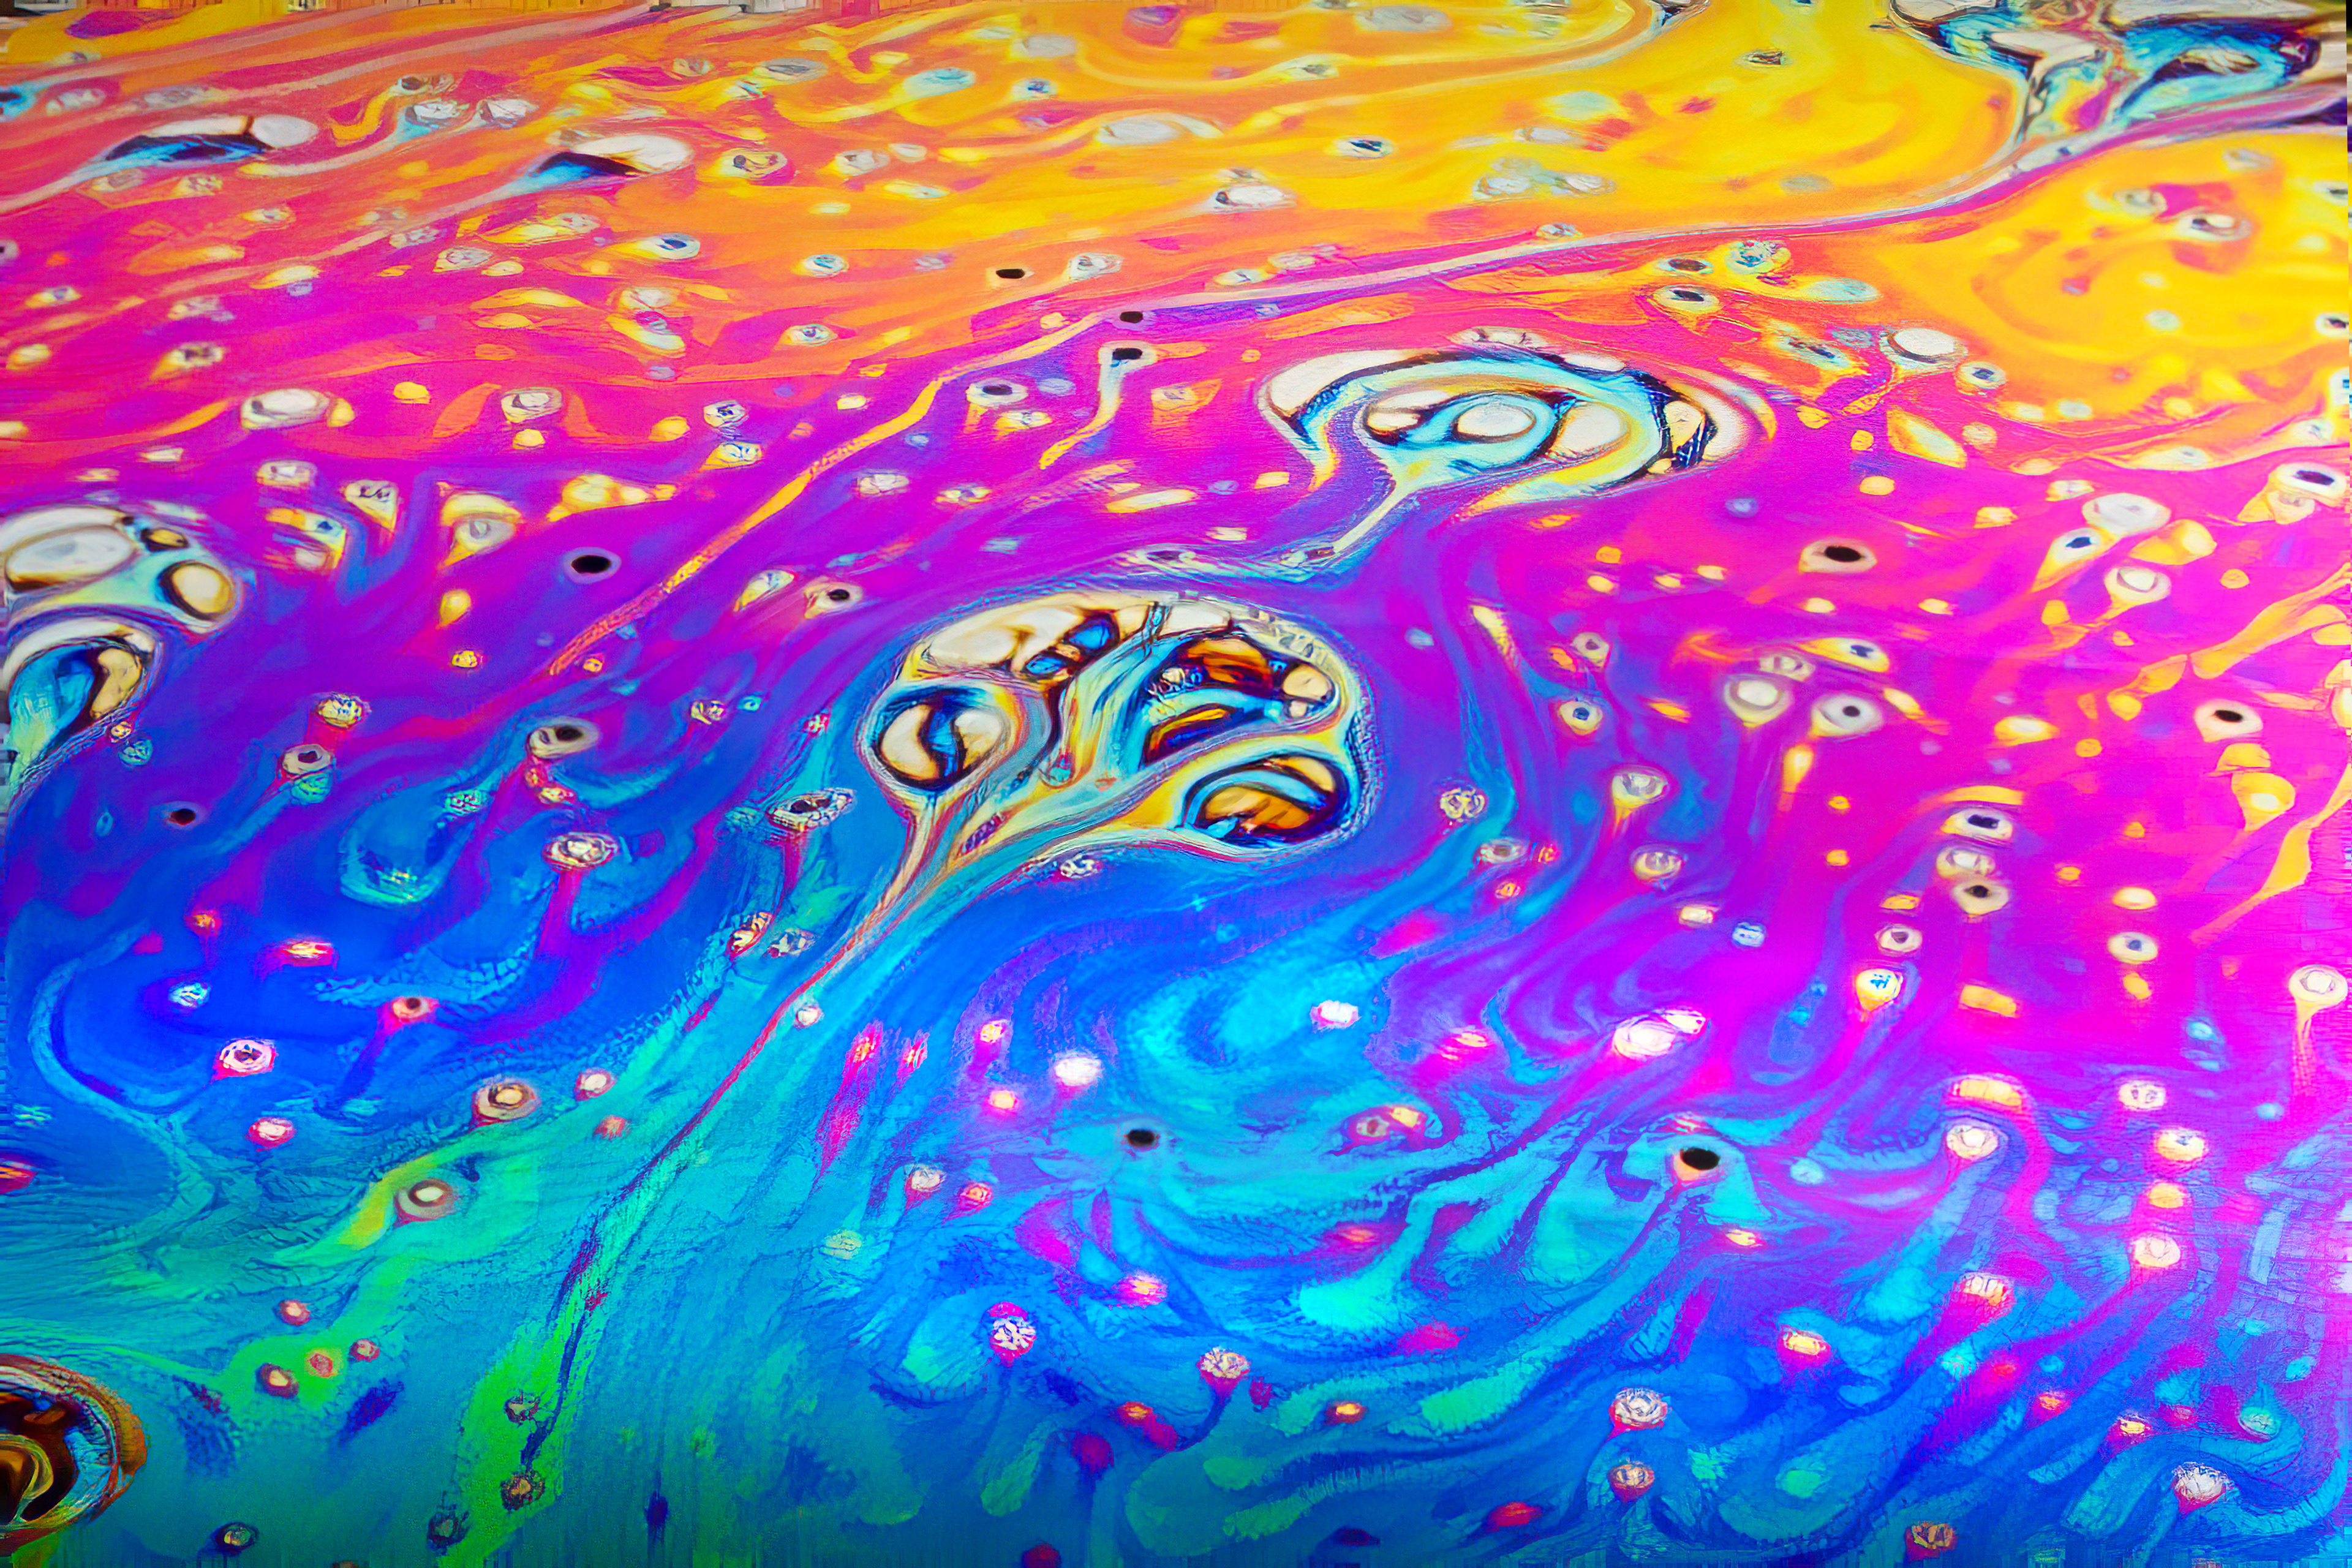
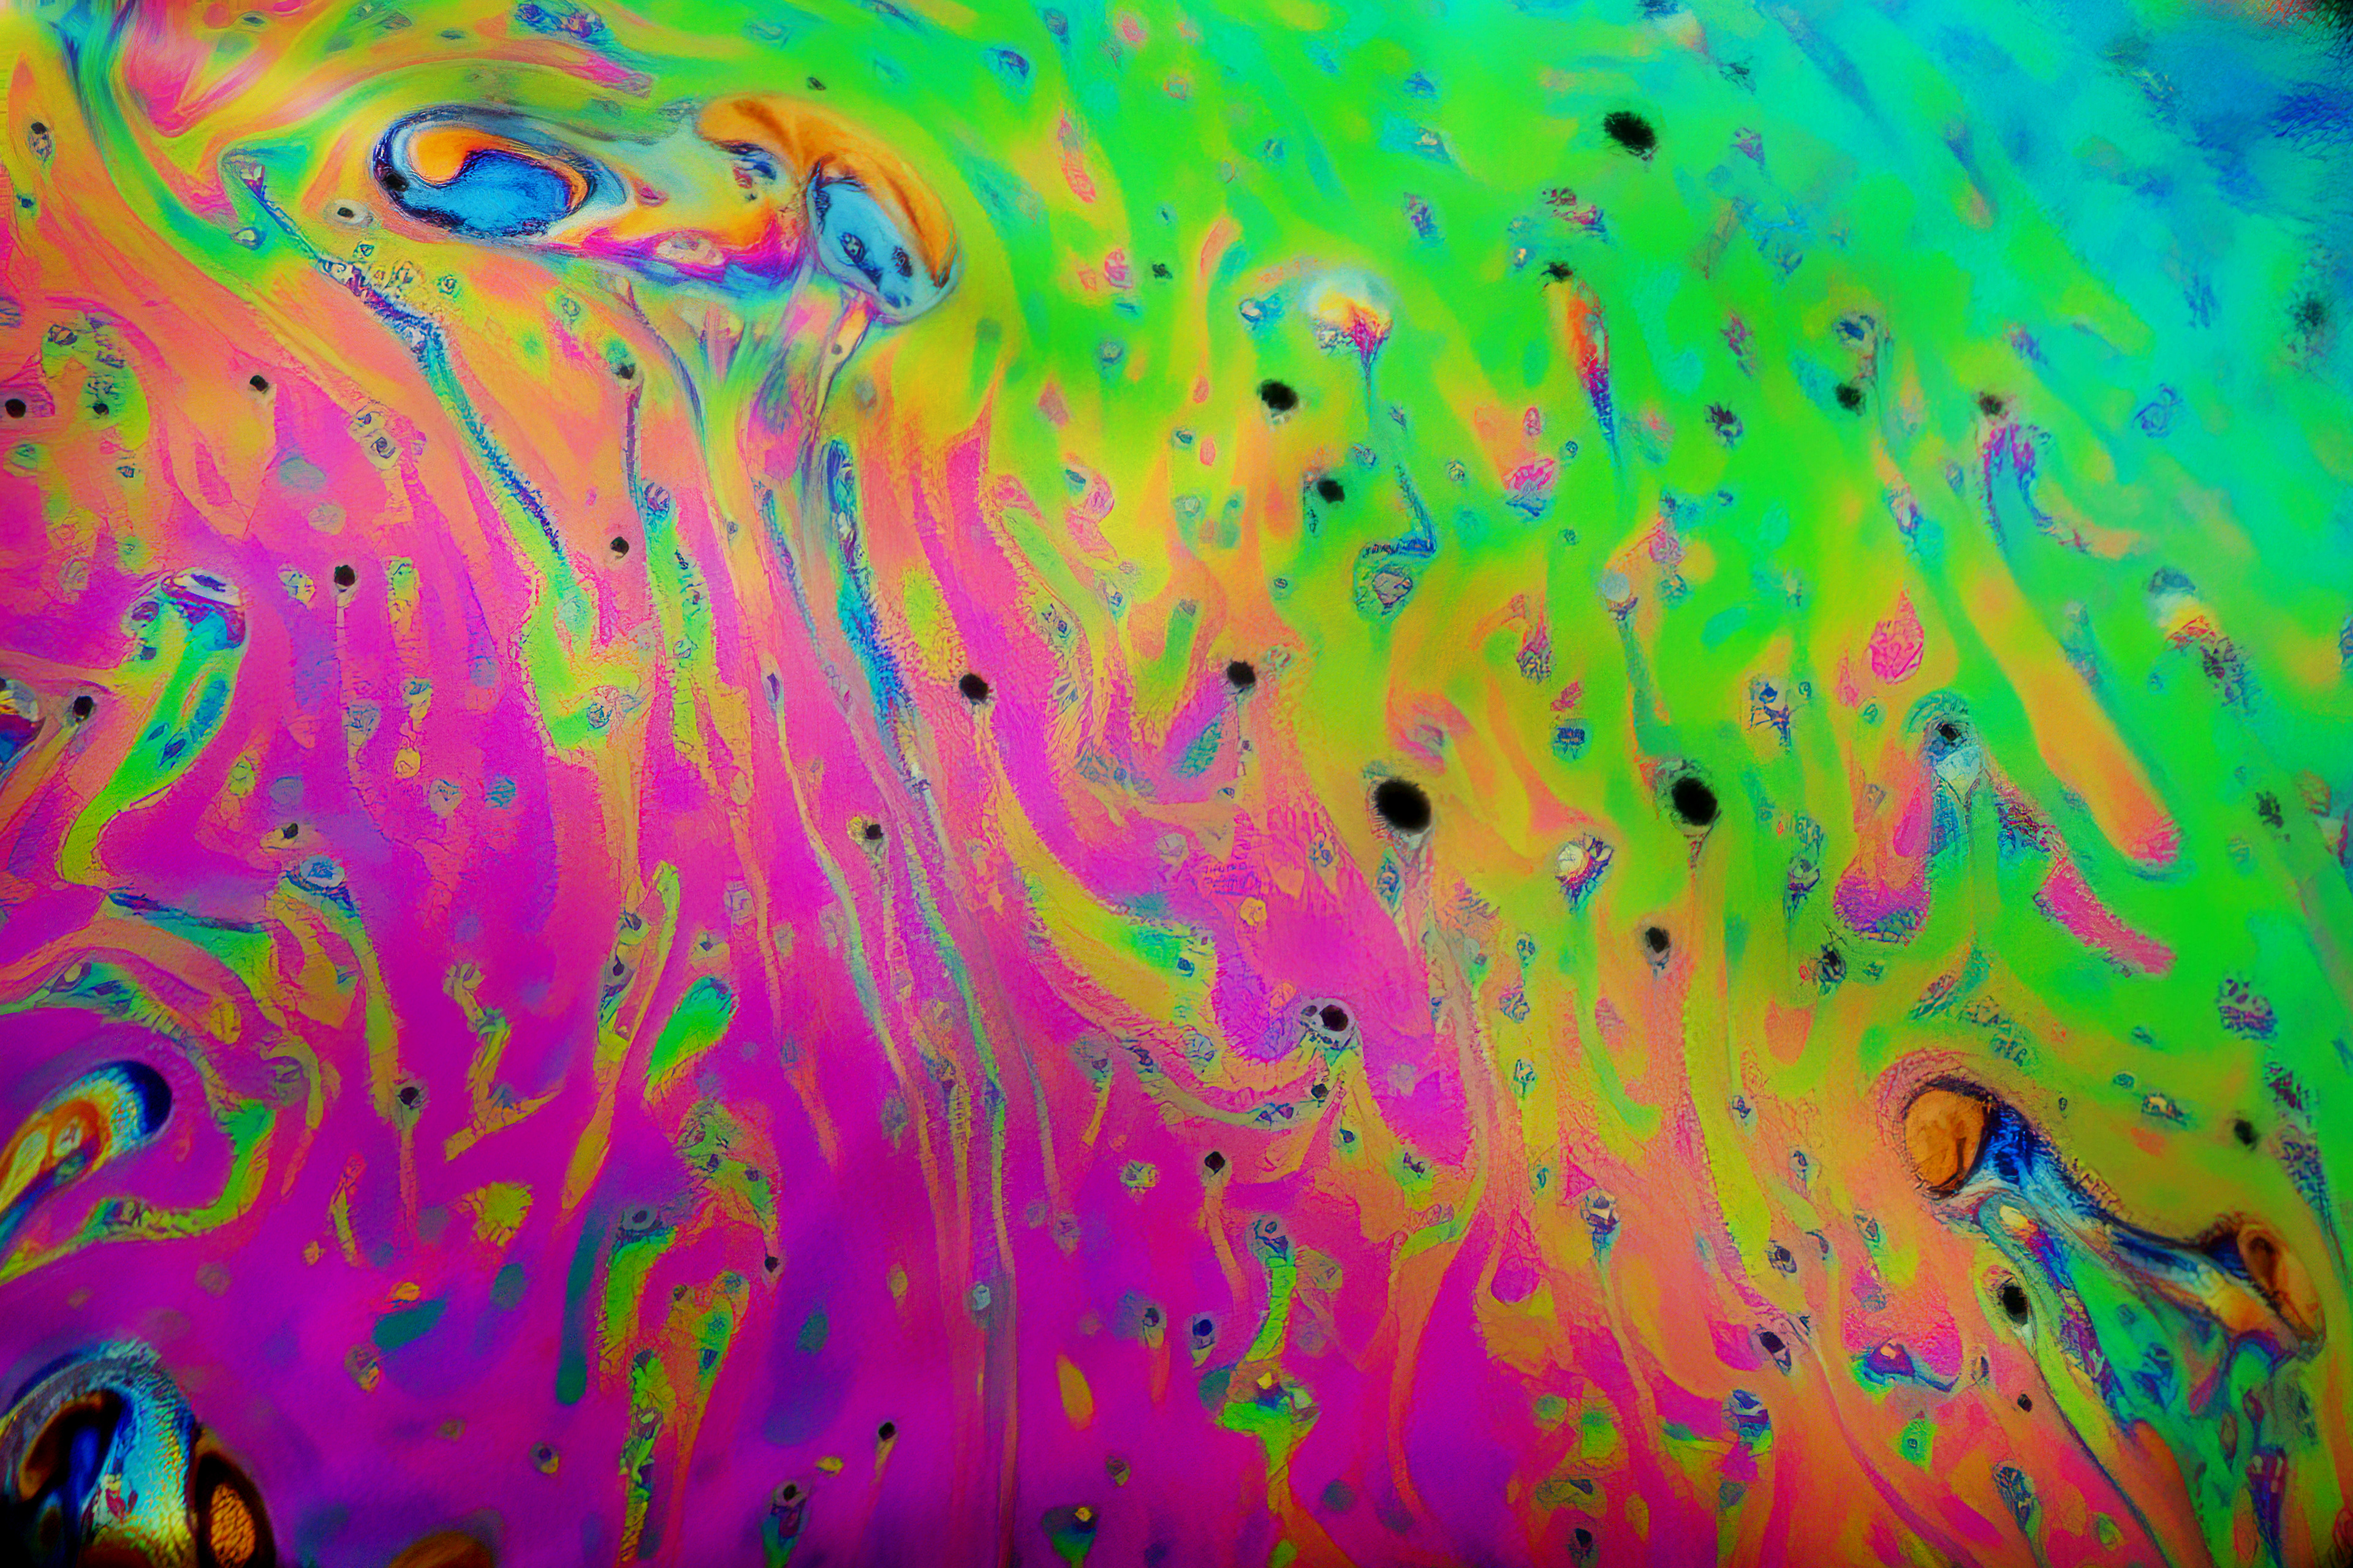
I filled the glass to the brim with water and added some bubble mix, then using a straw (bio-degradable, of course), I blew a bubble over the top of the glass. I was surprised at how easy this was.
Focusing
I really struggled to focus on the bubble, so I had David illuminating it with an LED light, switching it off before I fired the shutter button. I tried using manual focus, but didn't do much better as it was so hard to see the bubble in the dark.
I also tried using a tripod, but found it too restrictive, as I wanted to move the camera too much to get different angles of the bubble.
Results
I fired off quite a few shots, with many, many misses. I did get some images that I liked, however, but only after some serious cropping and editing in Photoshop.
Learning points
I will be having another go this evening, trying it out with the following changes to see what difference any of it makes:
1. Iron the white diffuser to get rid of creases, as I could clearly see those in the reflections on the bubble
2. Trying a larger container, which will then give me a larger surface to work from
3. Try to get in closer to the bubble with my camera.
4. Add an extra layer of diffuser inside the soft box. I was getting a cross-shaped specular highlight on each and every bubble, and am at a loss of how to get rid of that.
5. Move the glass closer to the light source
6. Change the flash power
7. Add glycerine to the bubble mix
Watch this space!
6. Change the flash power
7. Add glycerine to the bubble mix
Watch this space!
Day Two
Disaster hit this afternoon as I removed the flashgun with the softbox attached, to iron the white diffusers. The counterbalance overbalanced, sending the whole scaffolding contraption flying. Soapy water everywhere. Nothing appears broken, thankfully. That'll teach me to put the top on the bubble bottle in future.
Plan B for the set up. I received my new light stand this morning, so I attached the softbox-flash combo to the top of that and angled it at 90°, then laid it flat on top of the little table, with my camera bean bag acting as counterbalance. Now I just need the black velvet cloth to dry out before this evening's photoshoot.
I also made a couple of other changes:
1. adding the inner baffle in the soft box – and ironed both of them
2. adding glycerine to the soap bubble mix
As a result of the new set-up, the glass, and thus the bubble, is very much closer to the light source.
1. adding the inner baffle in the soft box – and ironed both of them
2. adding glycerine to the soap bubble mix
As a result of the new set-up, the glass, and thus the bubble, is very much closer to the light source.

In order to give me more light for focussing, I placed a continuous LED light to the side of the set up. This did not seem to interfere with the images. Even so, the camera struggled to focus in the low light, so after some trial and error, I placed it on a tripod and dialled in manual focus.

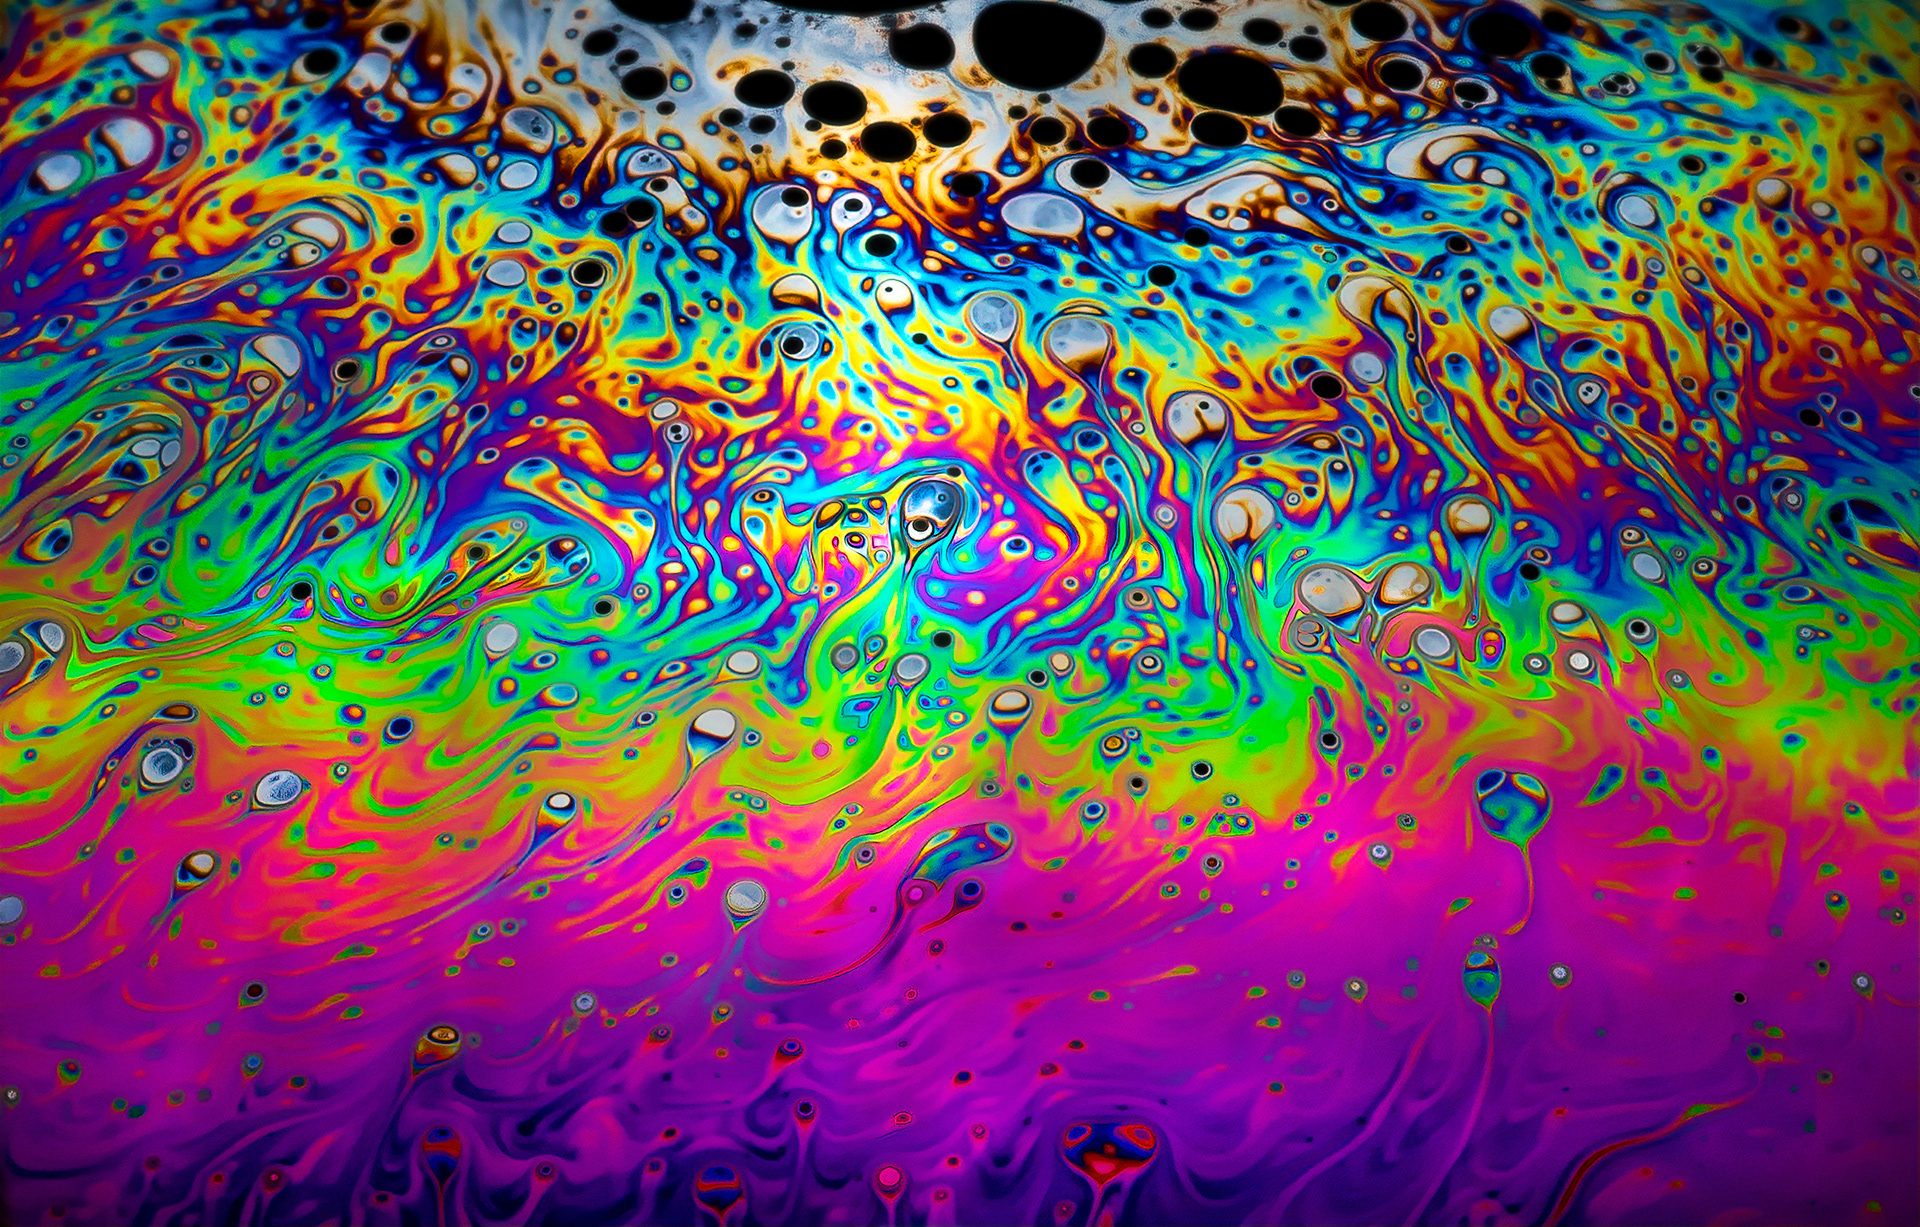
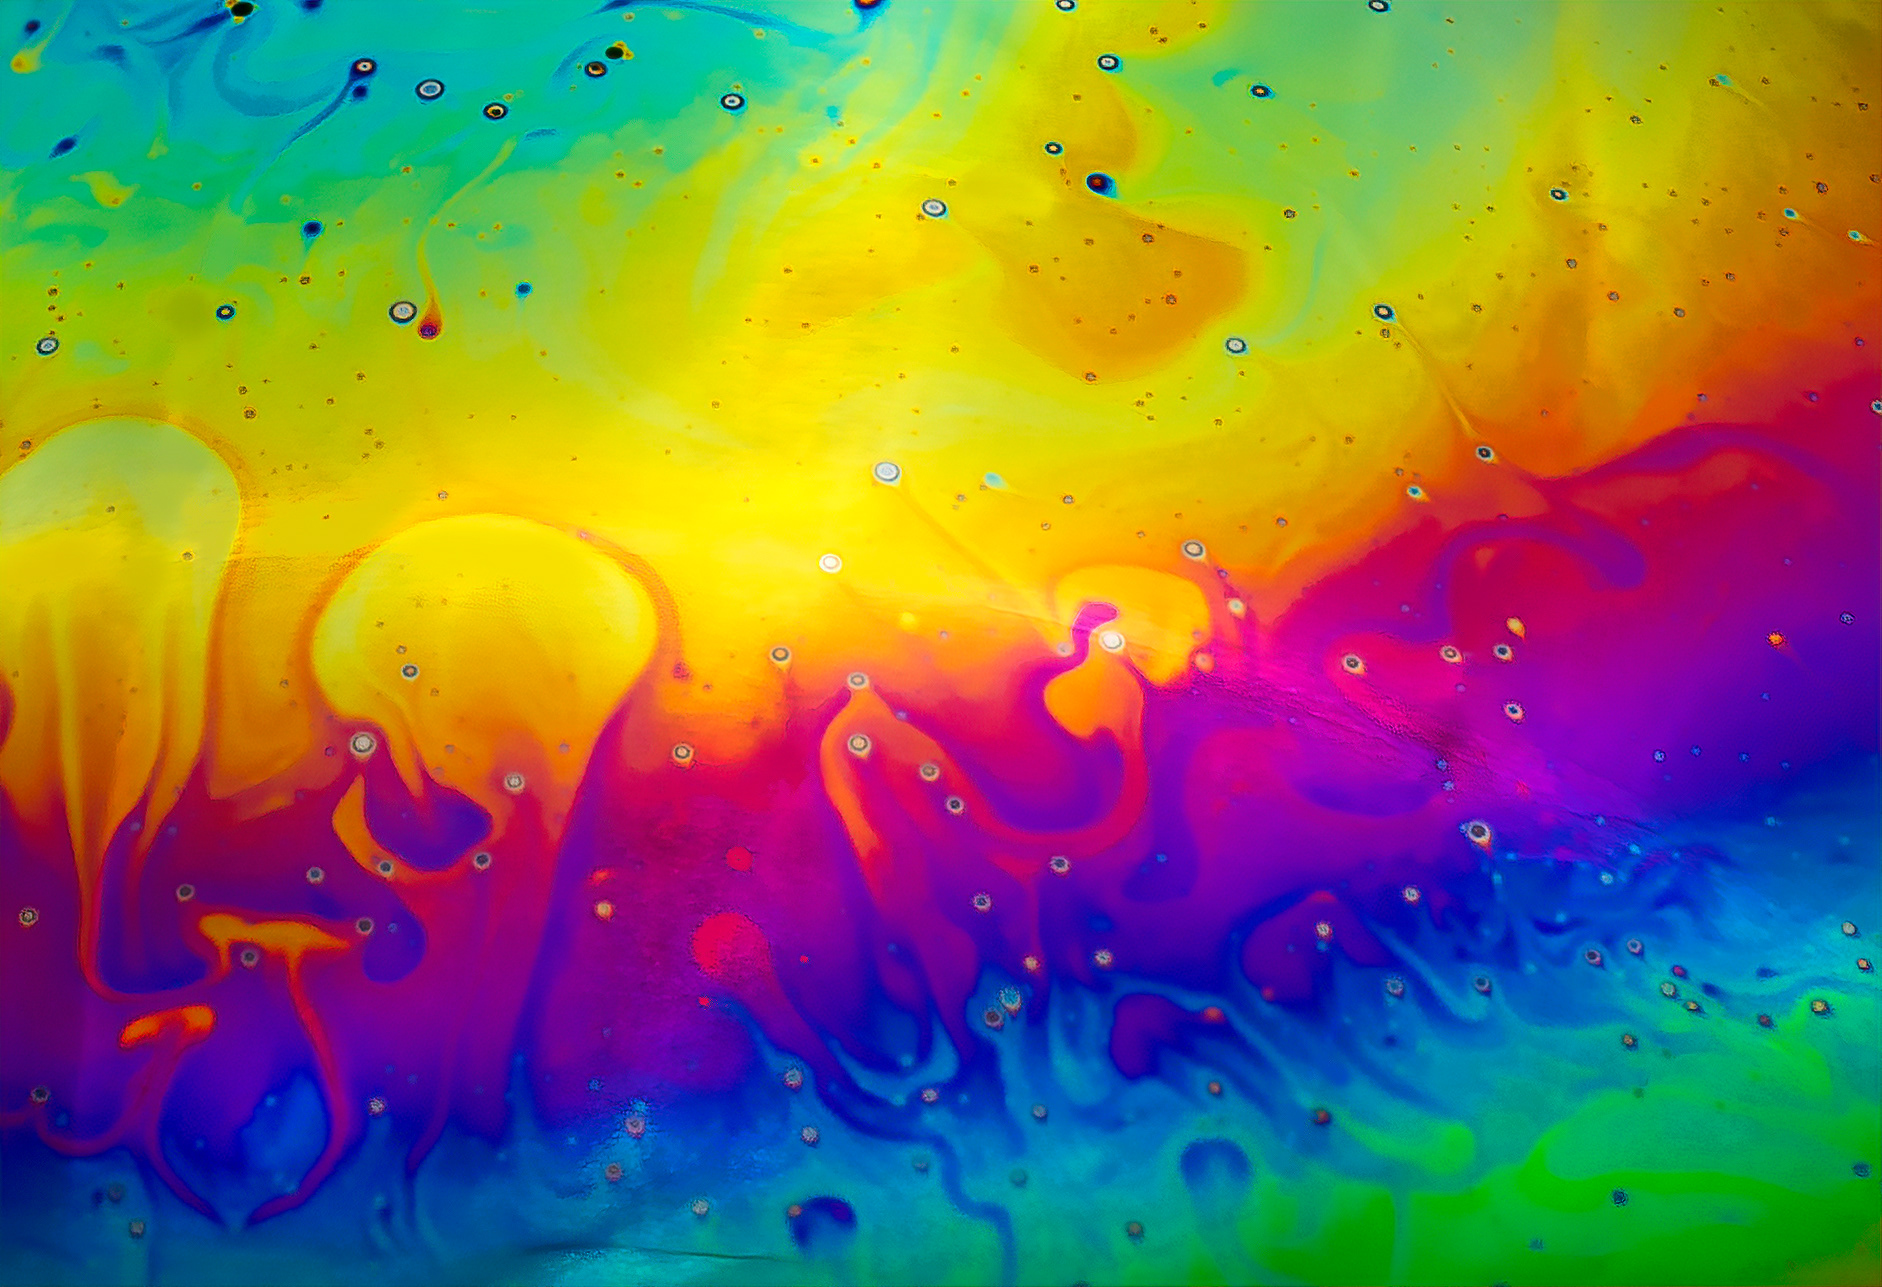
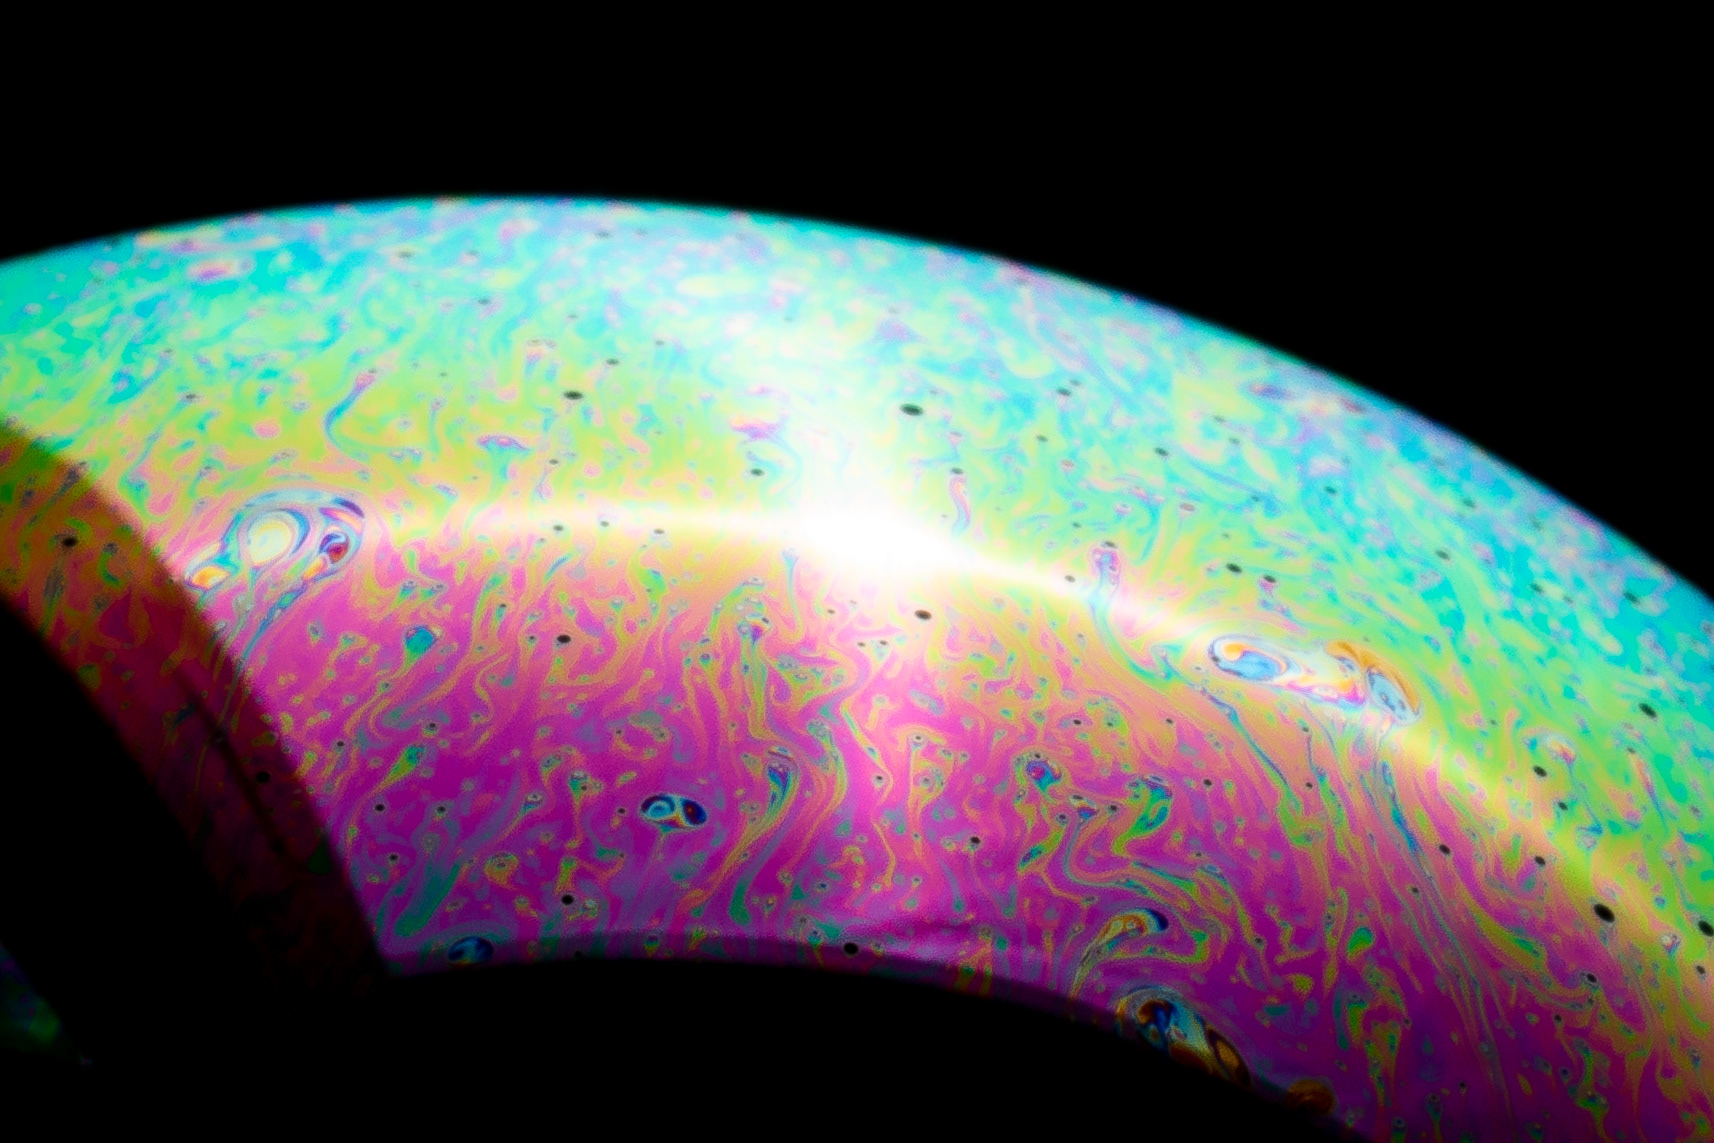
With this new set-up, I was getting perfect results every time. I found that the bubble looked quite dull upon the initial inflation, with just a few colourful stripes; but as the seconds, and even minutes went on, the soap mix separated from the water, and ran down the bubble in various exciting patterns – every one different. I also found that by blowing very, very gently on the bubbles, I could create more of a swirling pattern and change the colours up a bit.
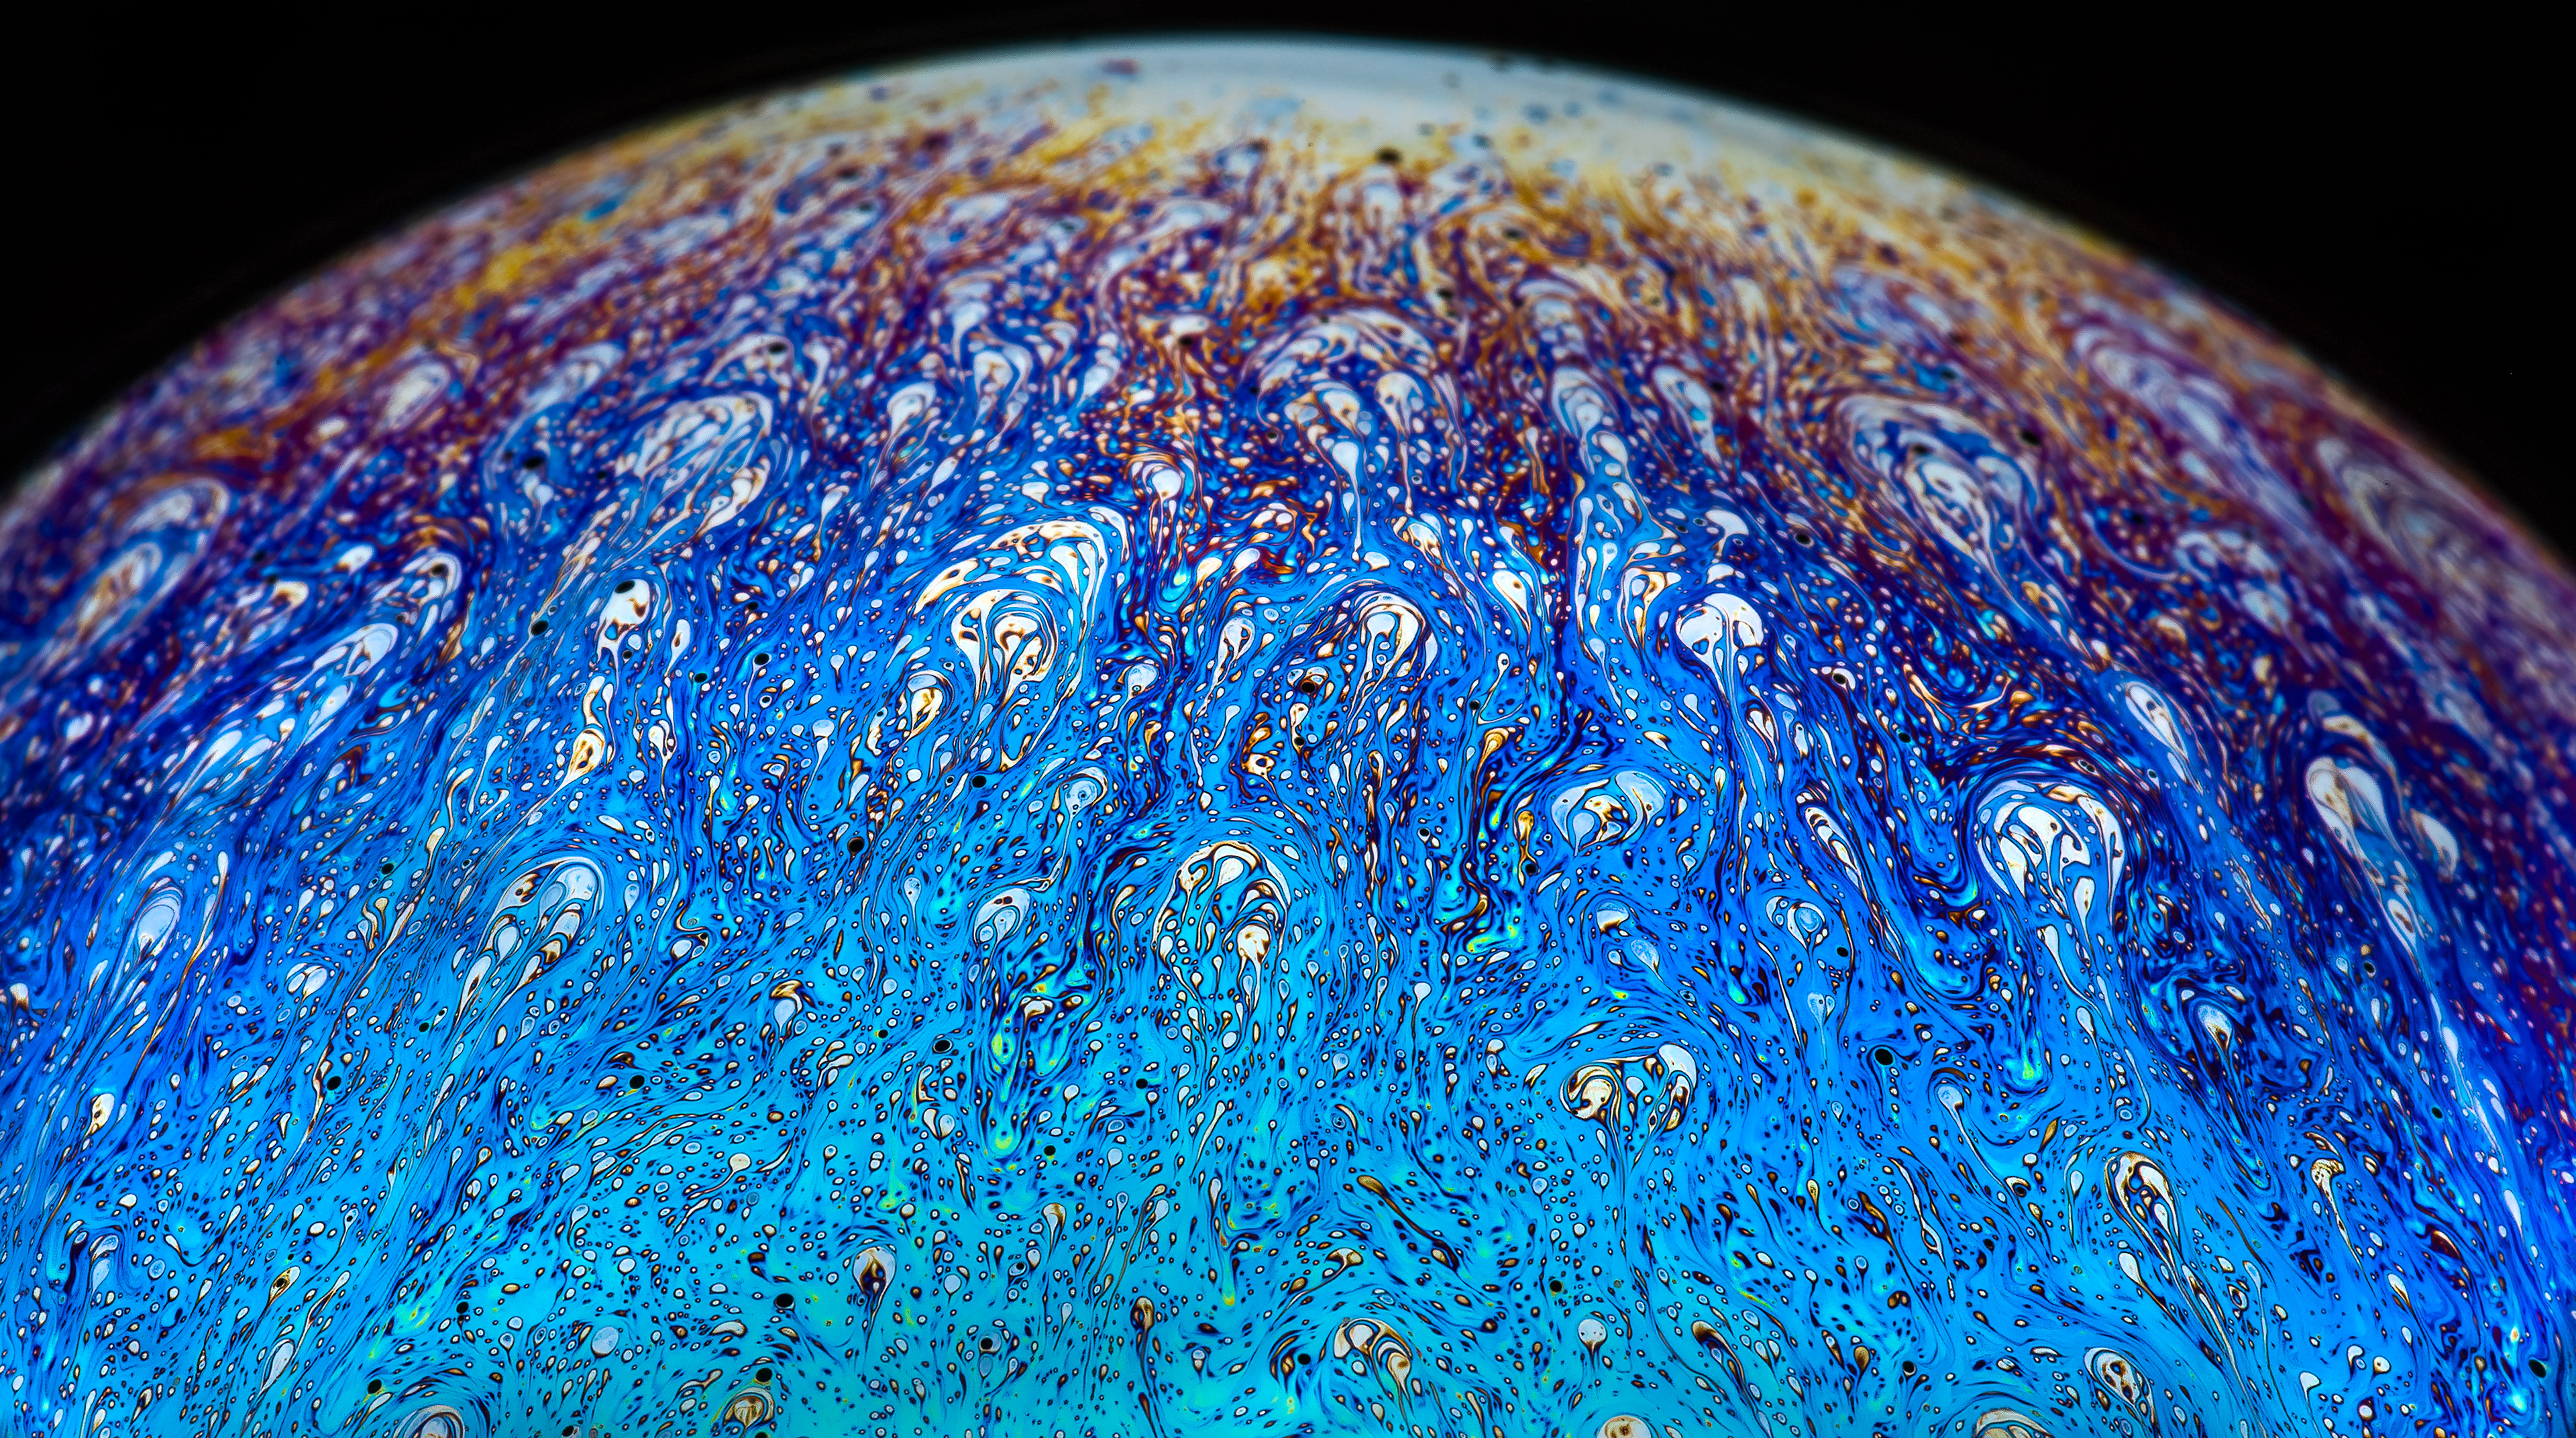

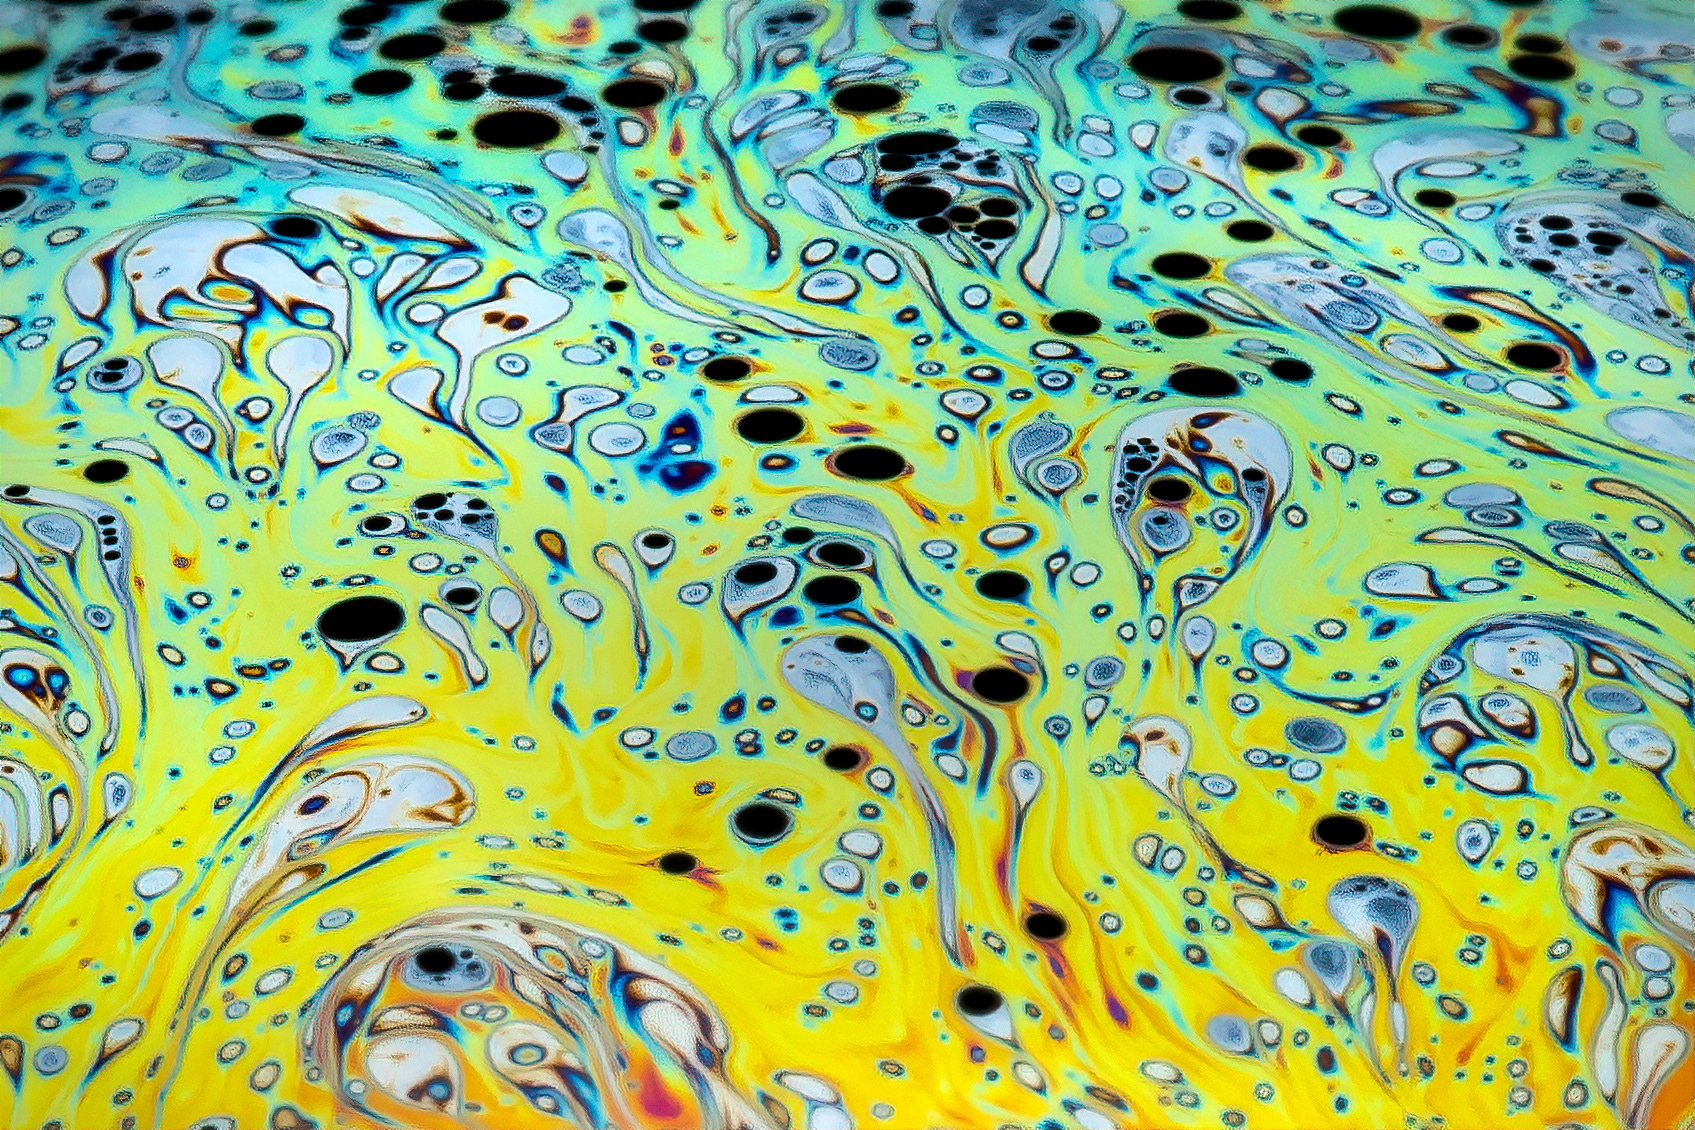
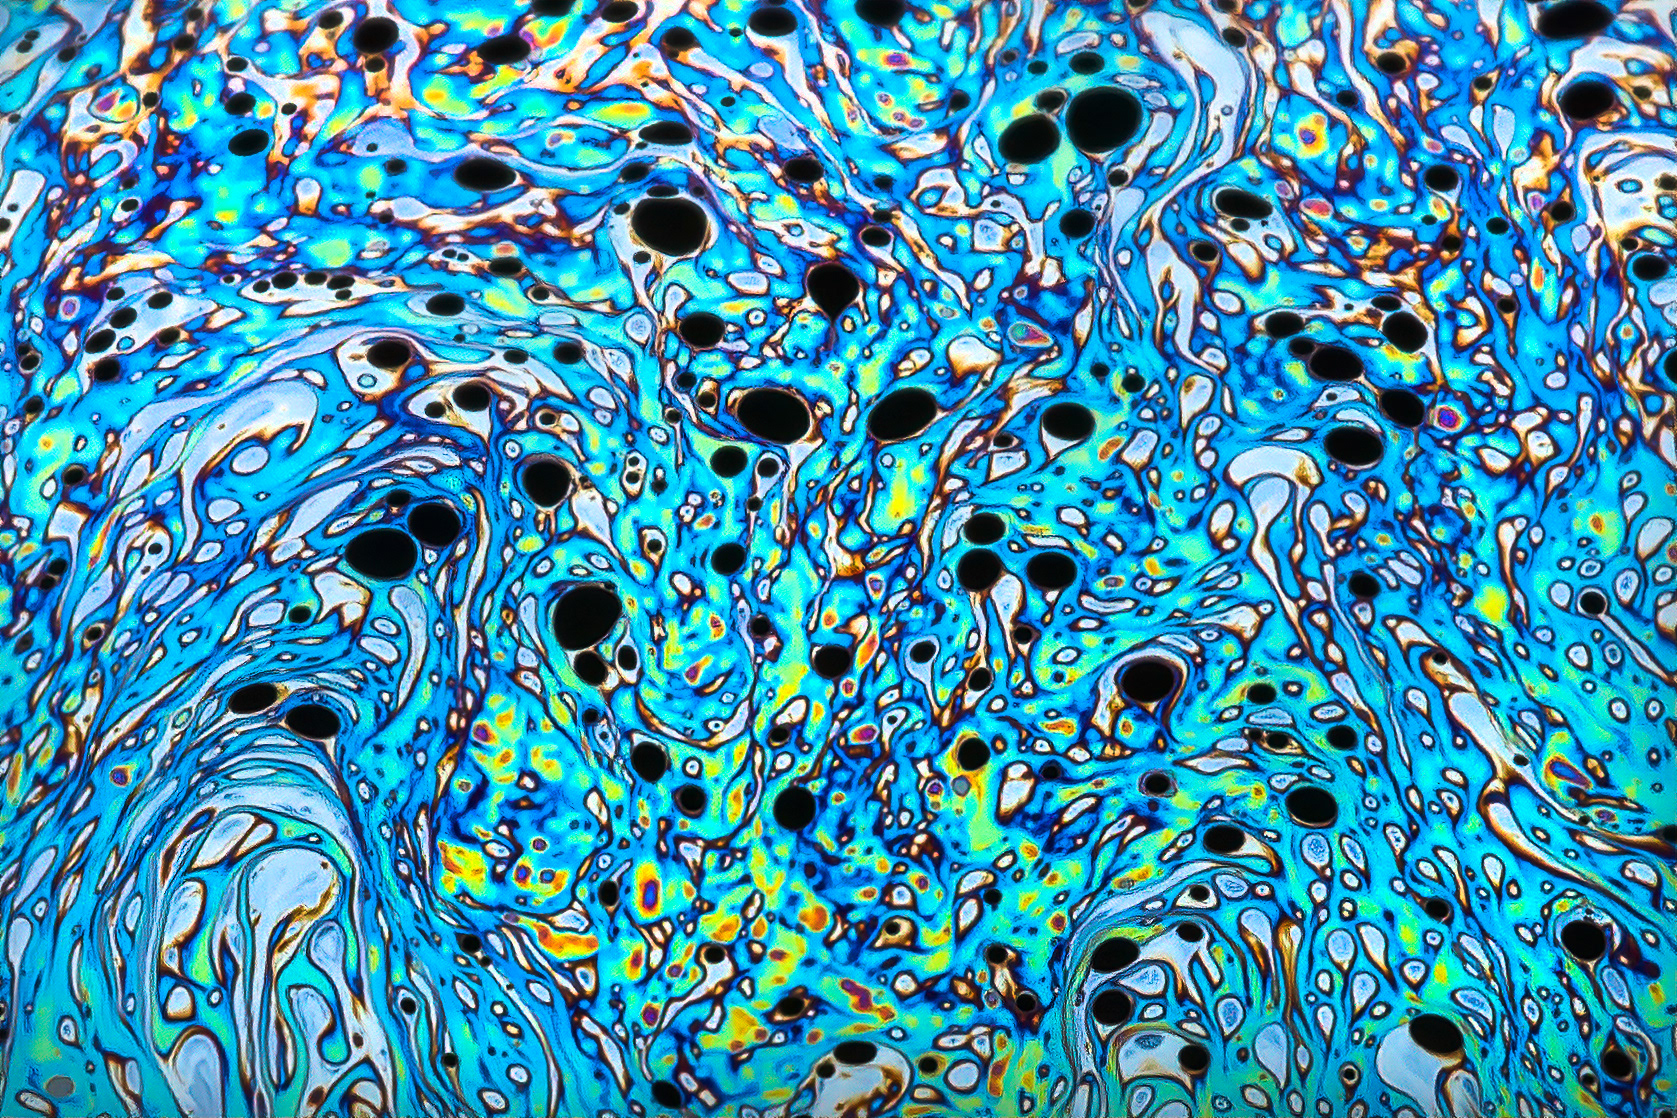
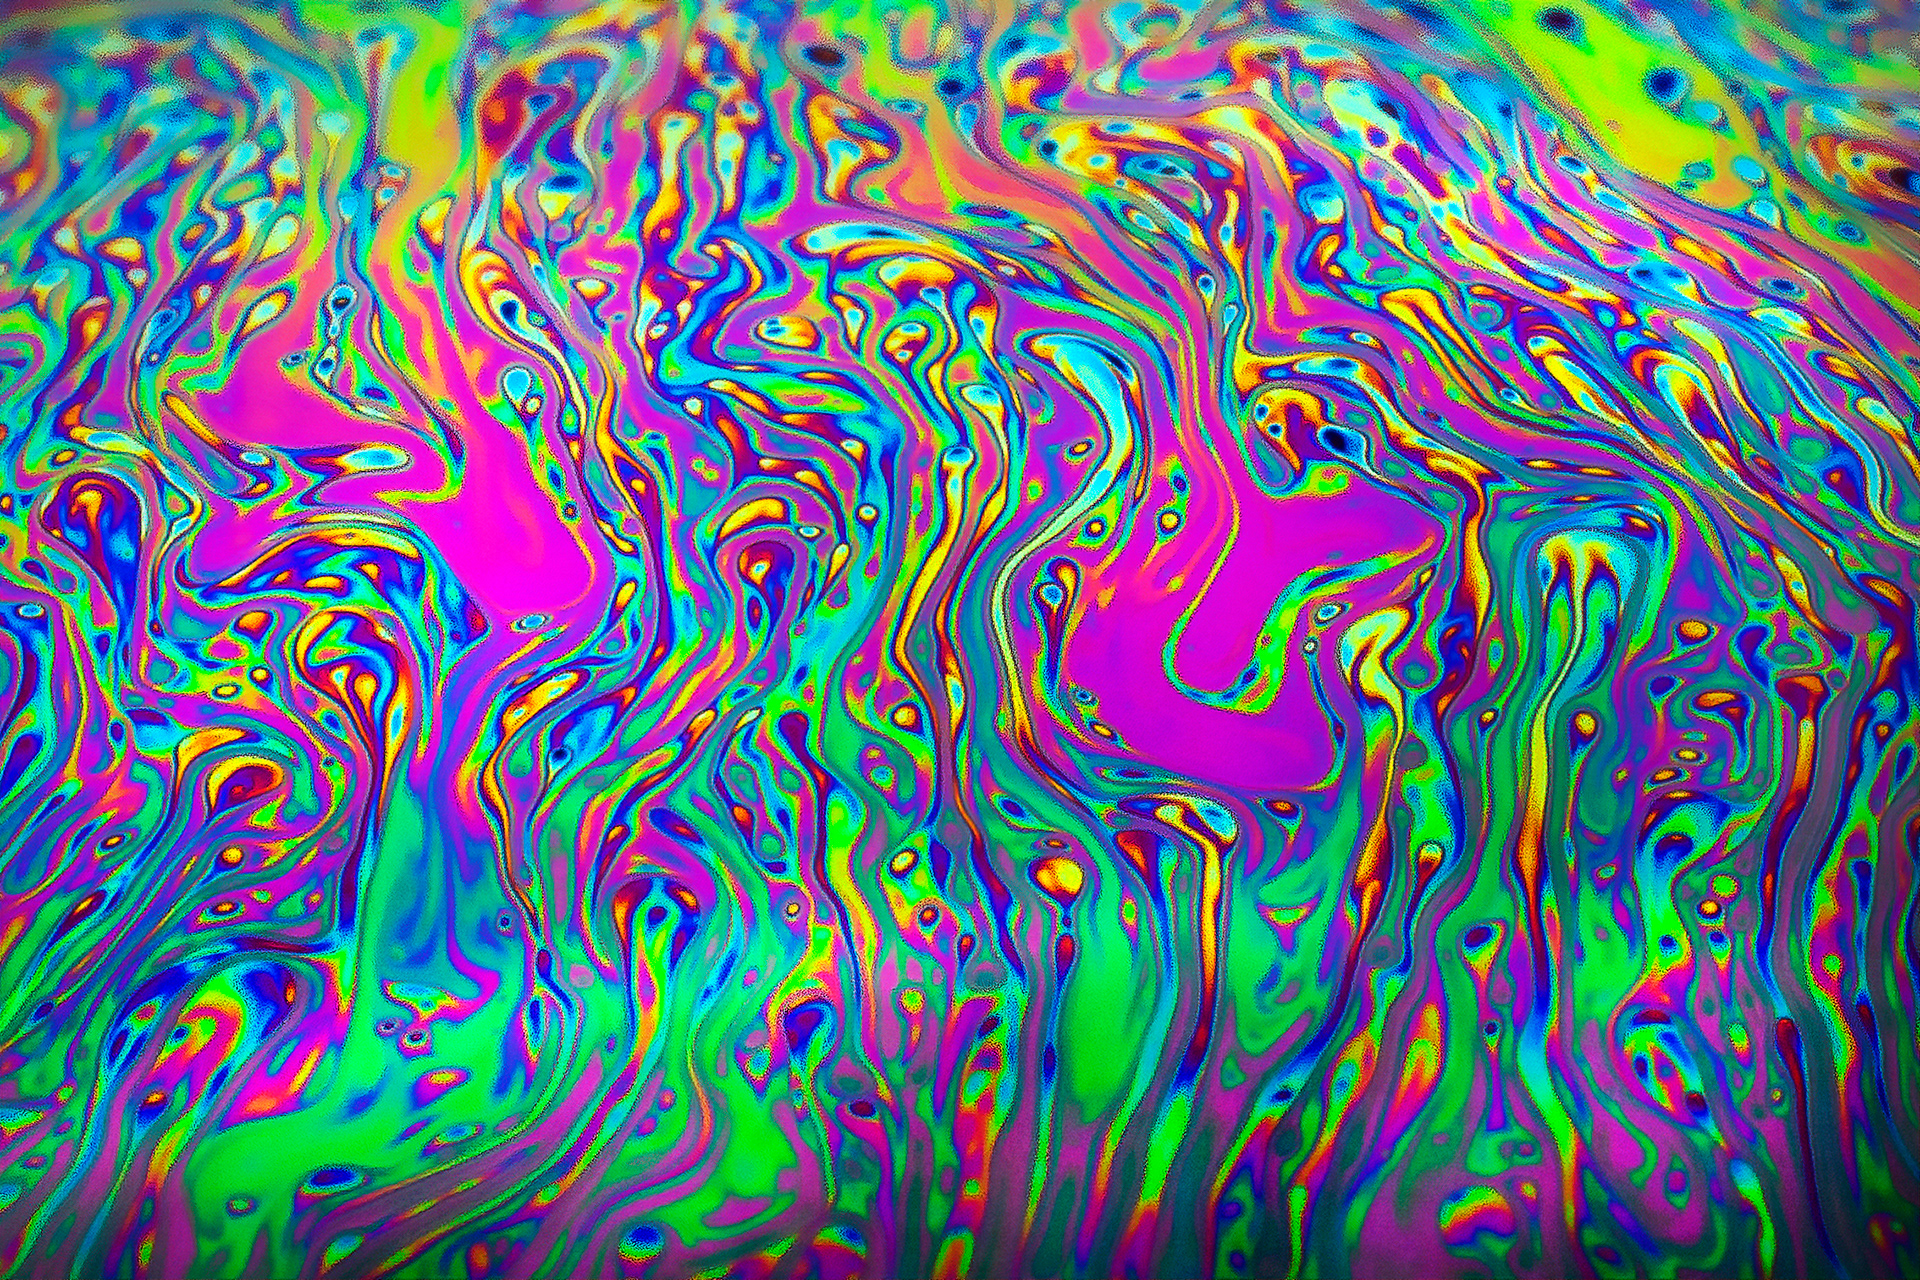
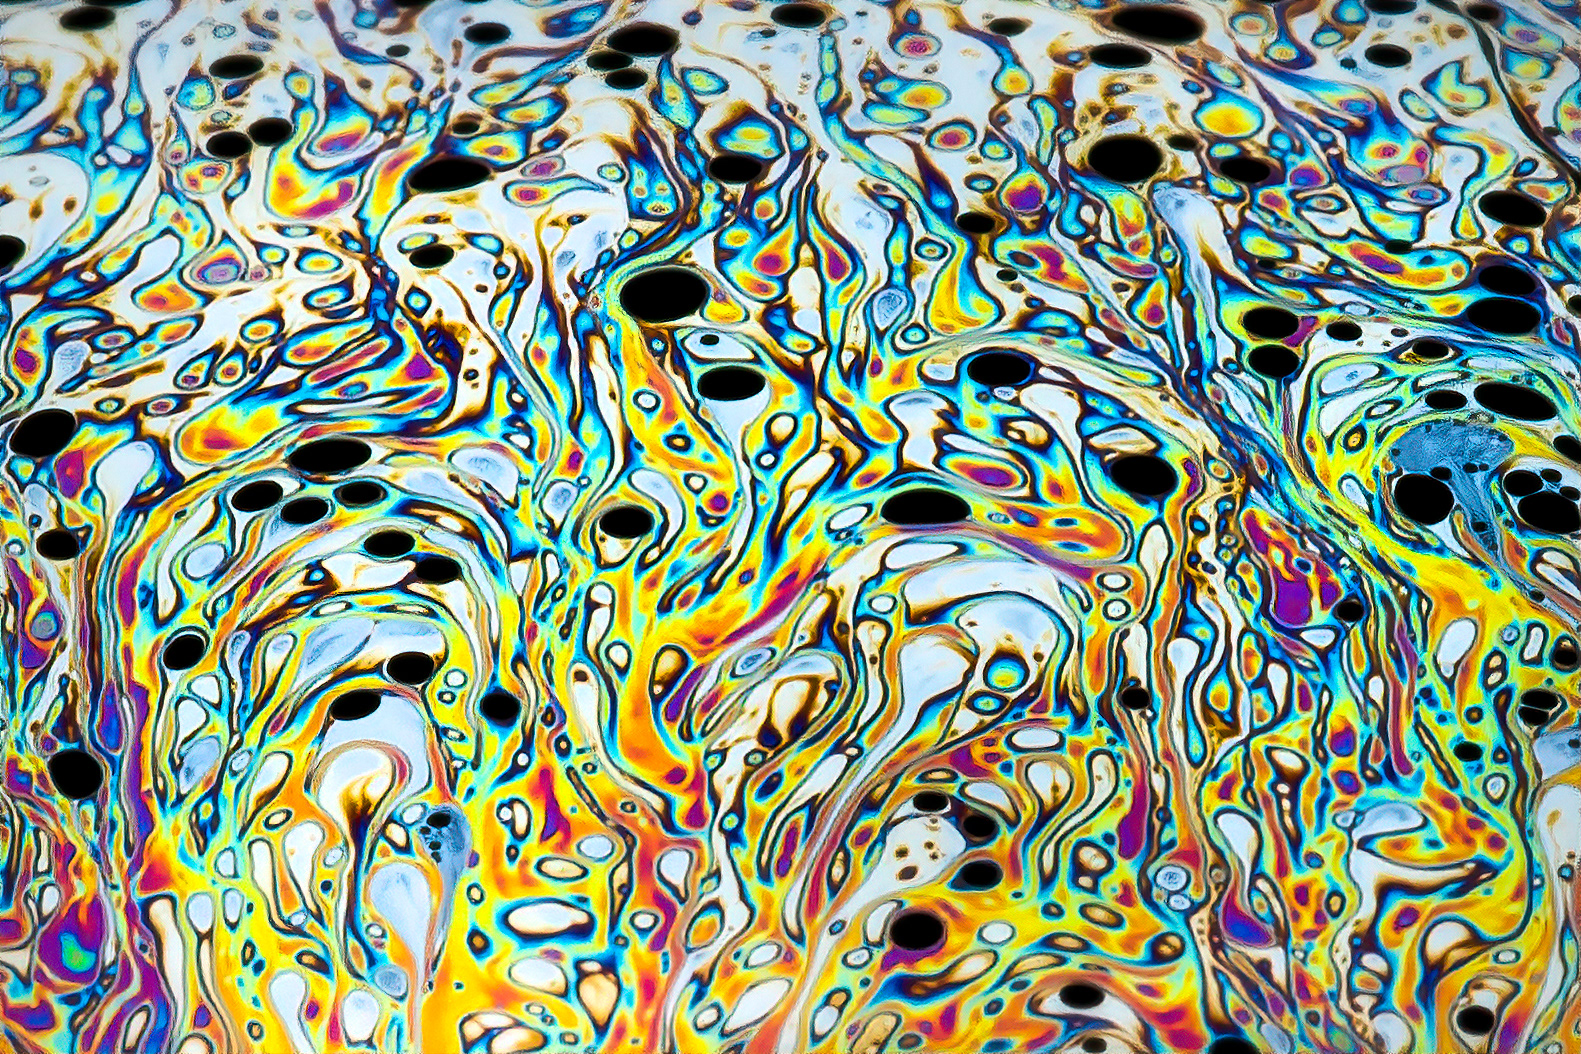
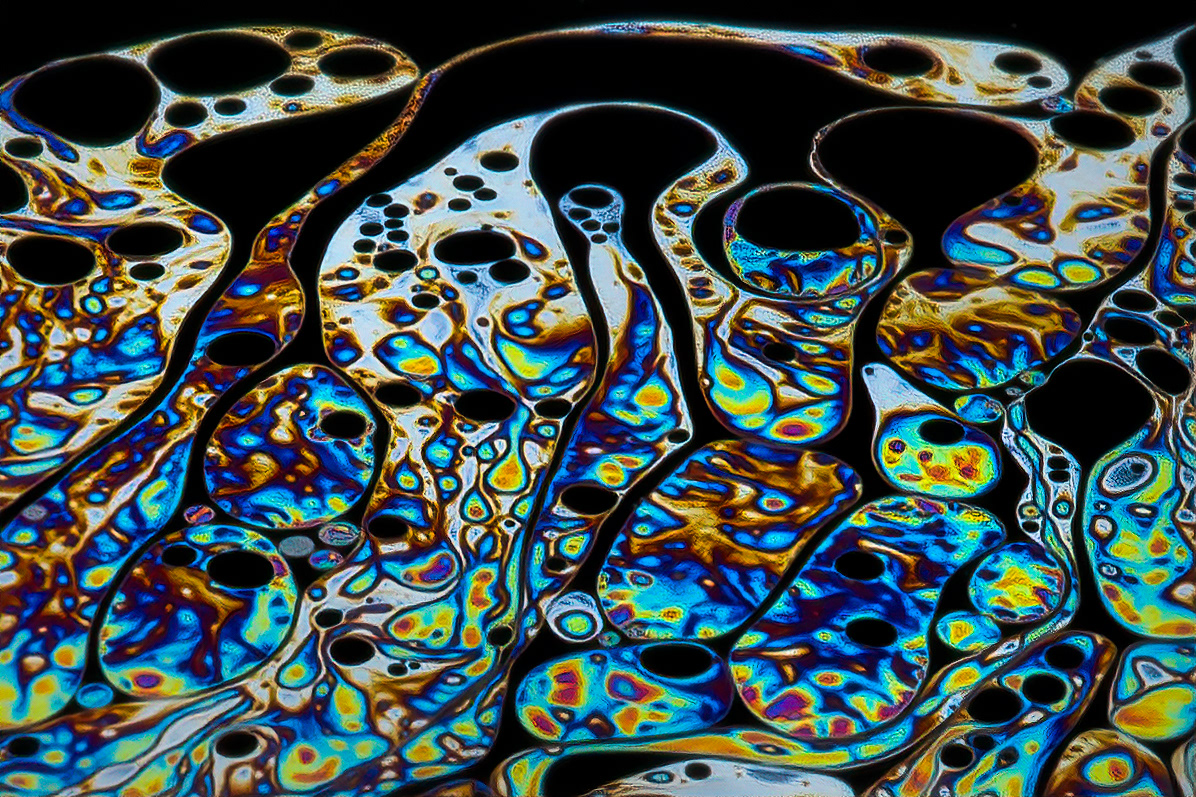
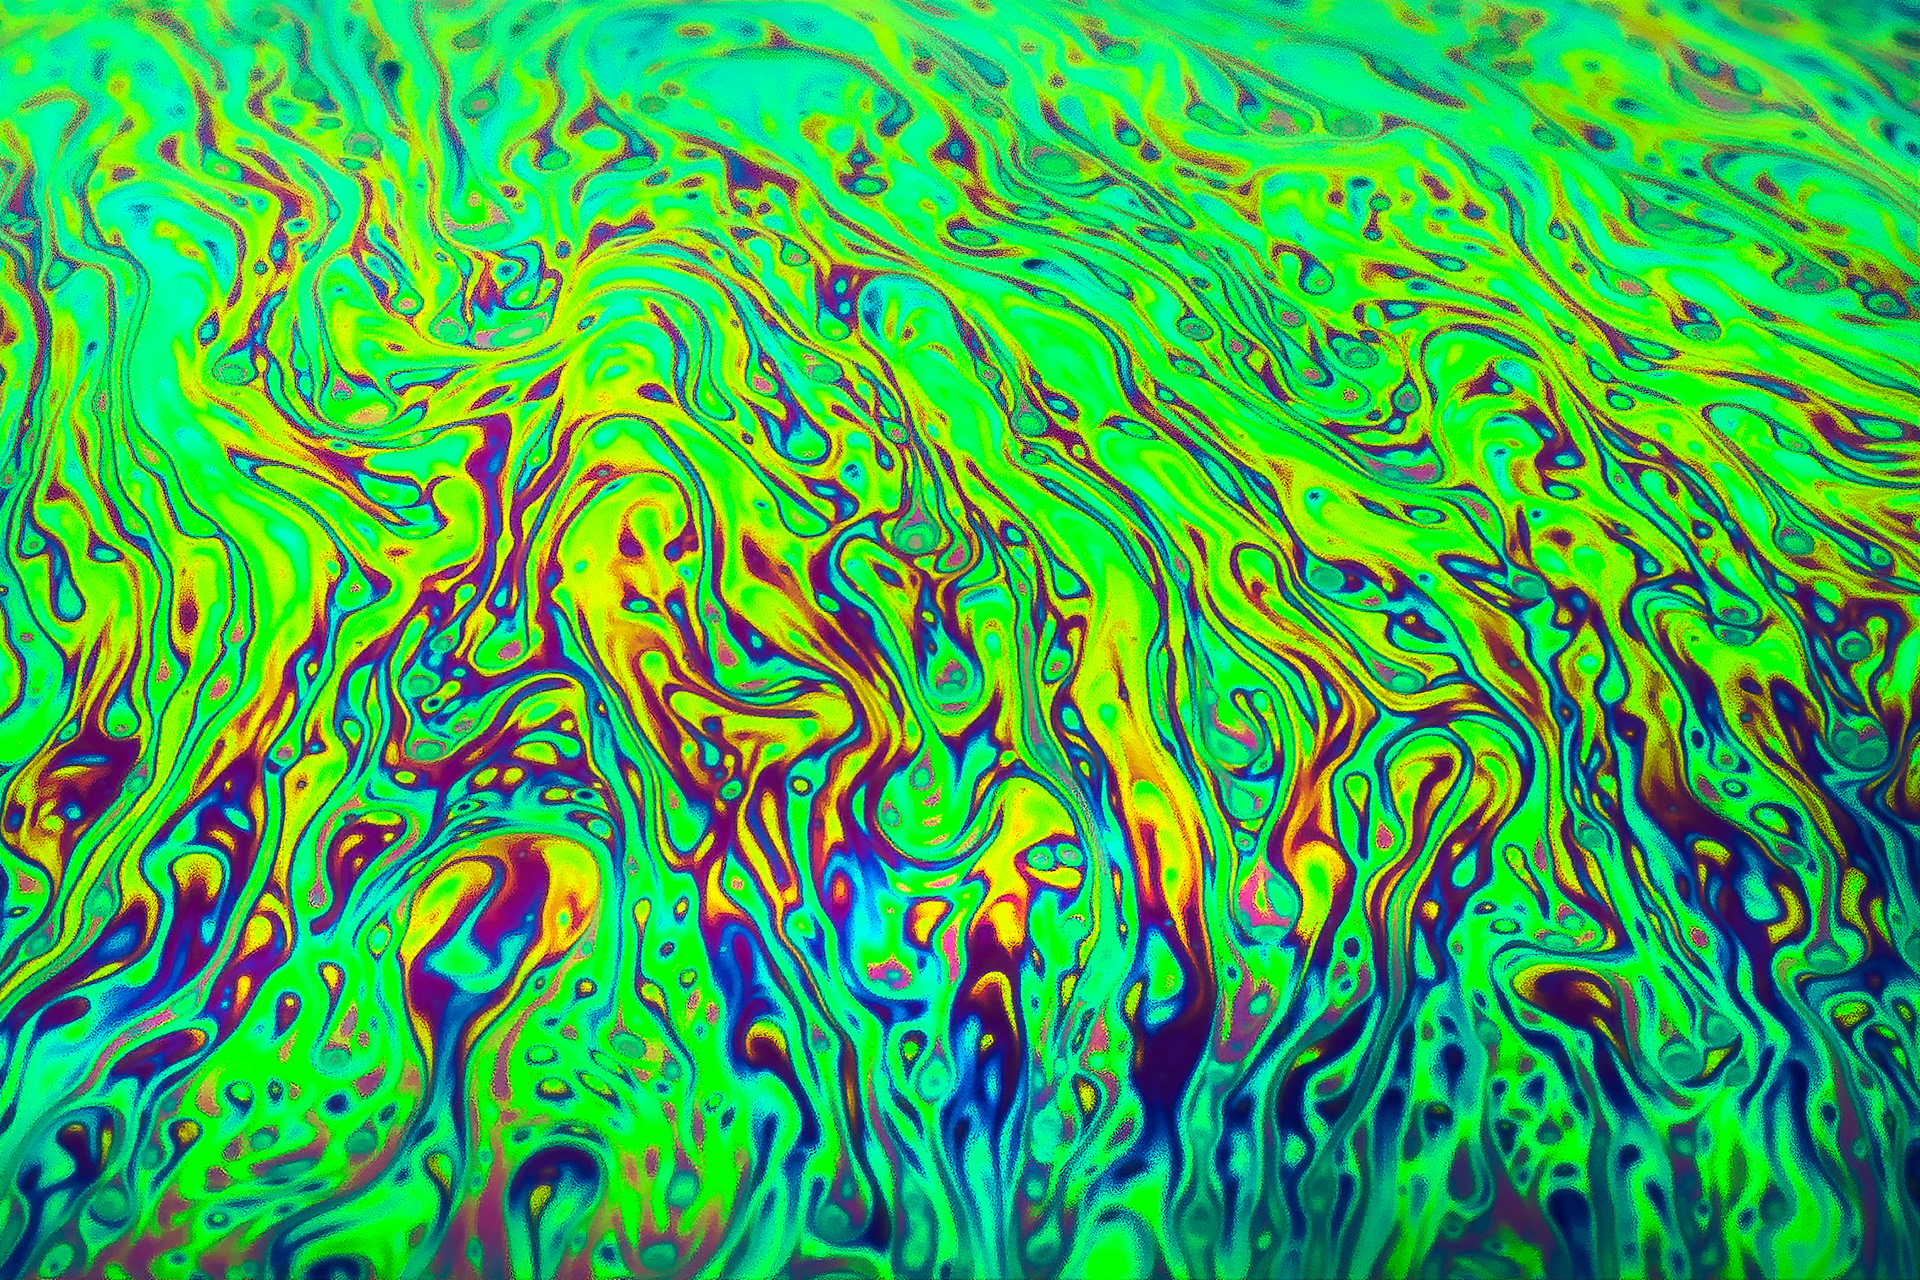
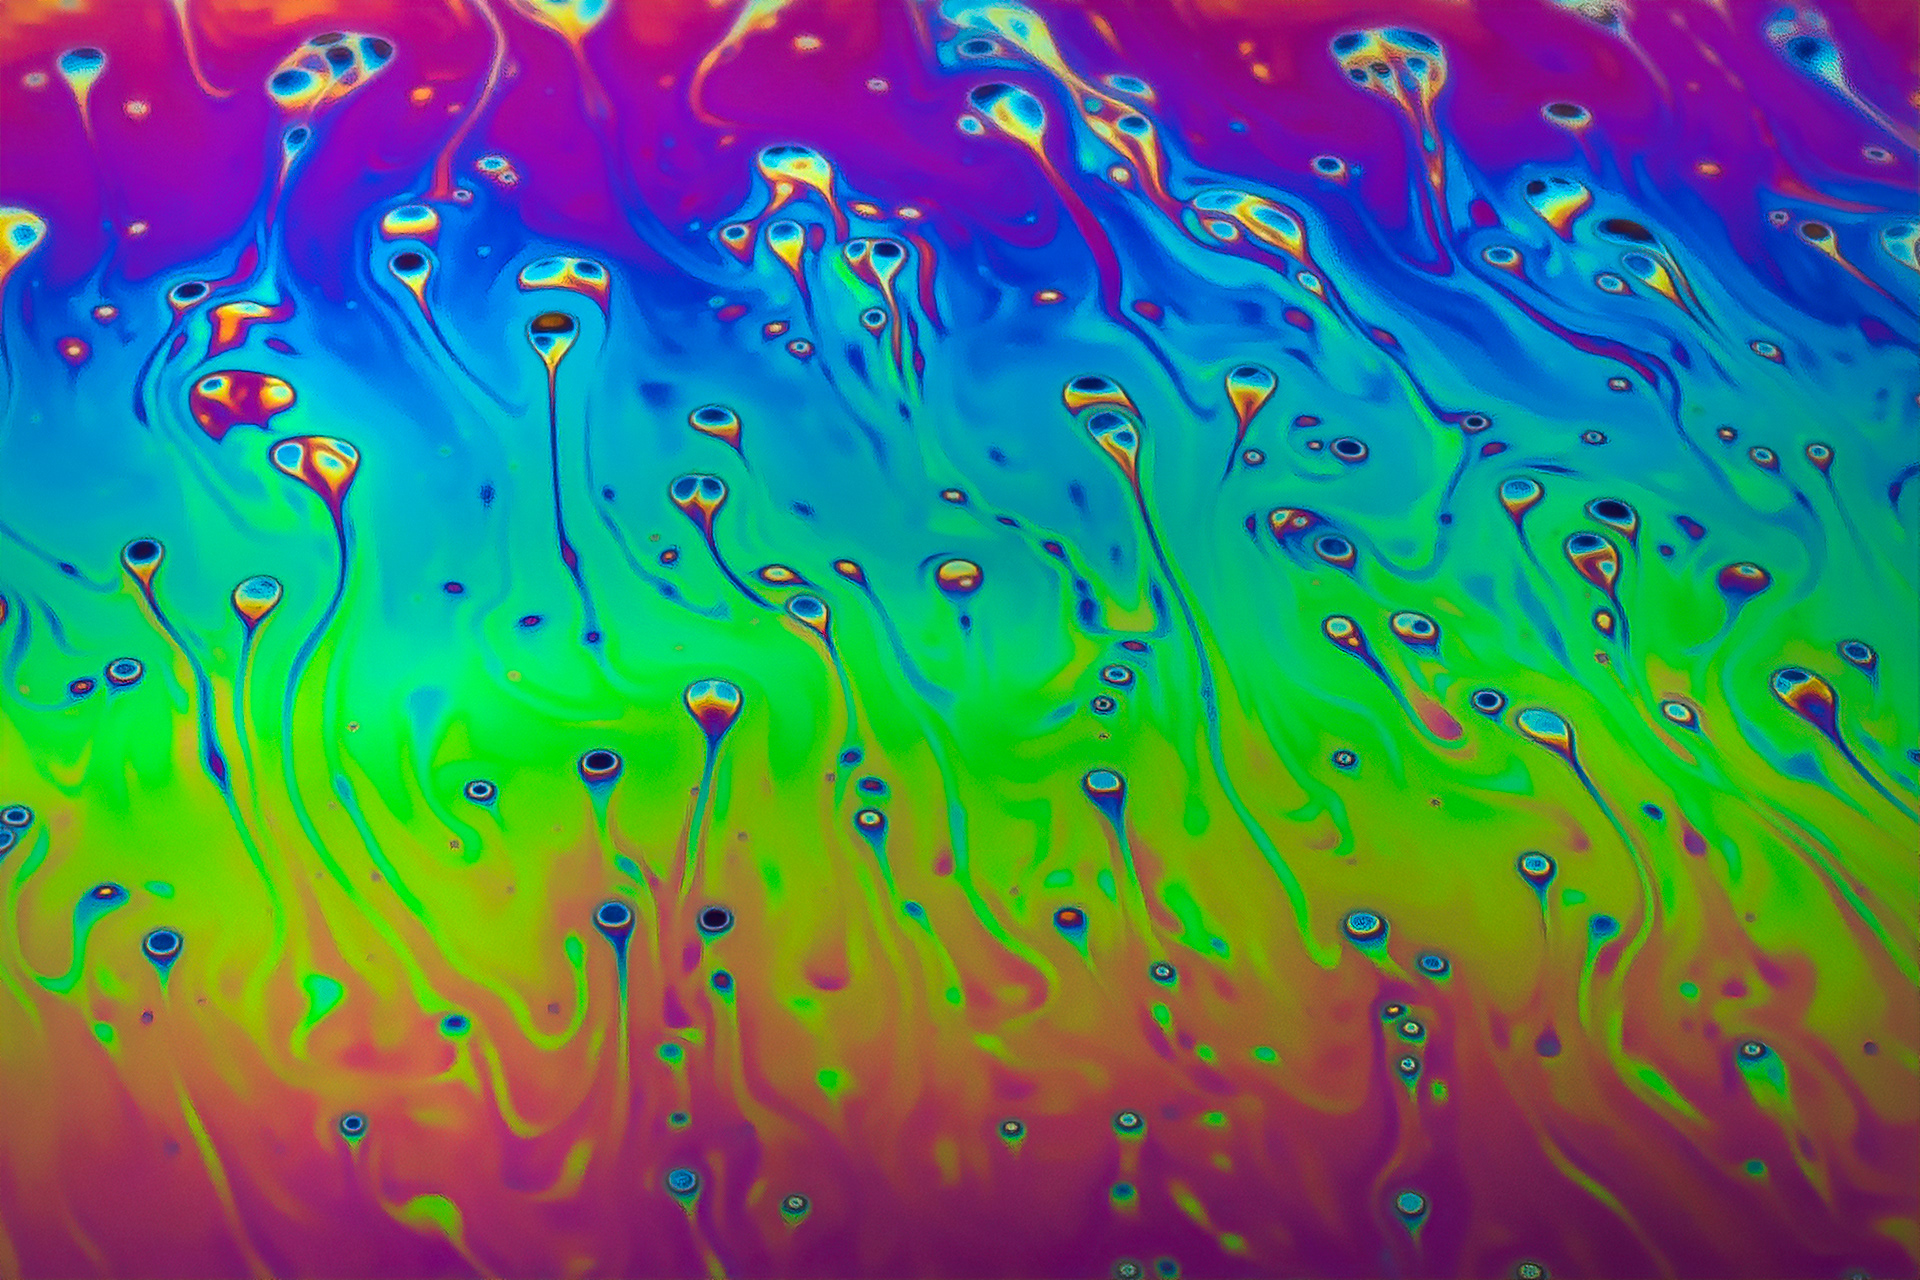
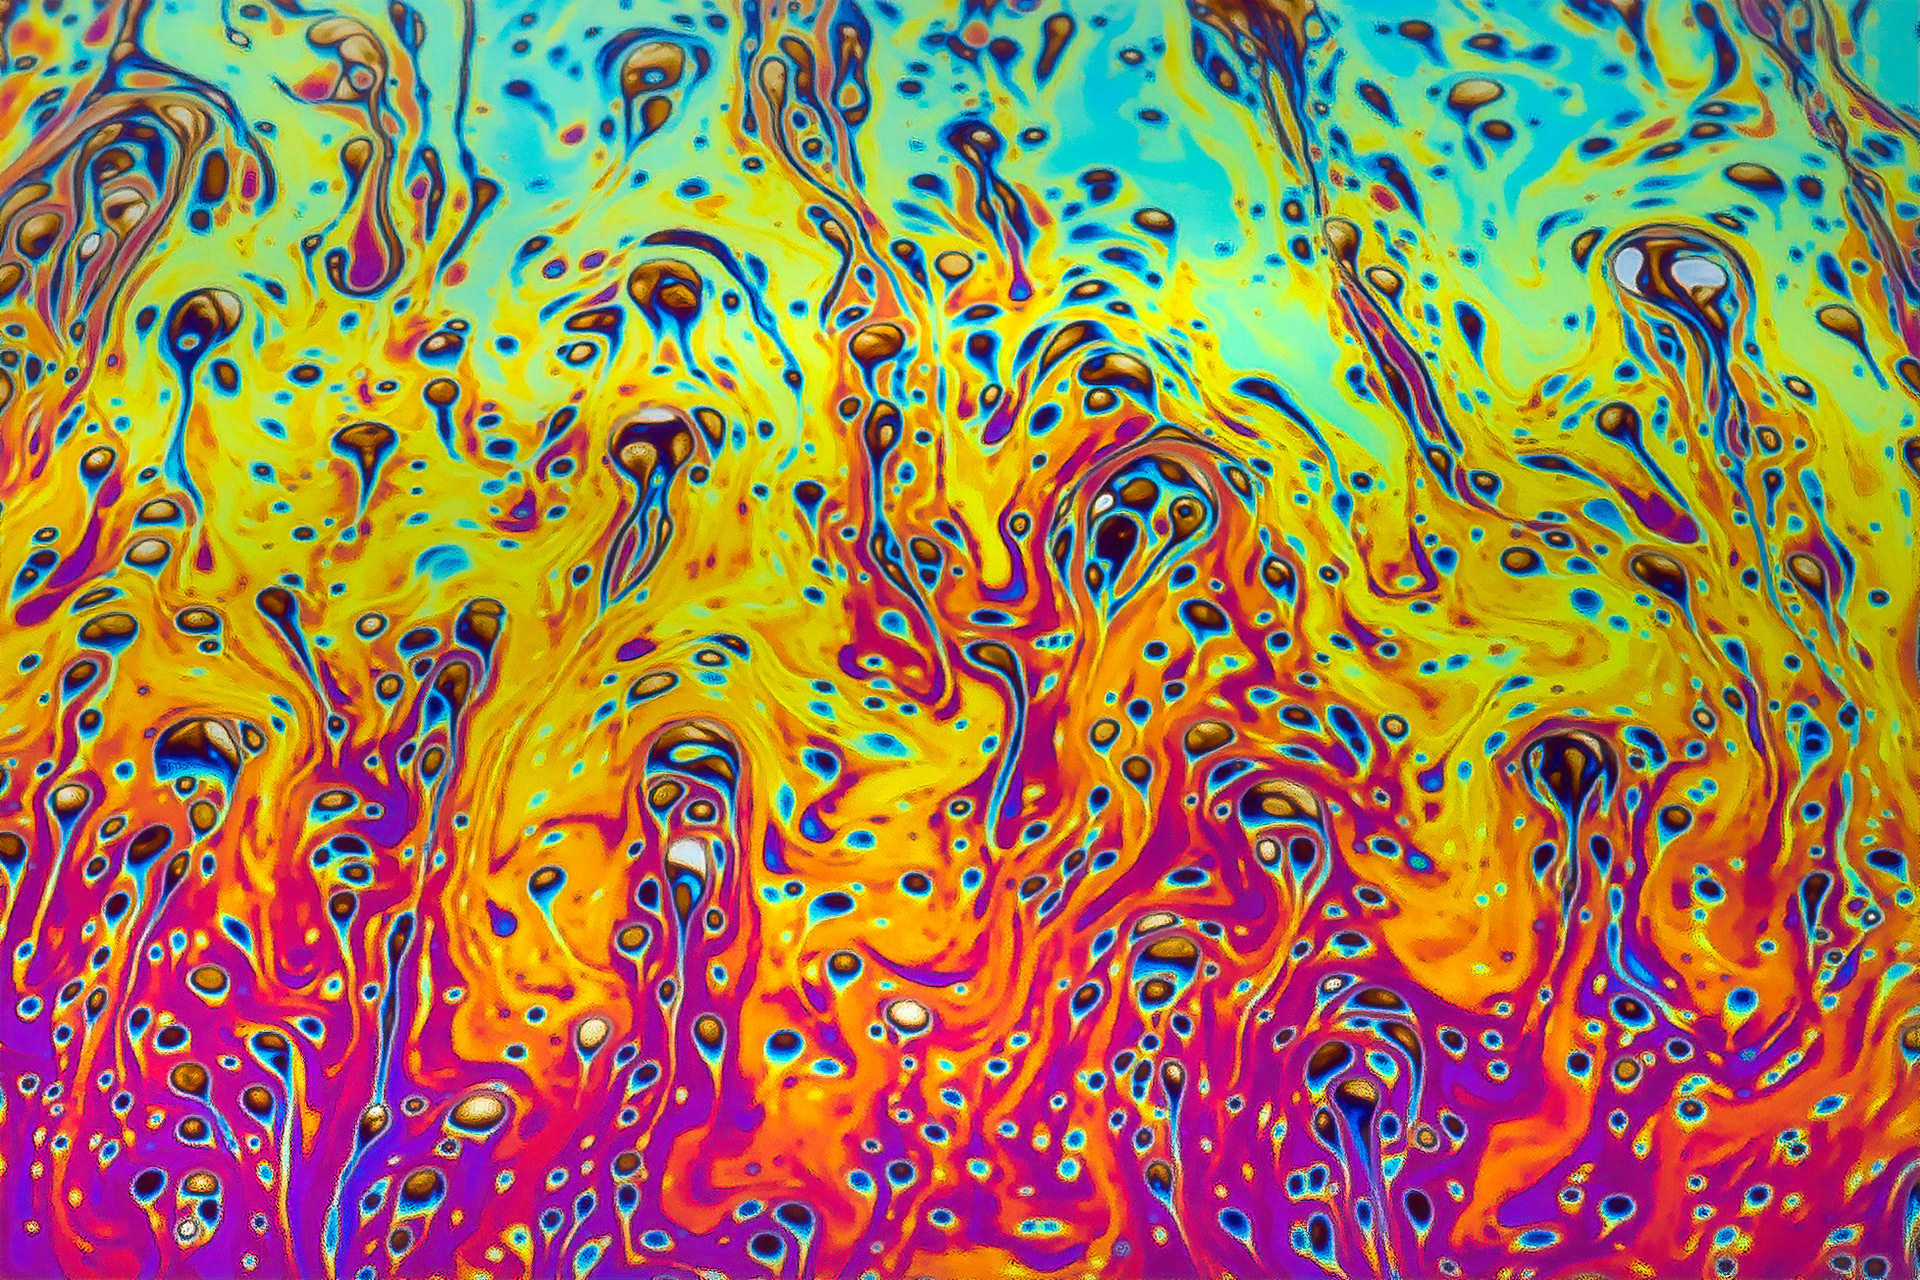

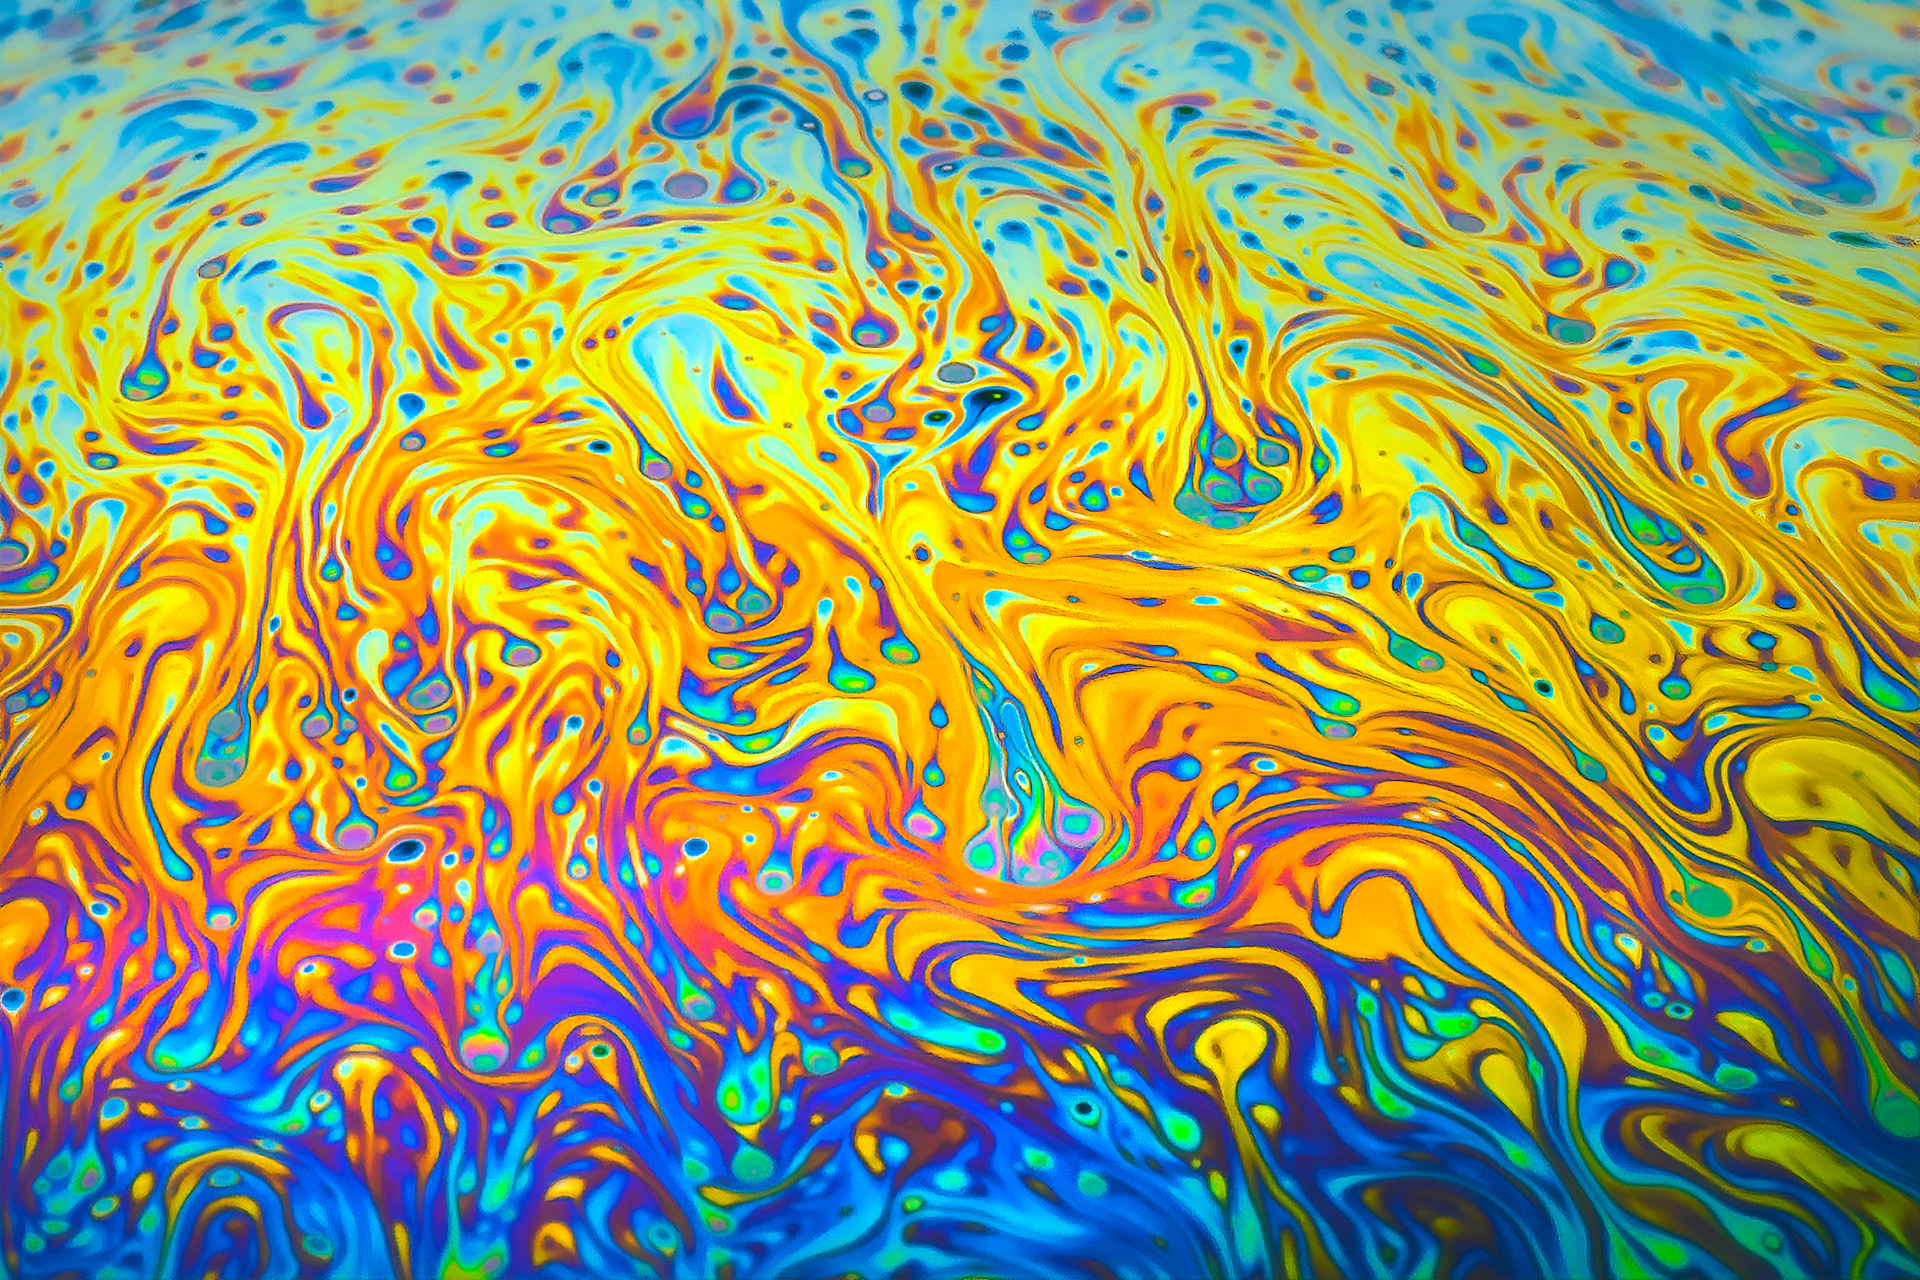
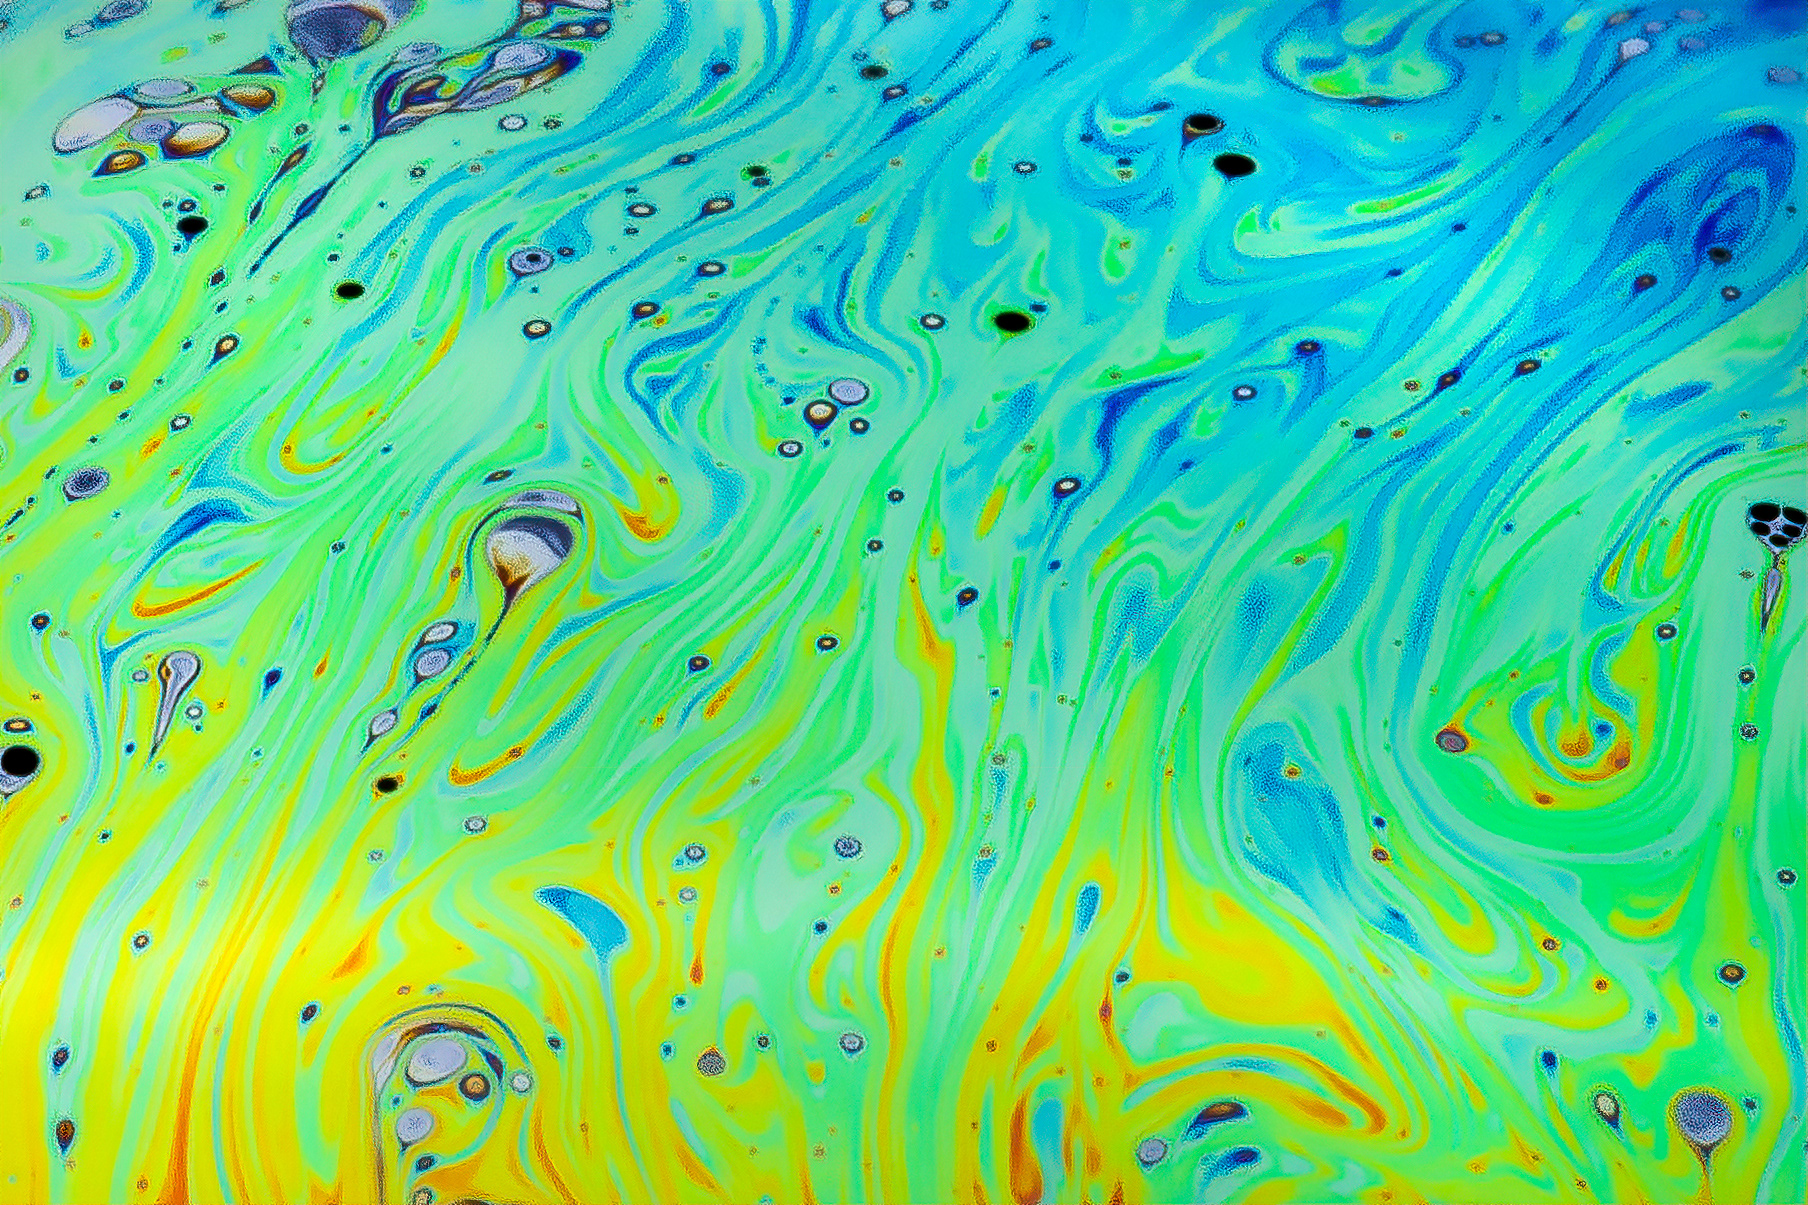
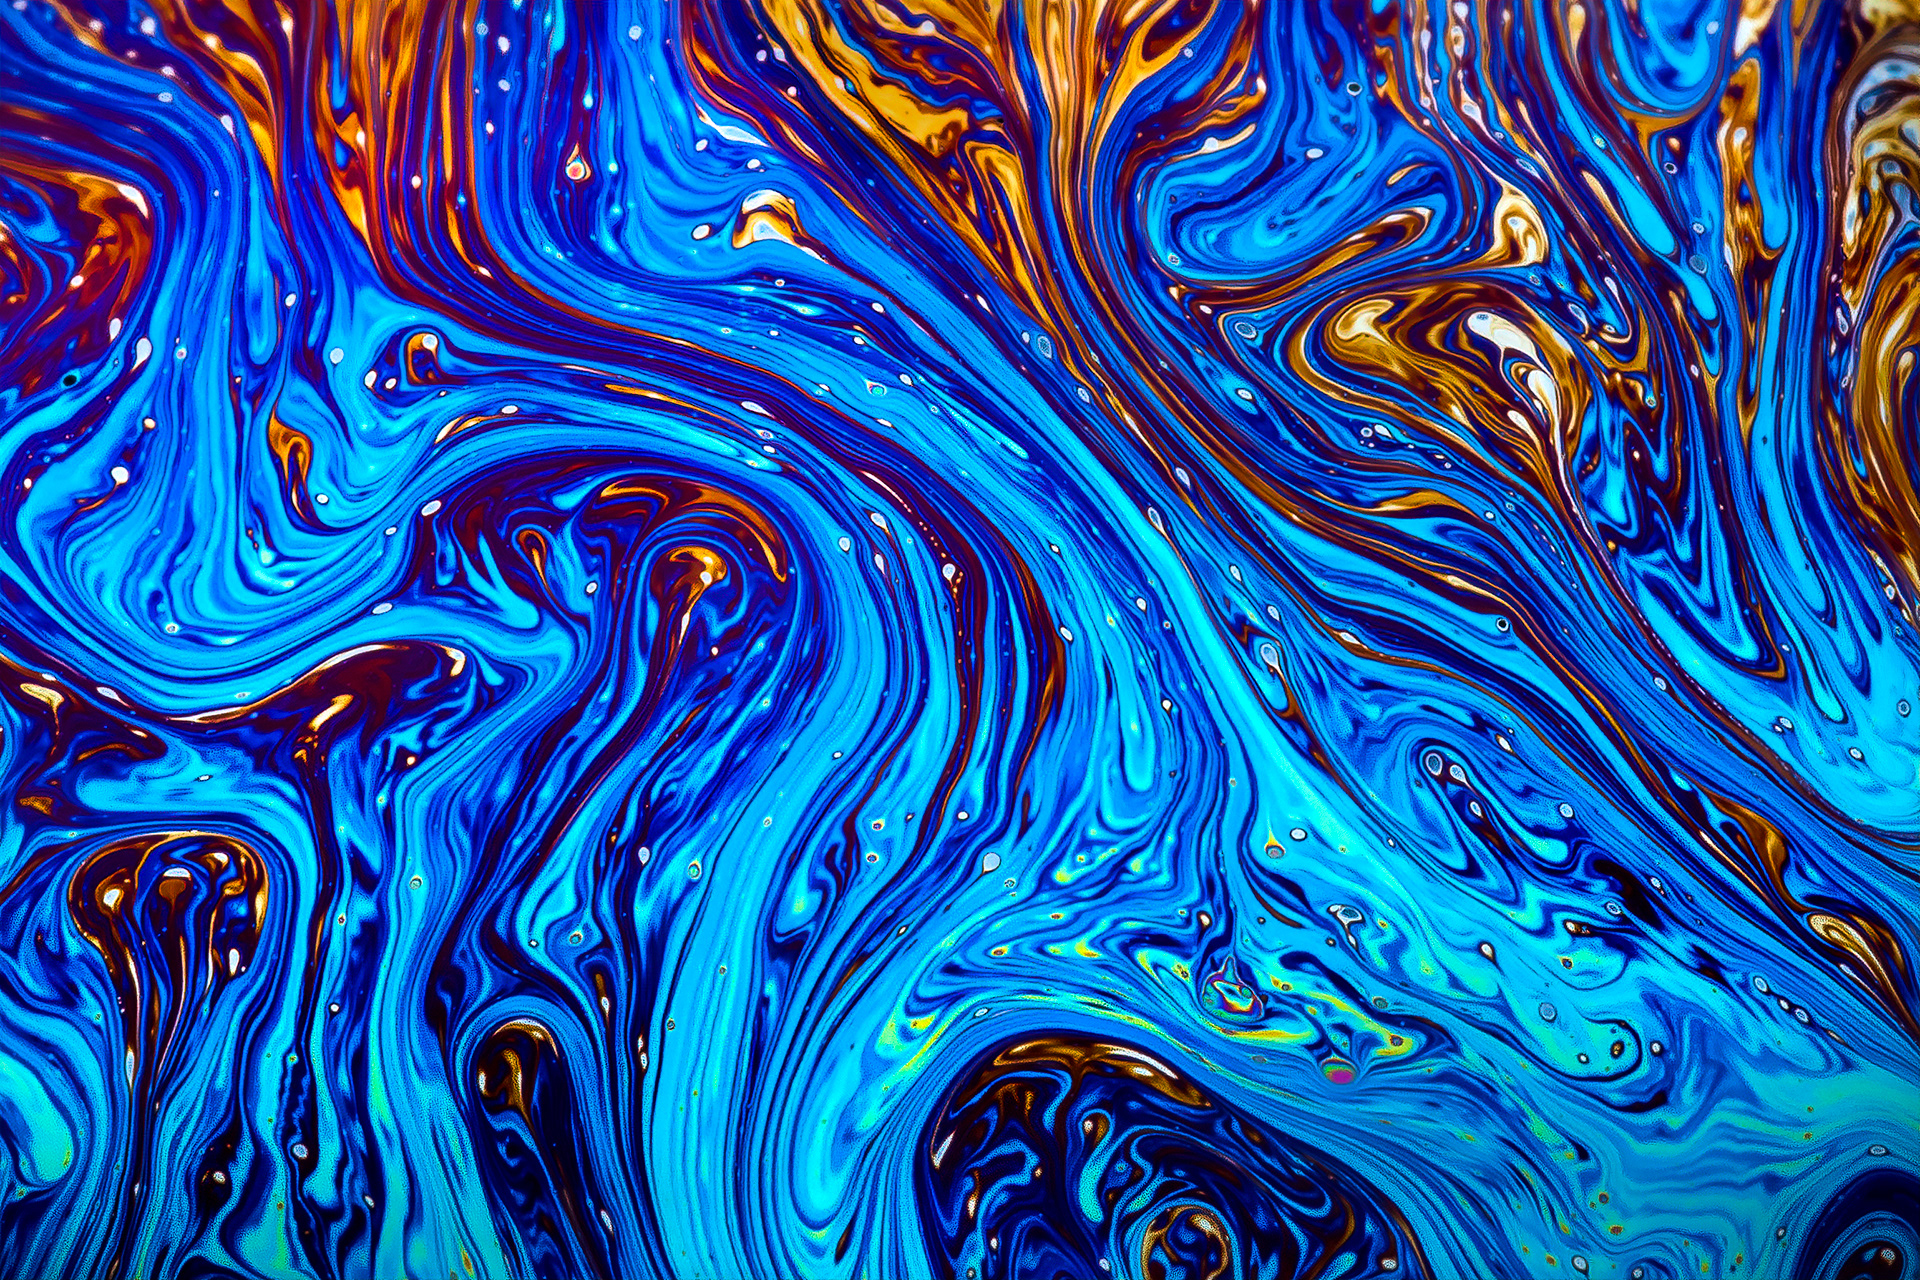
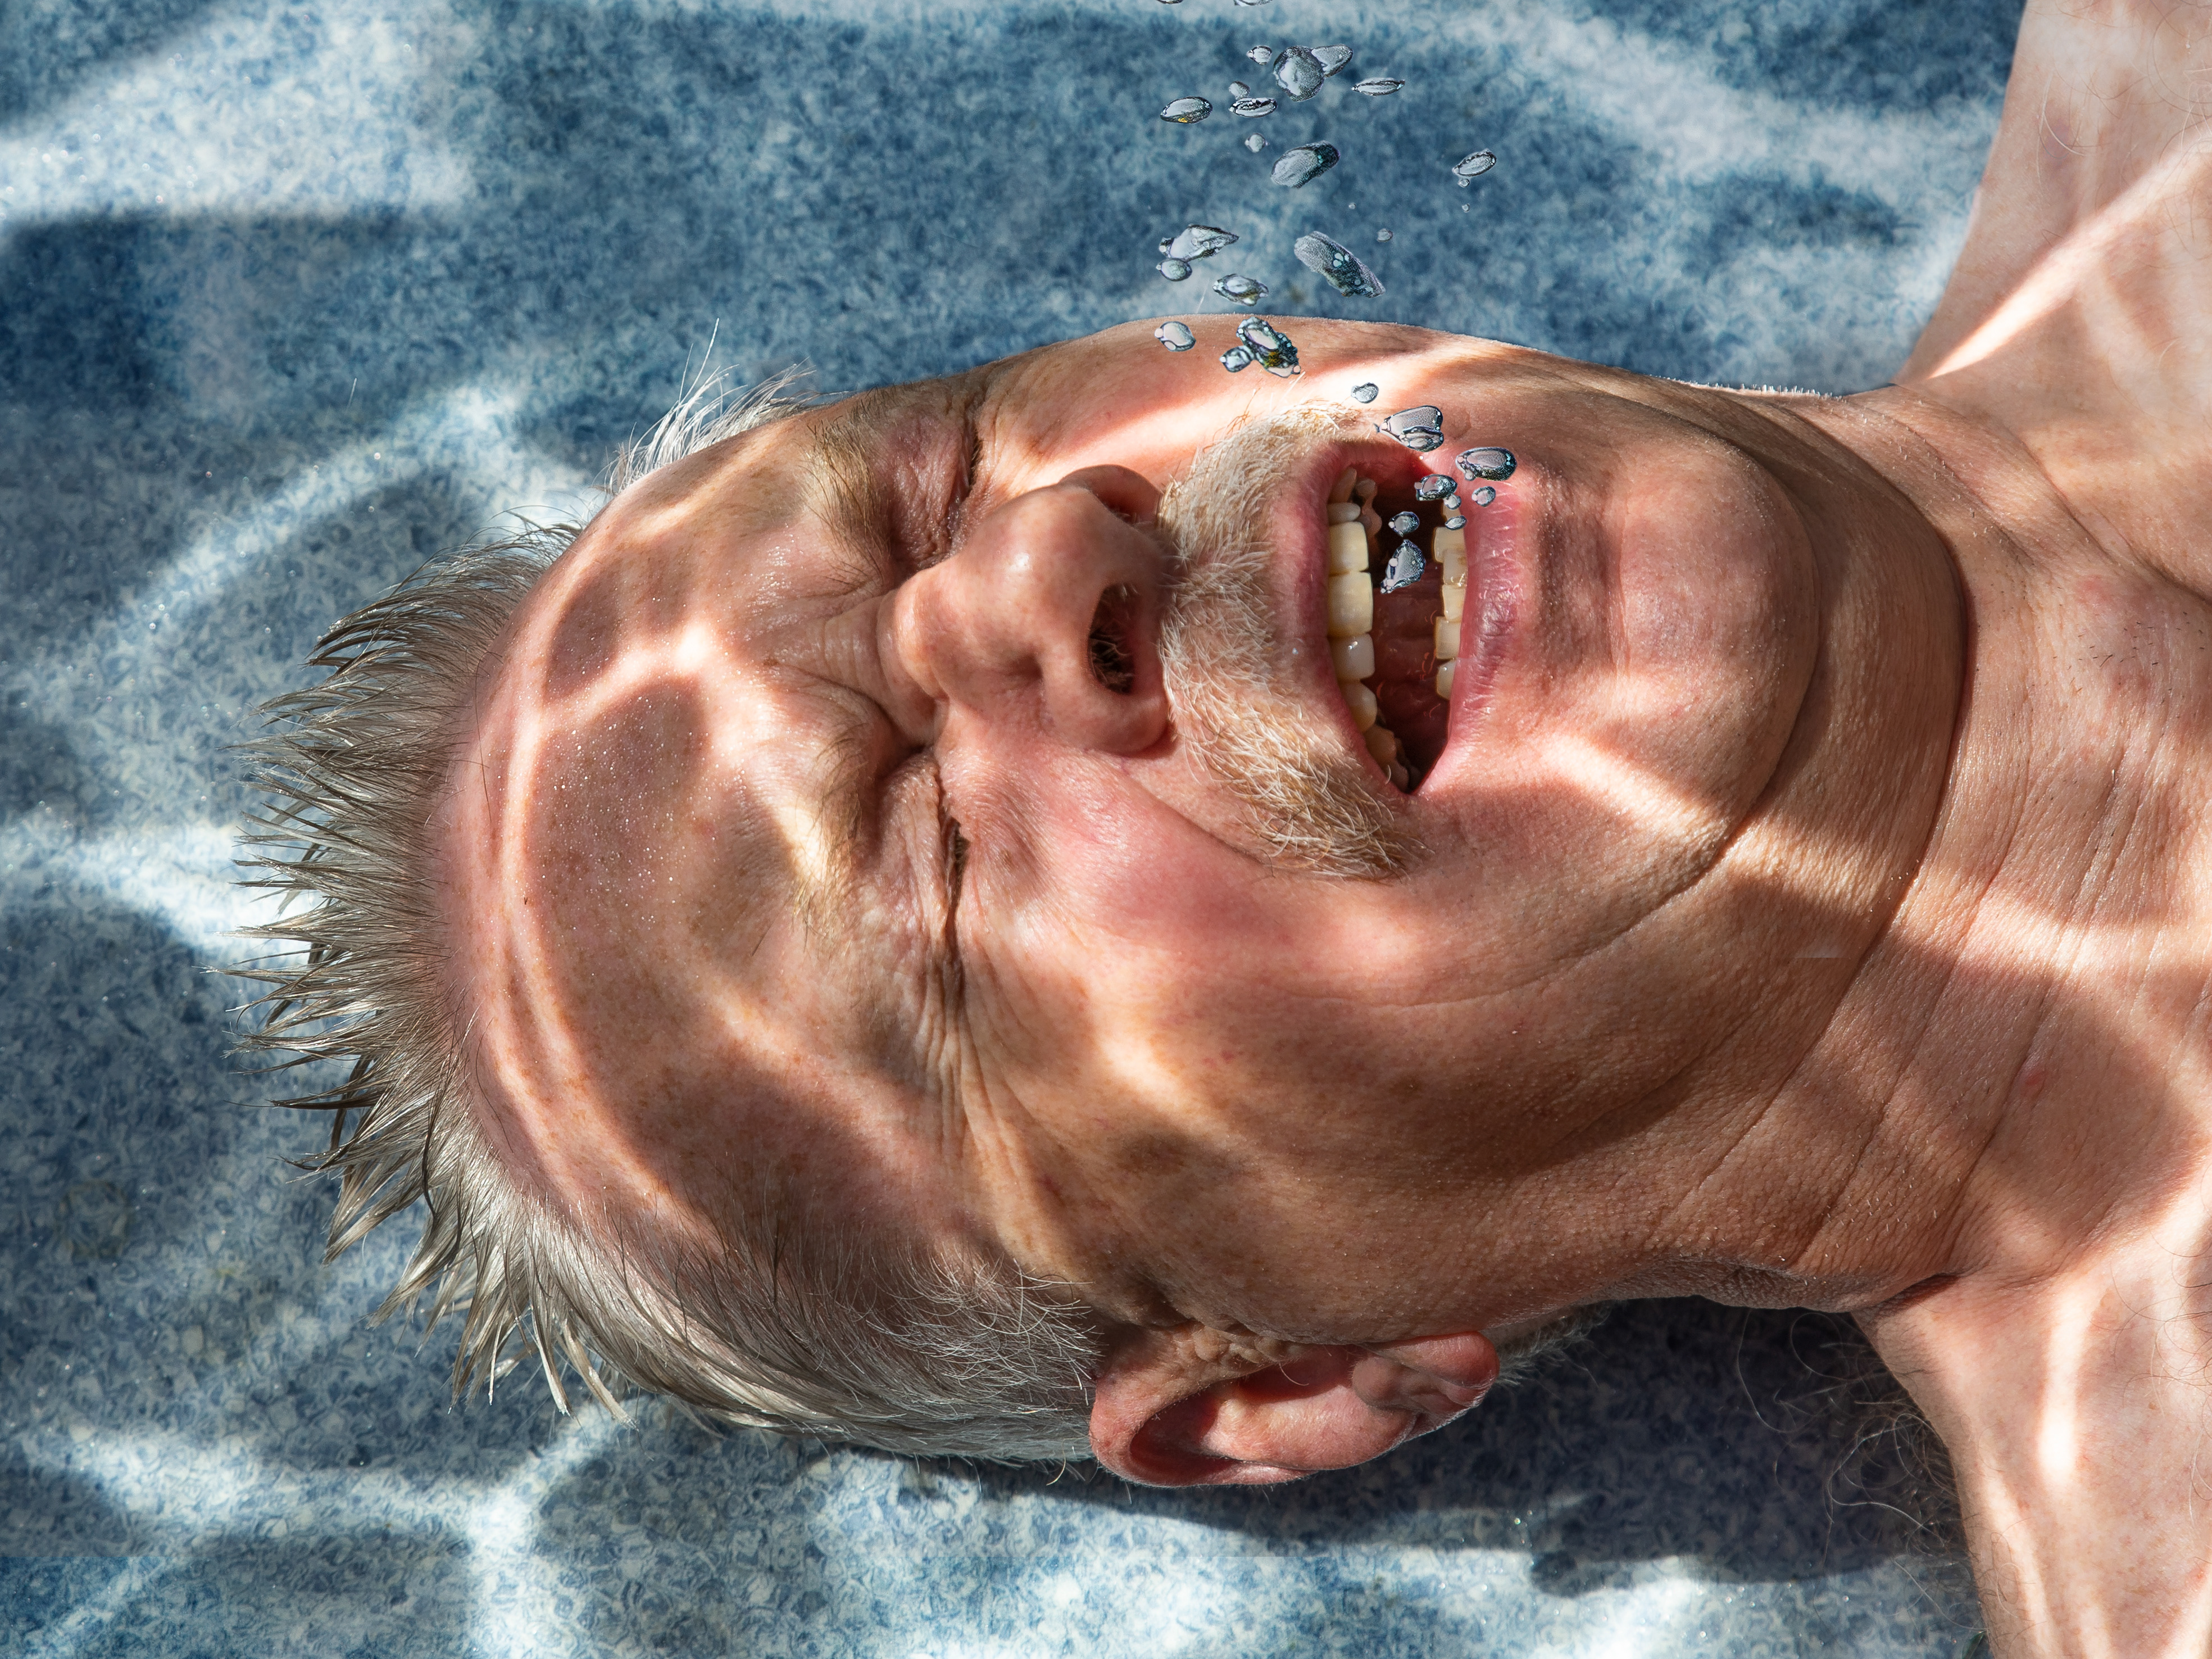
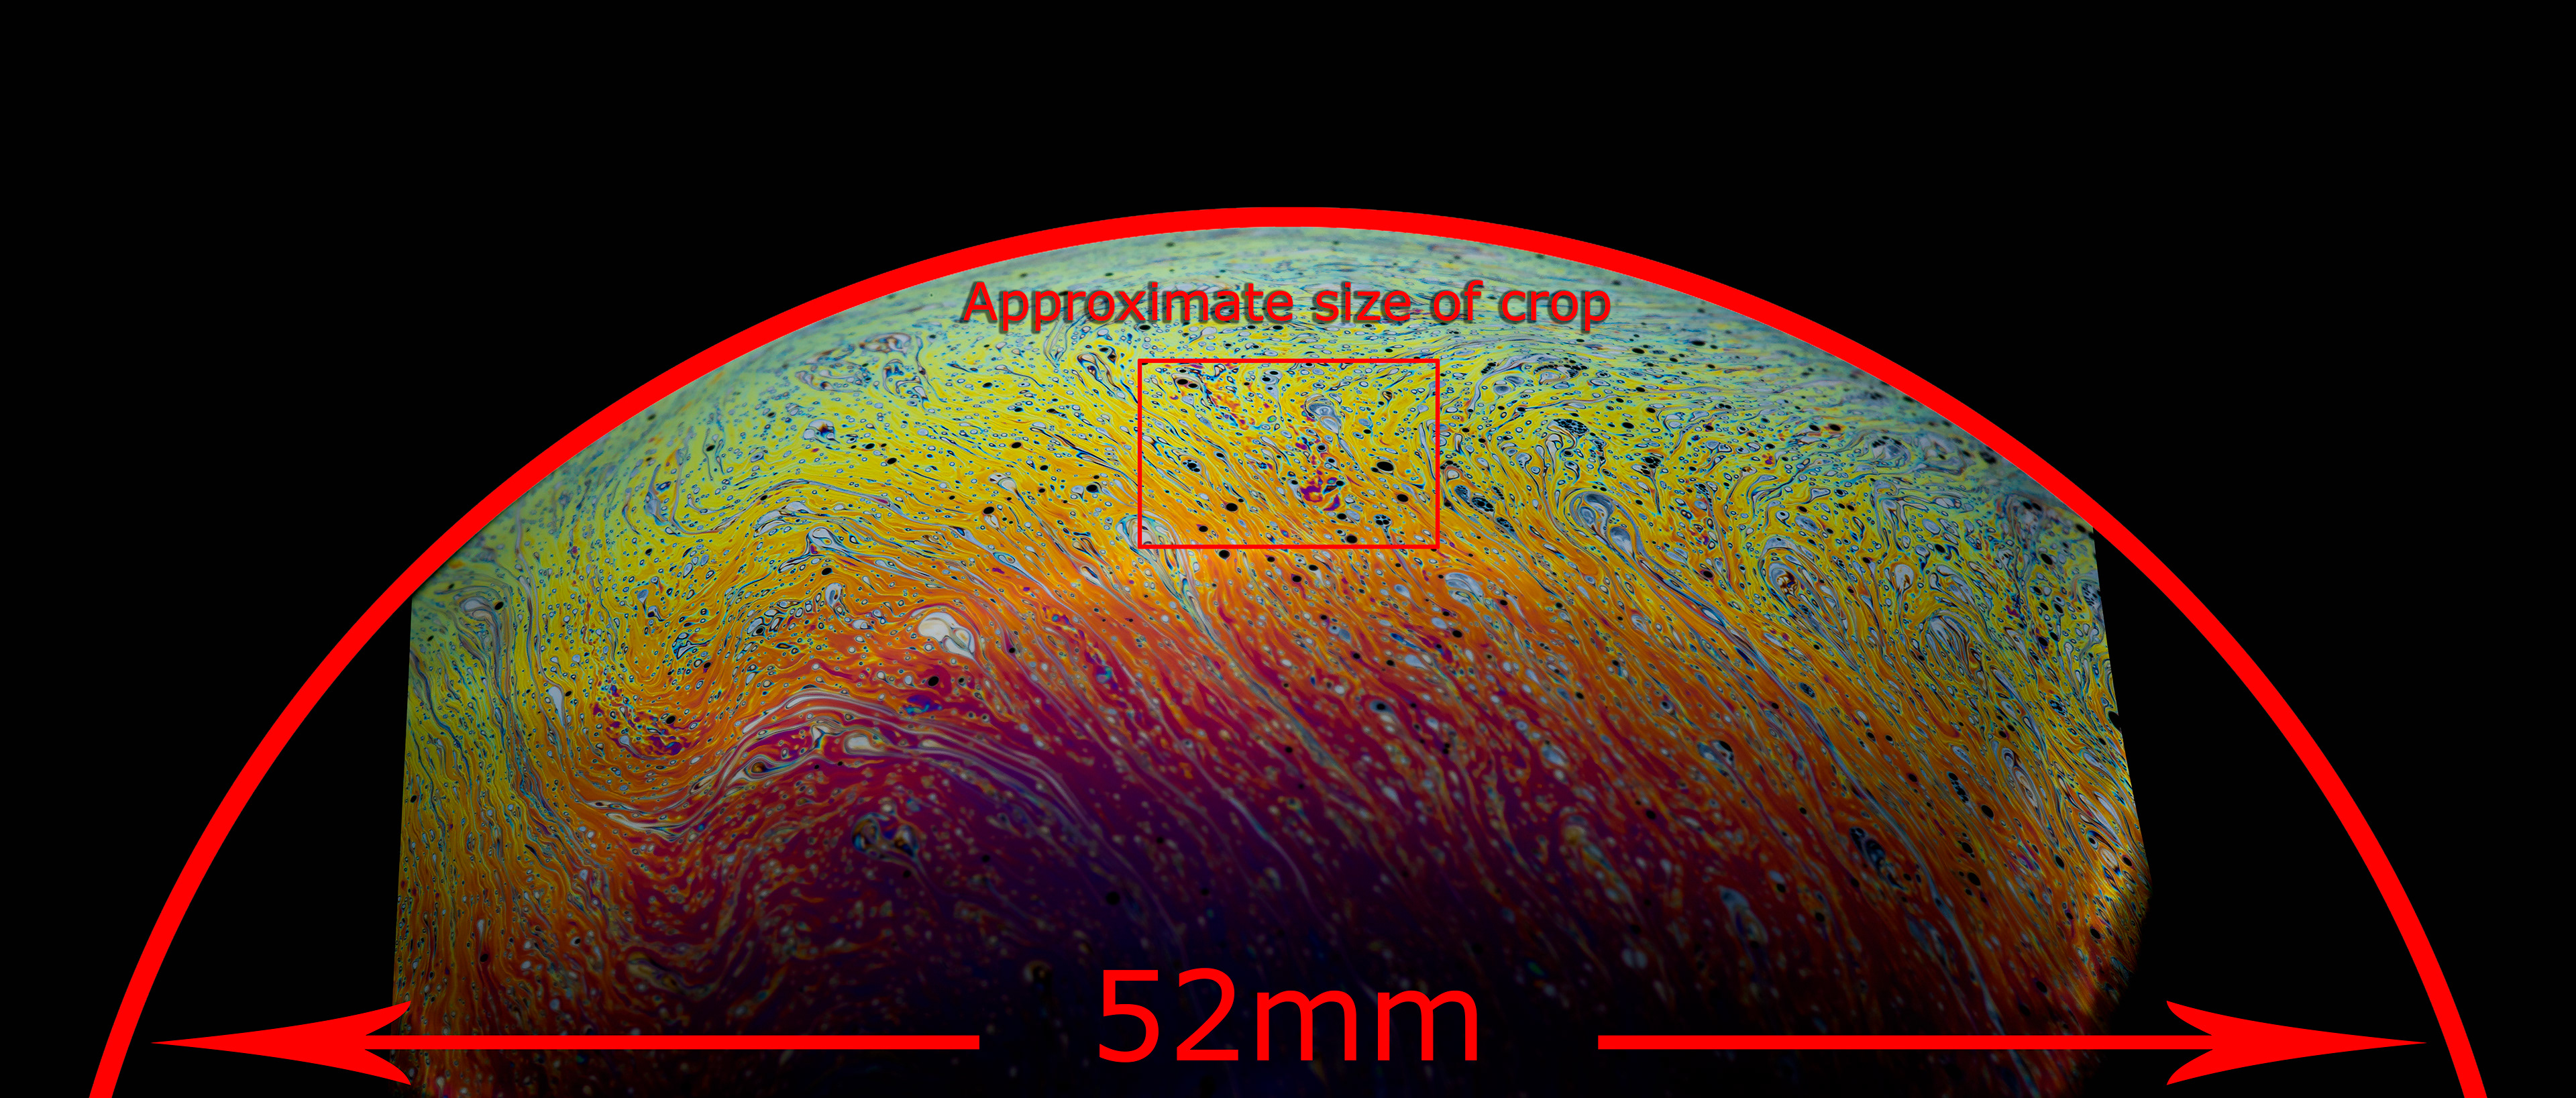
To give you a perspective of the size, see the diagram below. It basically means that the area of the bubble that you see here is about the size of your little finger nail.
Editing
The images needed minimal editing (apart from some serious cropping), although I did have to increase the exposure by one to one-and-a-half stops in Adobe RAW (so if I was to do it again, I would increase the ISO to 250), and some dodge and burn to bring out the colours and highlights.