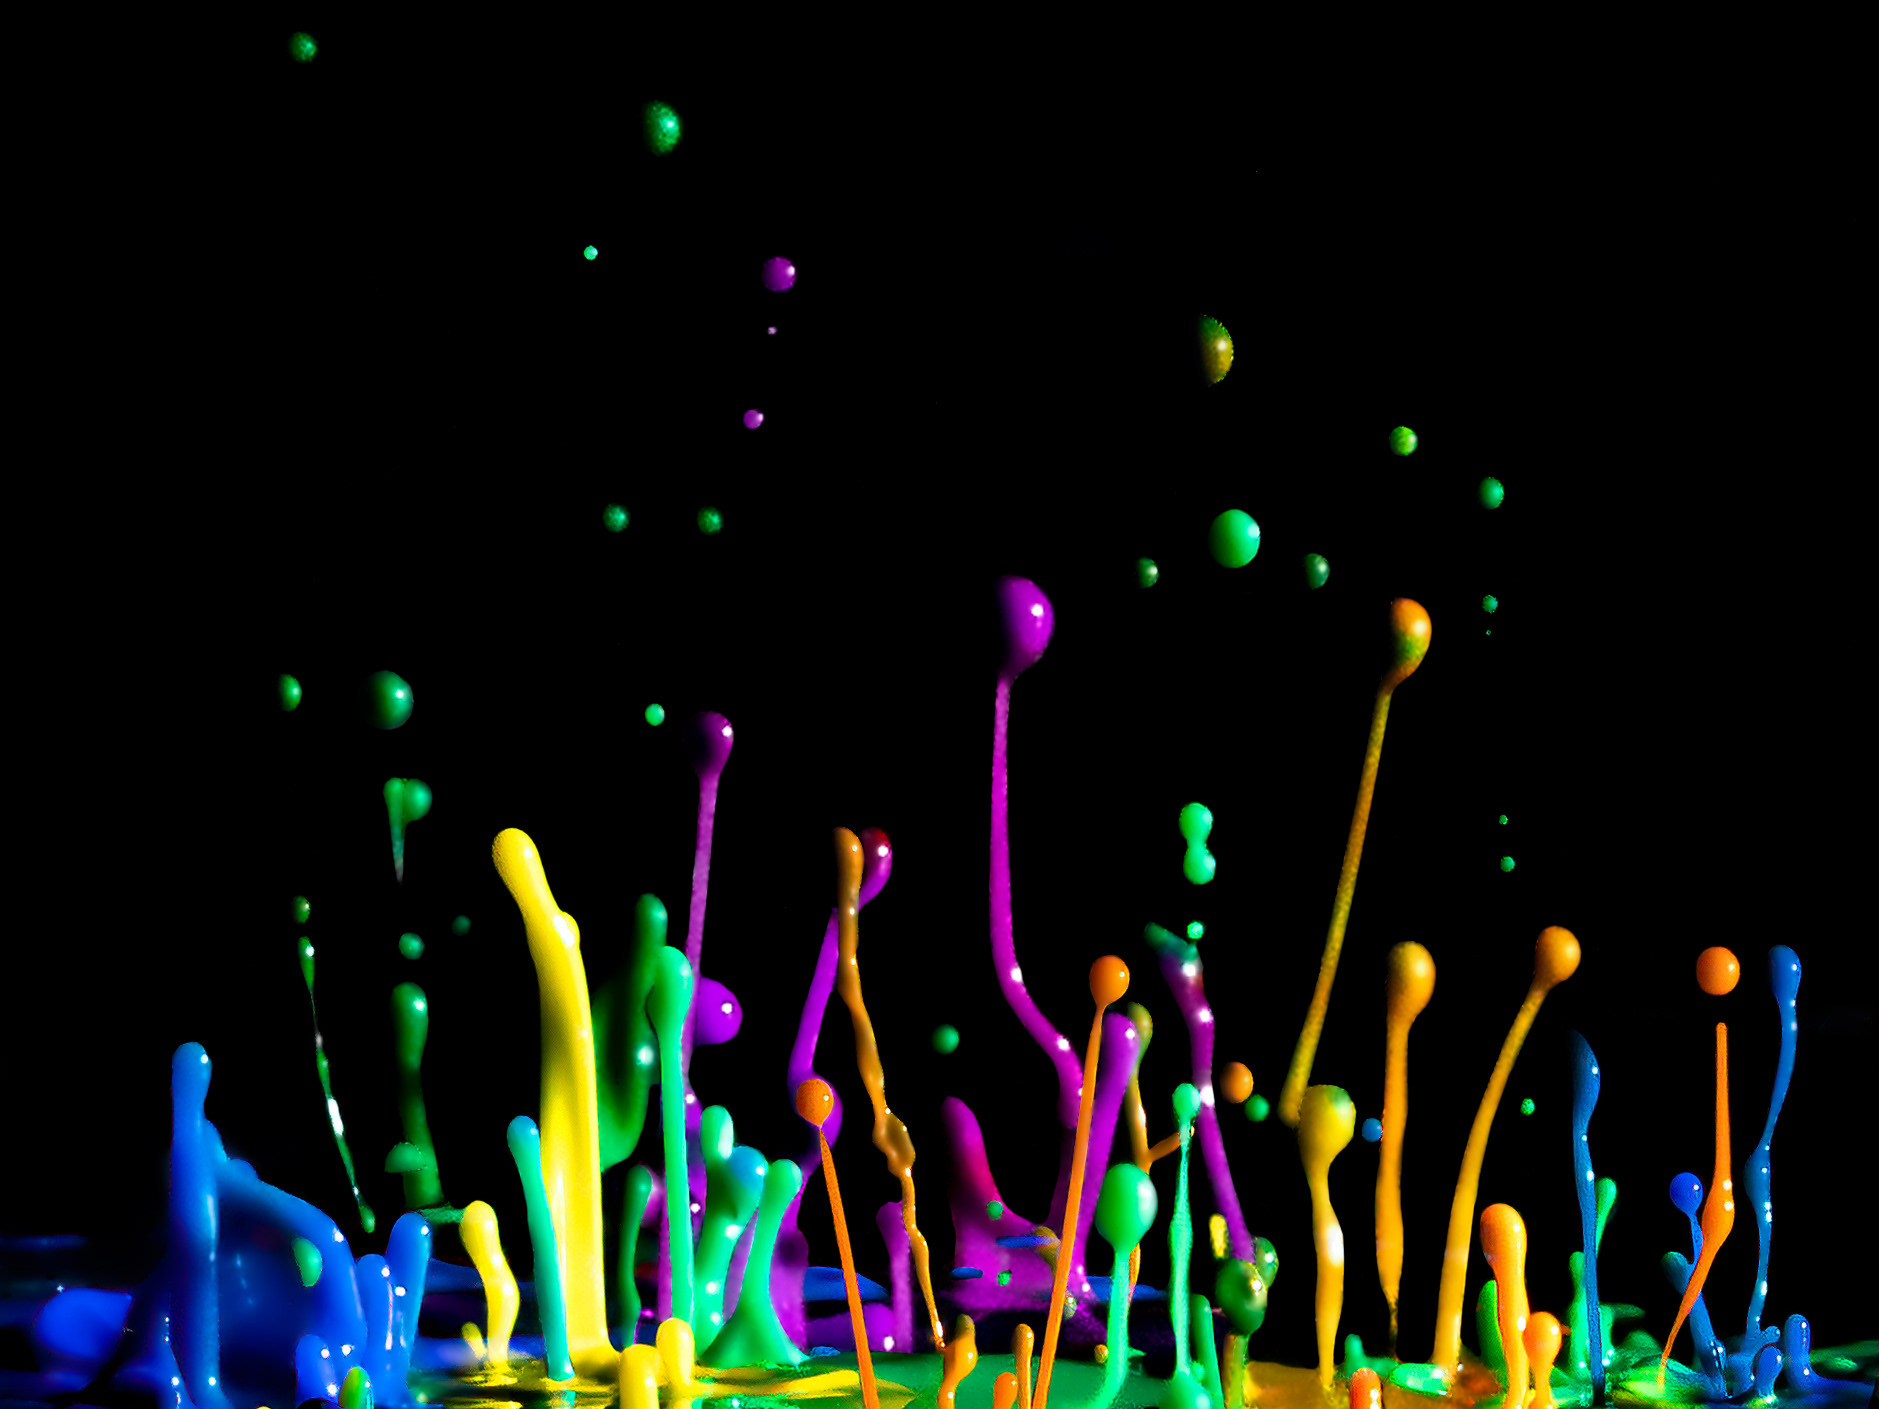
Back in 2018 I bought an Infrared Trigger set, with the idea of producing images like these. Then my dad became ill and my life was put on hold for the next year or more. Since he died last year I have been meaning to have a go, but I have always found an excuse to avoid having to step outside my comfort zone. A few days ago I decided to finally bite the bullet and set it all up.
Owning a large number of tripods of different sizes made my life a lot easier for this shoot (I'm a hoarder extraordinaire).
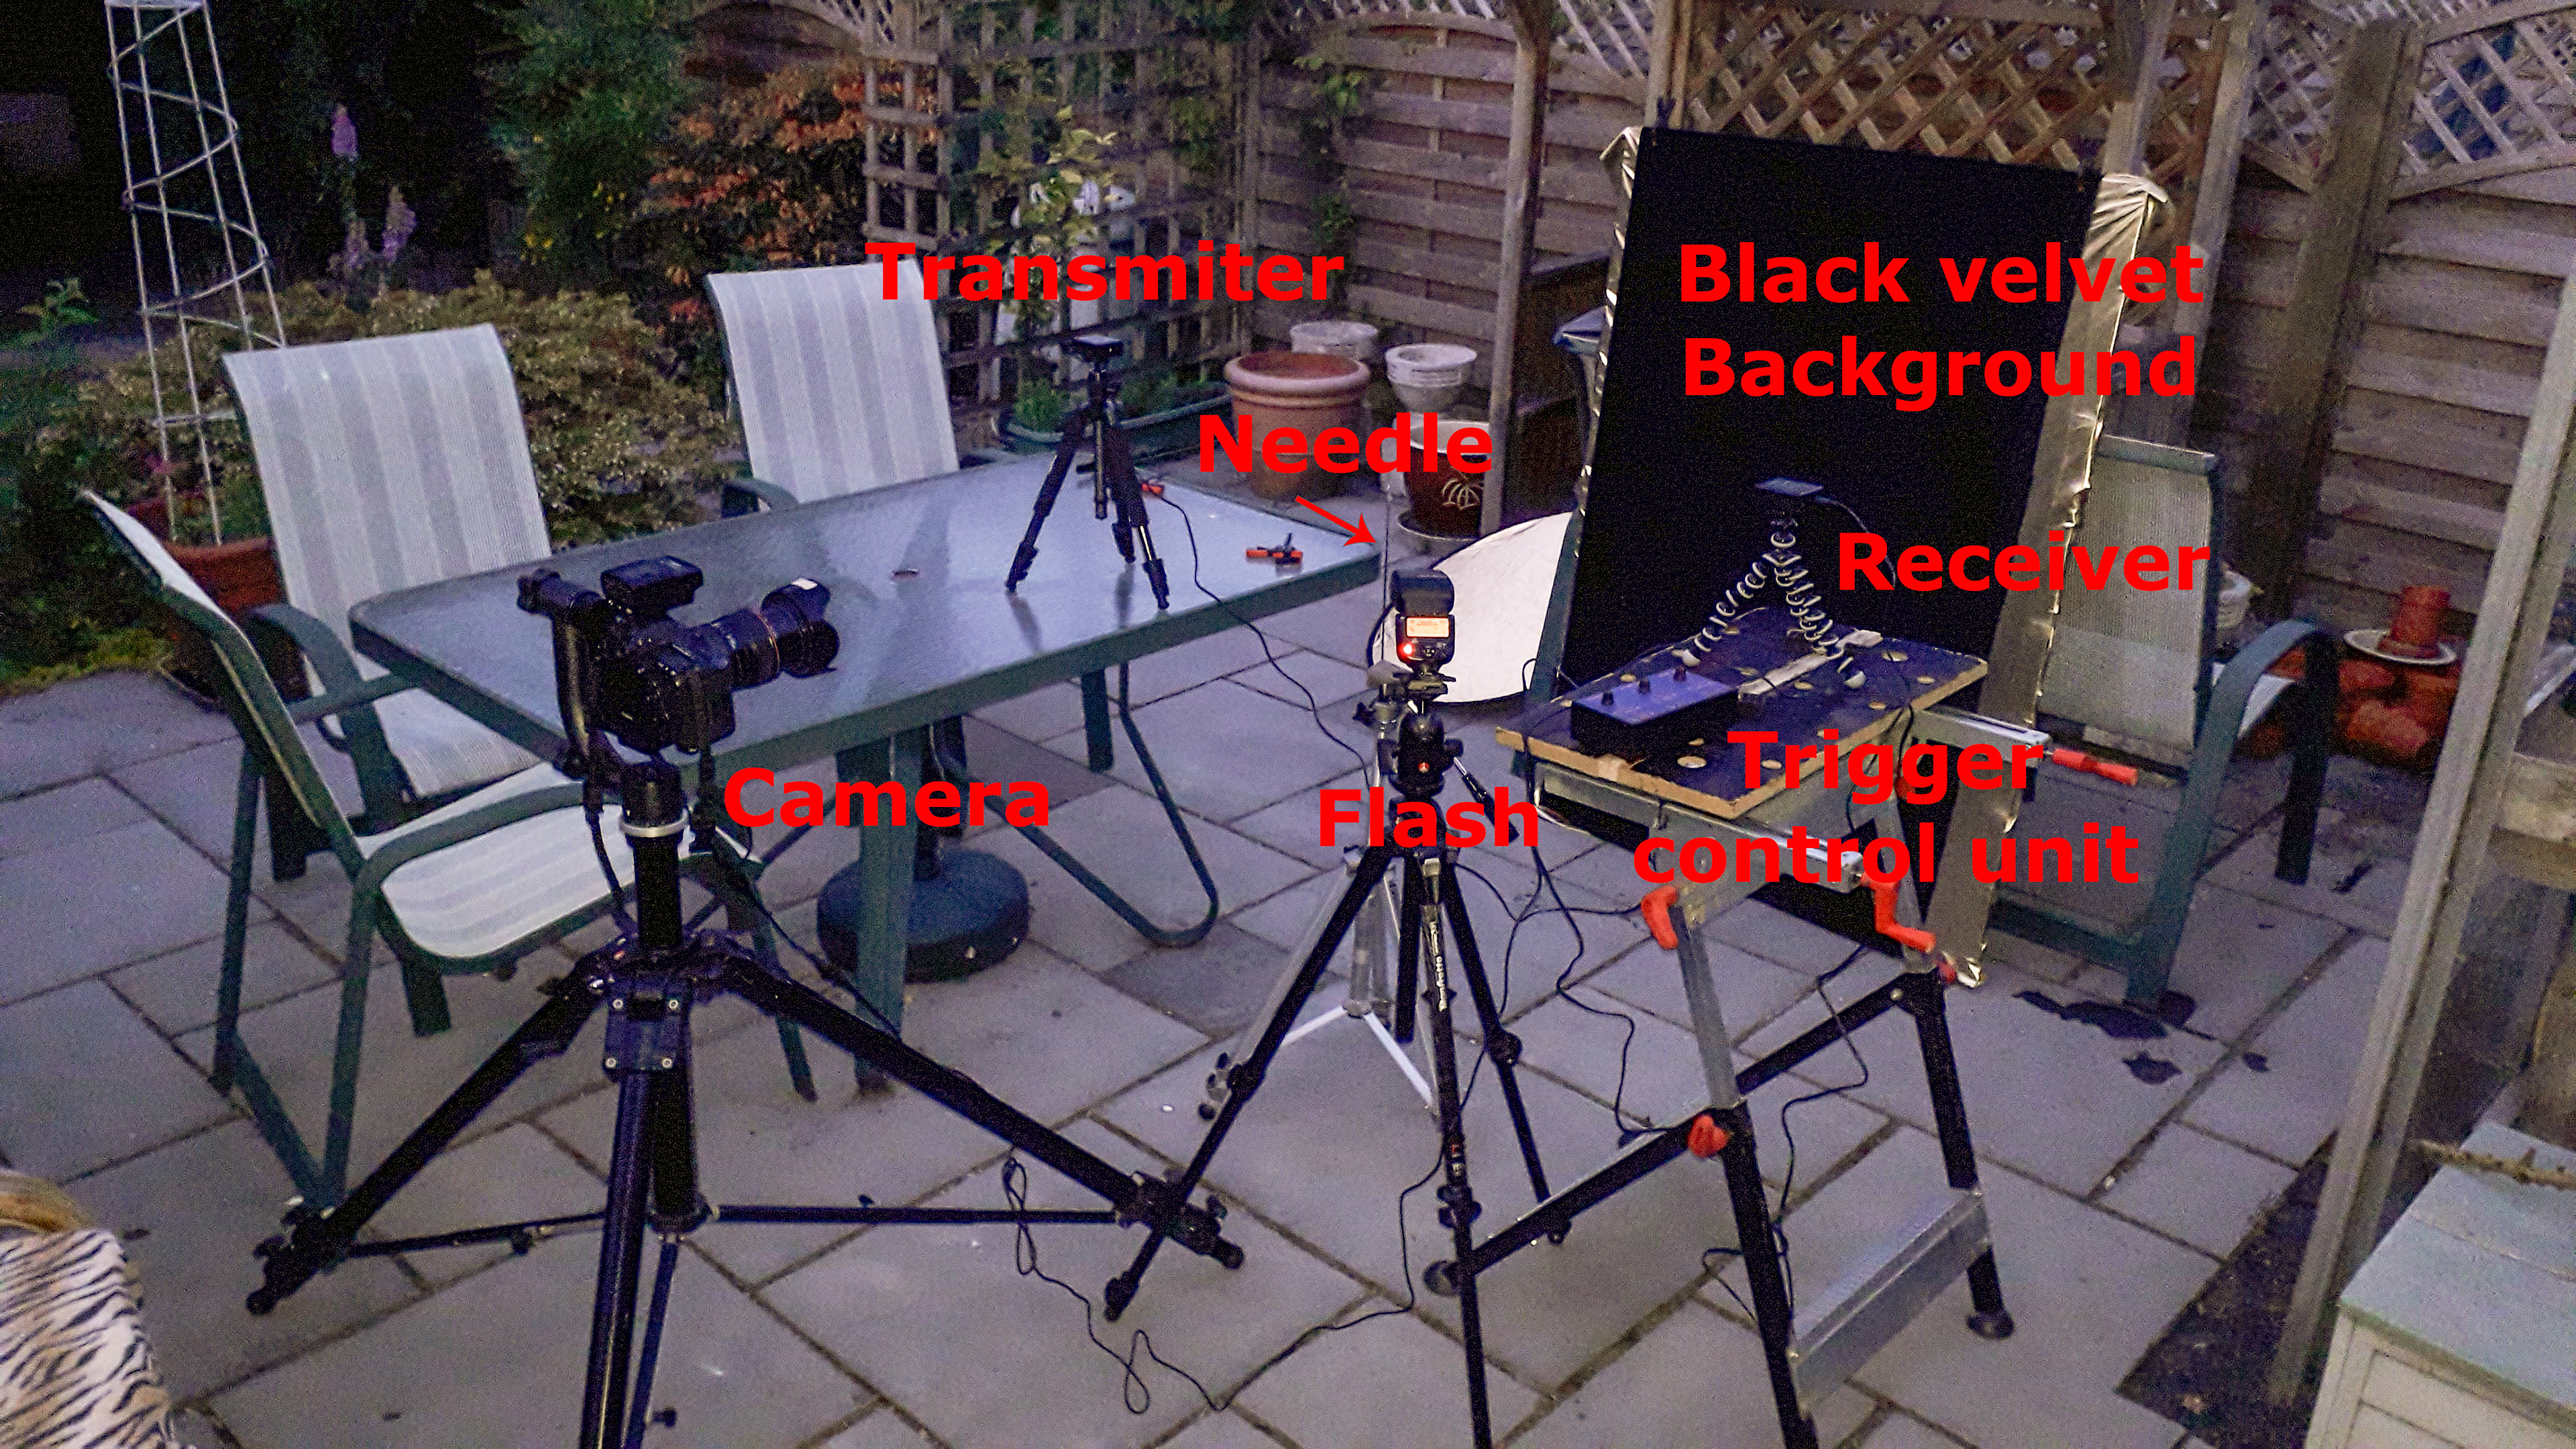
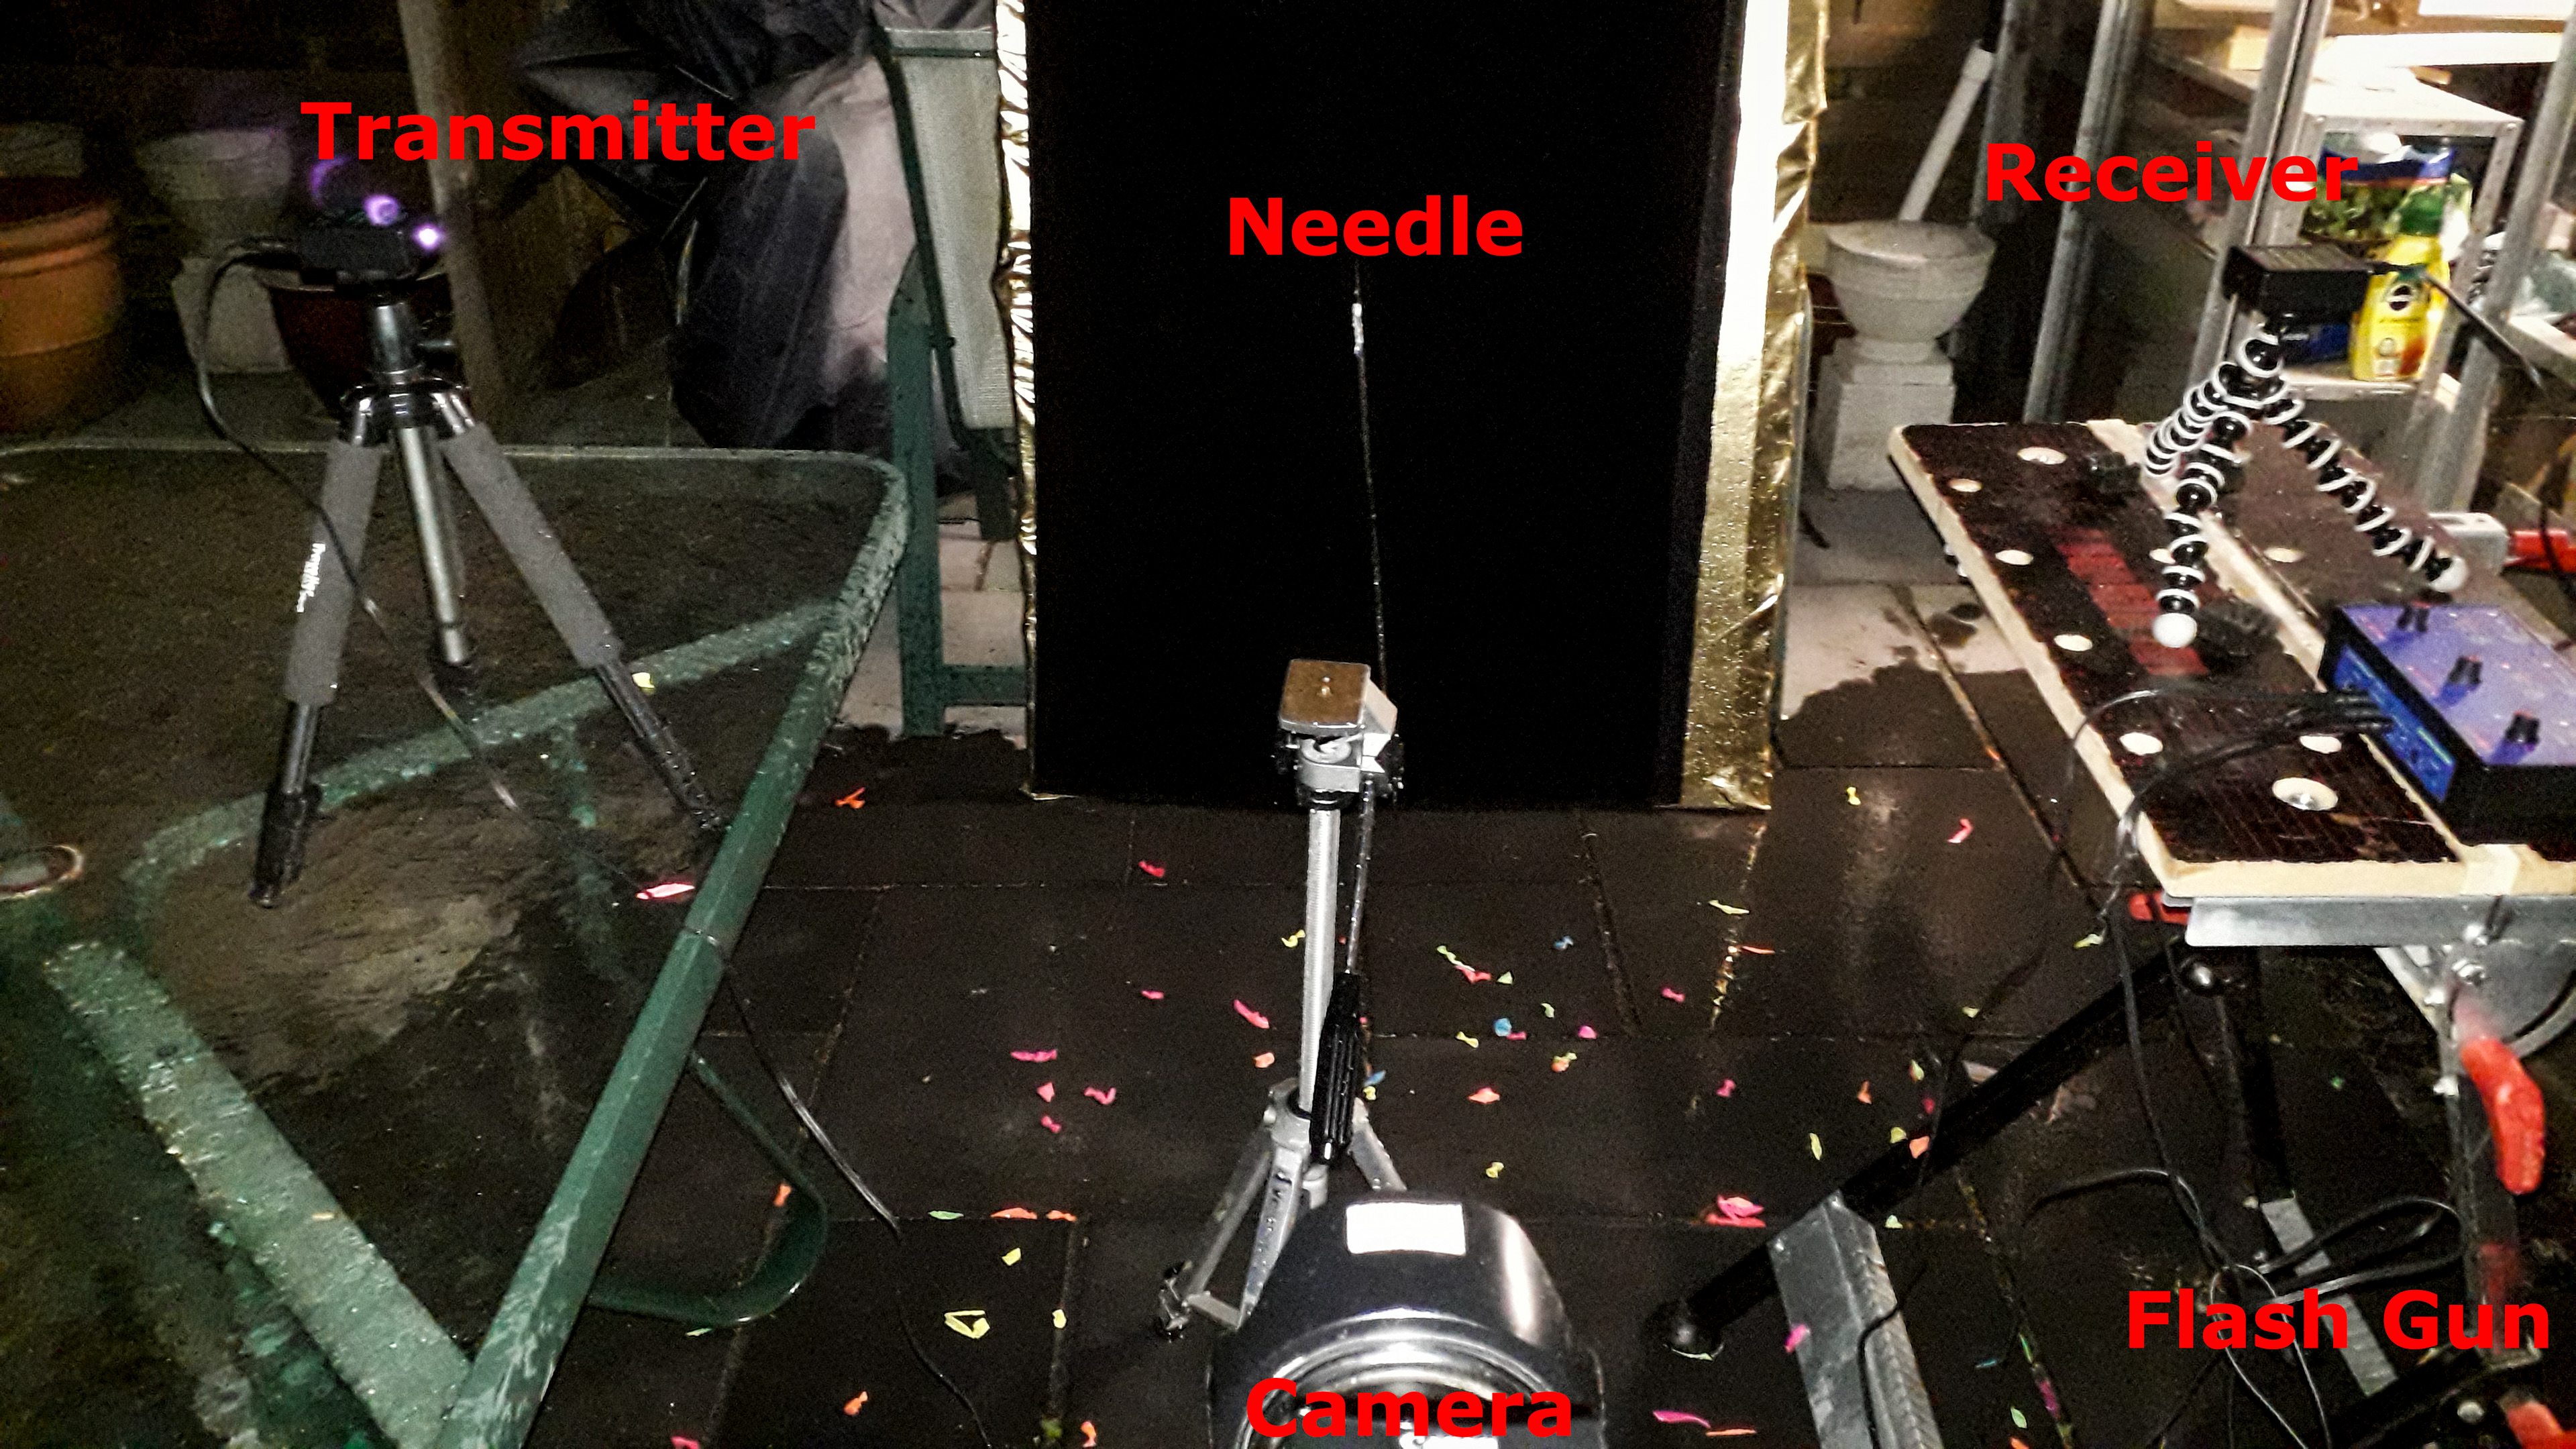
Apart from the obvious camera on a tripod, my Off Camera Flash gun was supported on another, as well as the transmitter (on the patio table), and the receiver on the Workmate.
I taped a sewing needle to a BBQ skewer and taped this again to a tripod, pointing straight up. The last part of my set up was a black velvet cloth draped over a wooden frame at the back, behind the needle.
Getting the transmitter and receiver lined up took a lot of trial and error, as the margin is only 3°, and was finally achieved using a plank of wood and a spirit level.
In fact the whole shoot was a series of experimentations. Setting up the sensitivity for the trigger, how to impale the balloons on the needle, how high to have the needle in relation to the IR beam etc.
And all this in the dark. We had set up the trigger earlier while there was still some light in the sky, but something had knocked the receiver off ever so slightly.
To focus on the needle, I had David hold his hand right by it with me shining a light and using autofocus, then switching the lens to manual focus. In order to retain a reasonable amount of depth of field, I set my aperture at f/11. My flash gun sync speed is 1/200, although the shutter speed does not really matter for this, as the only light will come from the flash gun. Taking a few test shots, I ascertained that I needed an ISO of 640 to get a decent exposure.
The flash gun was manually set to 1/64 of power, which equates (according to sources I checked on the web) to a flash duration of 1/15,000 second. As the power of the flash gun decreases, so does the duration of the light.
The balloons we bought from Amazon came in bundles of 37 with an adaptor to easily fill them all at once from a garden hose. They are self-tying – all you have to do when they have filled to your satisfaction, is to abruptly pull the fittings away and they magically seal. Thank goodness for that, otherwise it would be a long, drawn out job to tie a knot in every one of them.
Then the fun started.
I had the easy job, sitting by the camera directing the LSH, he was the one in the centre of the action, getting very wet. As the aforementioned trigger fires the camera – and therefore also the flash gun – I didn't even have to press the shutter on the camera.
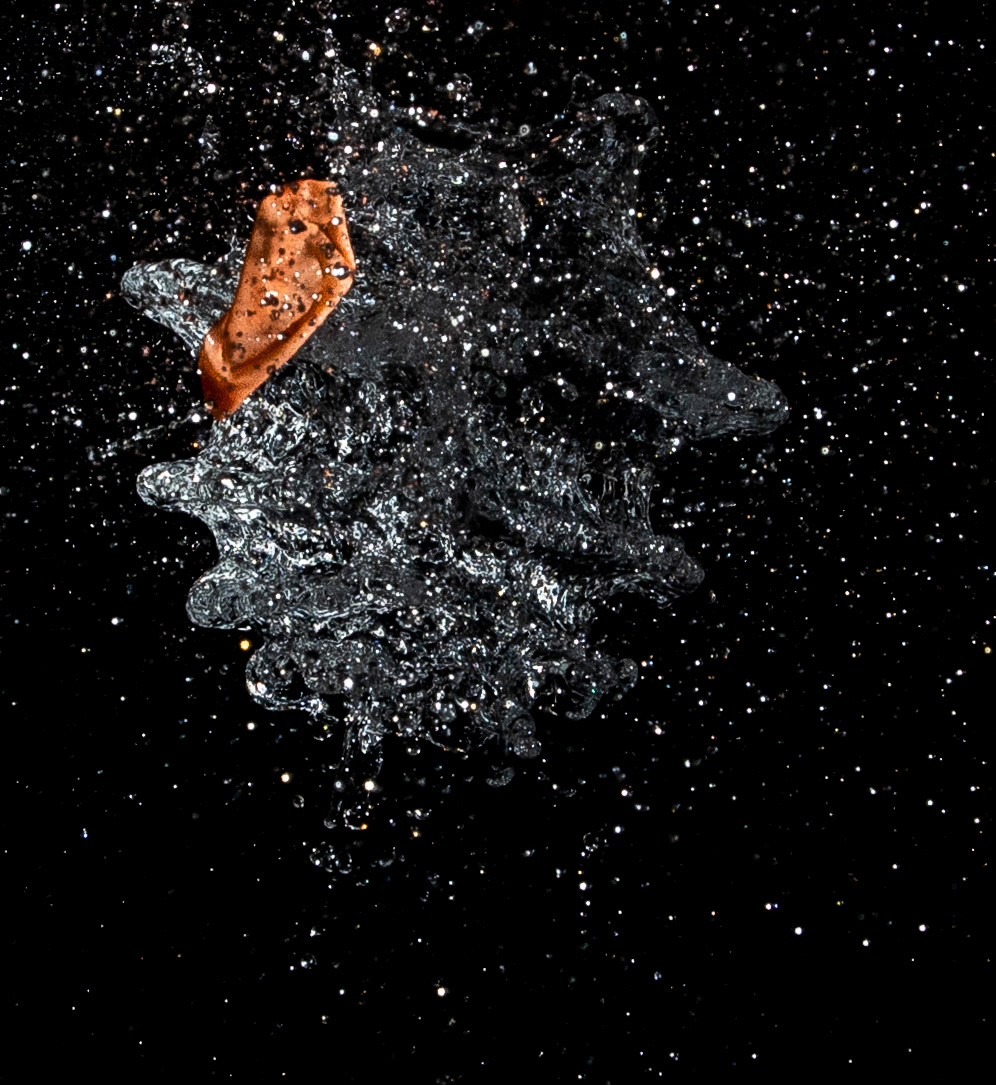
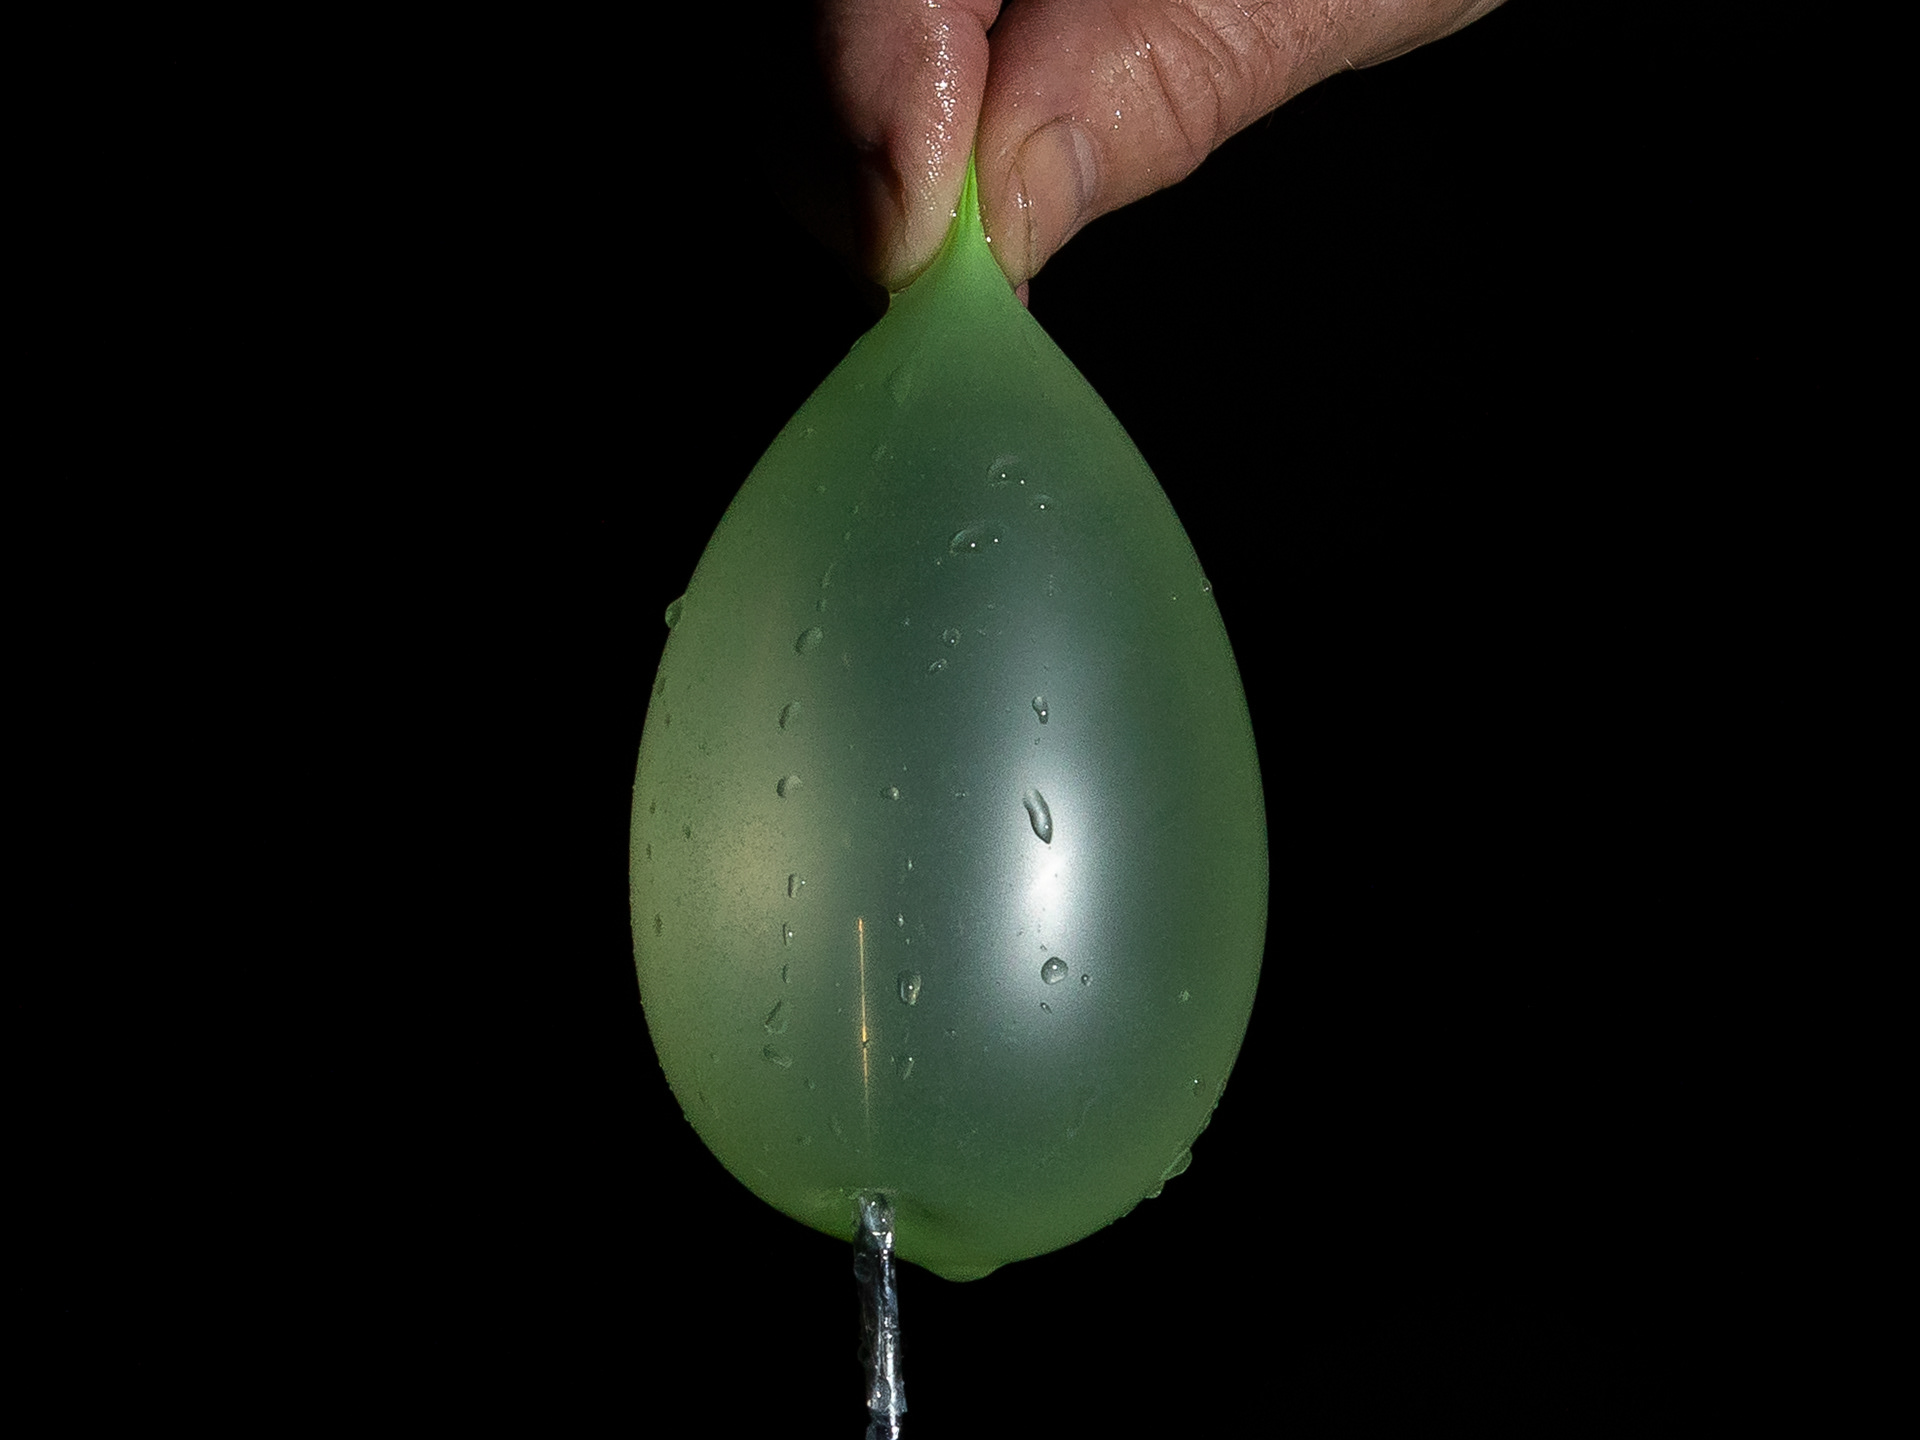
Initially he just dropped the balloons onto the needle, which was very hit and miss, but produced some reasonably good shots. However, I knew exactly what I wanted to achieve, and was prepared to carry on until I reached that, or my LSH became fed up, whichever came first.

The following night I went back out there. I knew I had to have the flash fire a nano-second earlier than it had been in order to catch the balloon JUST as it split open. But how to achieve that?
I checked my camera settings to ensure I didn't have second-curtain-sync selected (the flash gun has a choice of firing as the shutter opens, or when it closes, the former being what I wanted: first-curtain-sync). That was all OK, so on to the next thing we could make changes to.
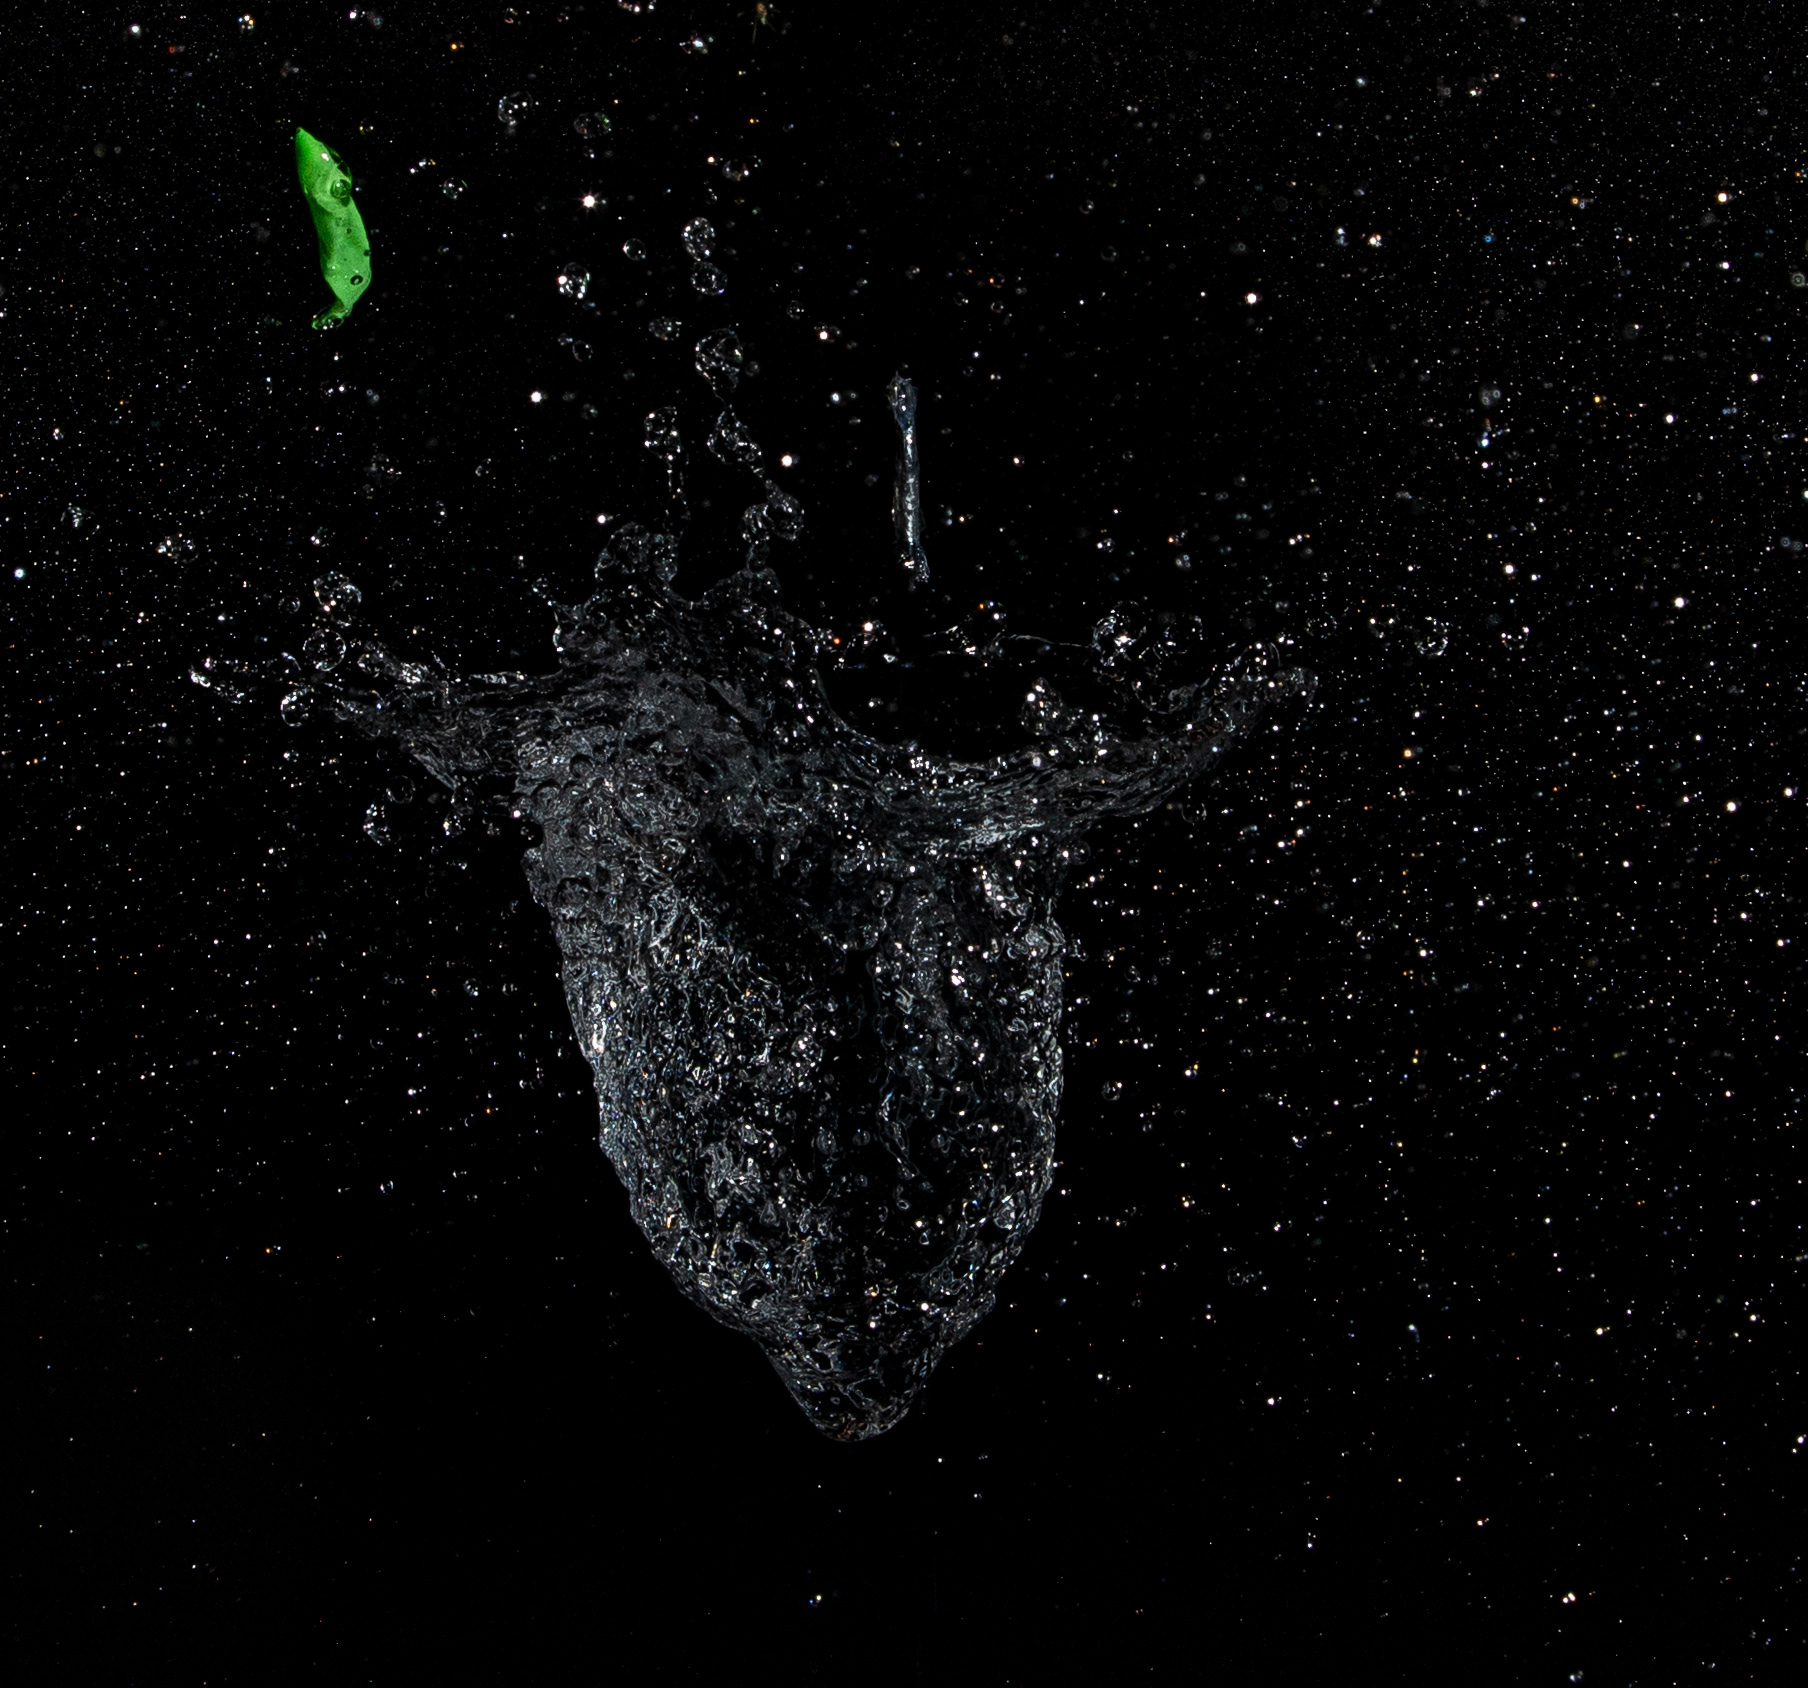
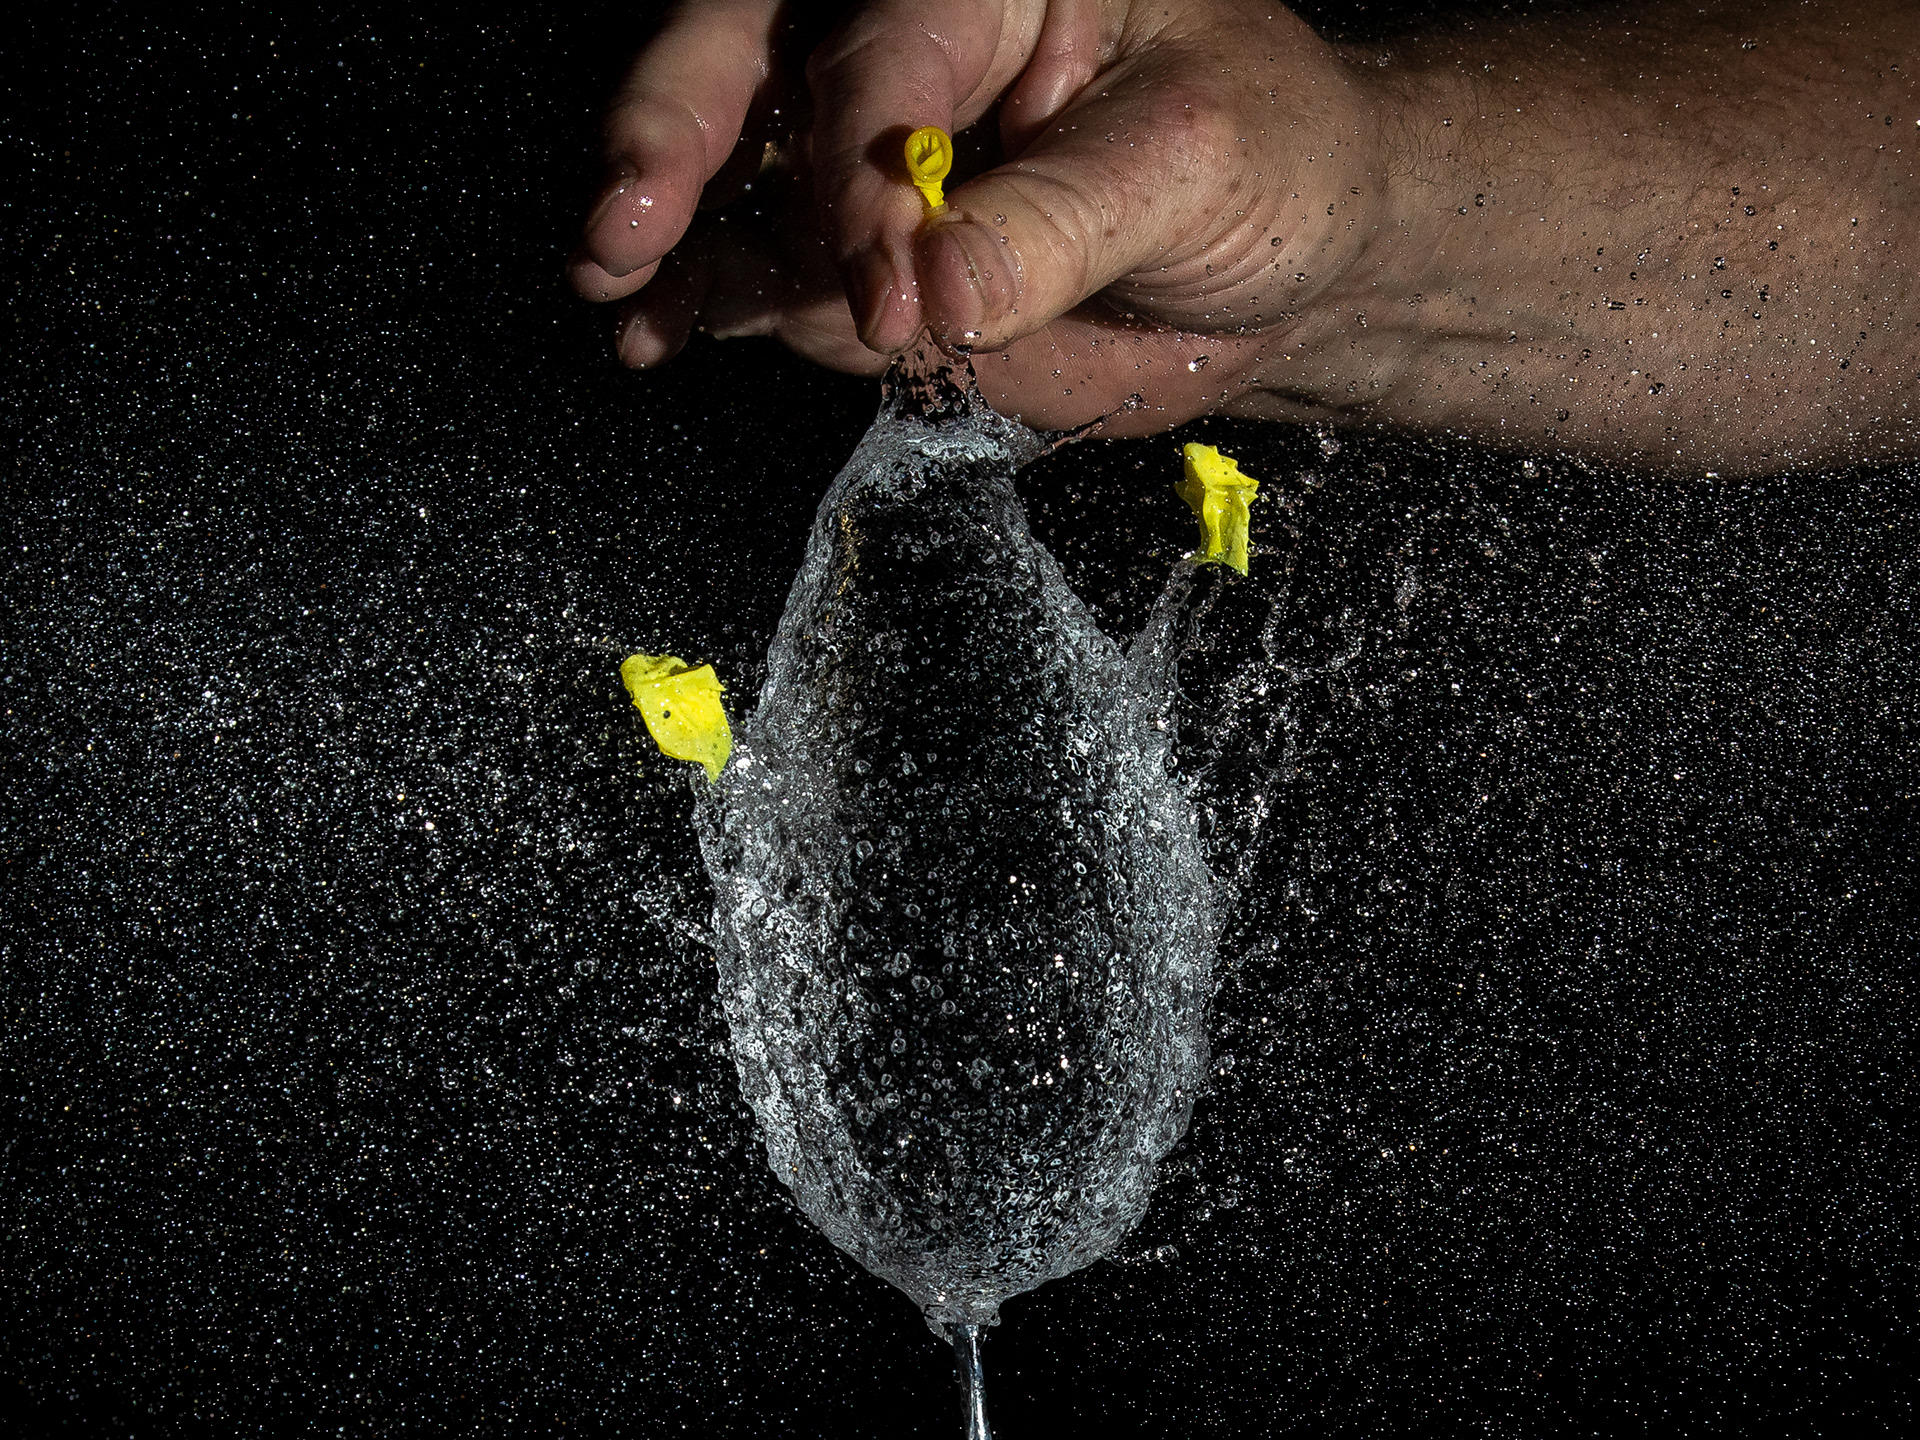
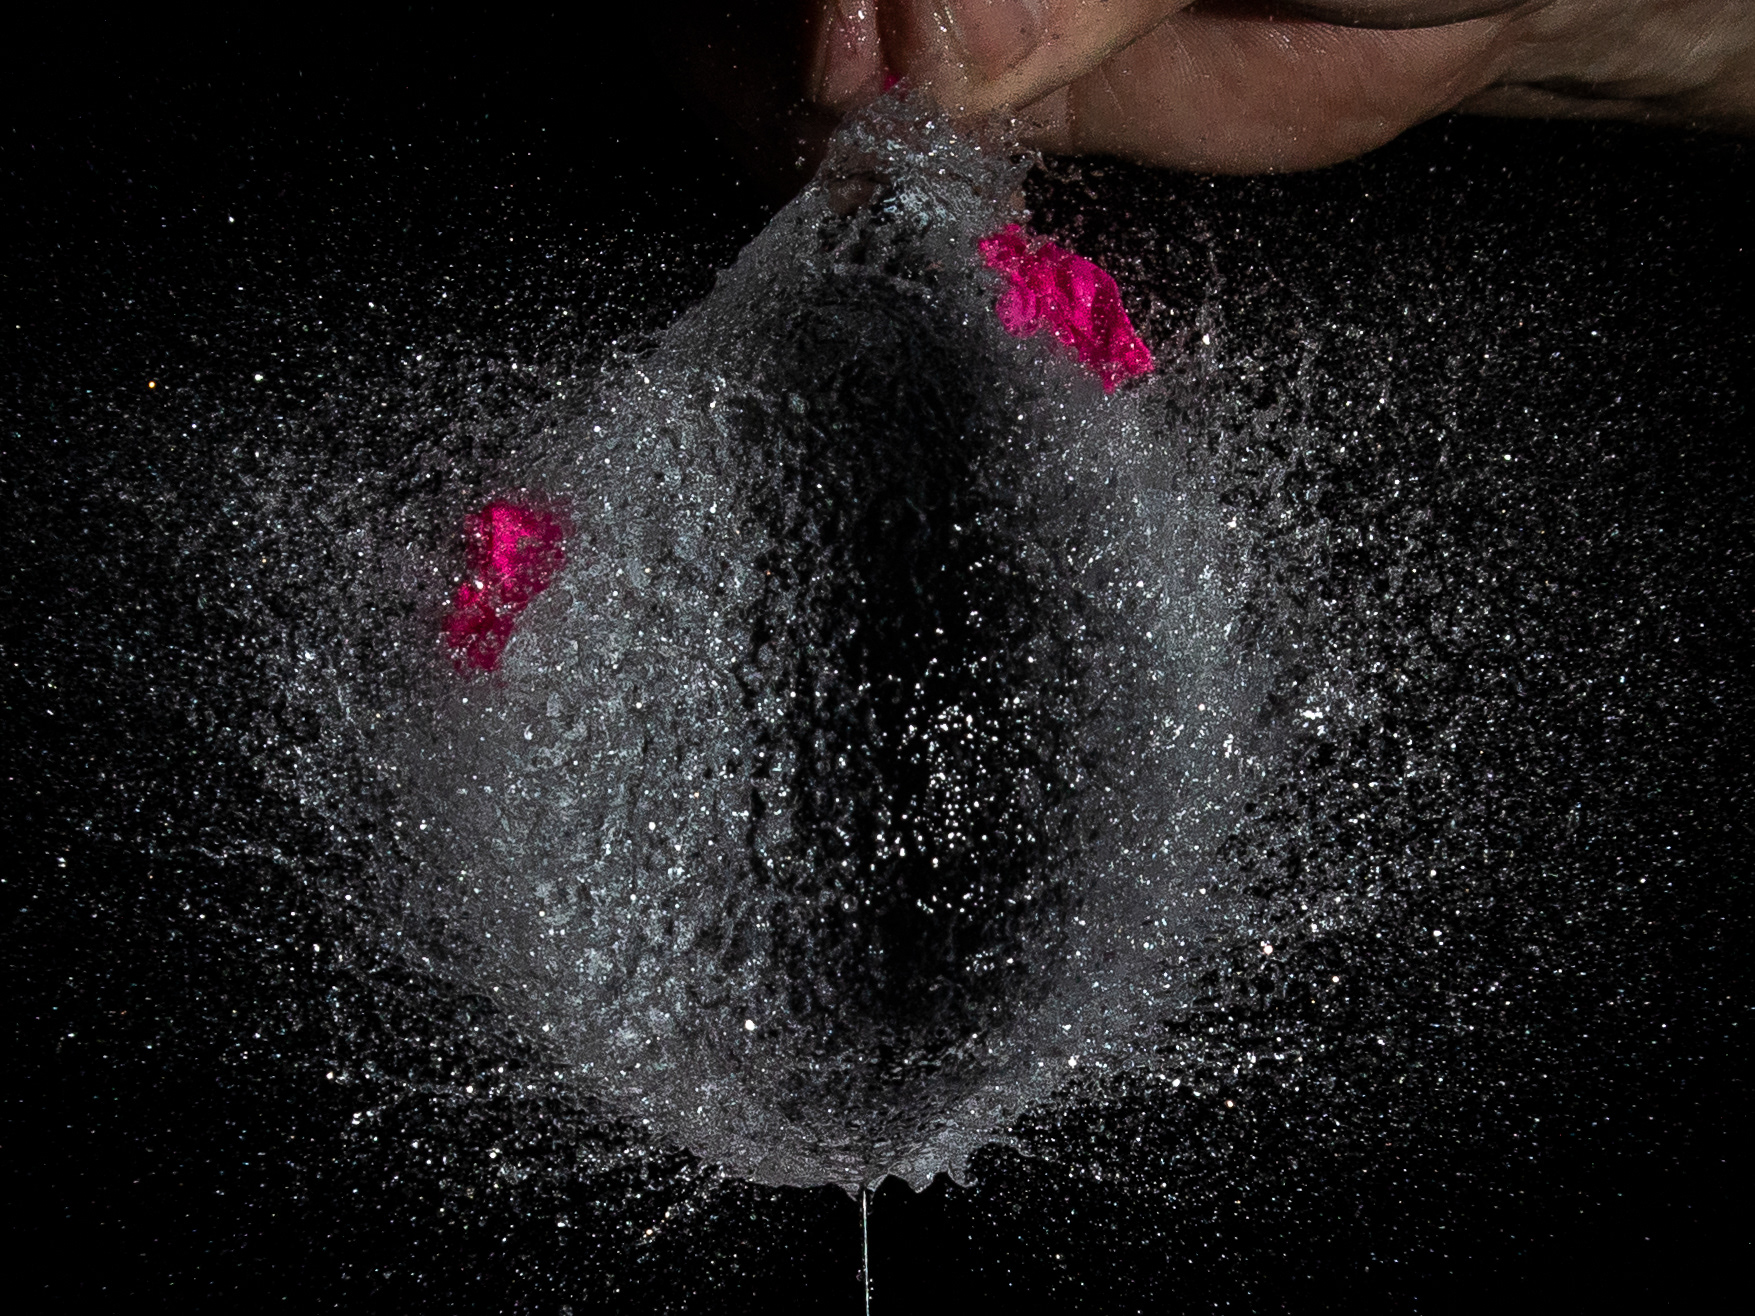
I lowered the power output on the flash gun to 1/128, which by my reckoning should be in the region of 1/21,000 second flash duration. That produced some better results, but I still wanted to have an image where the rubber of the balloon was still partially attached to it.
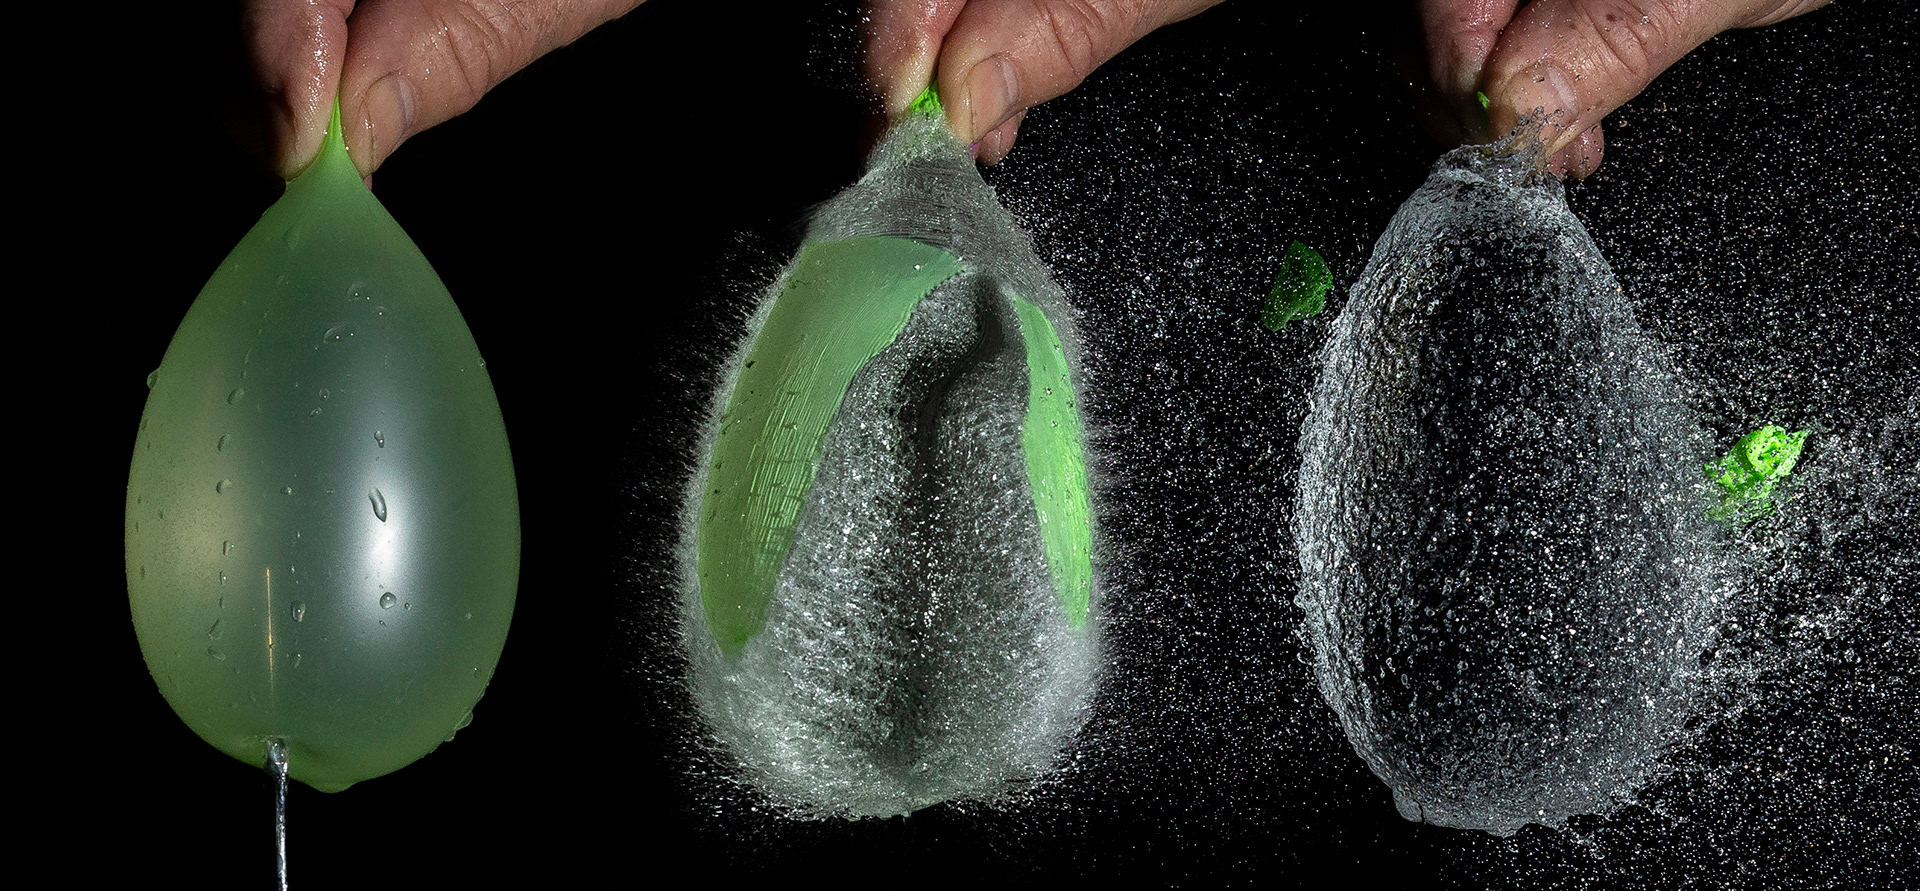
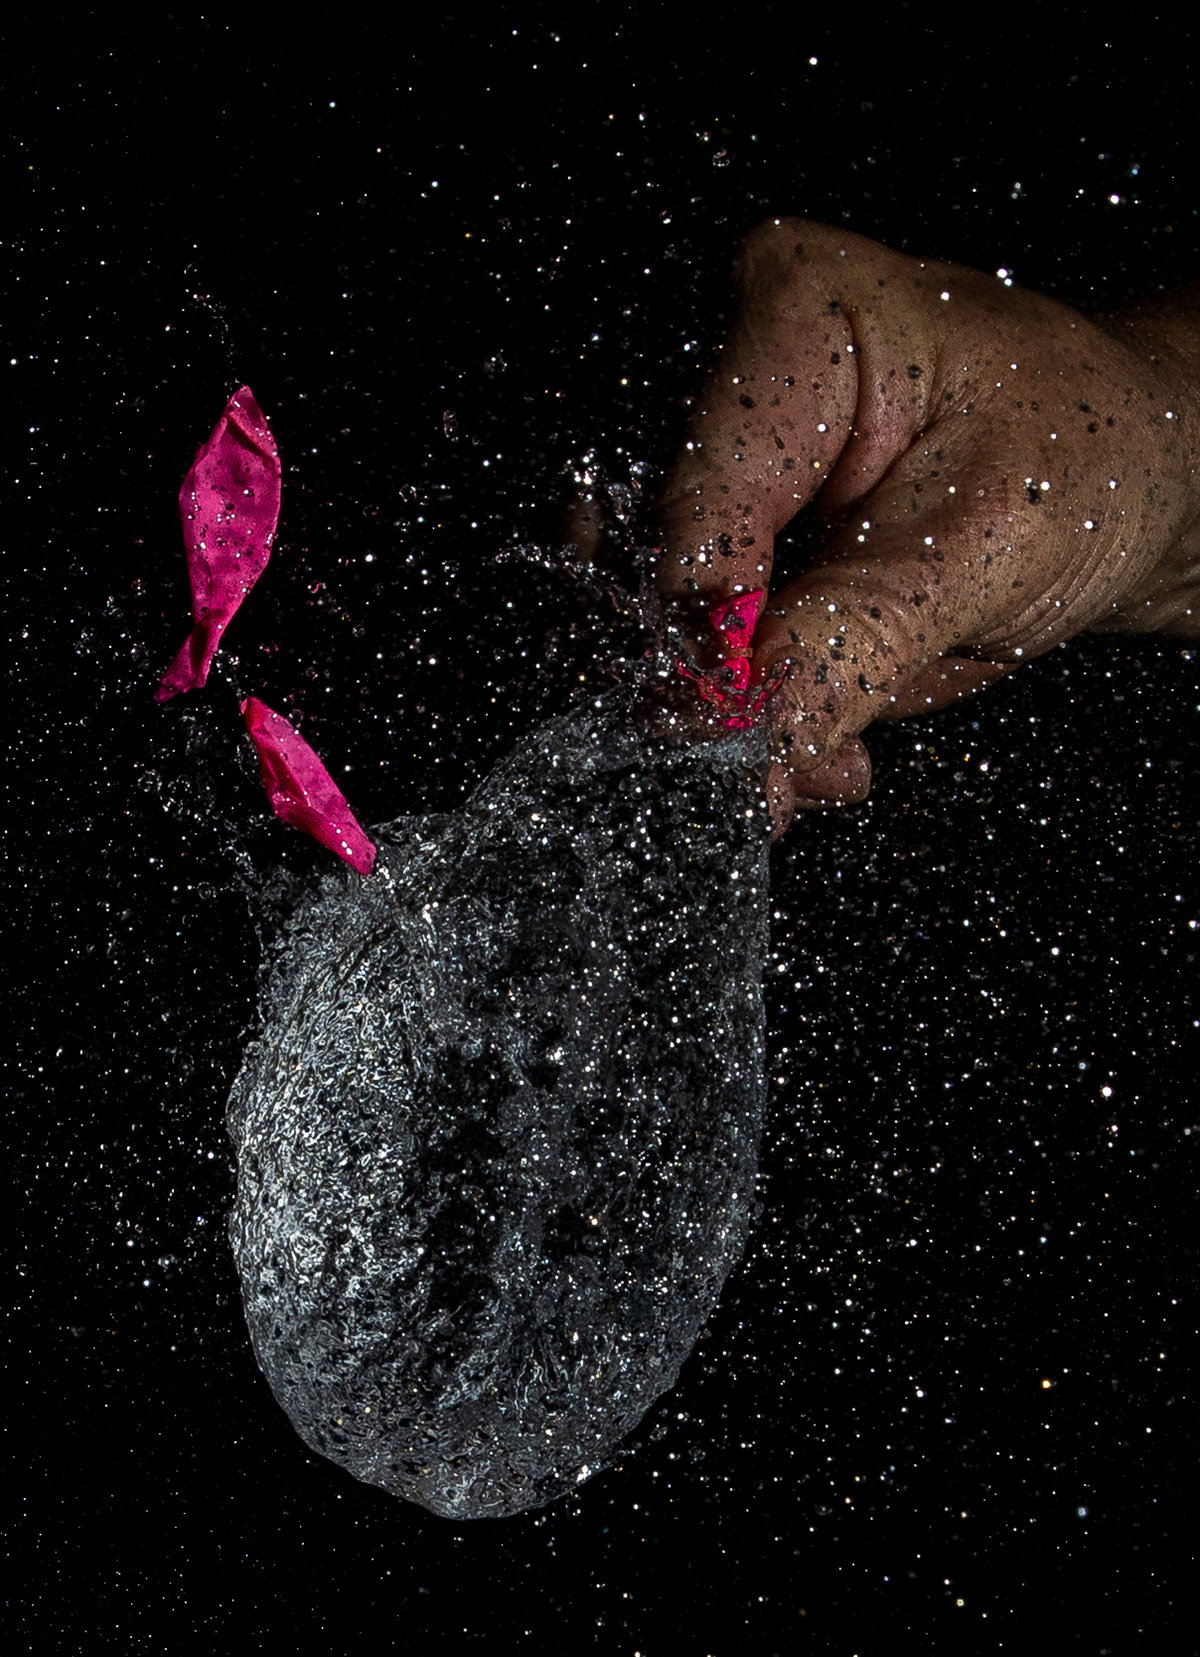
The next experiment was to lower the needle a few millimetres, so that the trigger would fire when the balloon was just that little bit further away from the needle. What I hadn't realised until I saw this photo, was that the balloon didn't always burst the moment the needle pierced it. Again it was very hit and miss with the results.
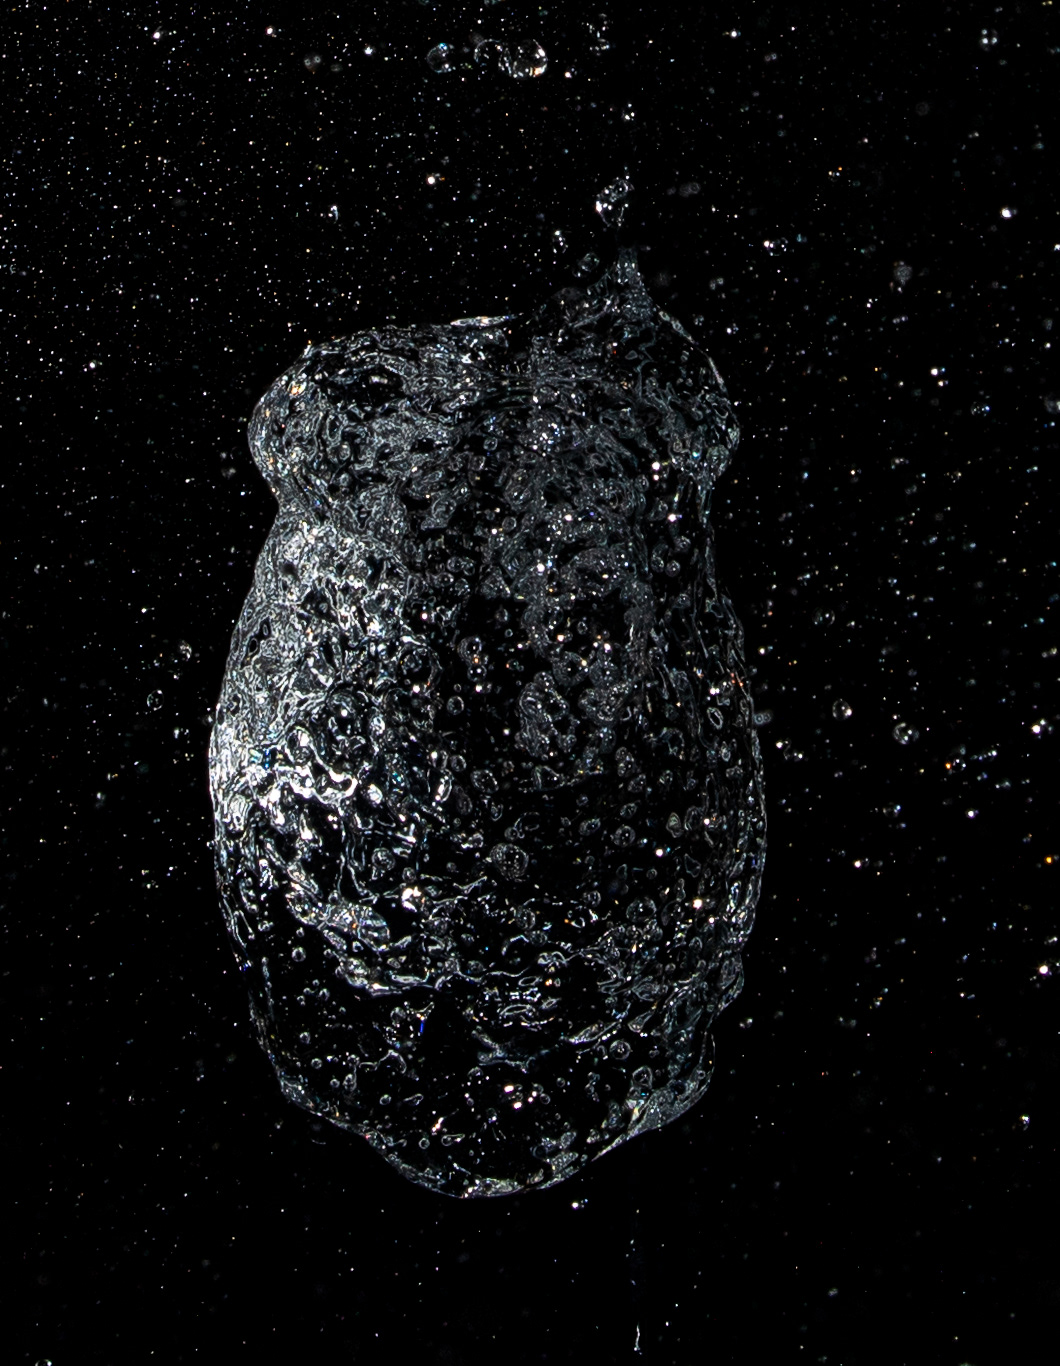
Our last trial involved the speed by which the balloon was hitting the needle. The best results were obtained when David pushed the balloon onto the needle rather than dropping it from above. Again it was very hit and miss, but the results were more promising, and I thought I had a couple of images that I was very happy with, so when the LSH said he'd had enough (despite there still being 2 batches of balloons left), I reluctantly agreed to call it a day.
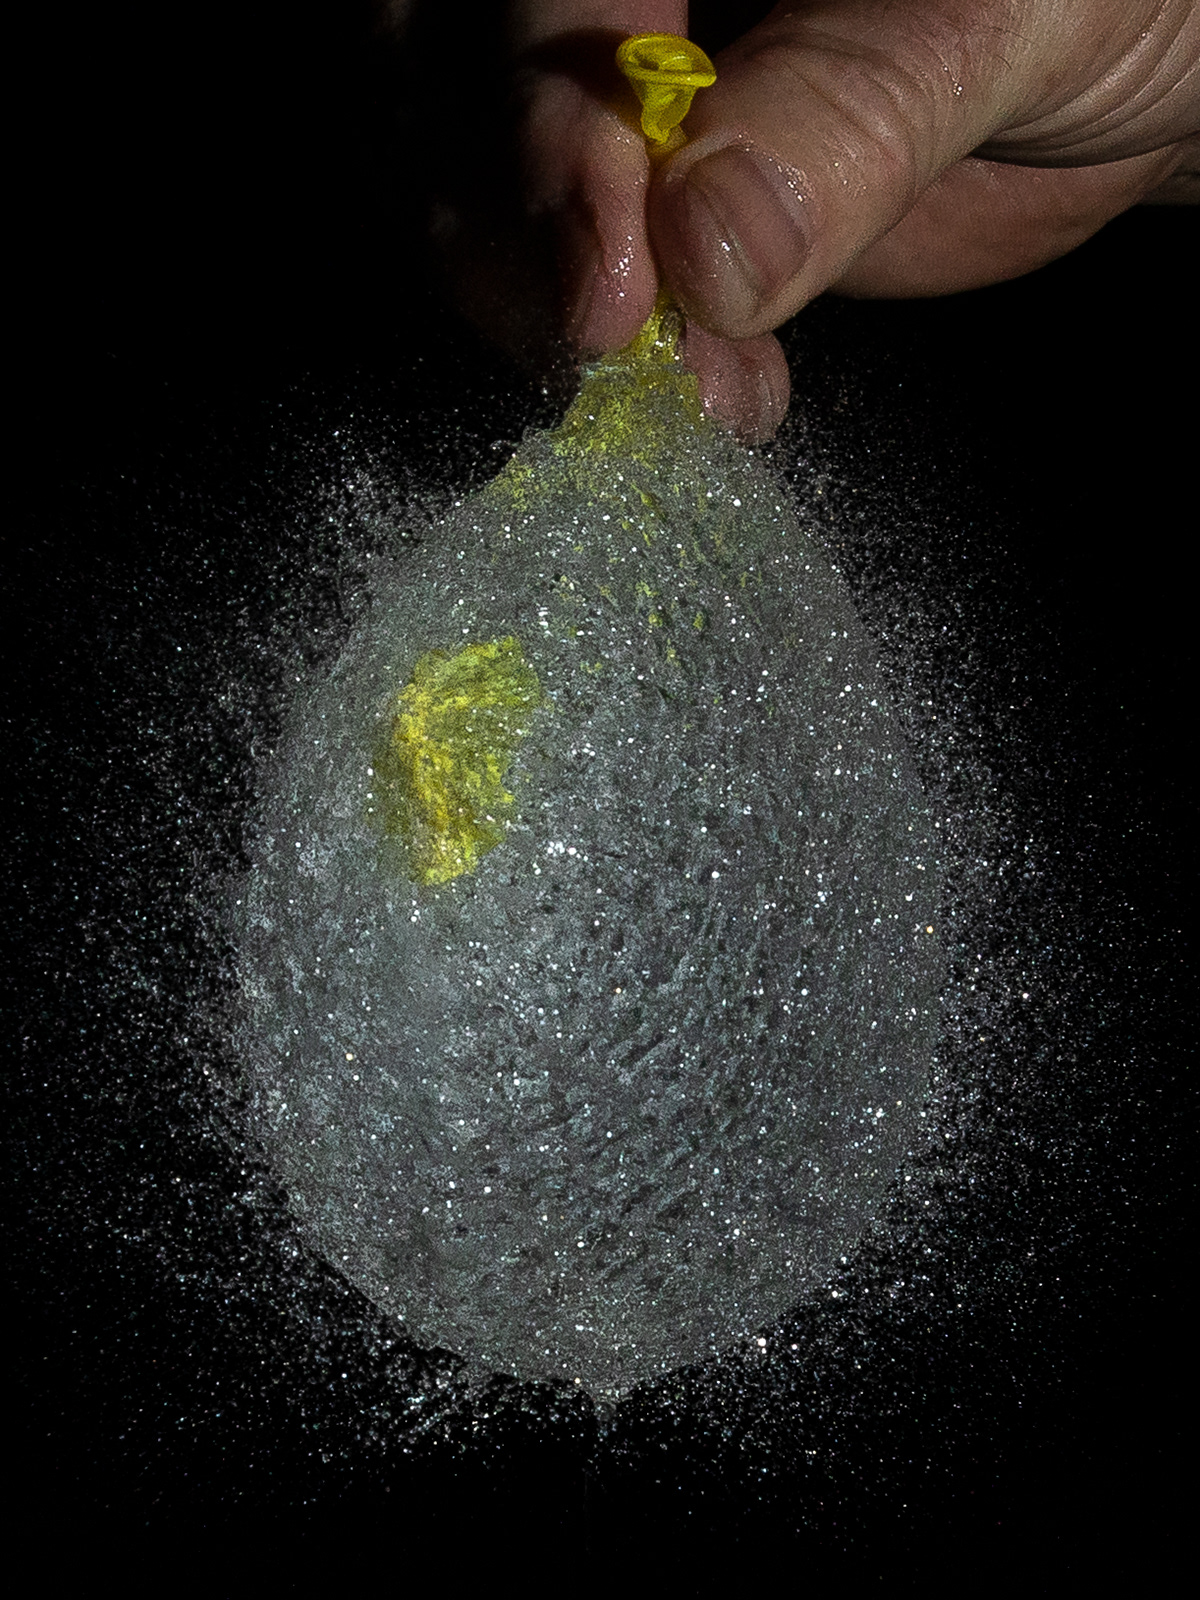
As for post processing, they needed very little editing – all I did was some cropping and using the clarity sliders in Photoshop selectively on the droplets. The picture you see is a combination of three different images taken of three different balloons at three different stages of bursting.
There is a certain amount of satisfaction to be had from overcoming all these obstacles and keep trying and trying and trying again until you get the results you want.
In short, in order to achieve this photo, we spent around five hours over two nights, with 148 balloons spraying water everywhere (I constantly had to wipe the camera lens, and poor David was soaked) and leaving a trail of multicoloured mess on the patio.
Patience? Perseverance? Dedication? Persistence? Stubbornness? Or just OCD? You decide.