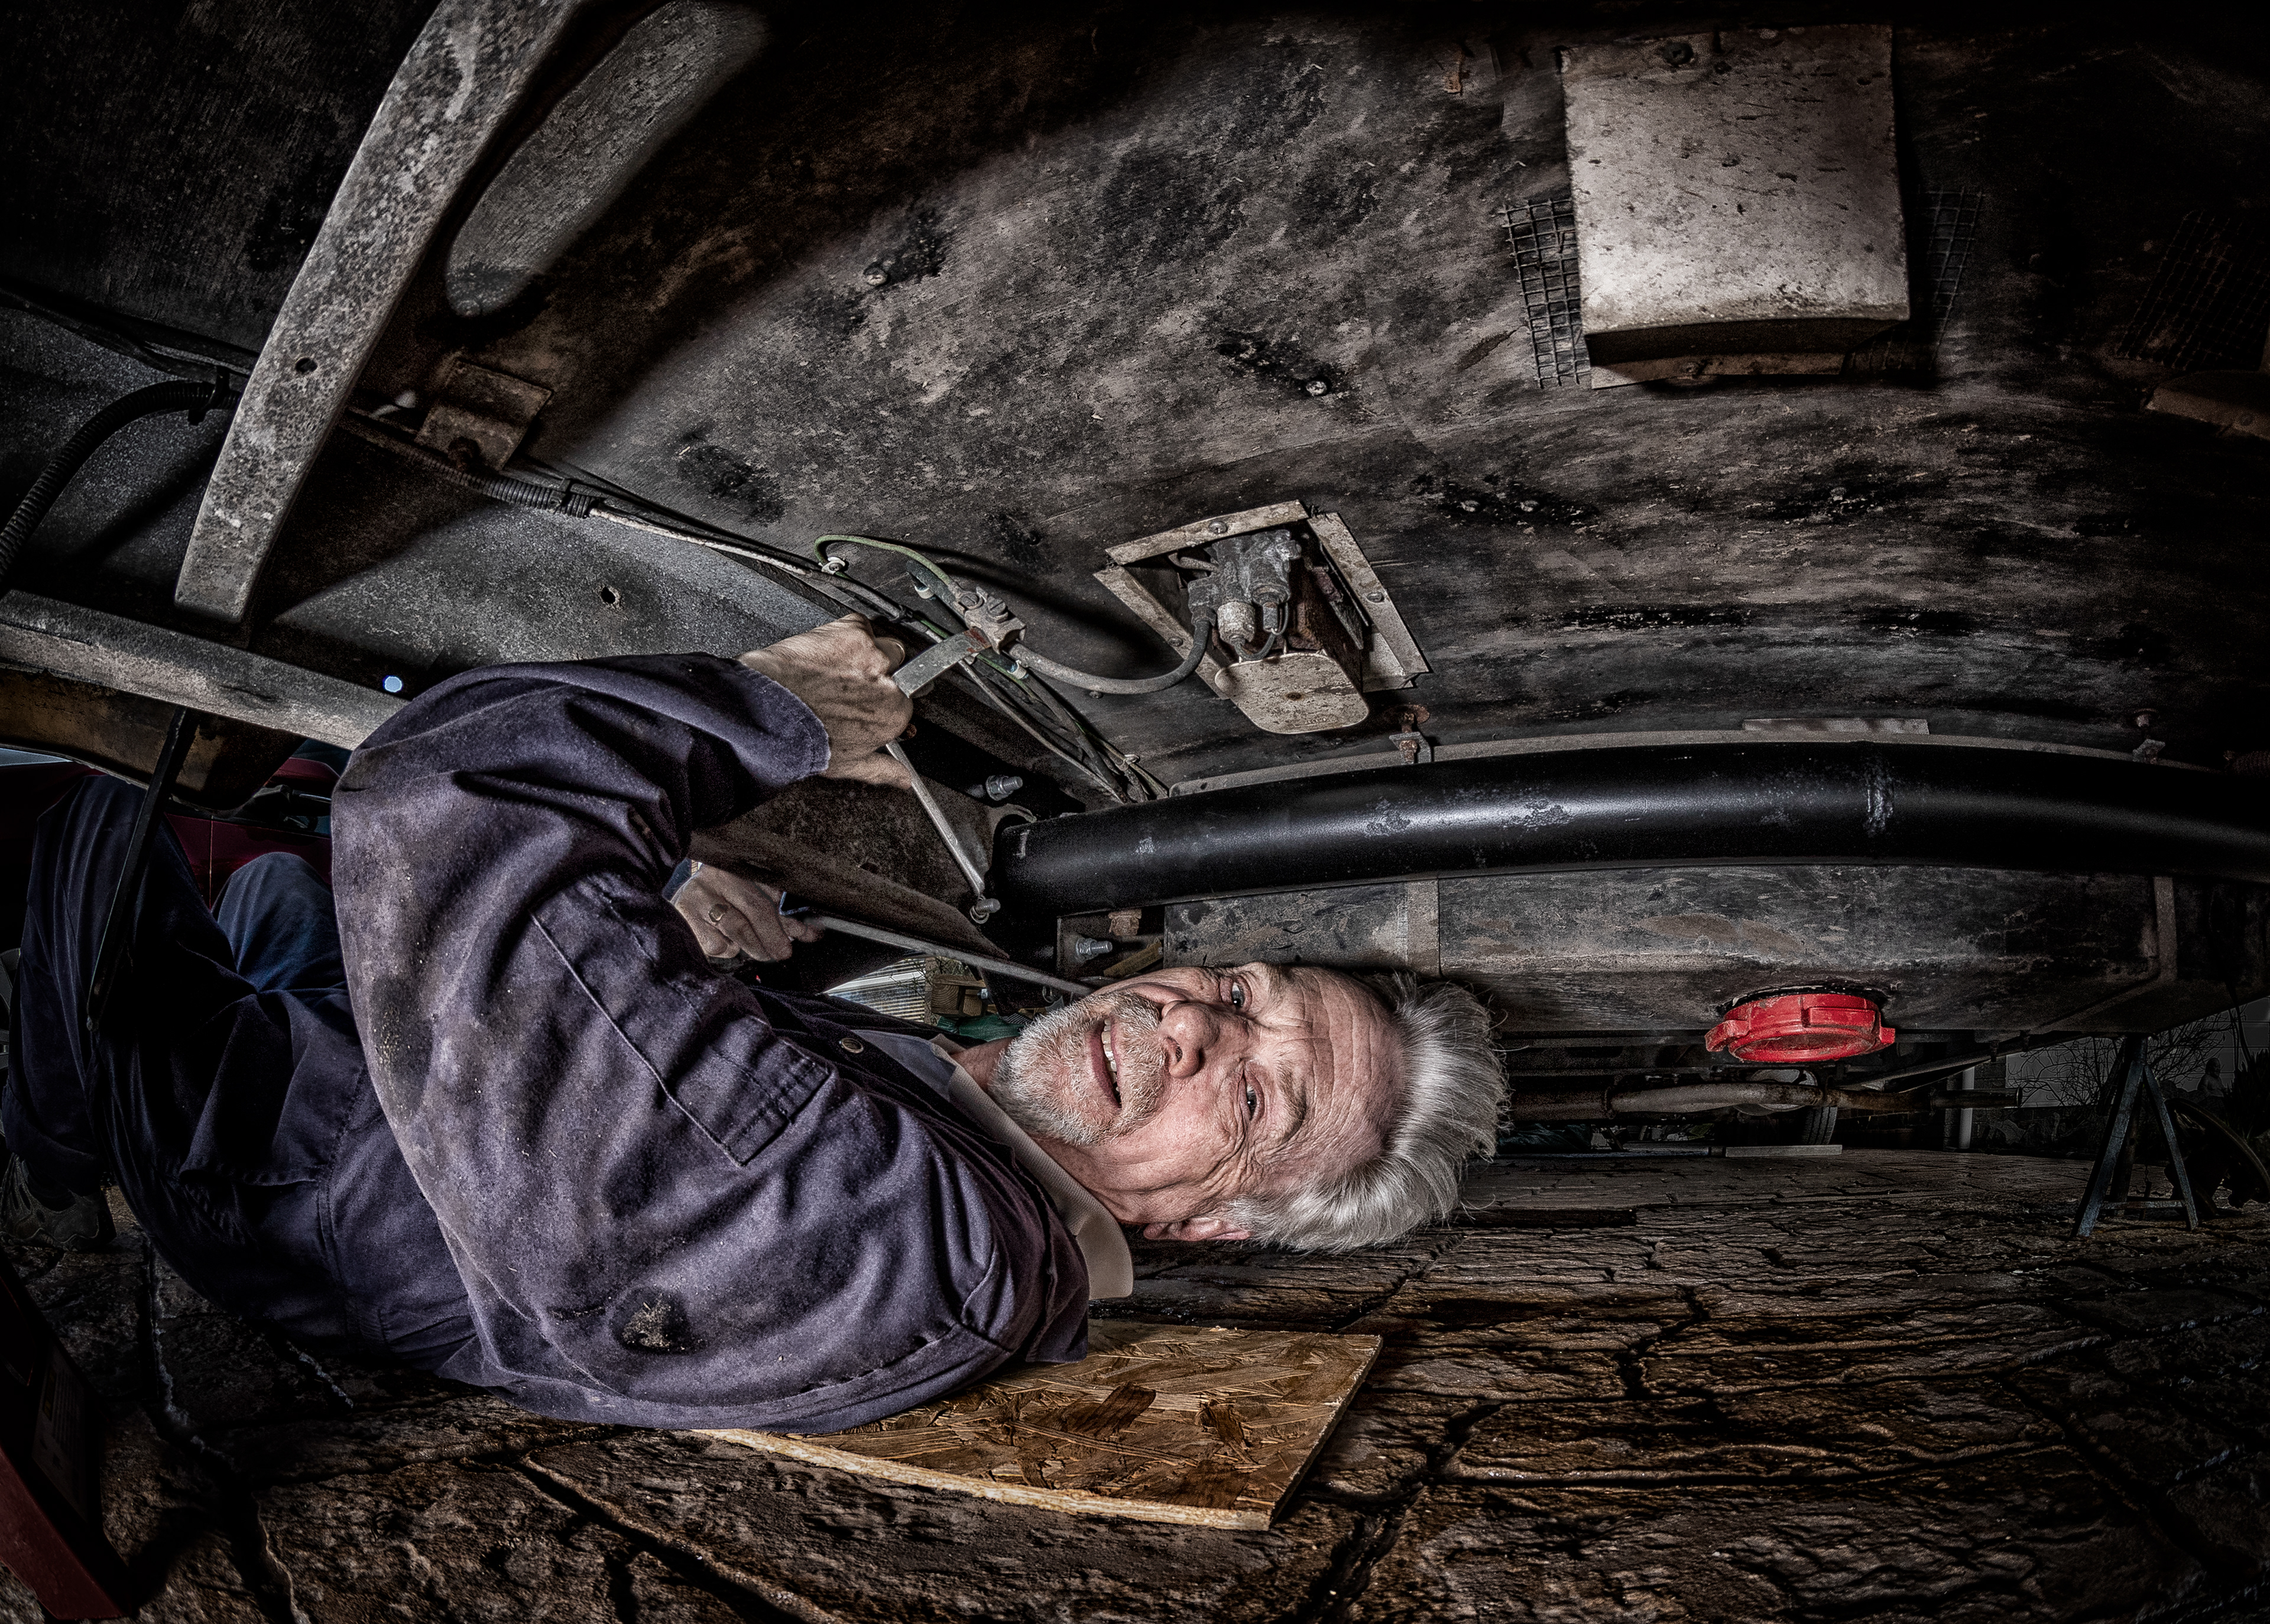
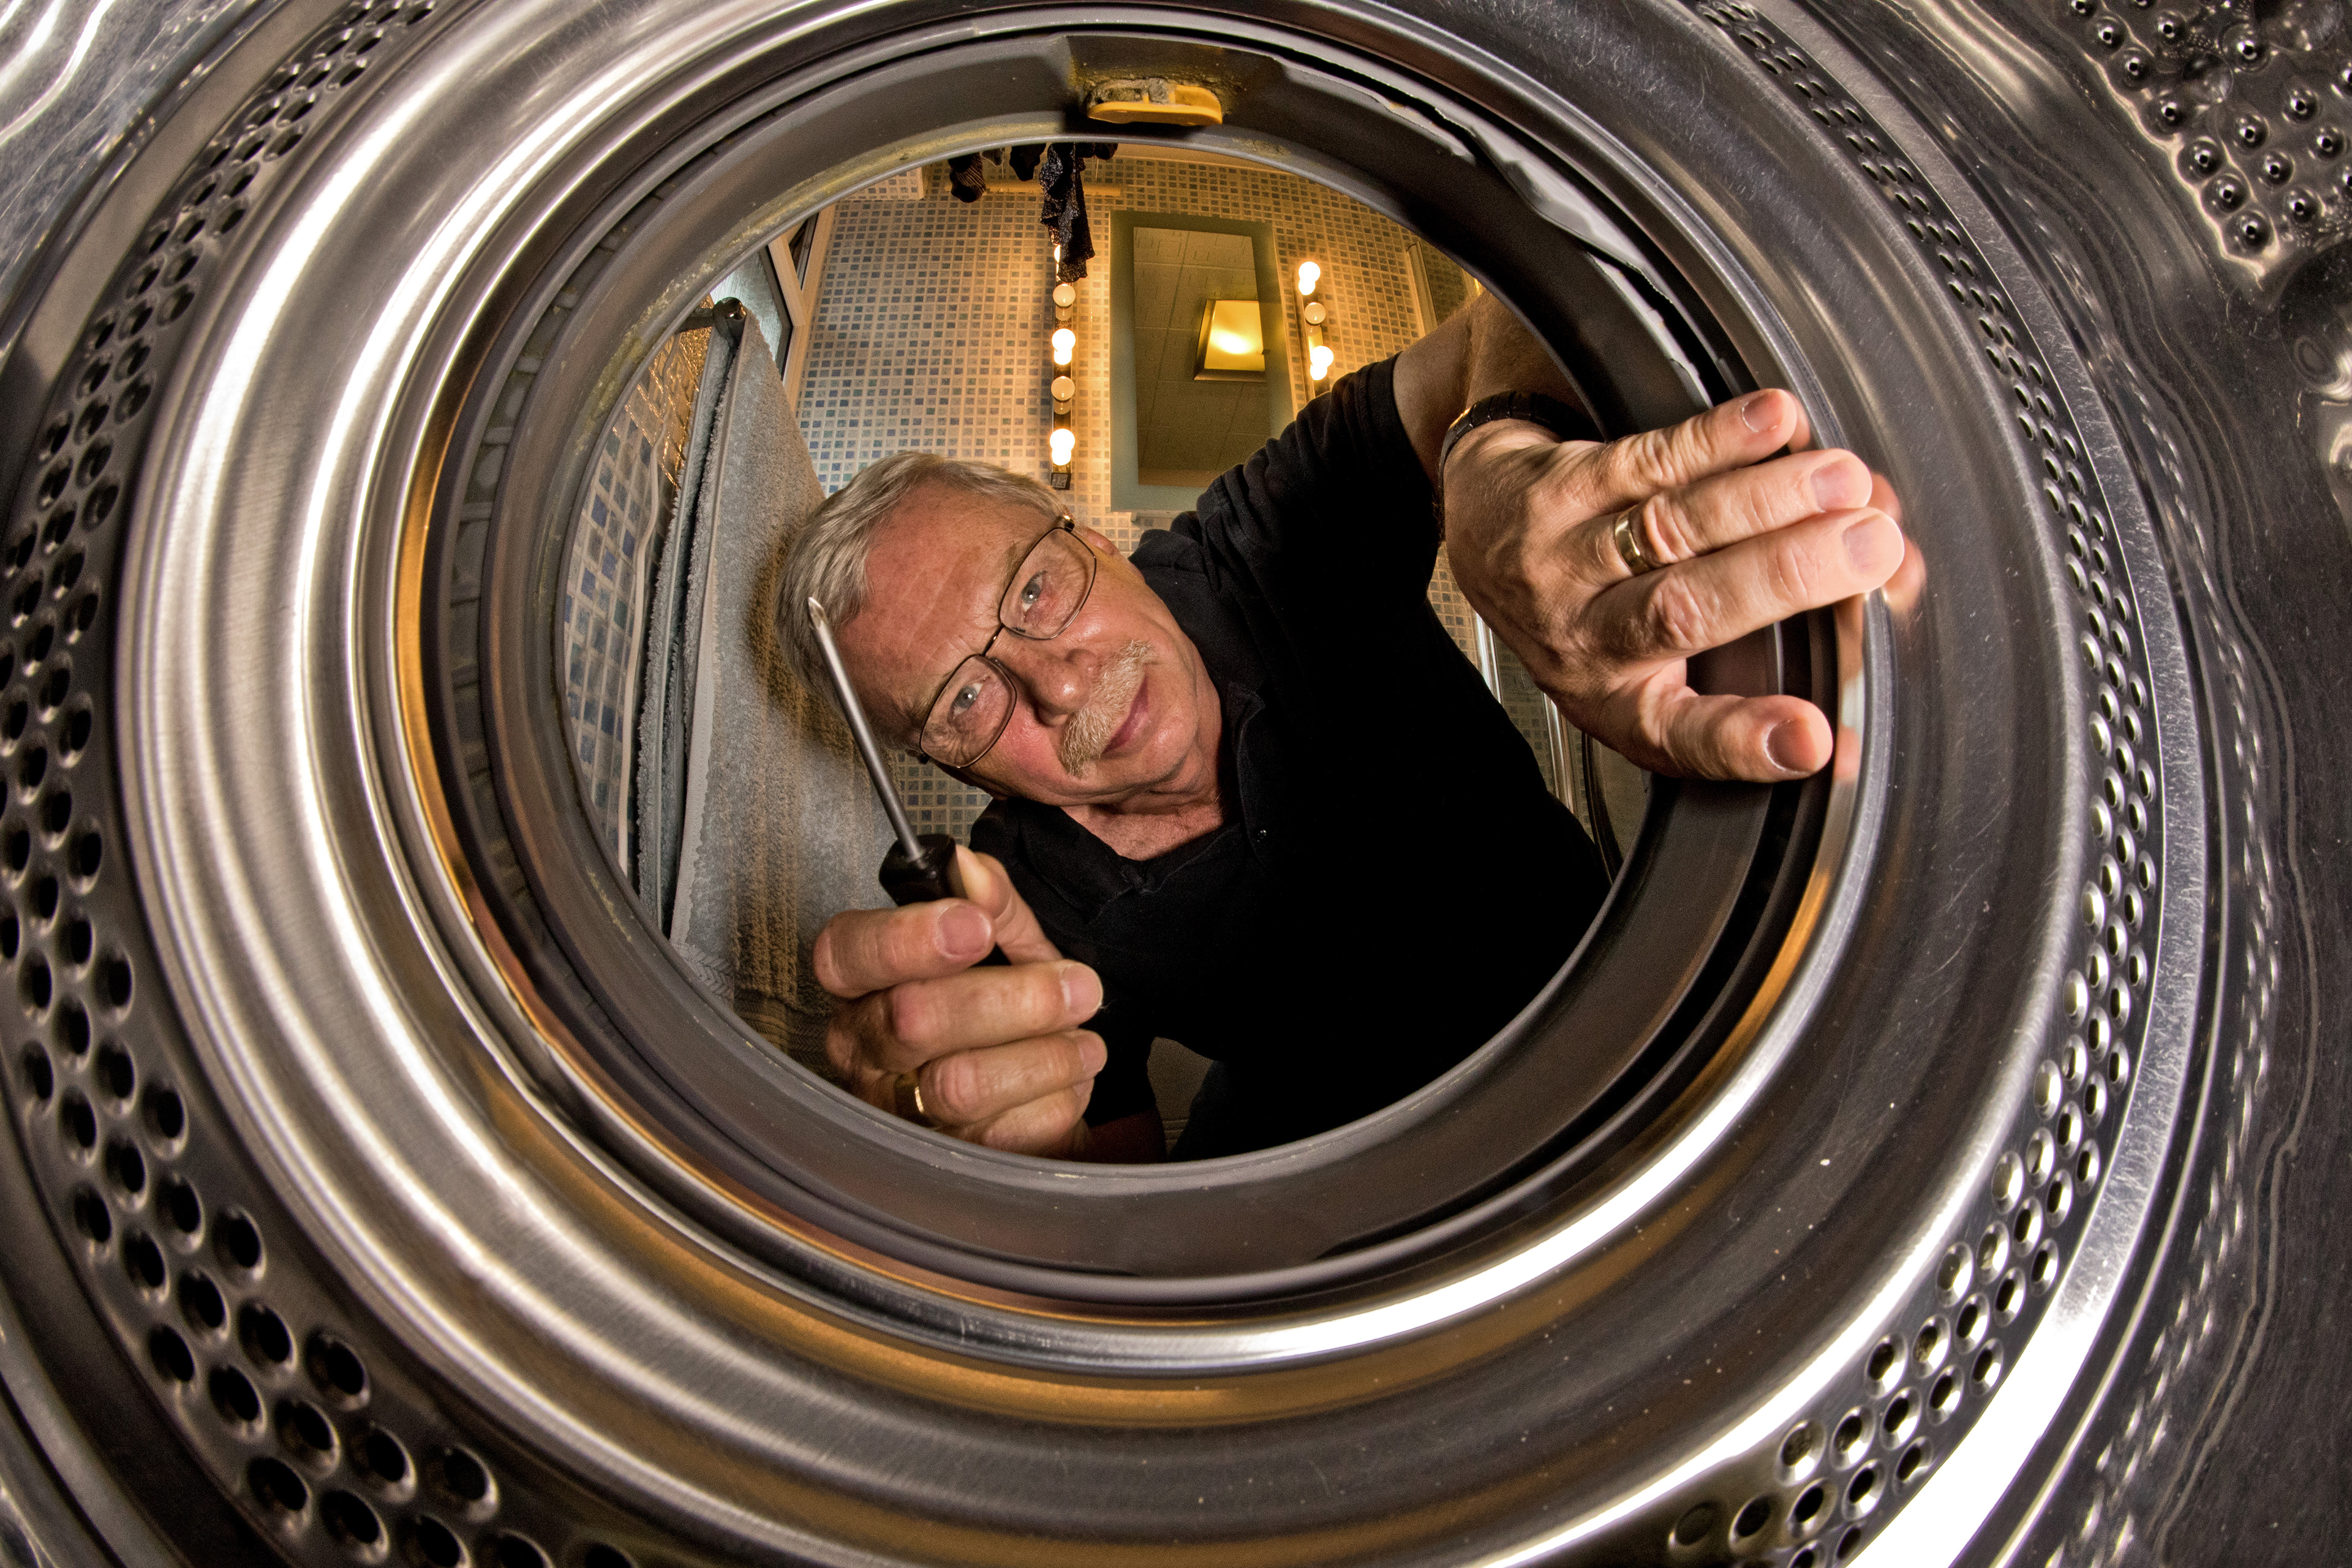
The LSH gets down and under.
After the axle collapsed on our RV, David removed it, sent it to Scotland for refurbishment, and re-fitted it. He had to cut the brake pipe in order to get it off, so he has re-created the bits he needed, and is now putting the final touches on the repair job.
In order to create (or stage) this photo, there was no way I was going to lie down and crawl under the van: a) I would never get up again, and b) I suffer from claustrophobia and the mere thought of it sends me into shivers!
Instead I placed my camera on a gimbal, fitted with a wide angle lens and a flash gun off to the left in the image. David dragged the camera and light into position, and I operated it via my phone from a safe - and vertical - distance.
Canon 8-15mm @ 10mm
f/9
1/320 sec
ISO 400
Edited in Photoshop, with a couple of filters in Nik Colour Efex PRO 4 (Detail Extraction, Bleach Bypass, Lens Vignette)
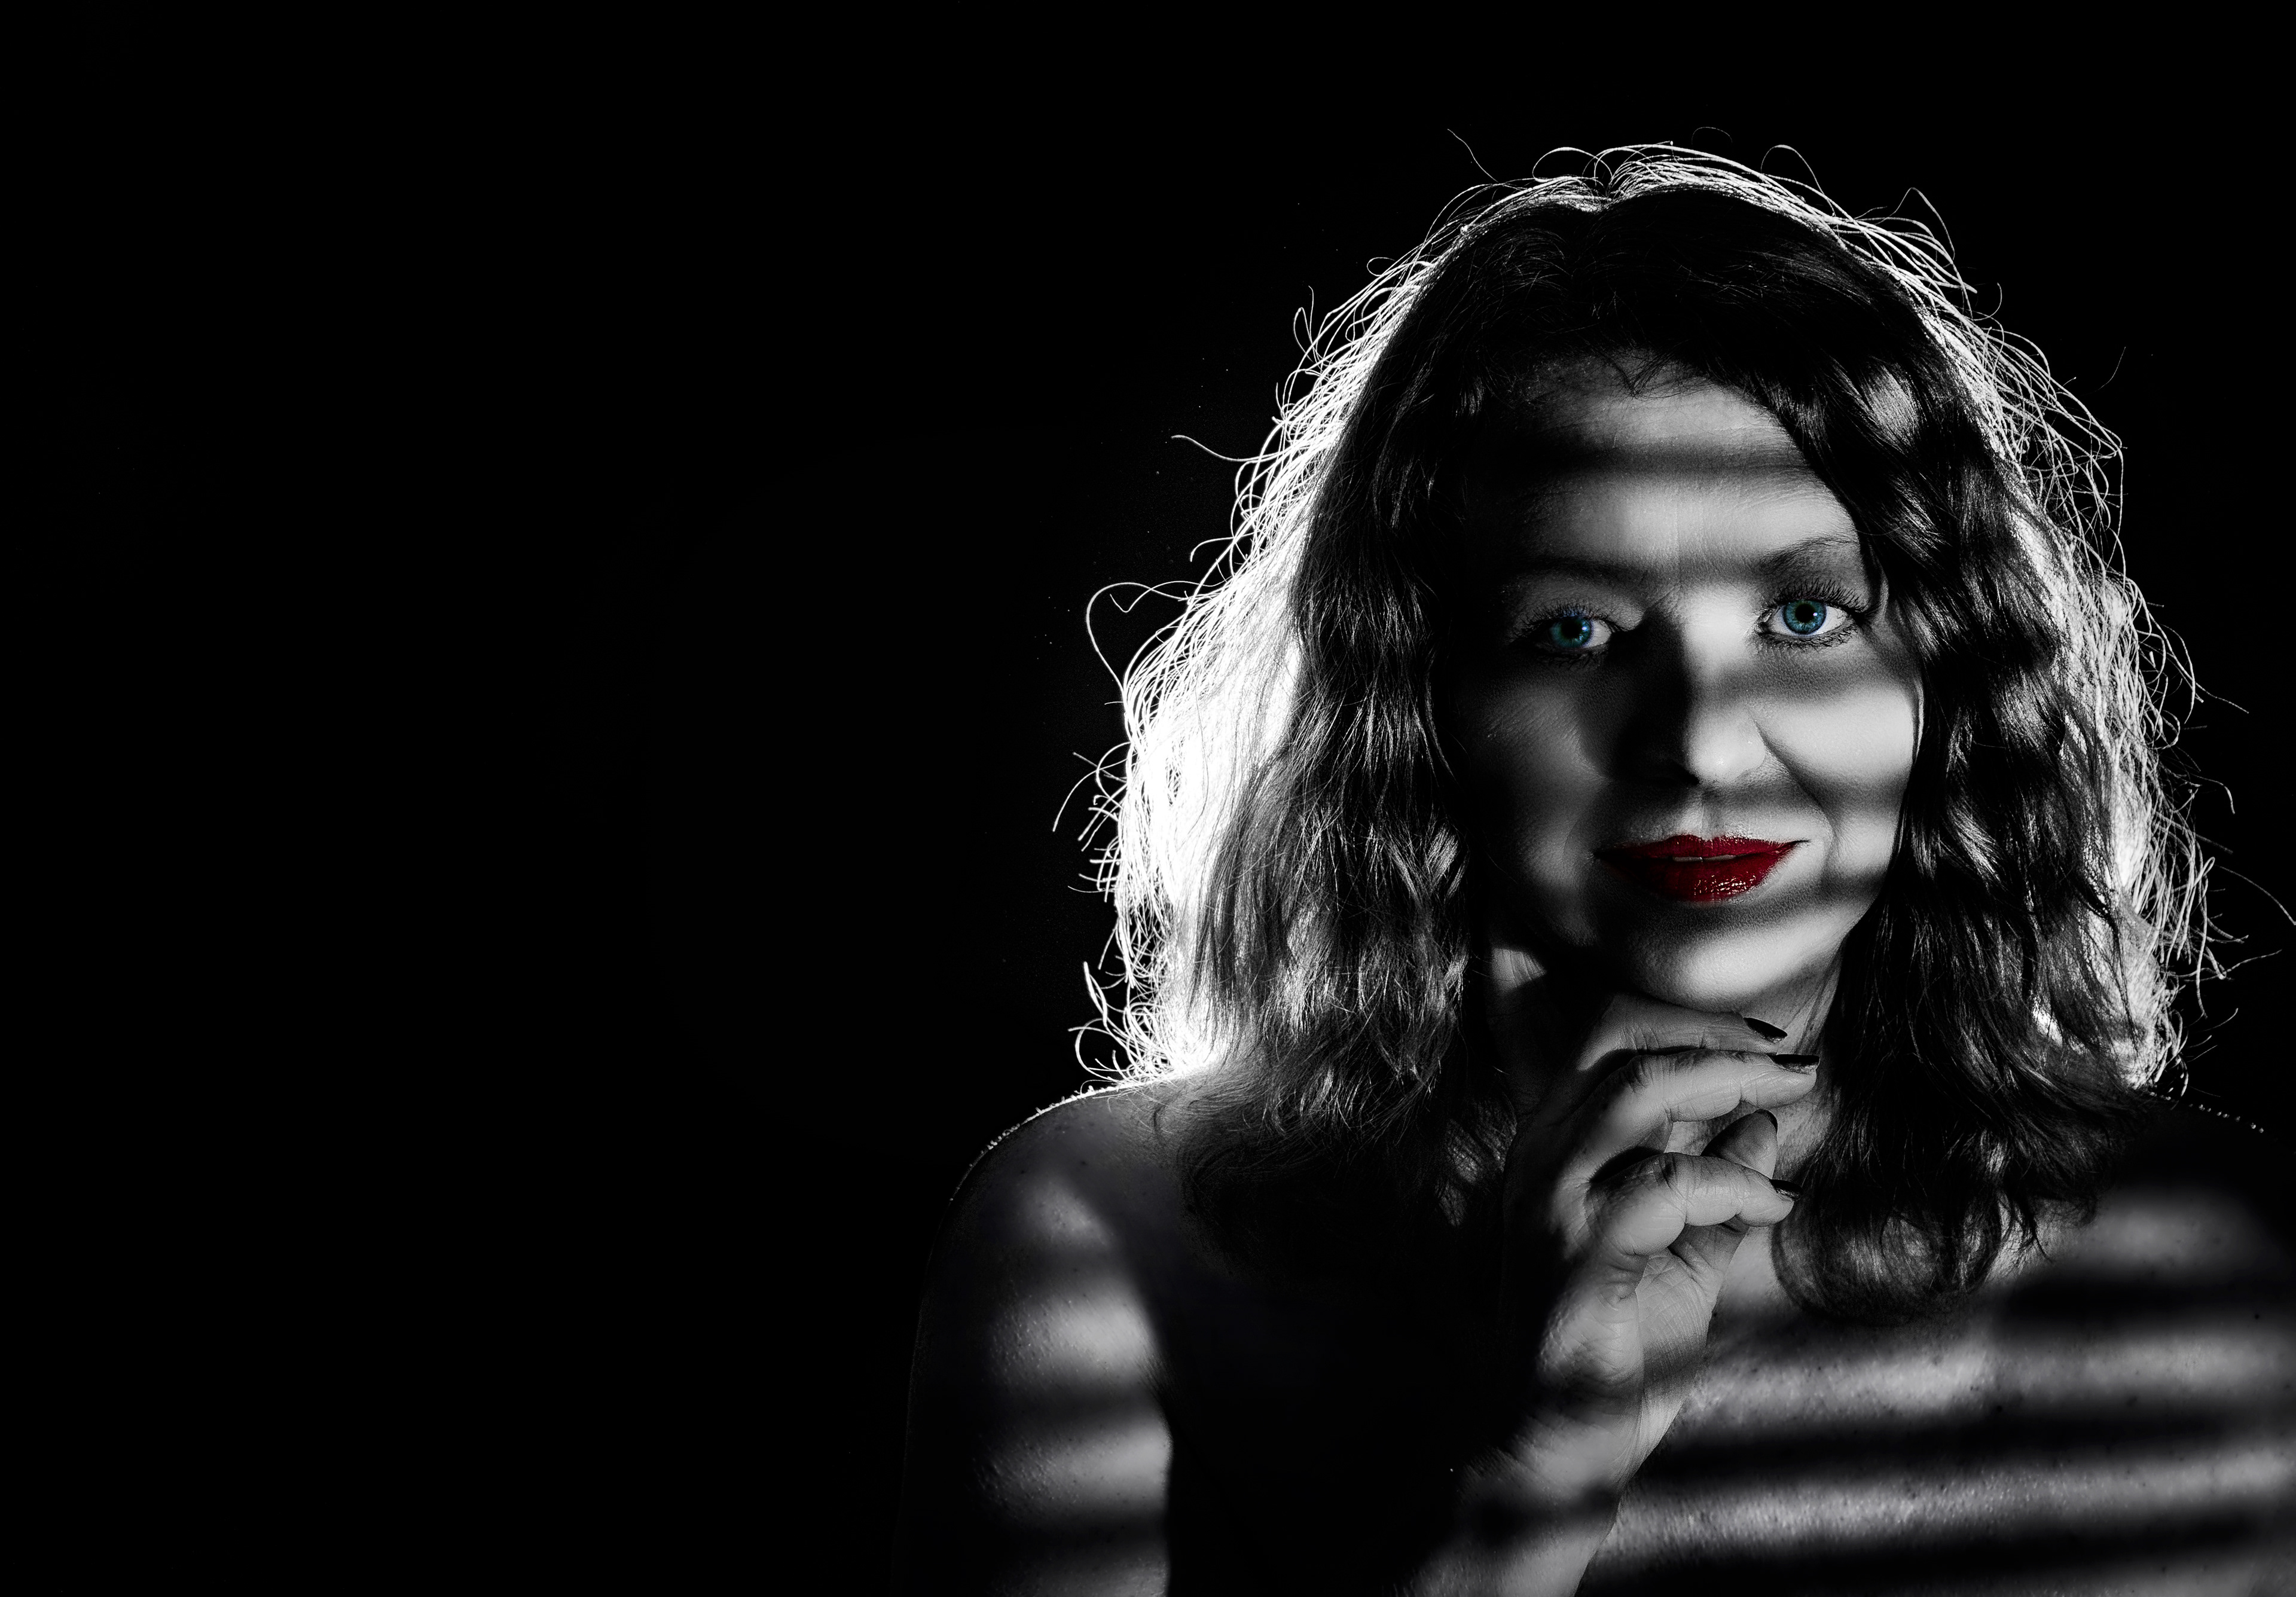
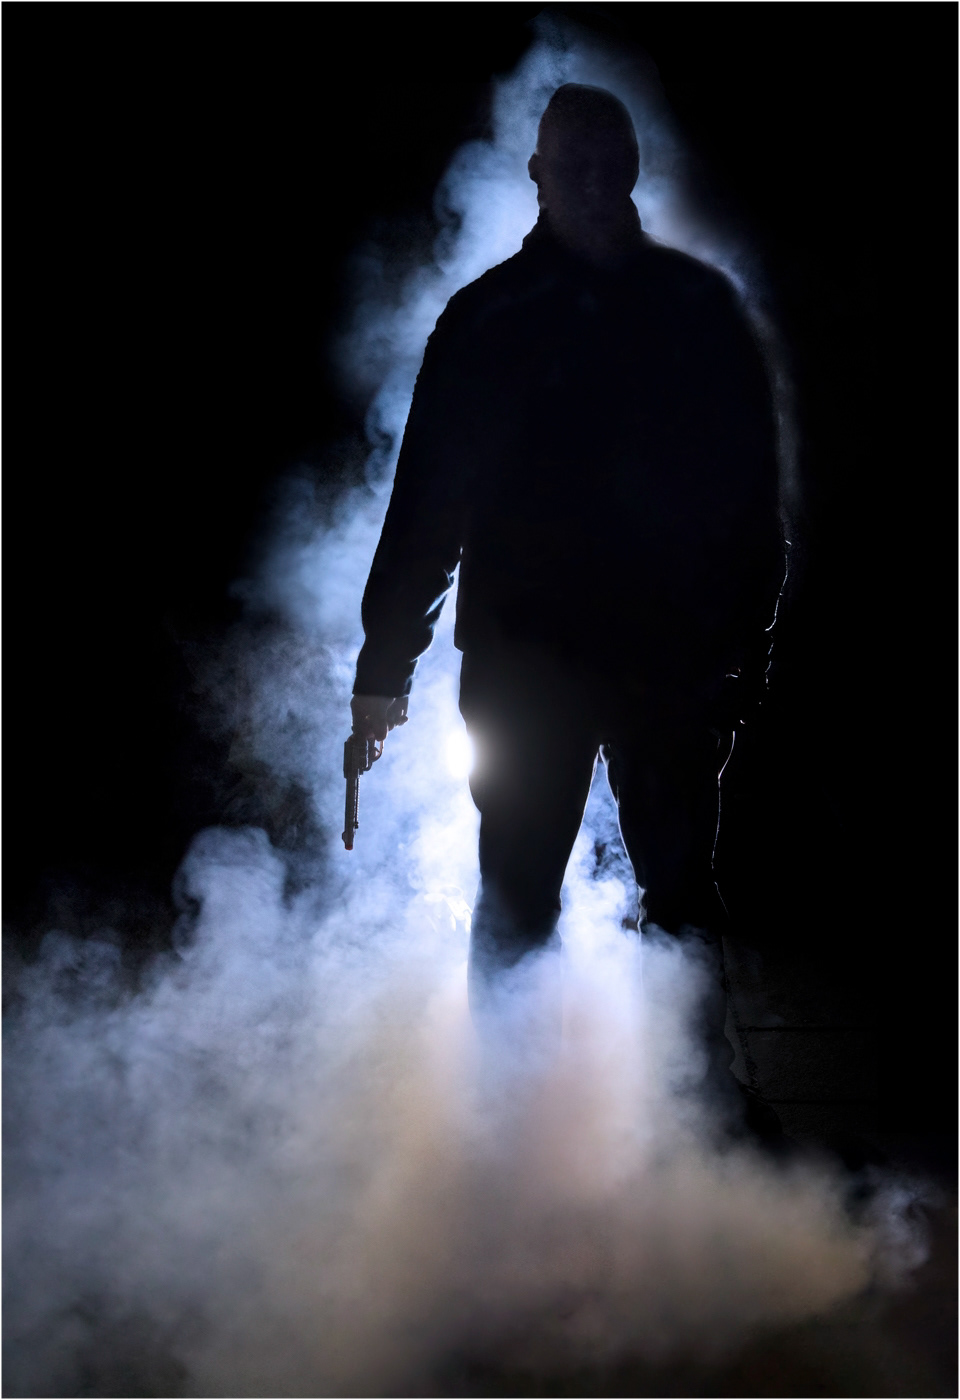
The idea was to recreate a 1950s film noir look.
To get the heavy shadows covering my face, I created a striped gobo from a black foam sheet which I cut into thin strips and stuck on a piece of plastic, mounted in a frame to keep its shape. I had the LSH hold this between me and the main flash gun (which was at a 45° angle to my left), moving it back and forth until I got the desired effect.
Behind me I hung a black velvet cloth from my glass cabinet, held in place by a couple of heavy vases (it's all high tech this shoot, you know! ) I also placed a flash gun between me and the background, facing forward, to create the rim light.
Using my phone to operate the camera, I was able to see how I should pose to get the look I wanted; although getting the shadows in just the right place took some trial and error, as obviously they would only be visible once I fired the camera, thus activating the flash.
The image is heavily edited in Camera Raw, Portrait Pro (to try and make me look 35 years younger), Nik Silver Efex Pro 2 (for the black and white conversion), Nike Define 2 (to get rid of some noise) and Photoshop to add drama and the colour pop.
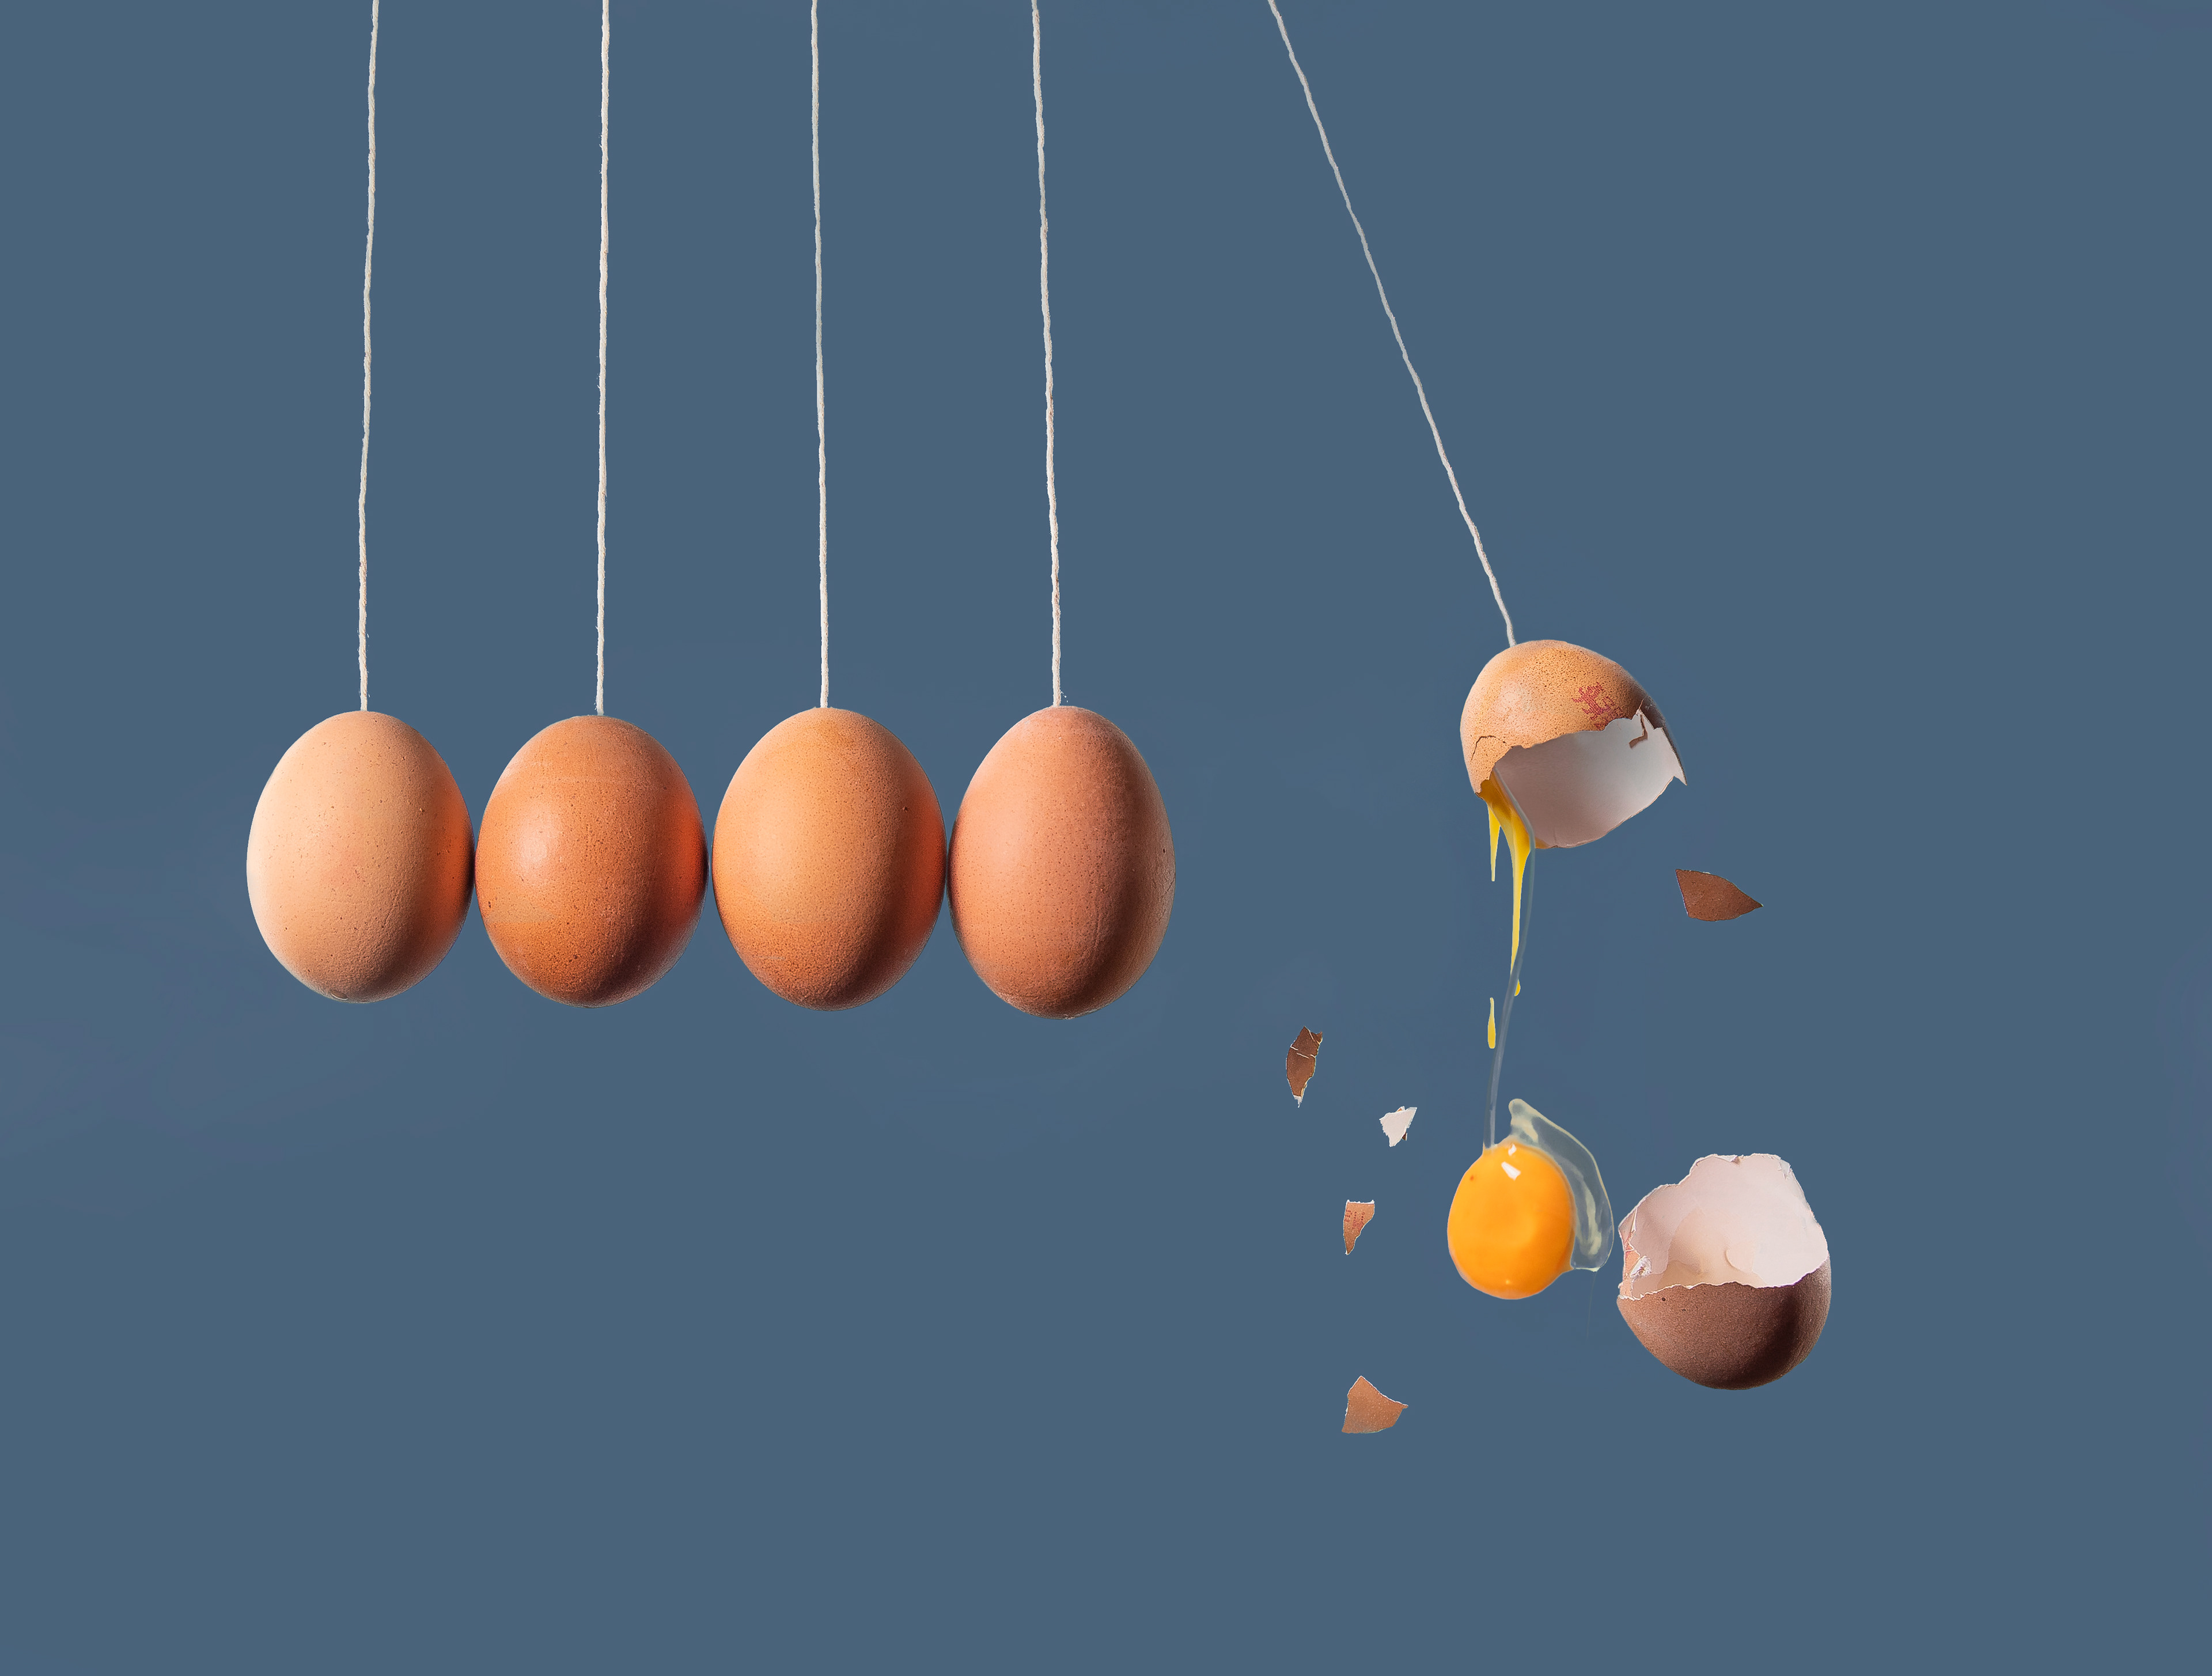
I only had to break four eggs to get the timing right for this image, with the LSH pouring the egg through a hole in the top of the broken shell on the right. That shell was attached a metal BBQ skewer held in place with a clamp. The rest of the image (the four 'hanging eggs - which incidentally were hard boiled), lower egg shell and the little broken bits) was taken as a flat-lay on a fish tank on its side with the blue paper underneath. Thankfully it was pancake day, so I could use up the raw eggs!
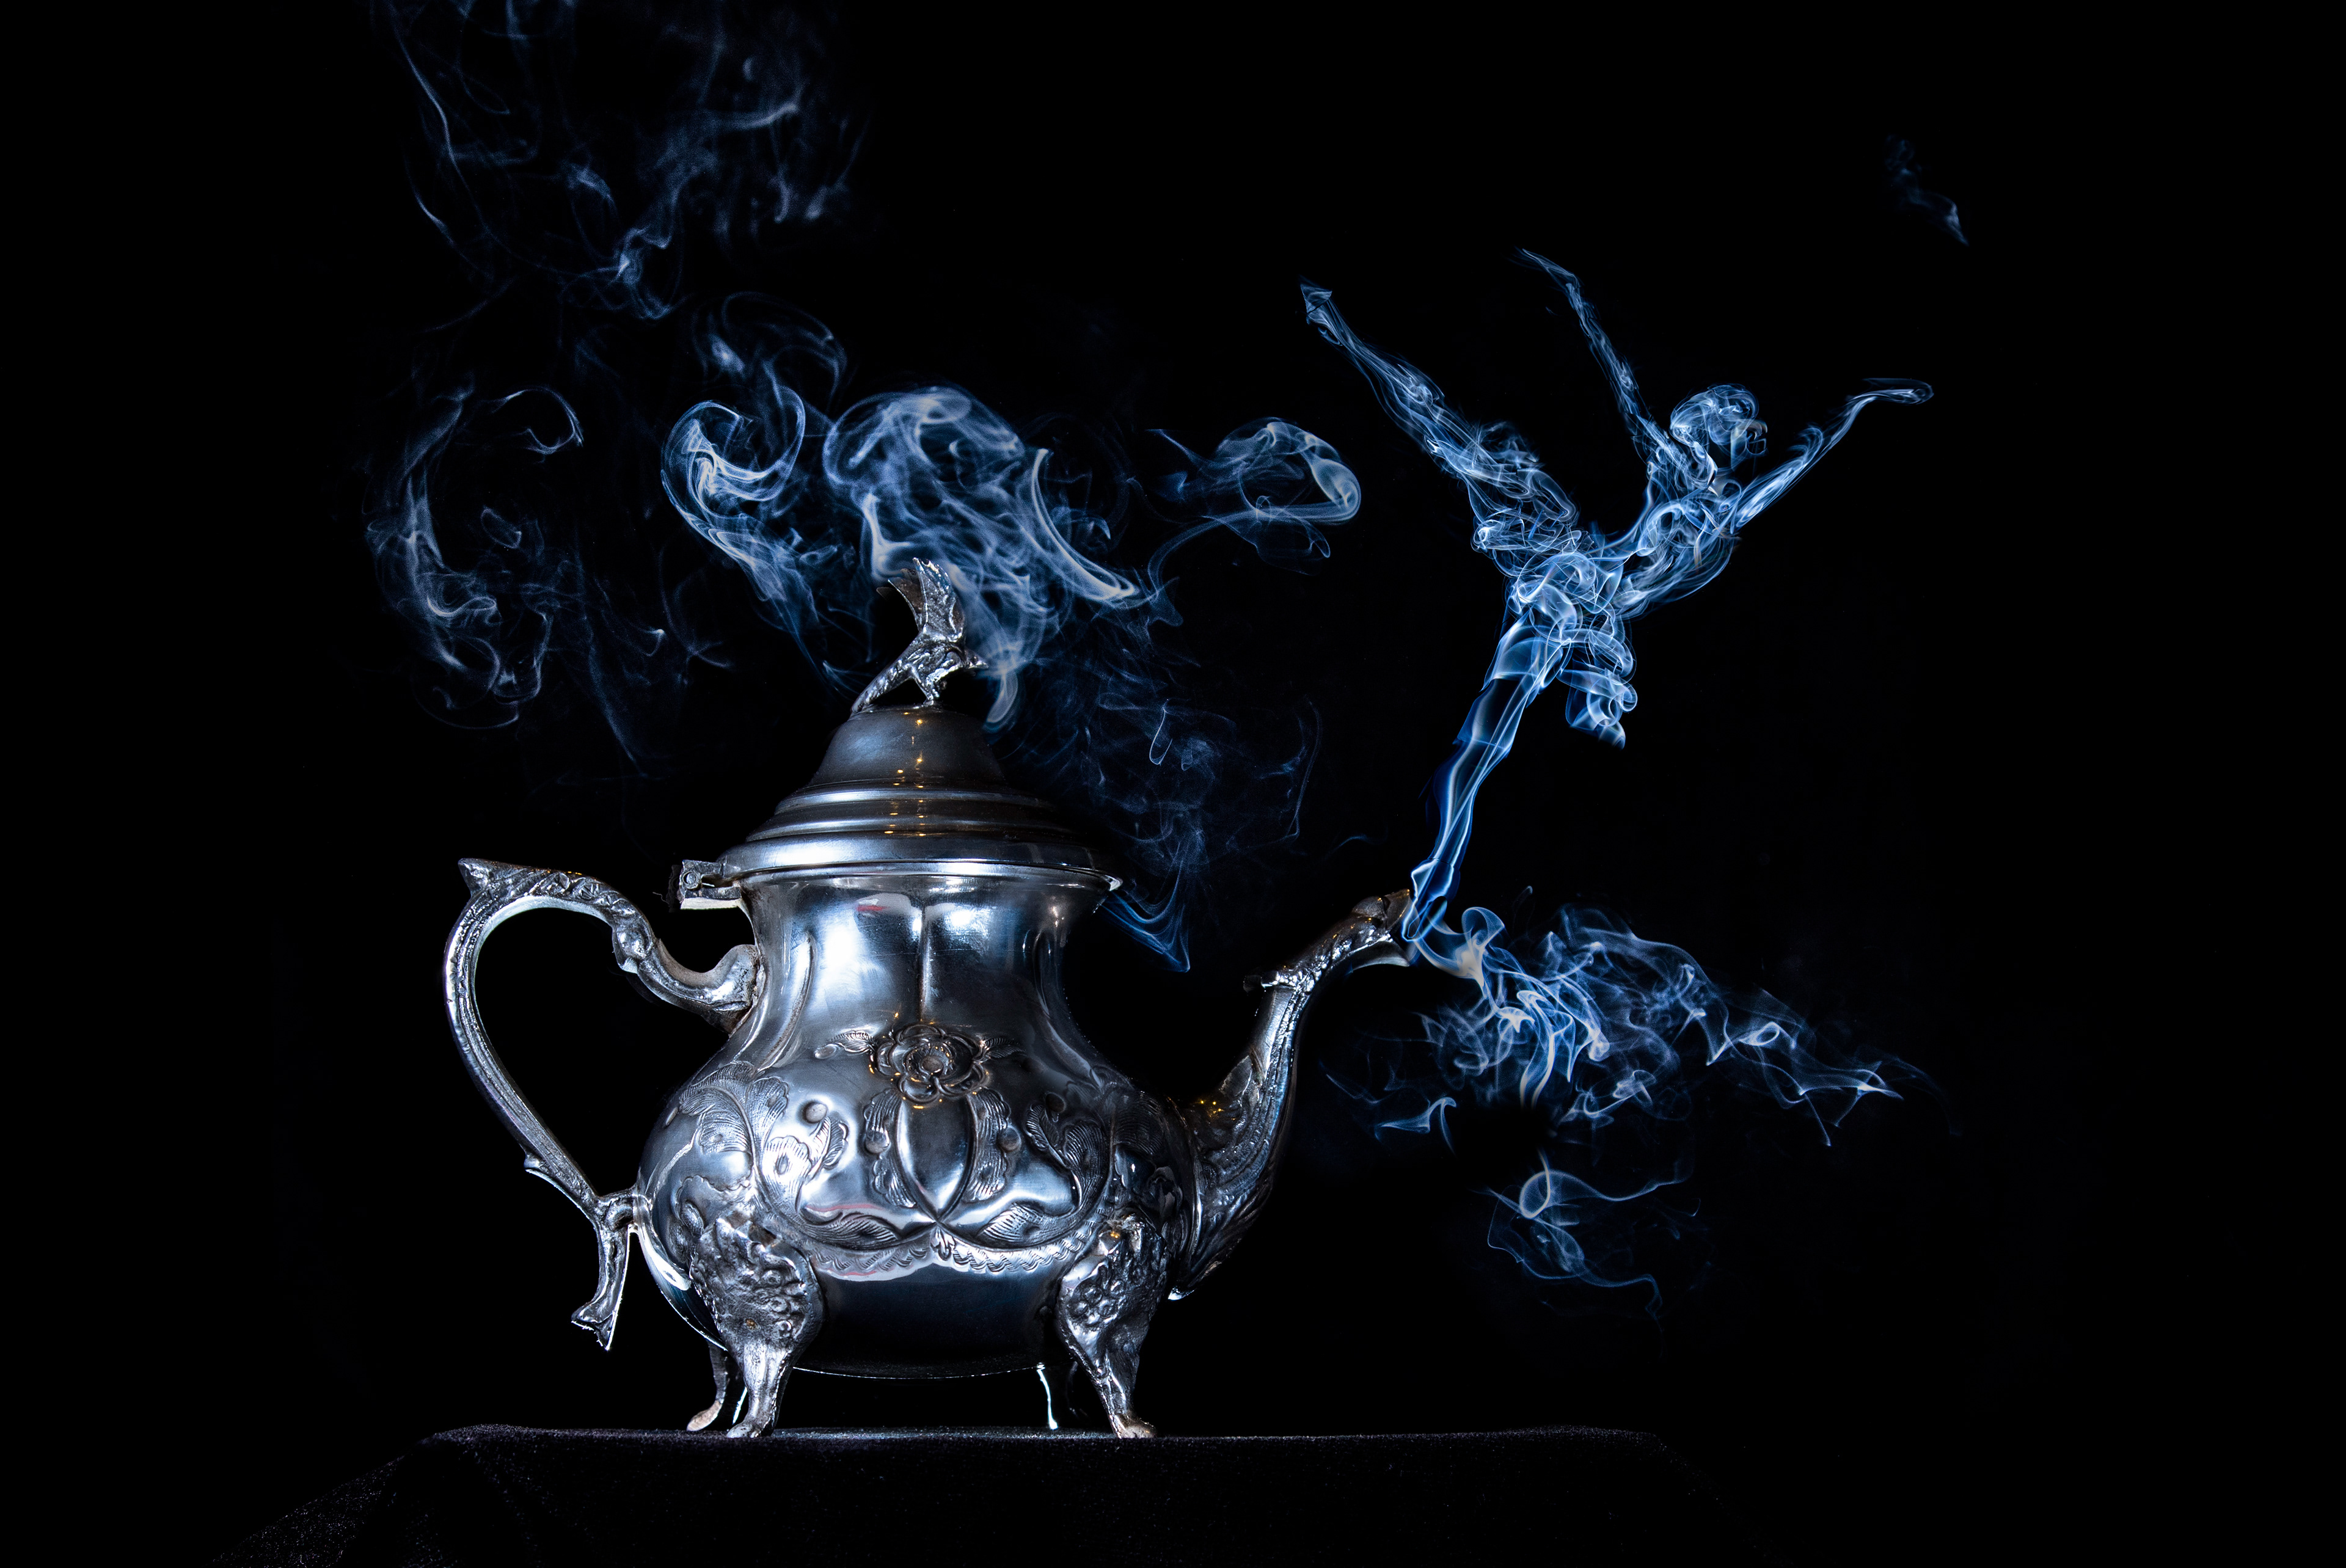
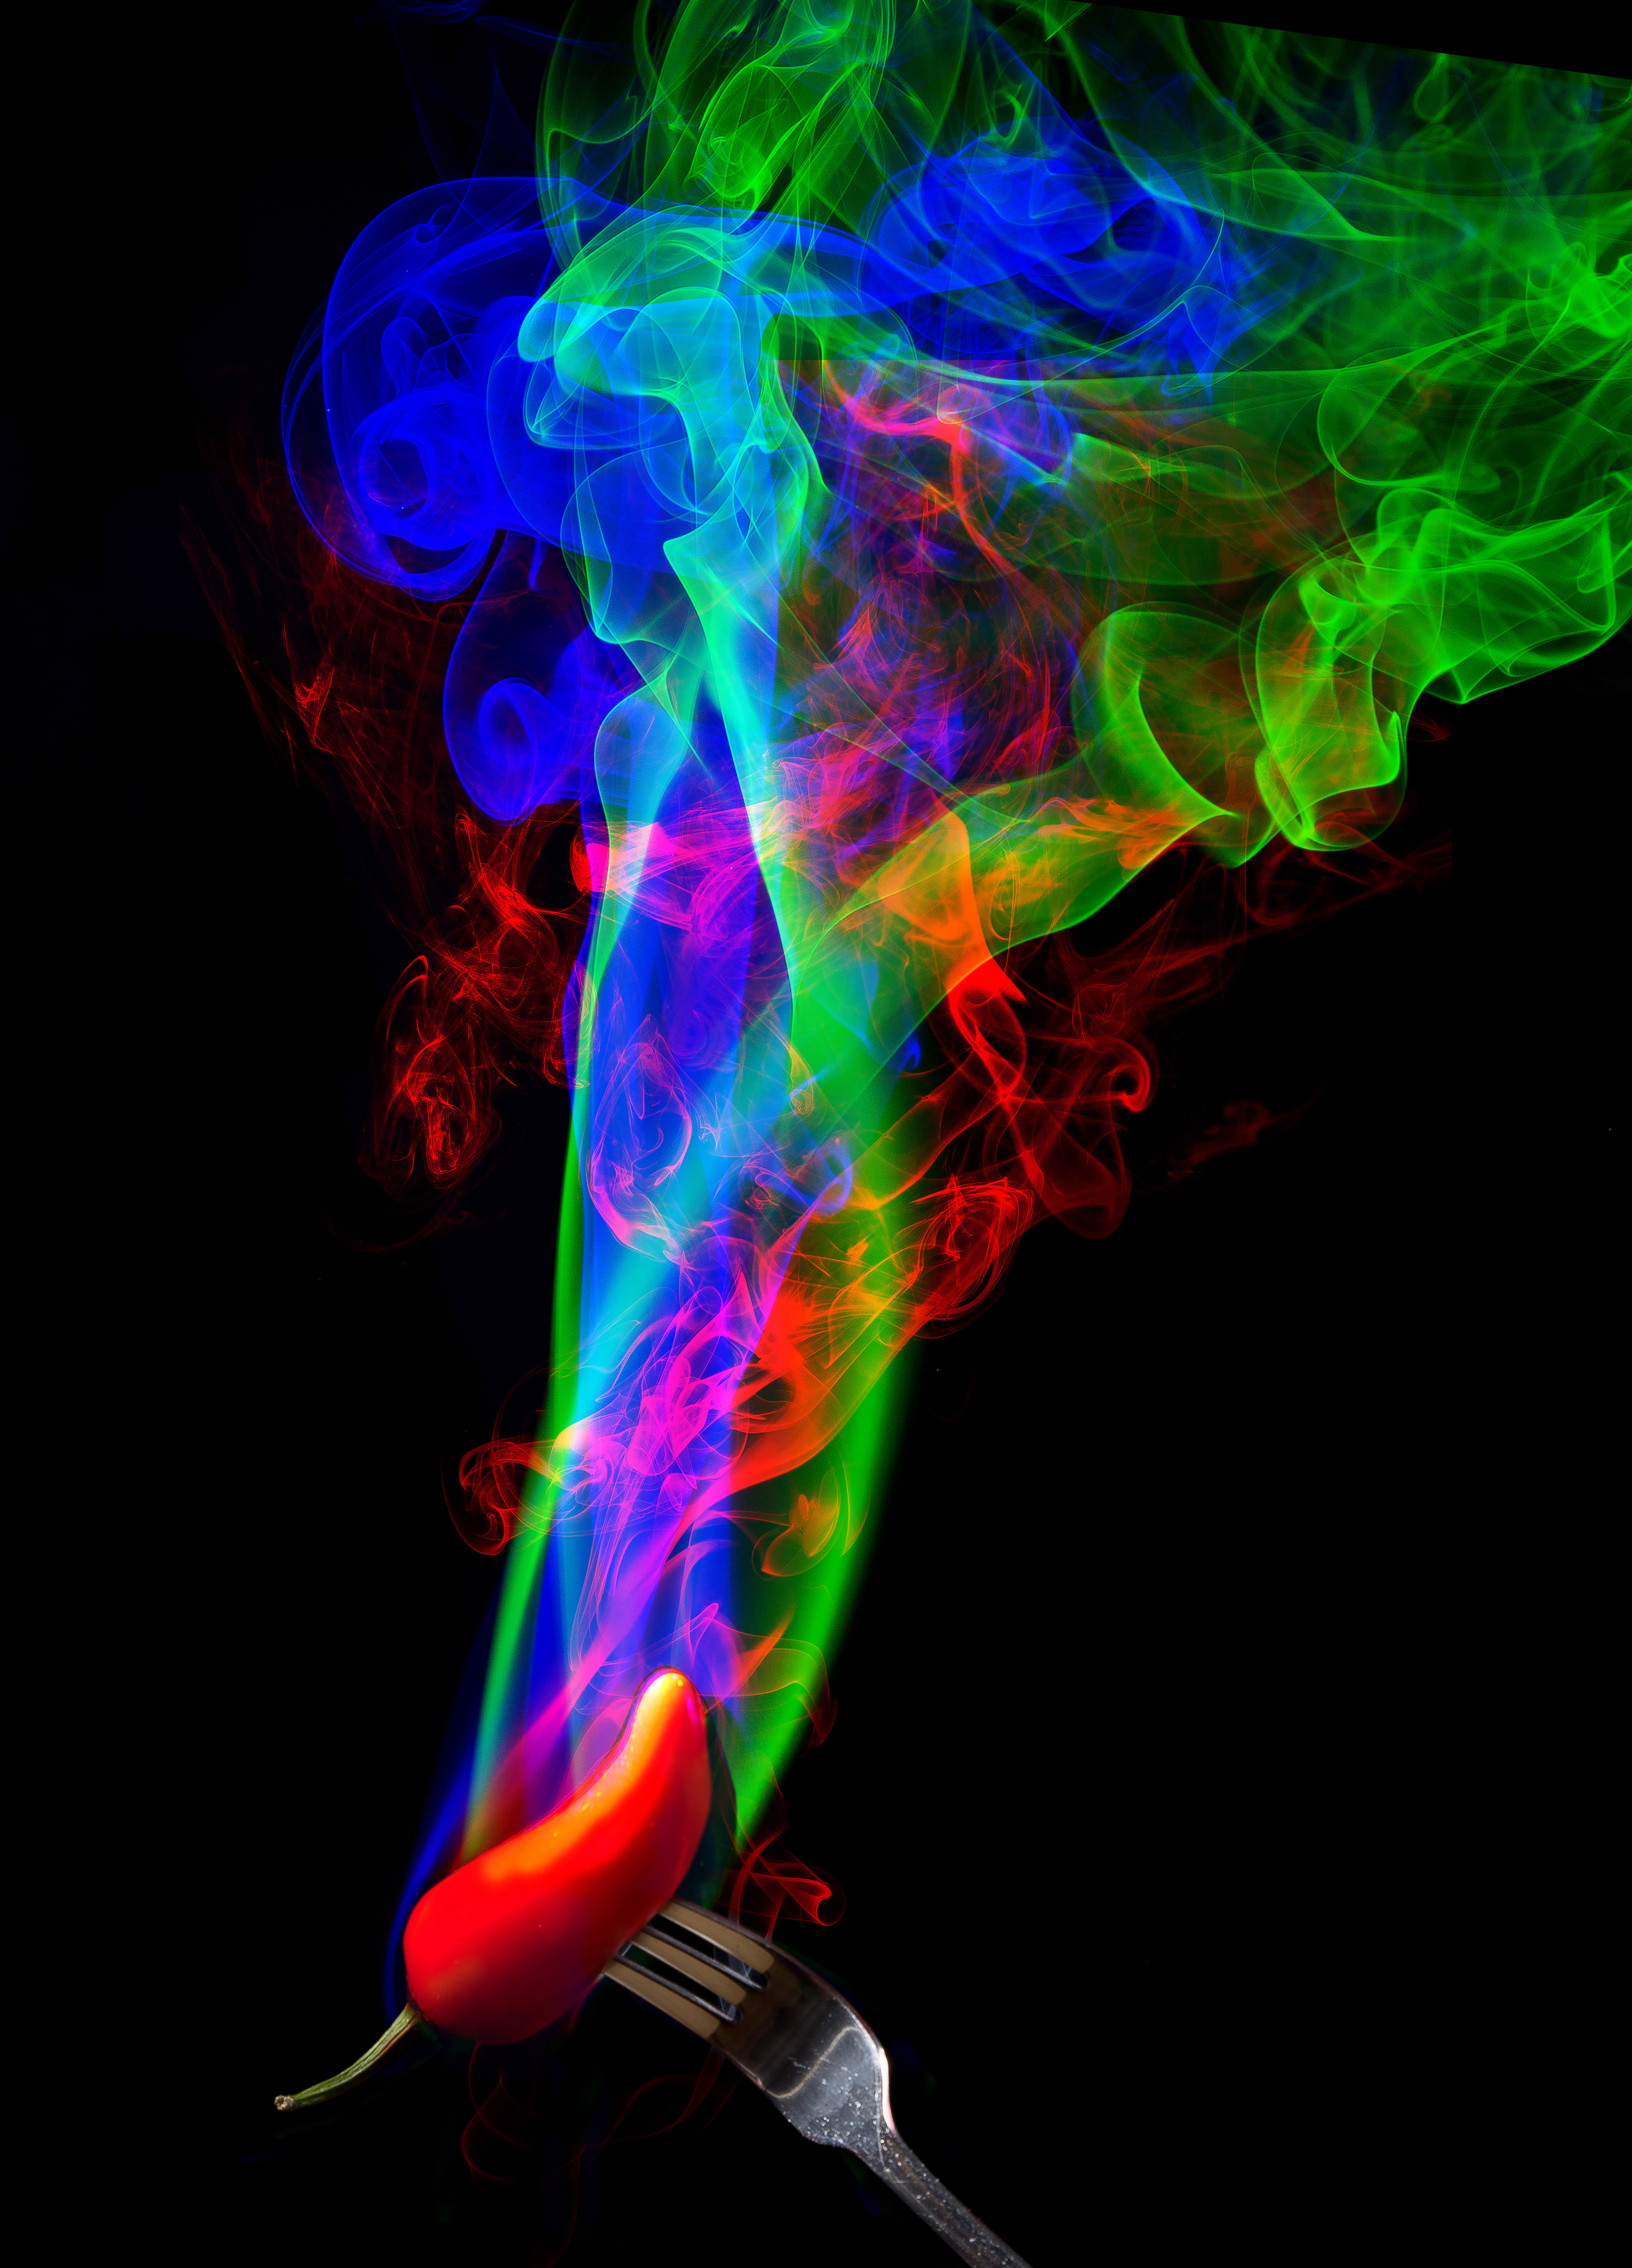
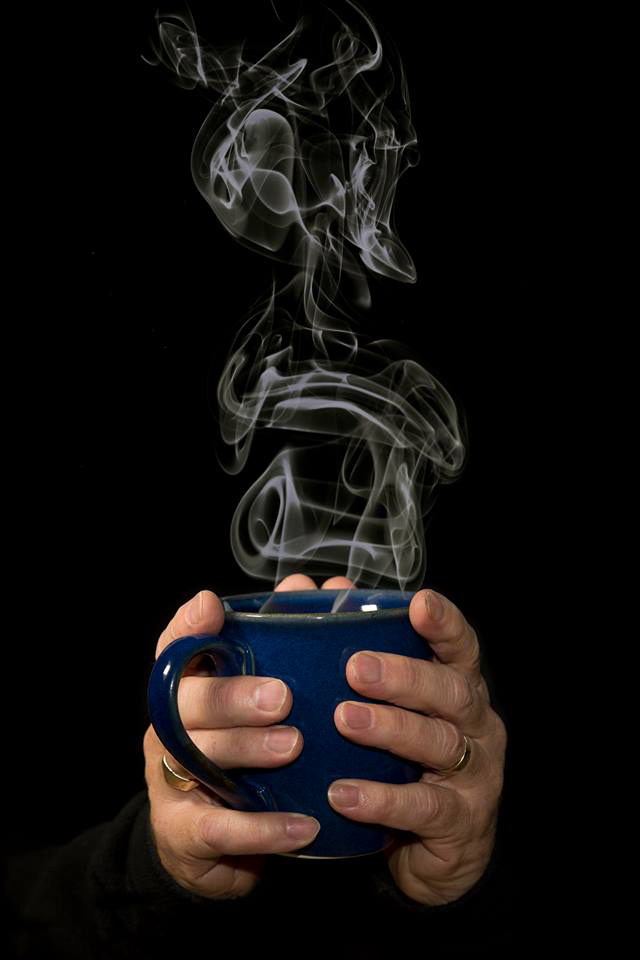
A Moroccan teapot was positioned some distance in front of a black background, with the LSH (Long Suffering Husband) holding an incense stick behind it. Two images joined together, then manipulated in Photoshop to make the right hand smoke plume look like a dancer.
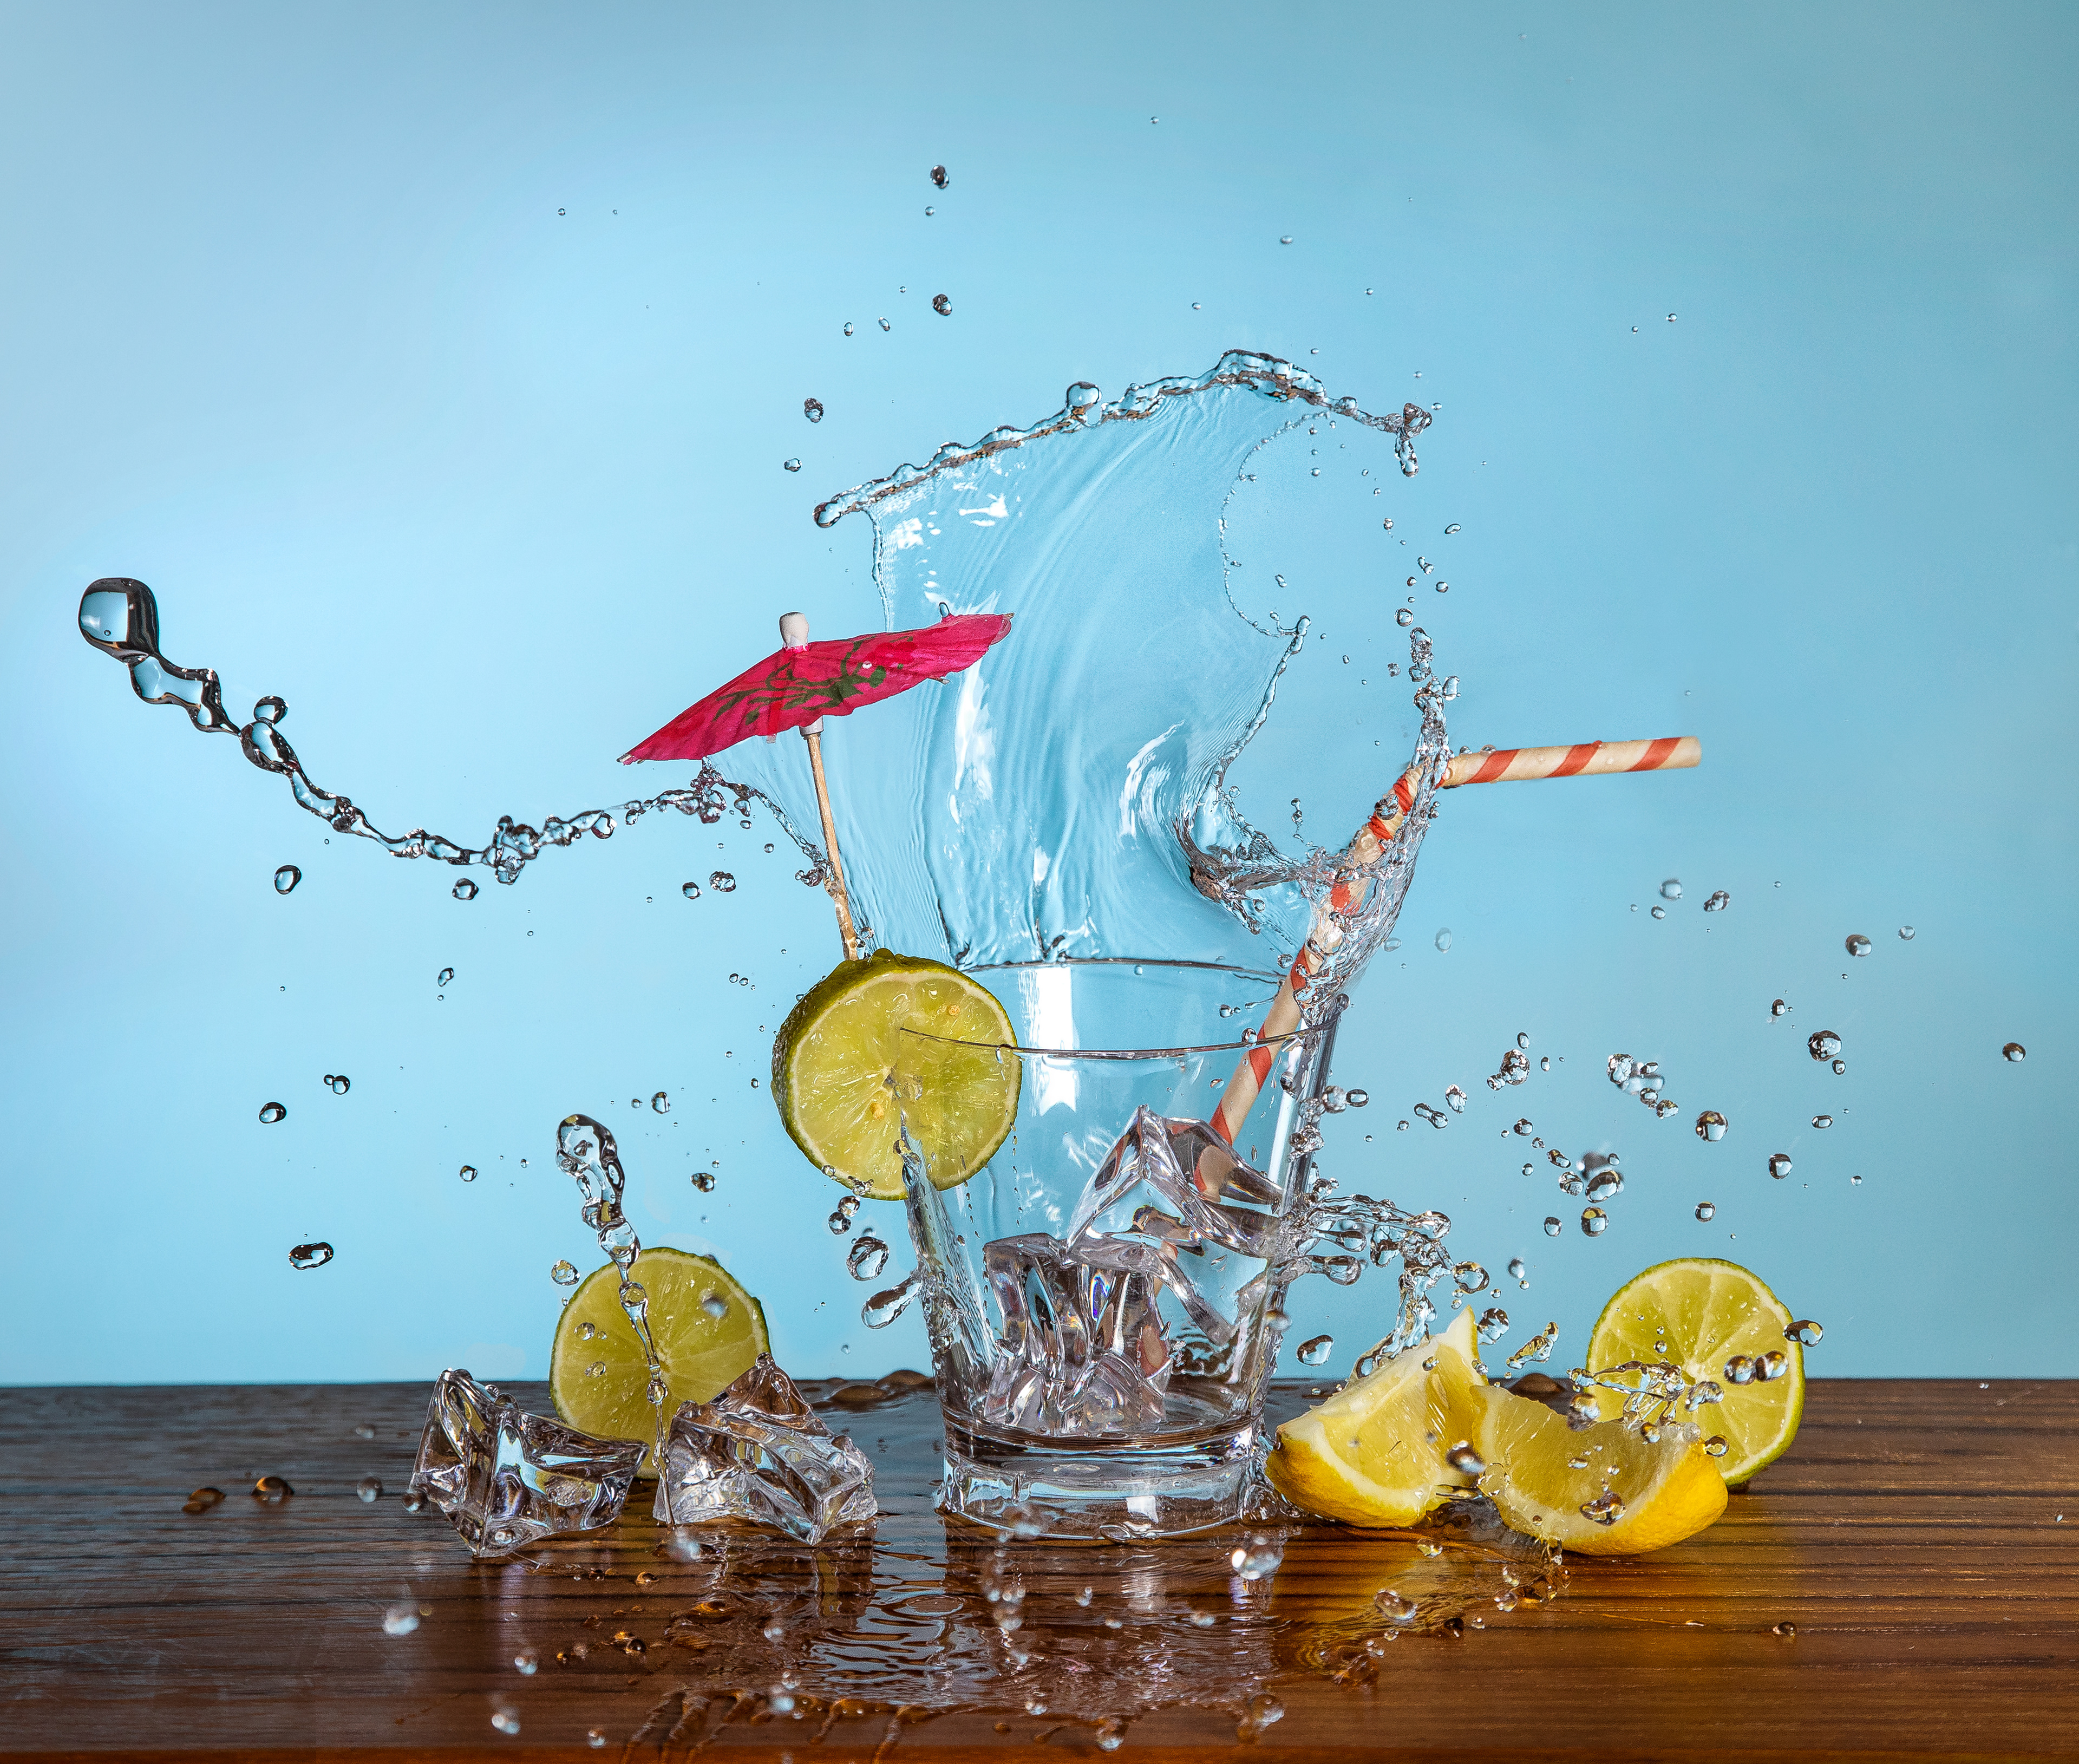
The whole scene - glasses, lemons and limes, ice cubes, umbrella and straw - was attached to a plank using a hot glue gun. The plank was then mounted upside down and water splashed upwards.
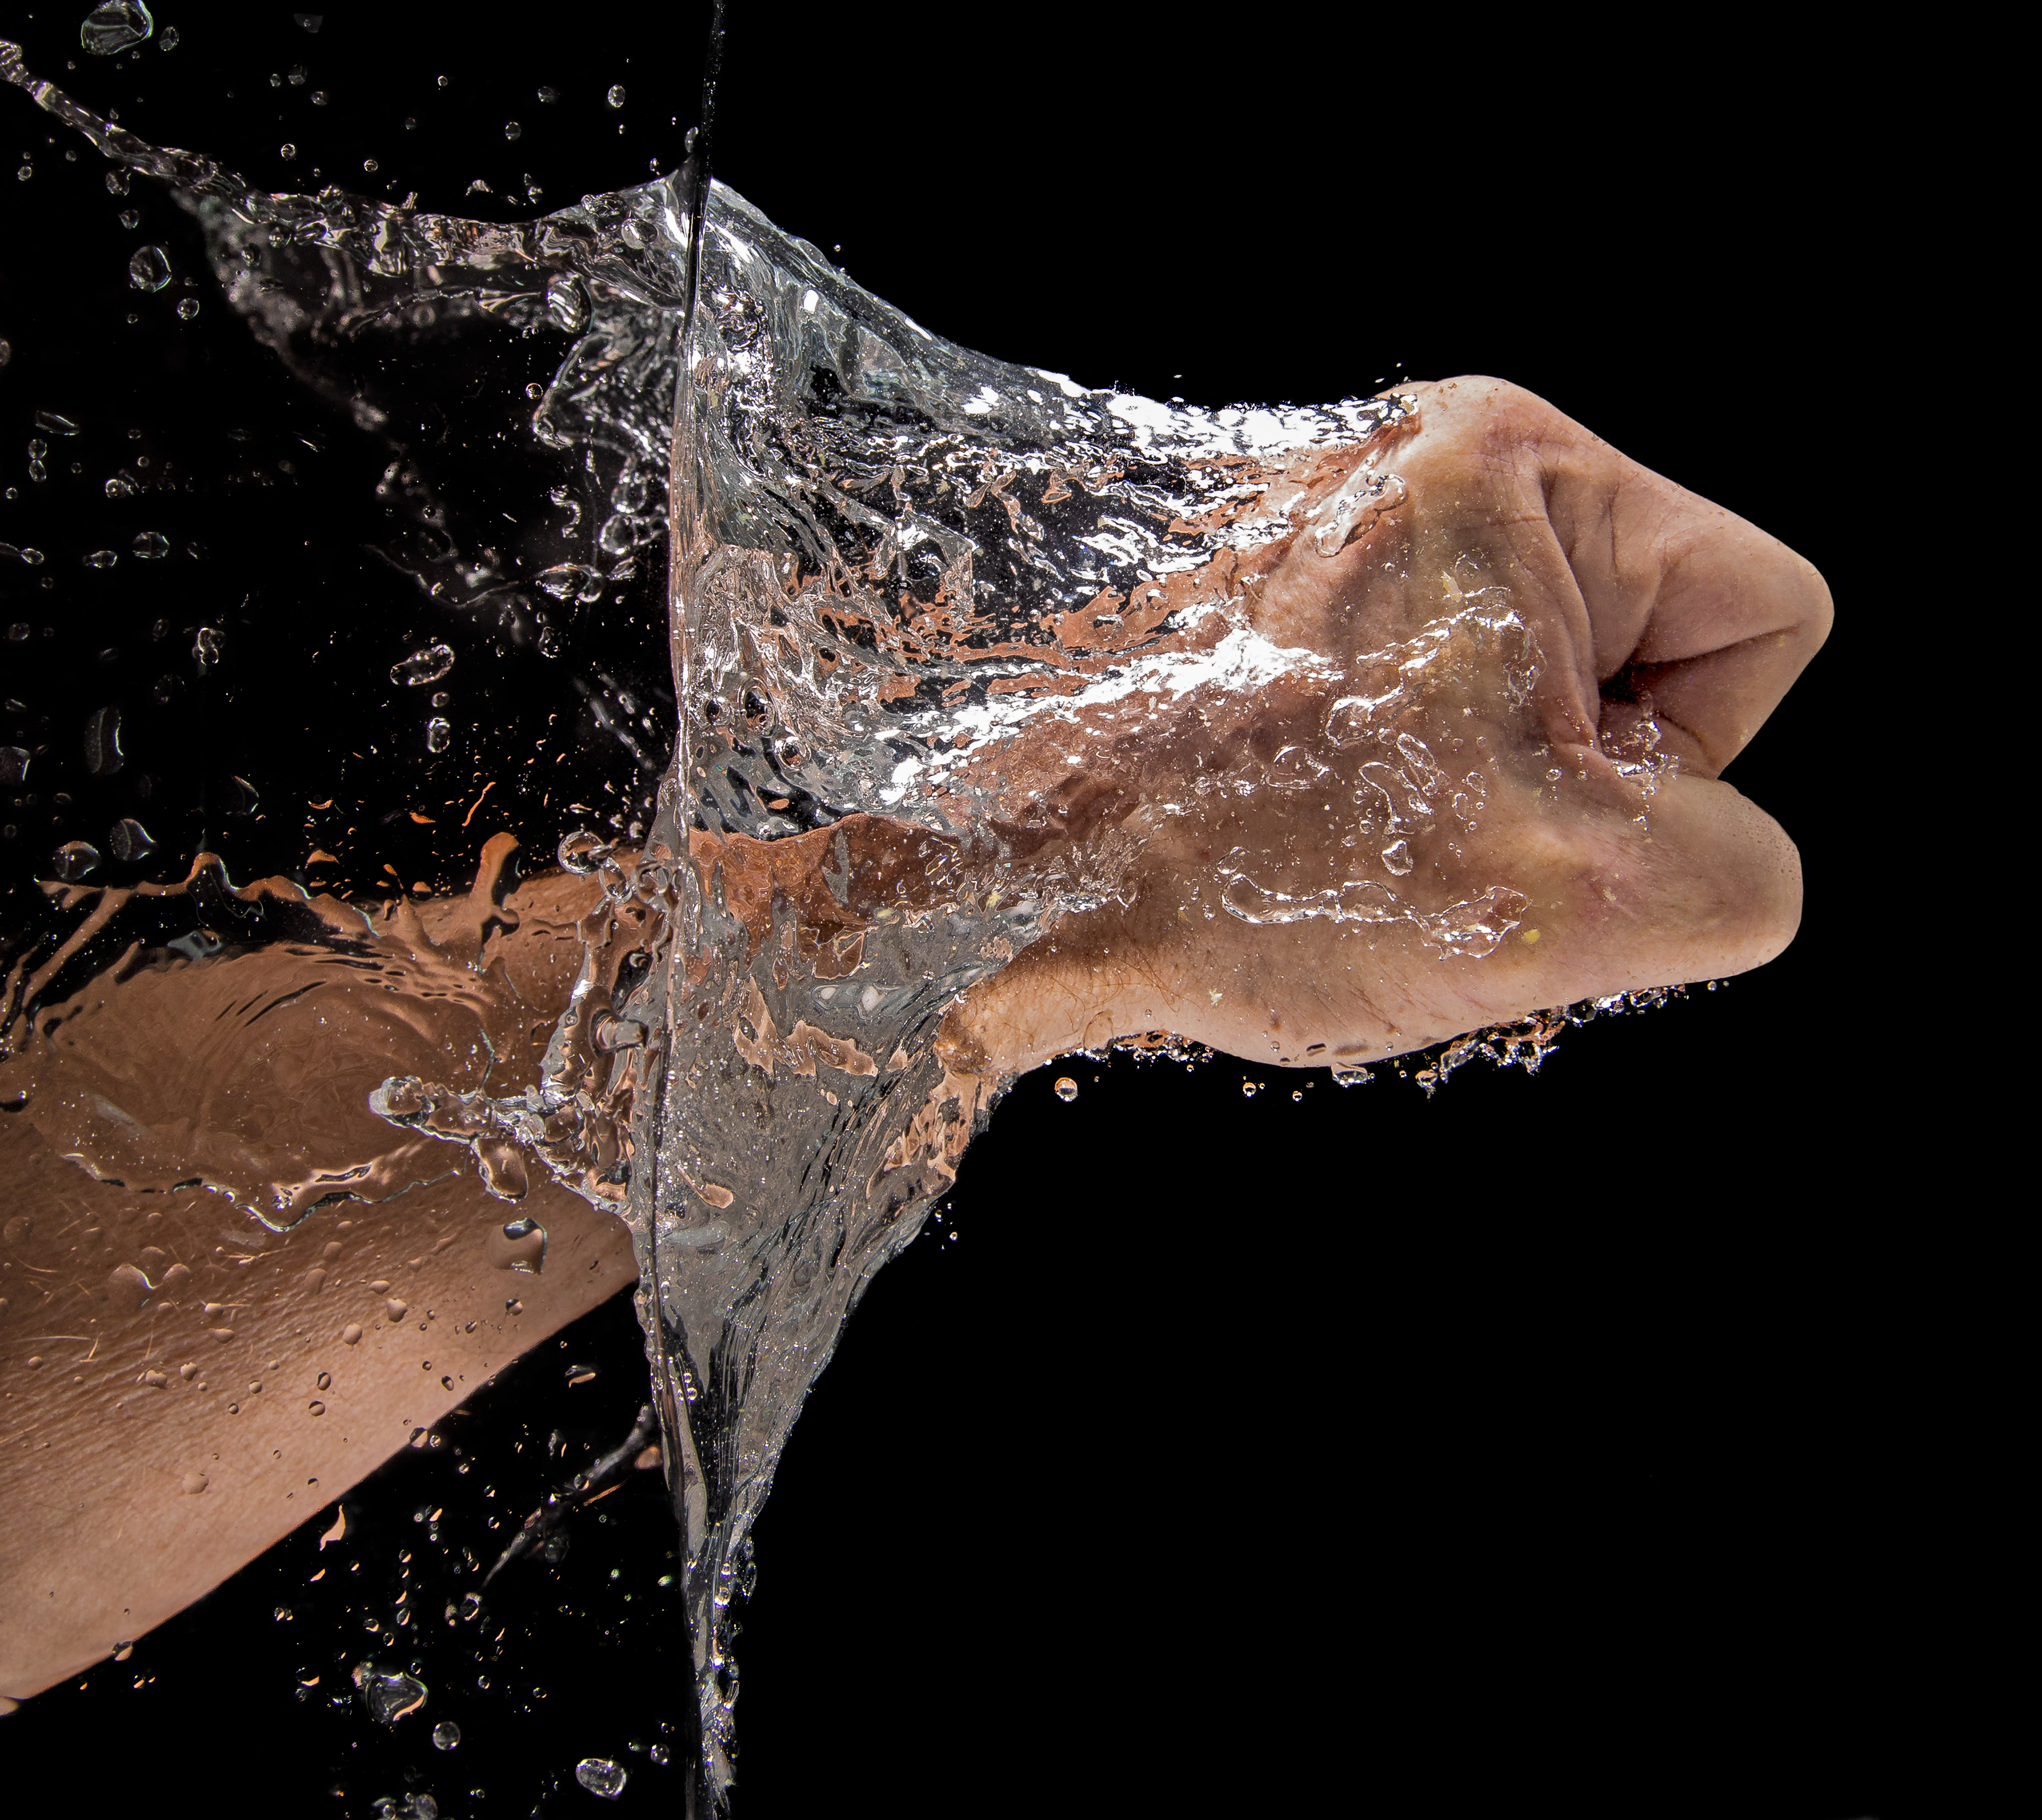
For this image I had him punch the water in a fish tank, turning the image on its side in post processing for greater impact.
The Harris Shutter
This technique was developed by a chap called Bob Harris who worked for Kodak. The effect is achieved by creating three separate images in each of the three primary colours: Red, Blue and Green. When layered, only those areas within the frame that are different to the other images take on that colour.

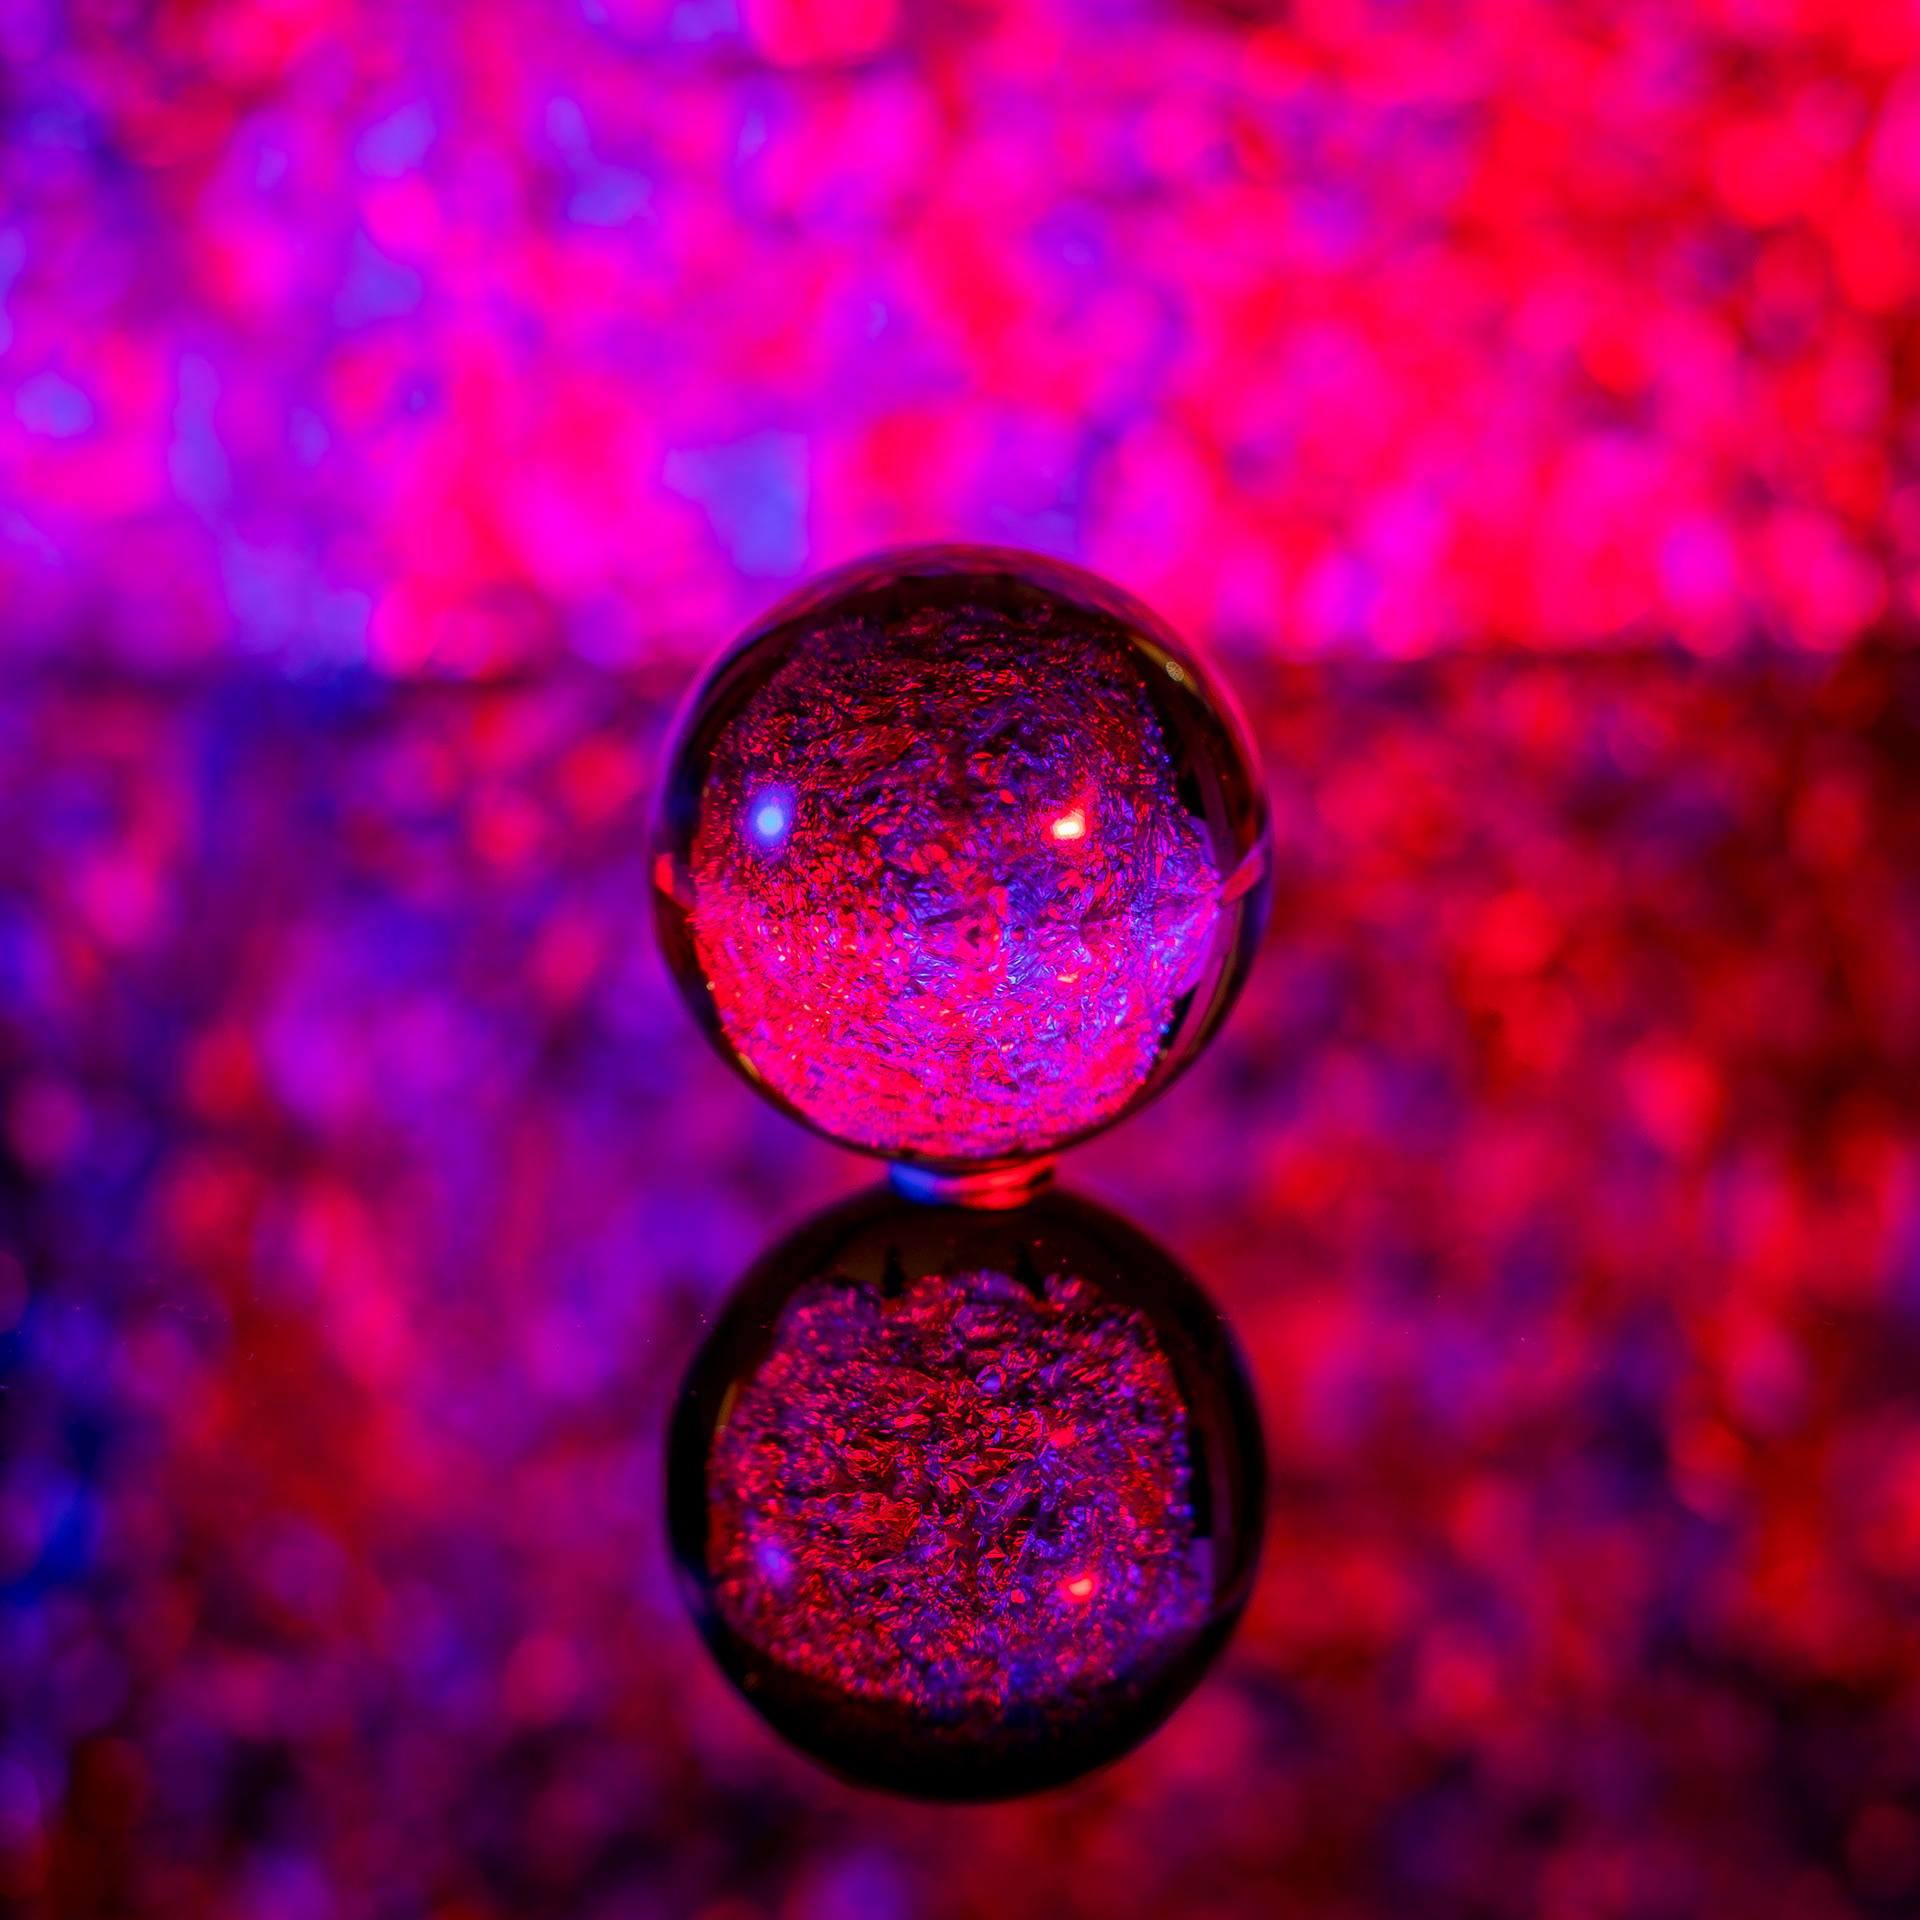
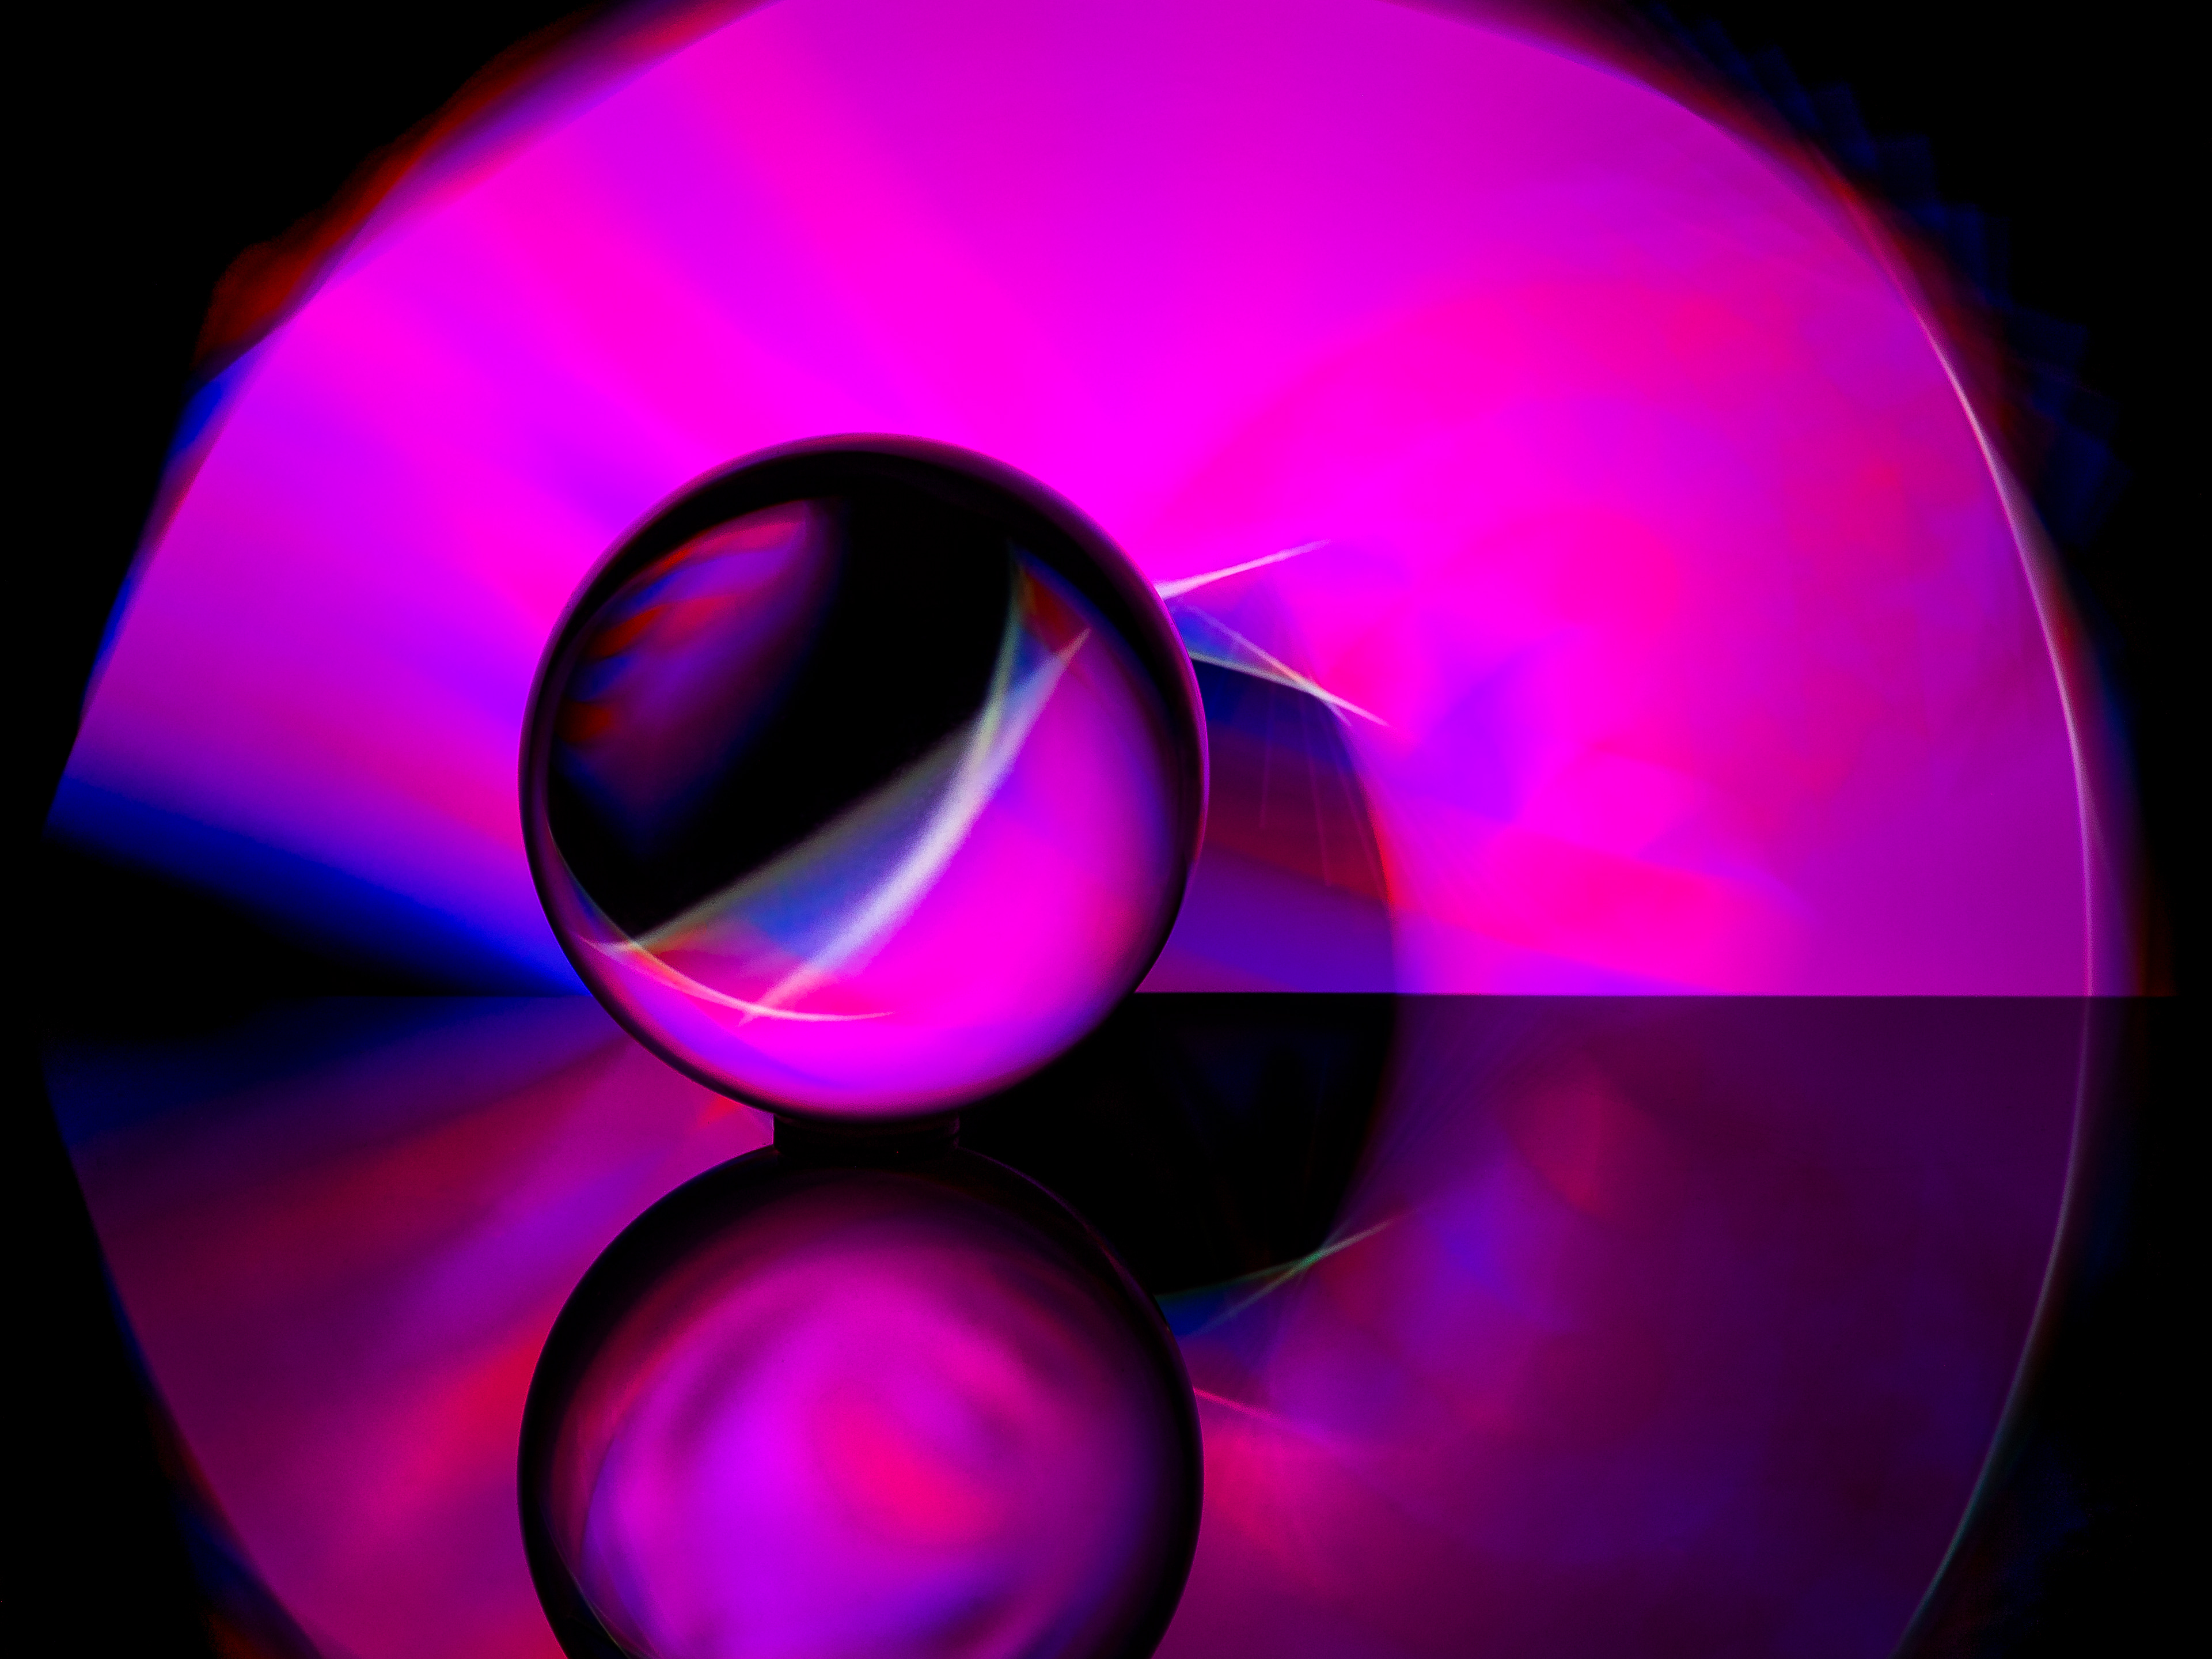
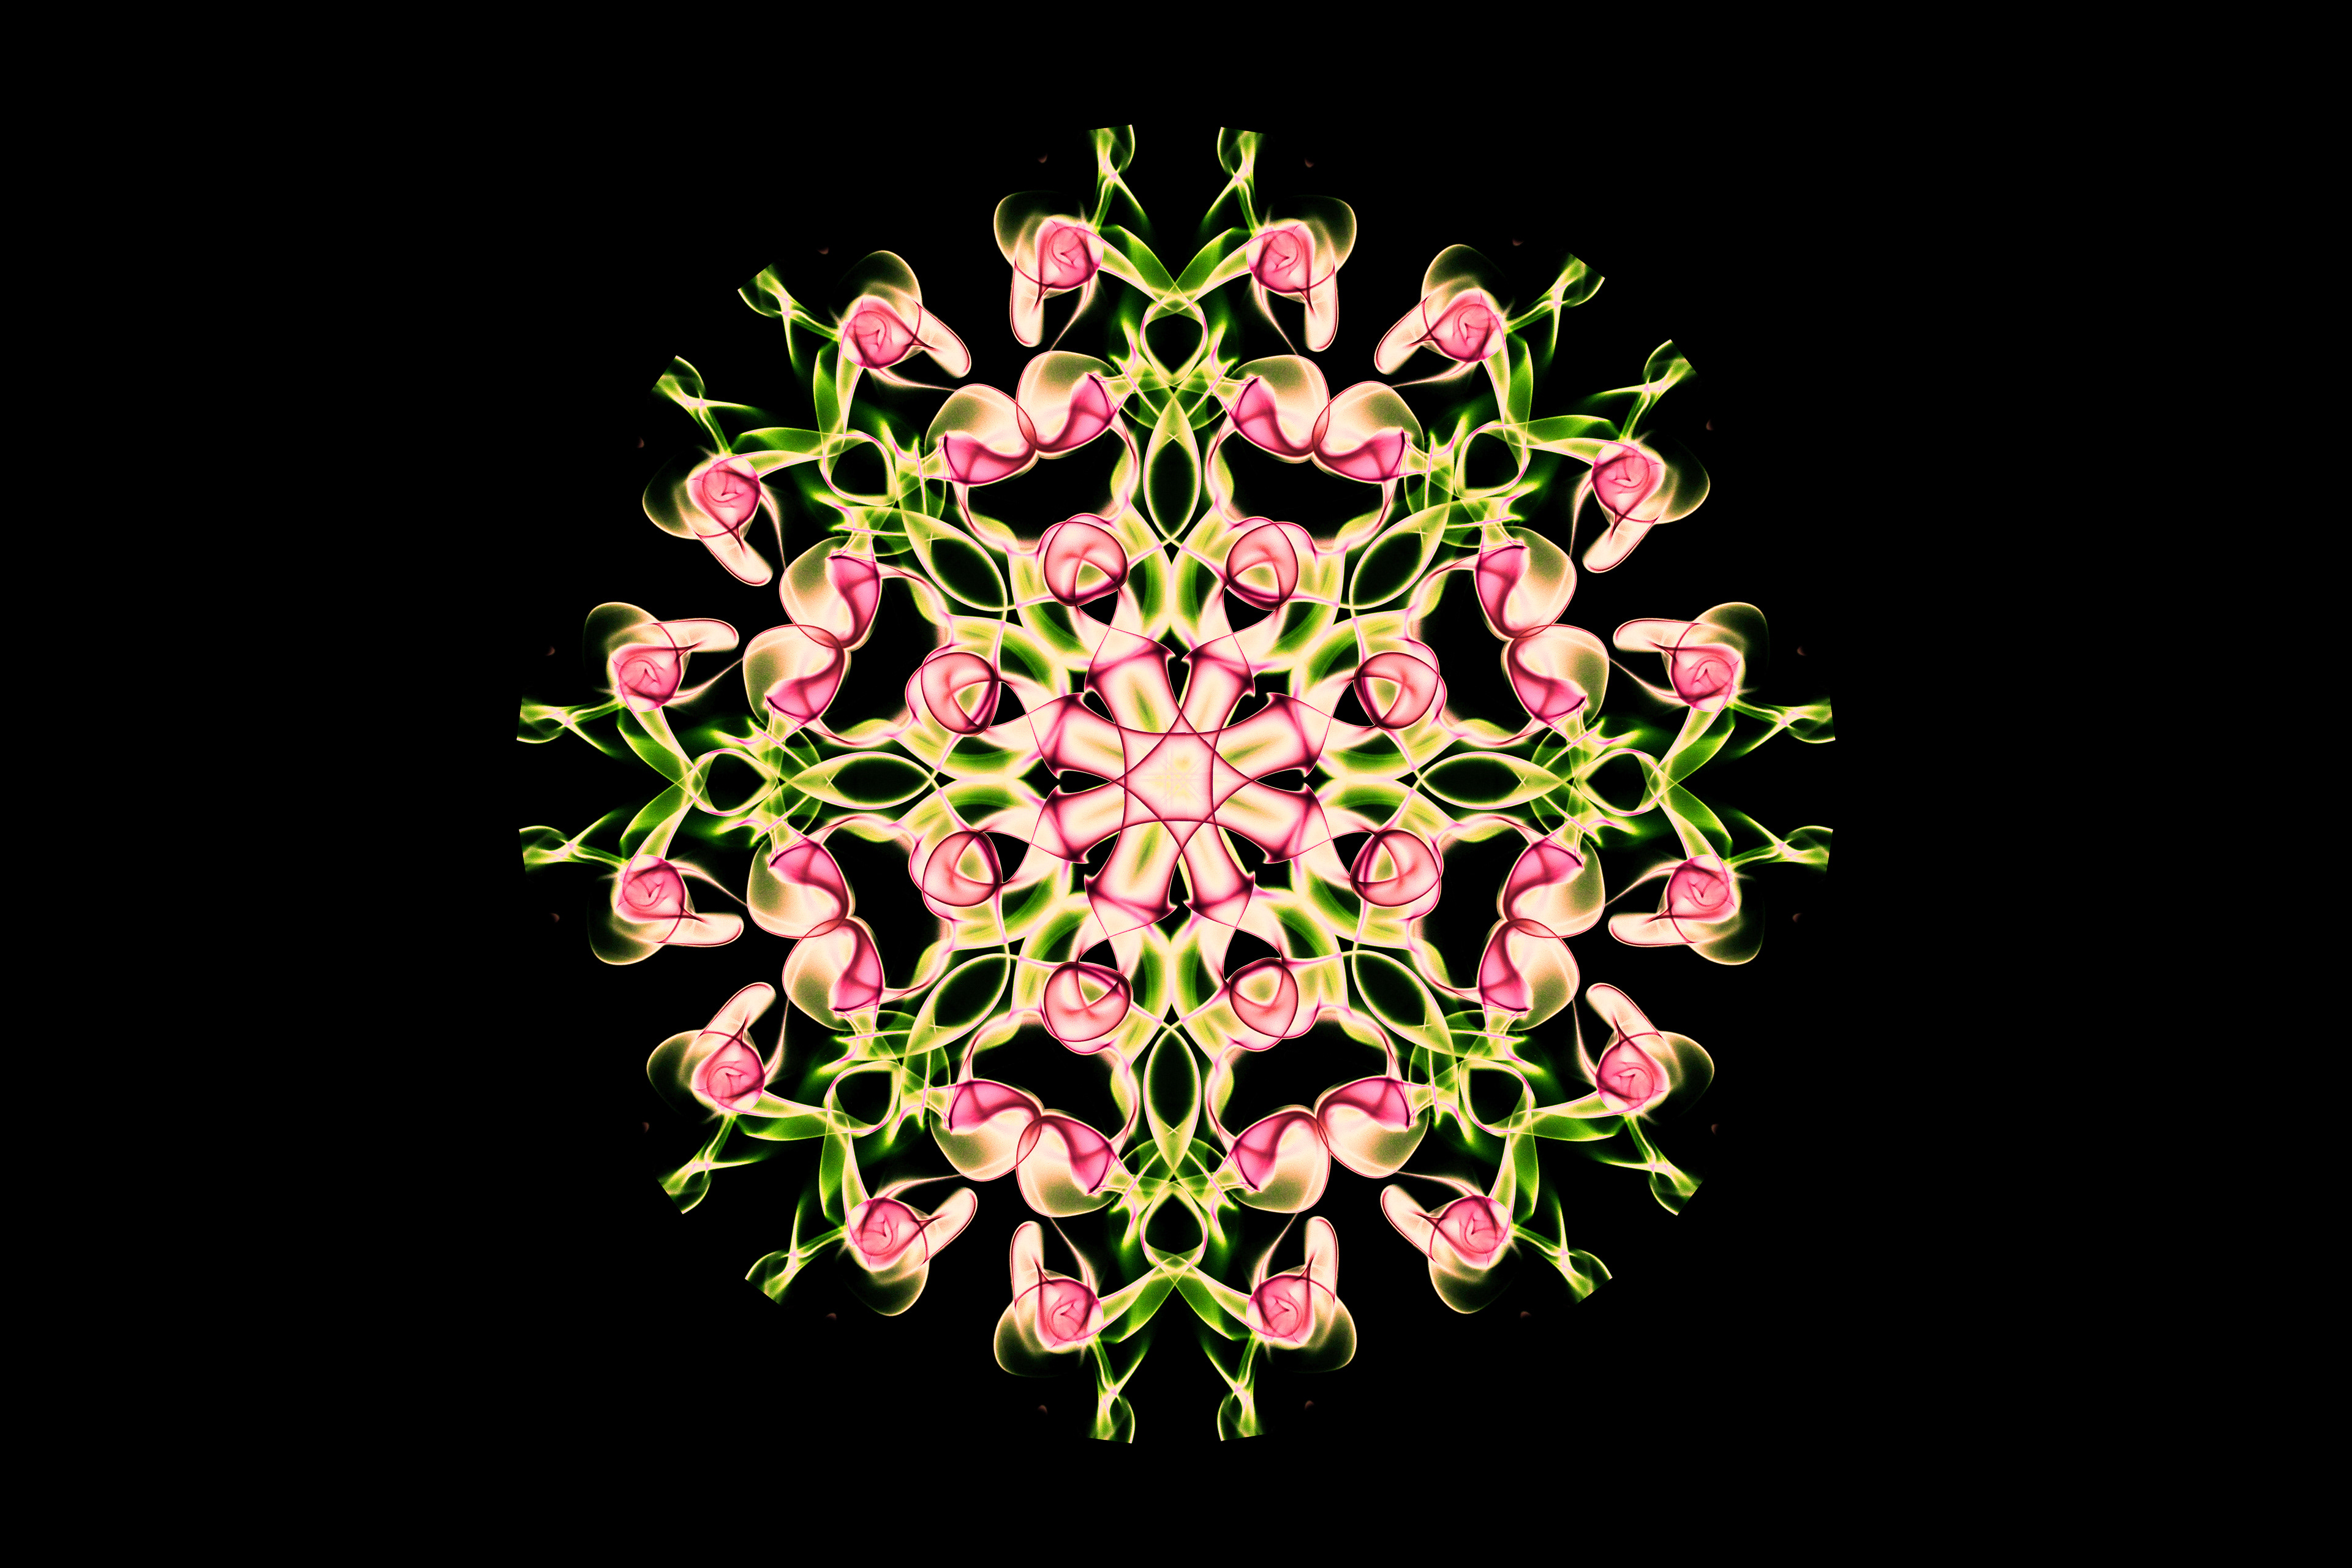
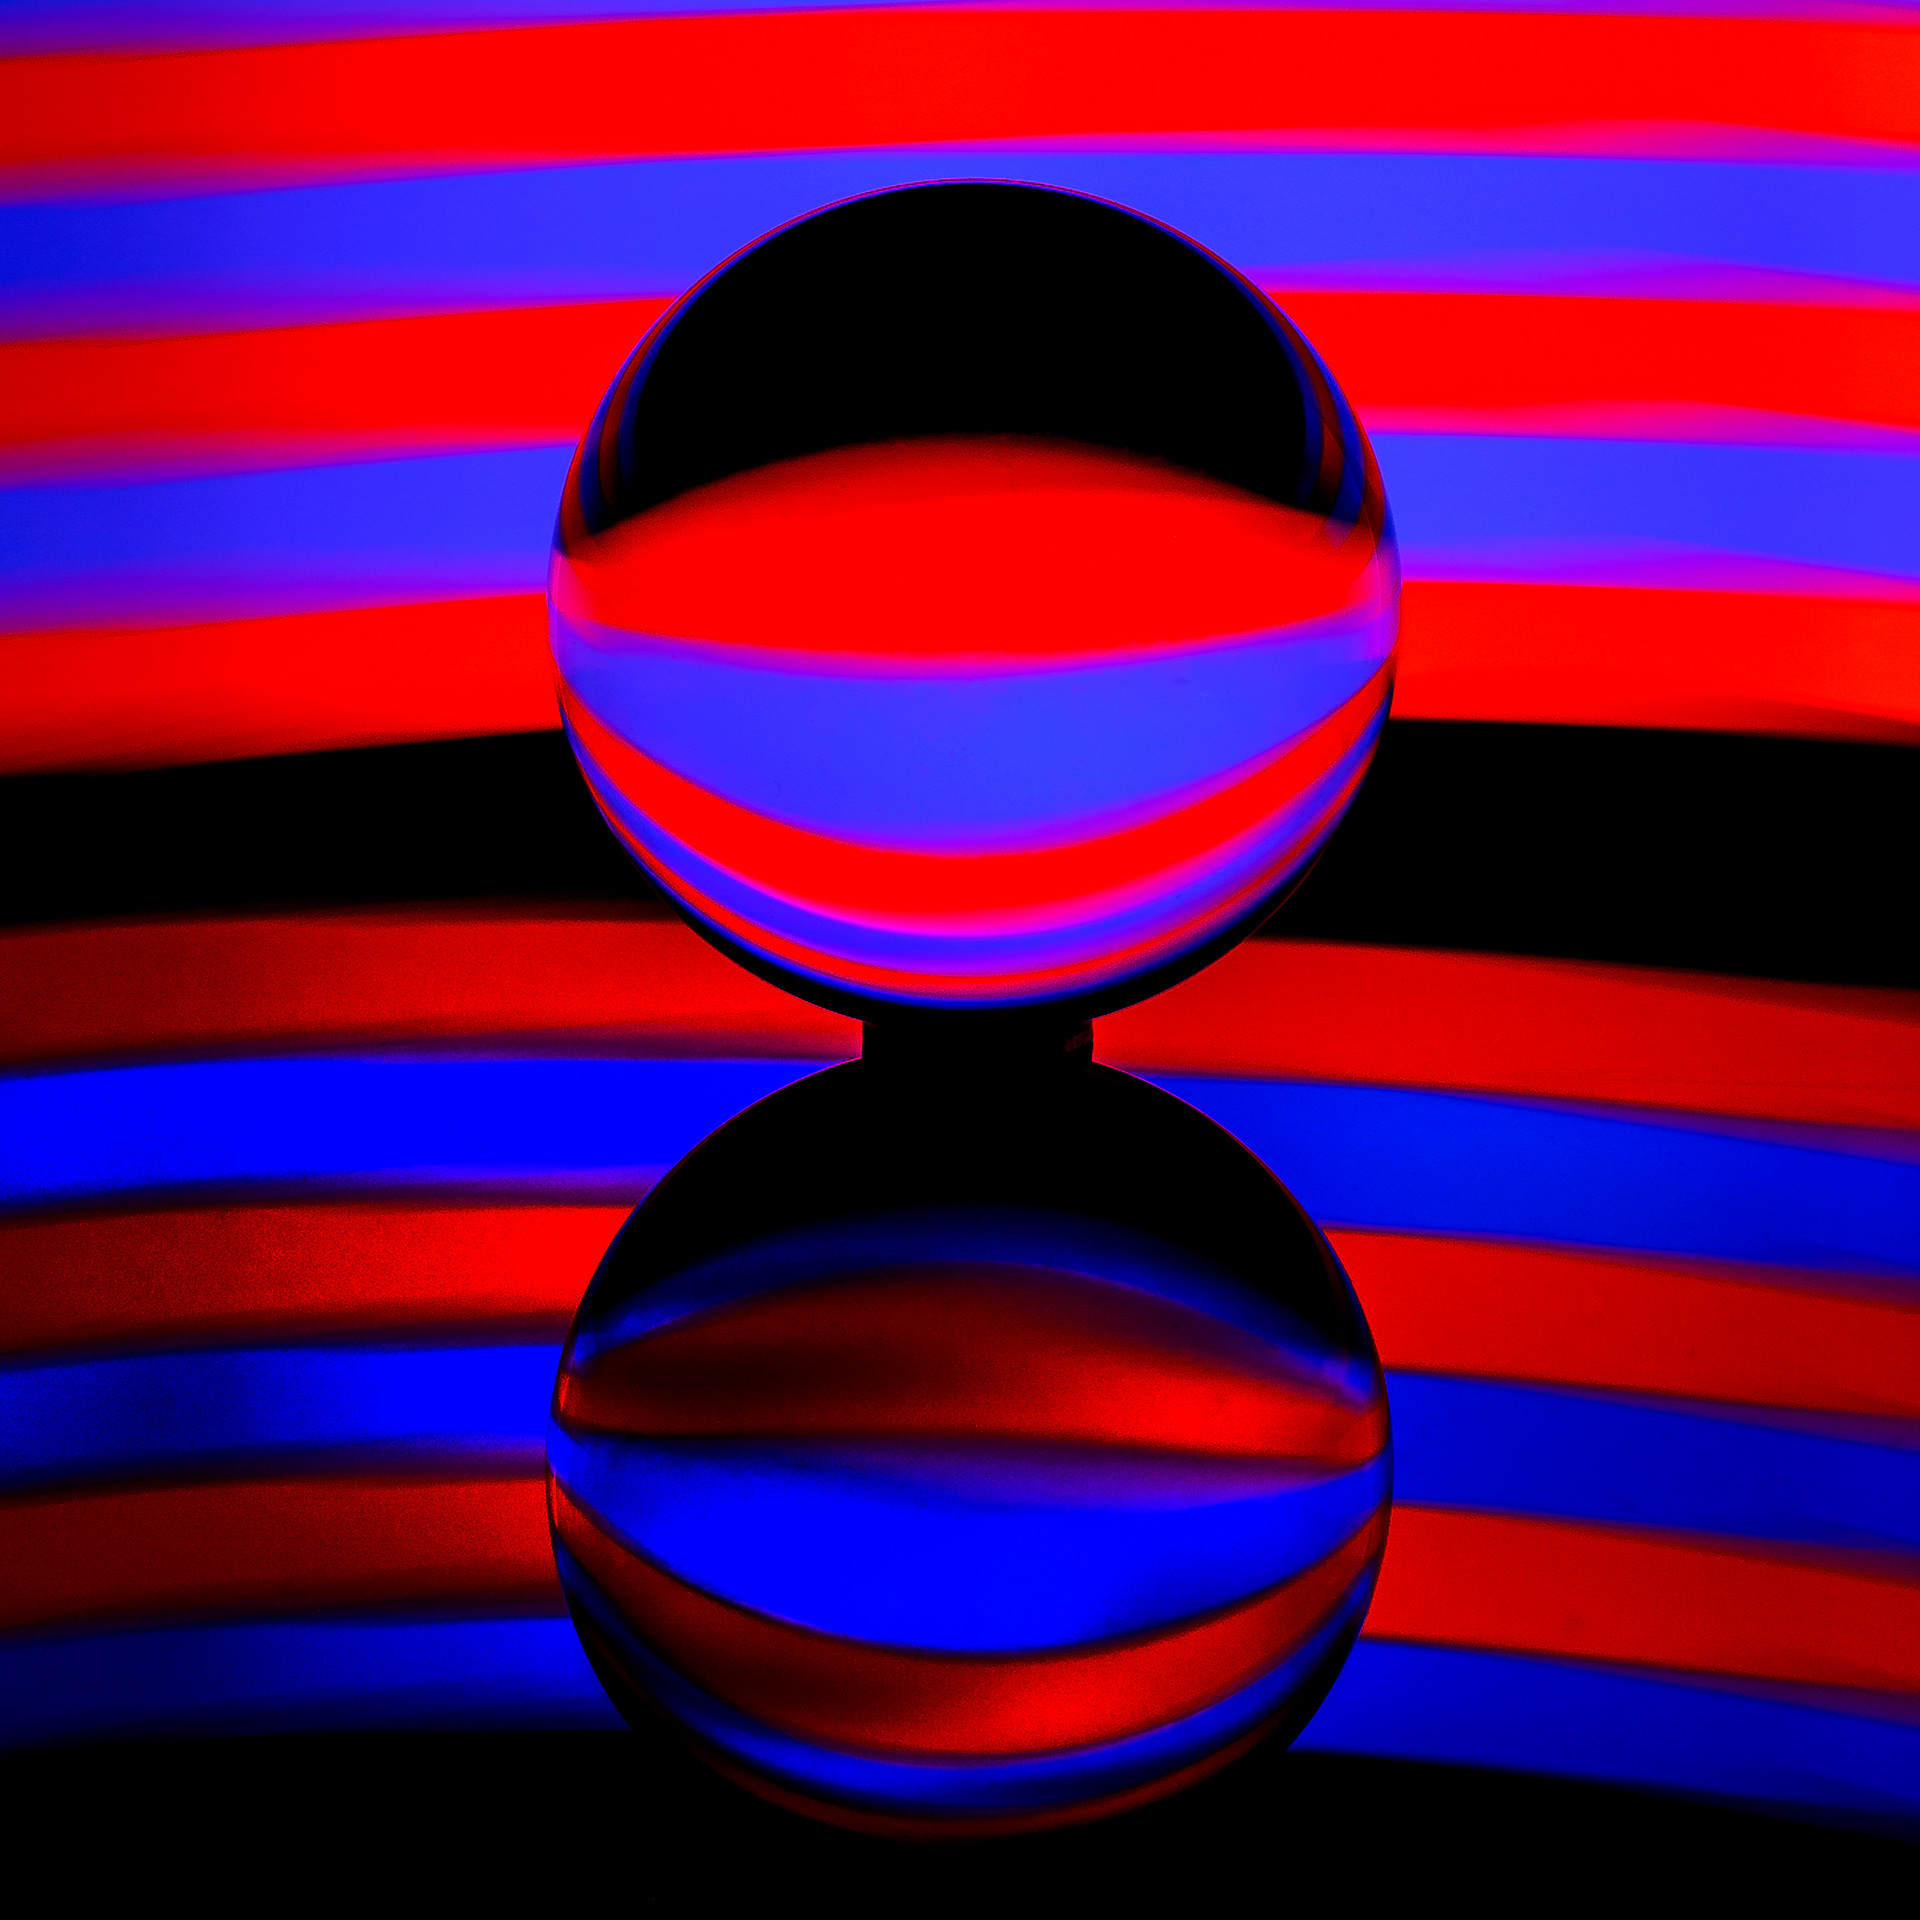
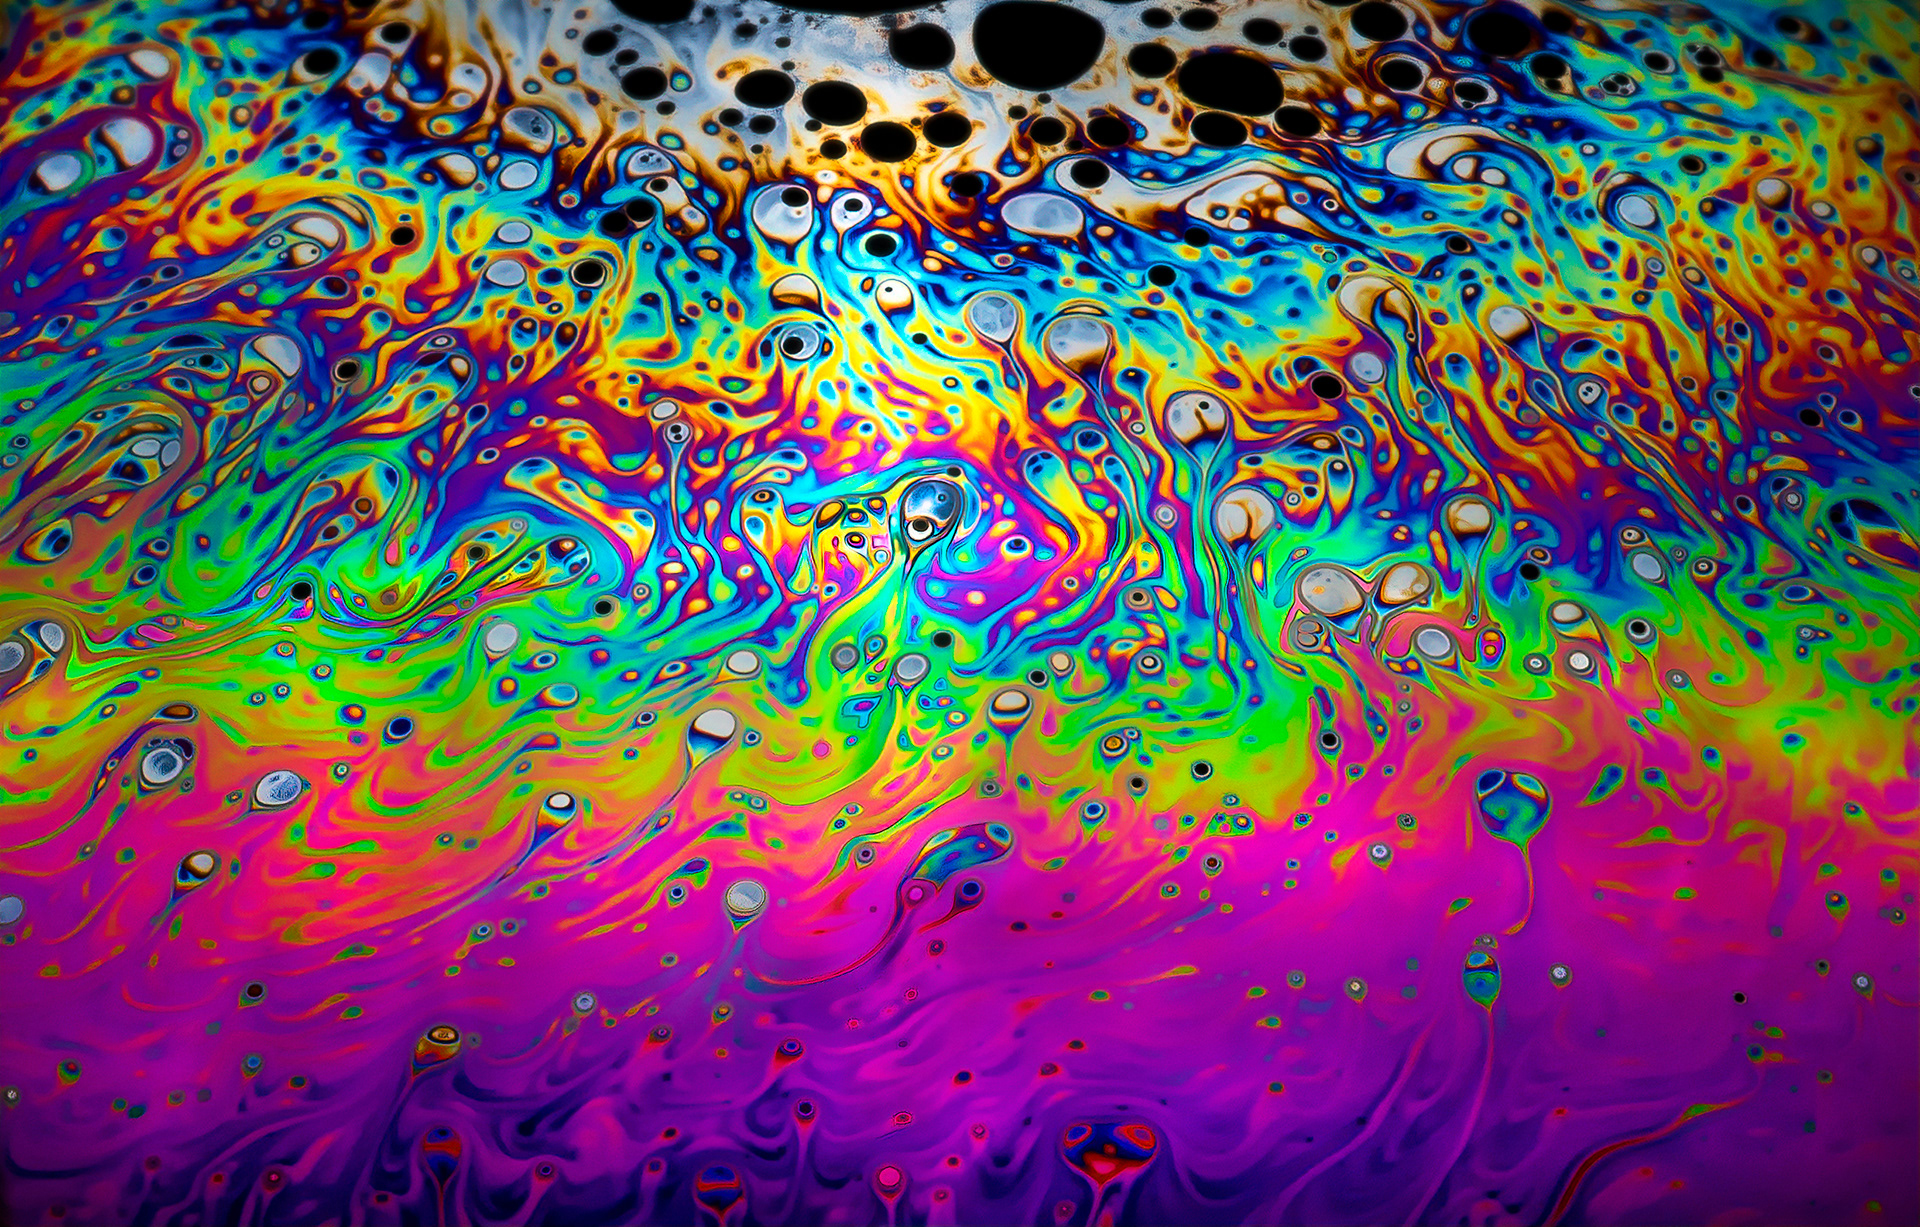
Crystal lens ball, crumpled tin foil, black plexiglass, head torch with red bulb and an LED light.
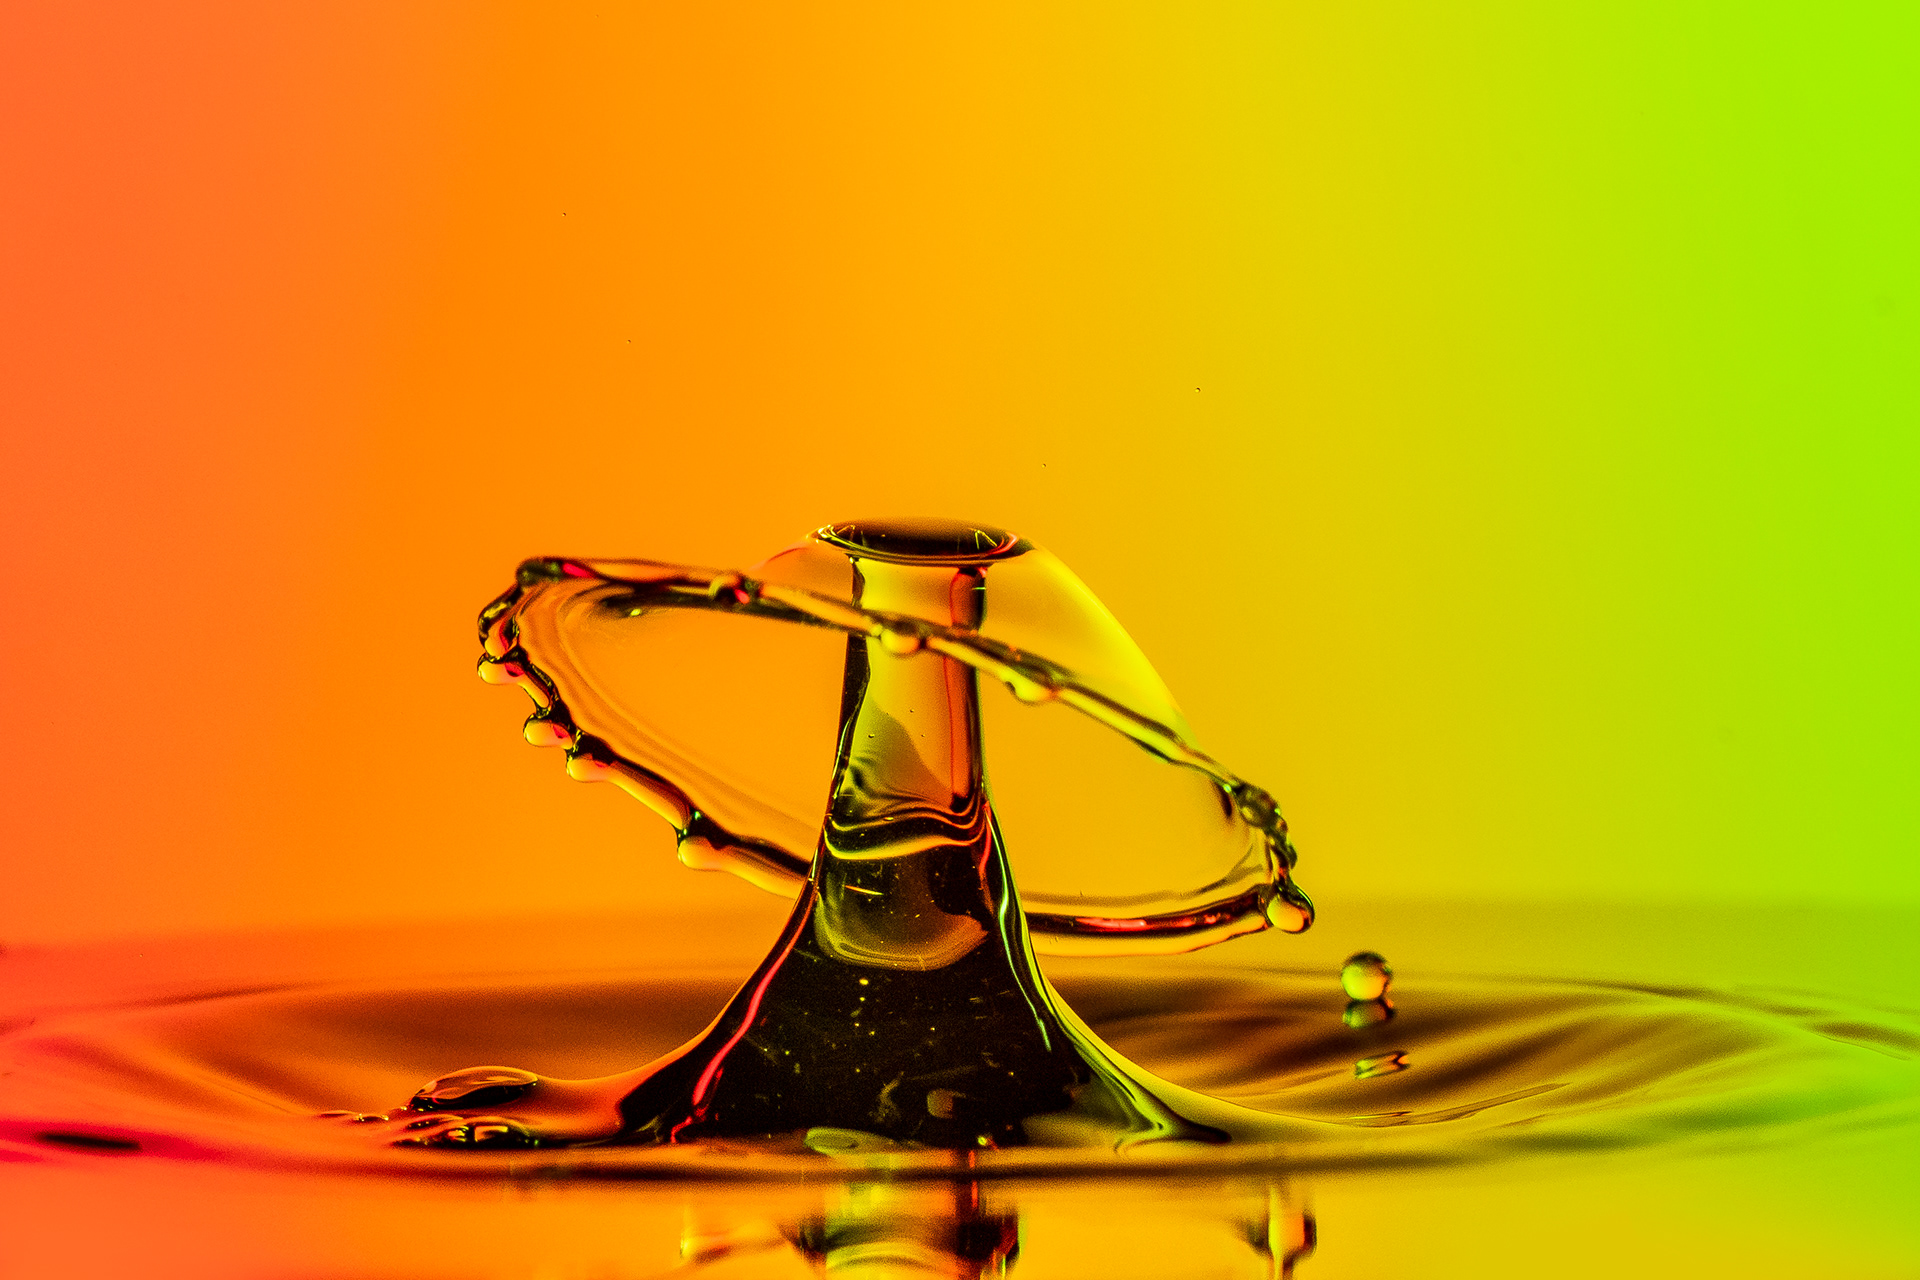
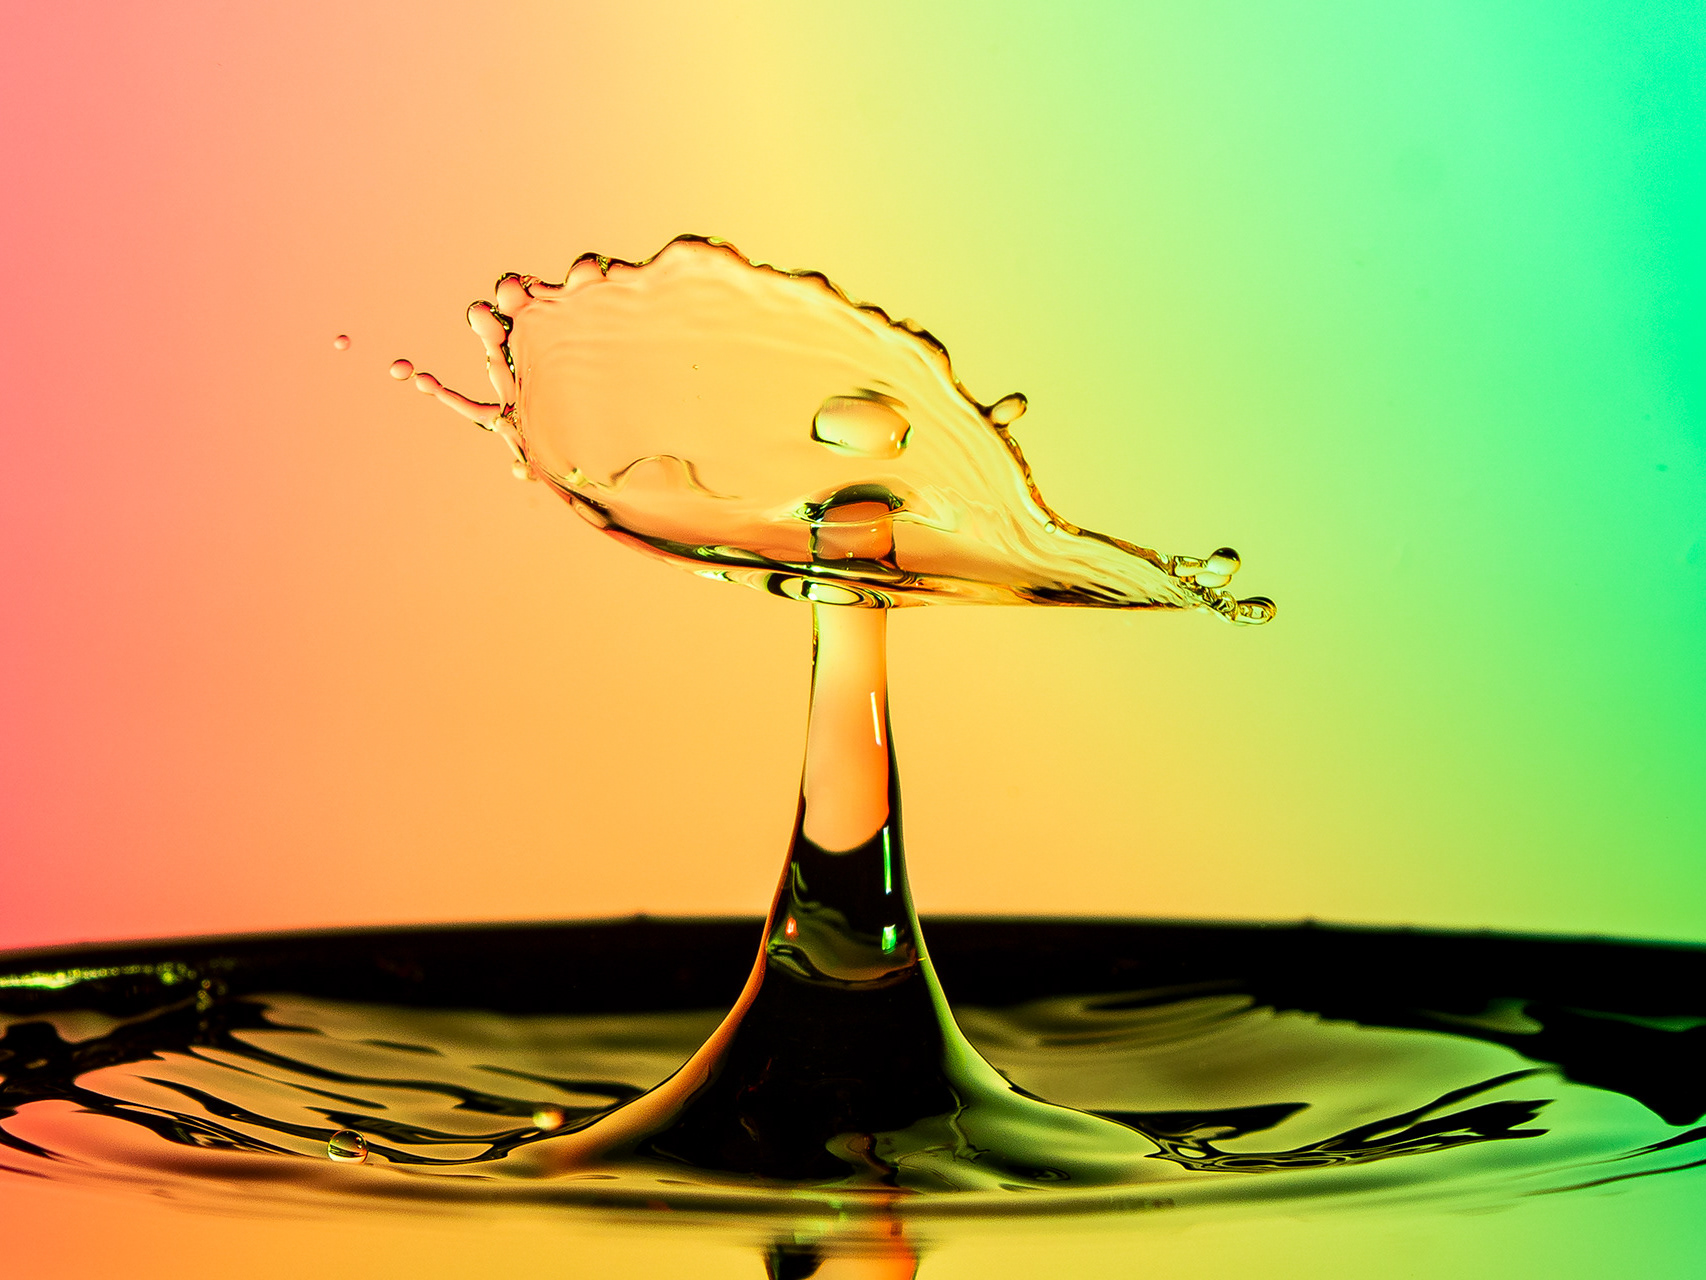
Water drop art. Check out how it is done here.
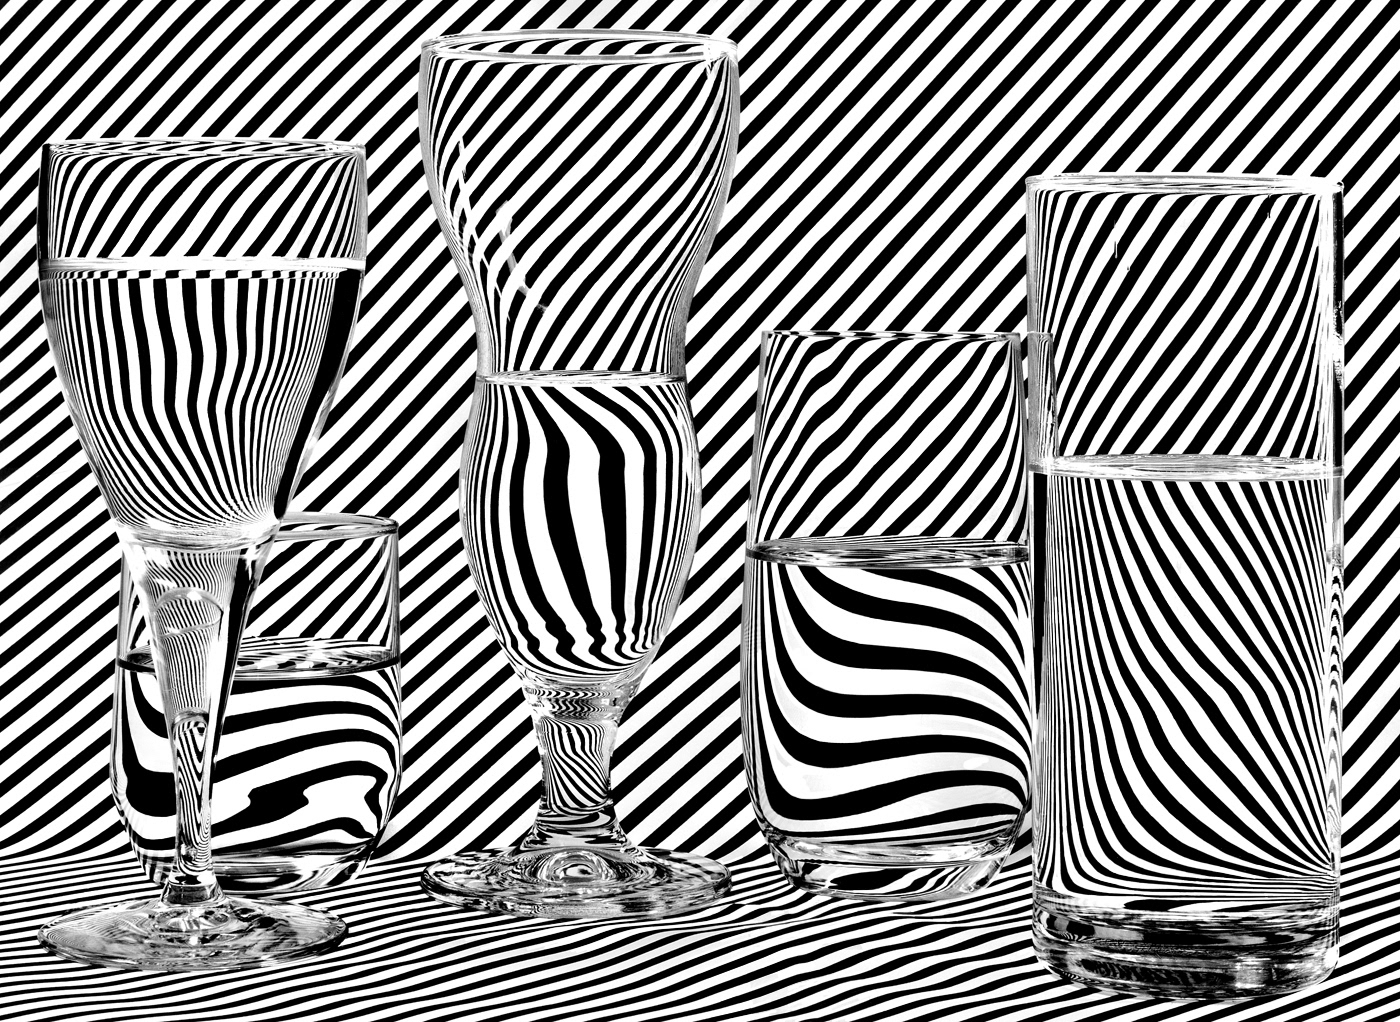
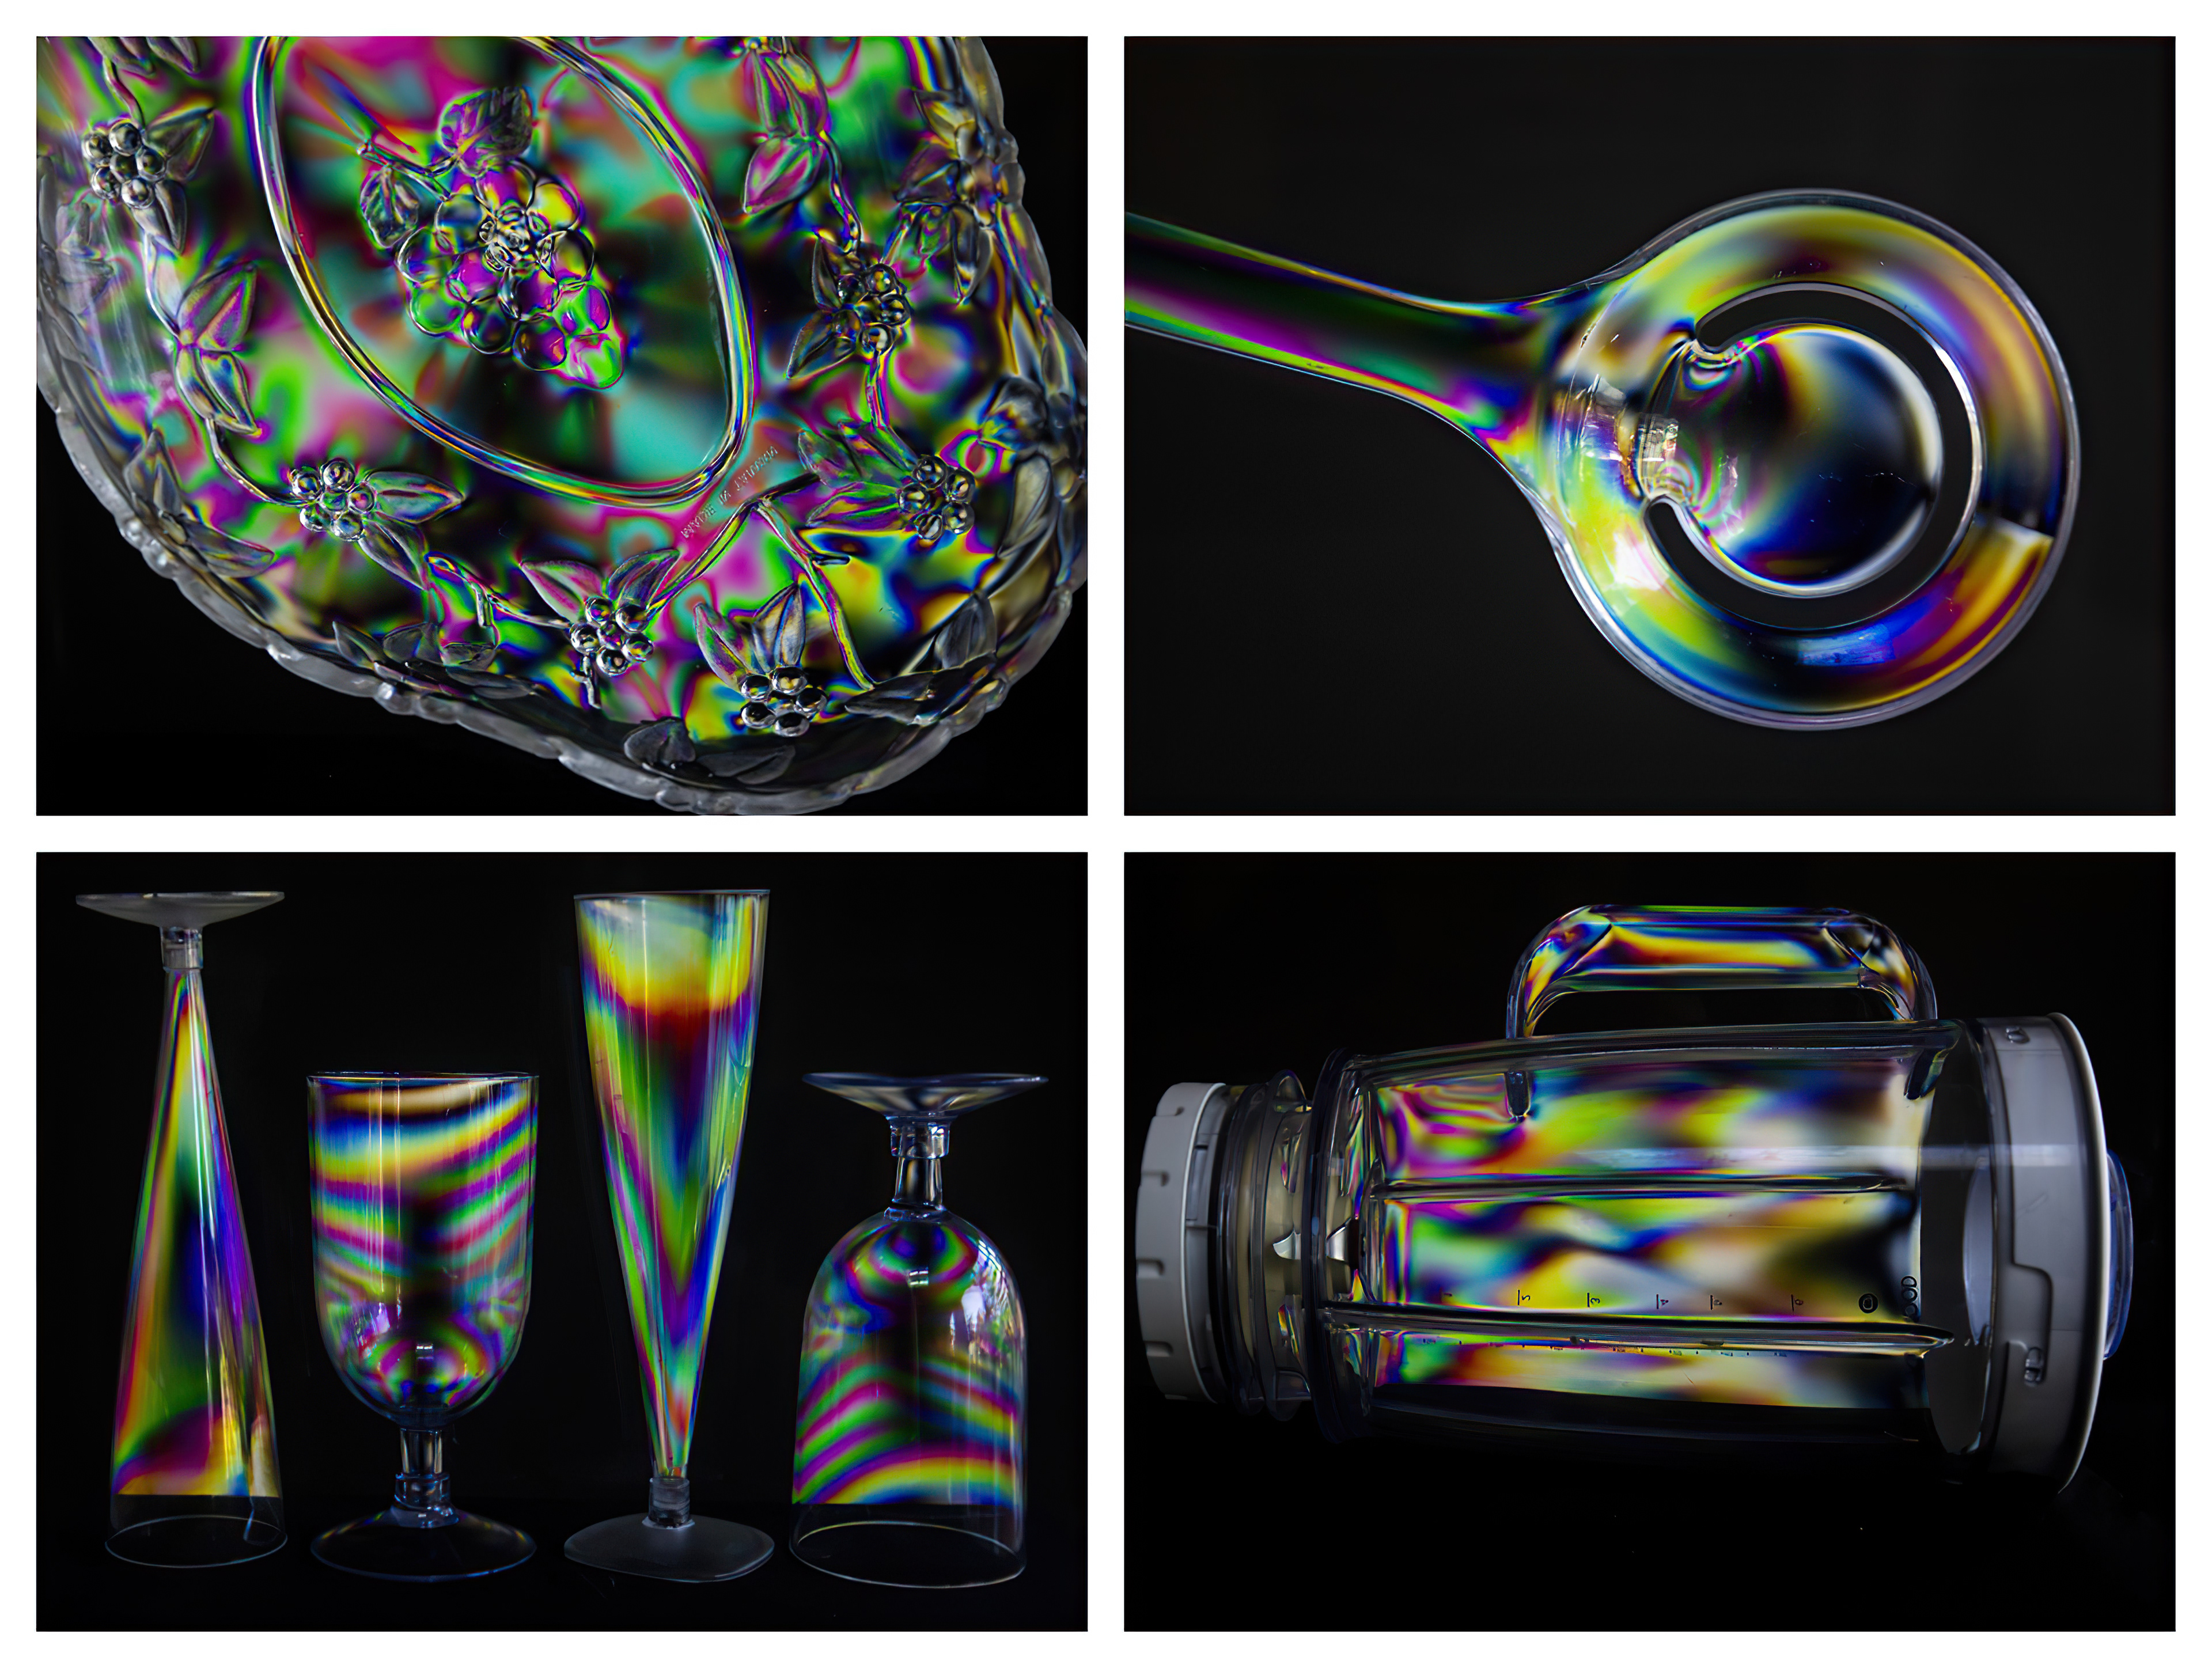
Cross polarisation
With a completely white background on my laptop screen, I placed a glossy black board over the keyboard, upon which were various plastic items. By adding a polariser filter to my lens and turning it, I managed to show stress in the plastic in amazing technicolour!

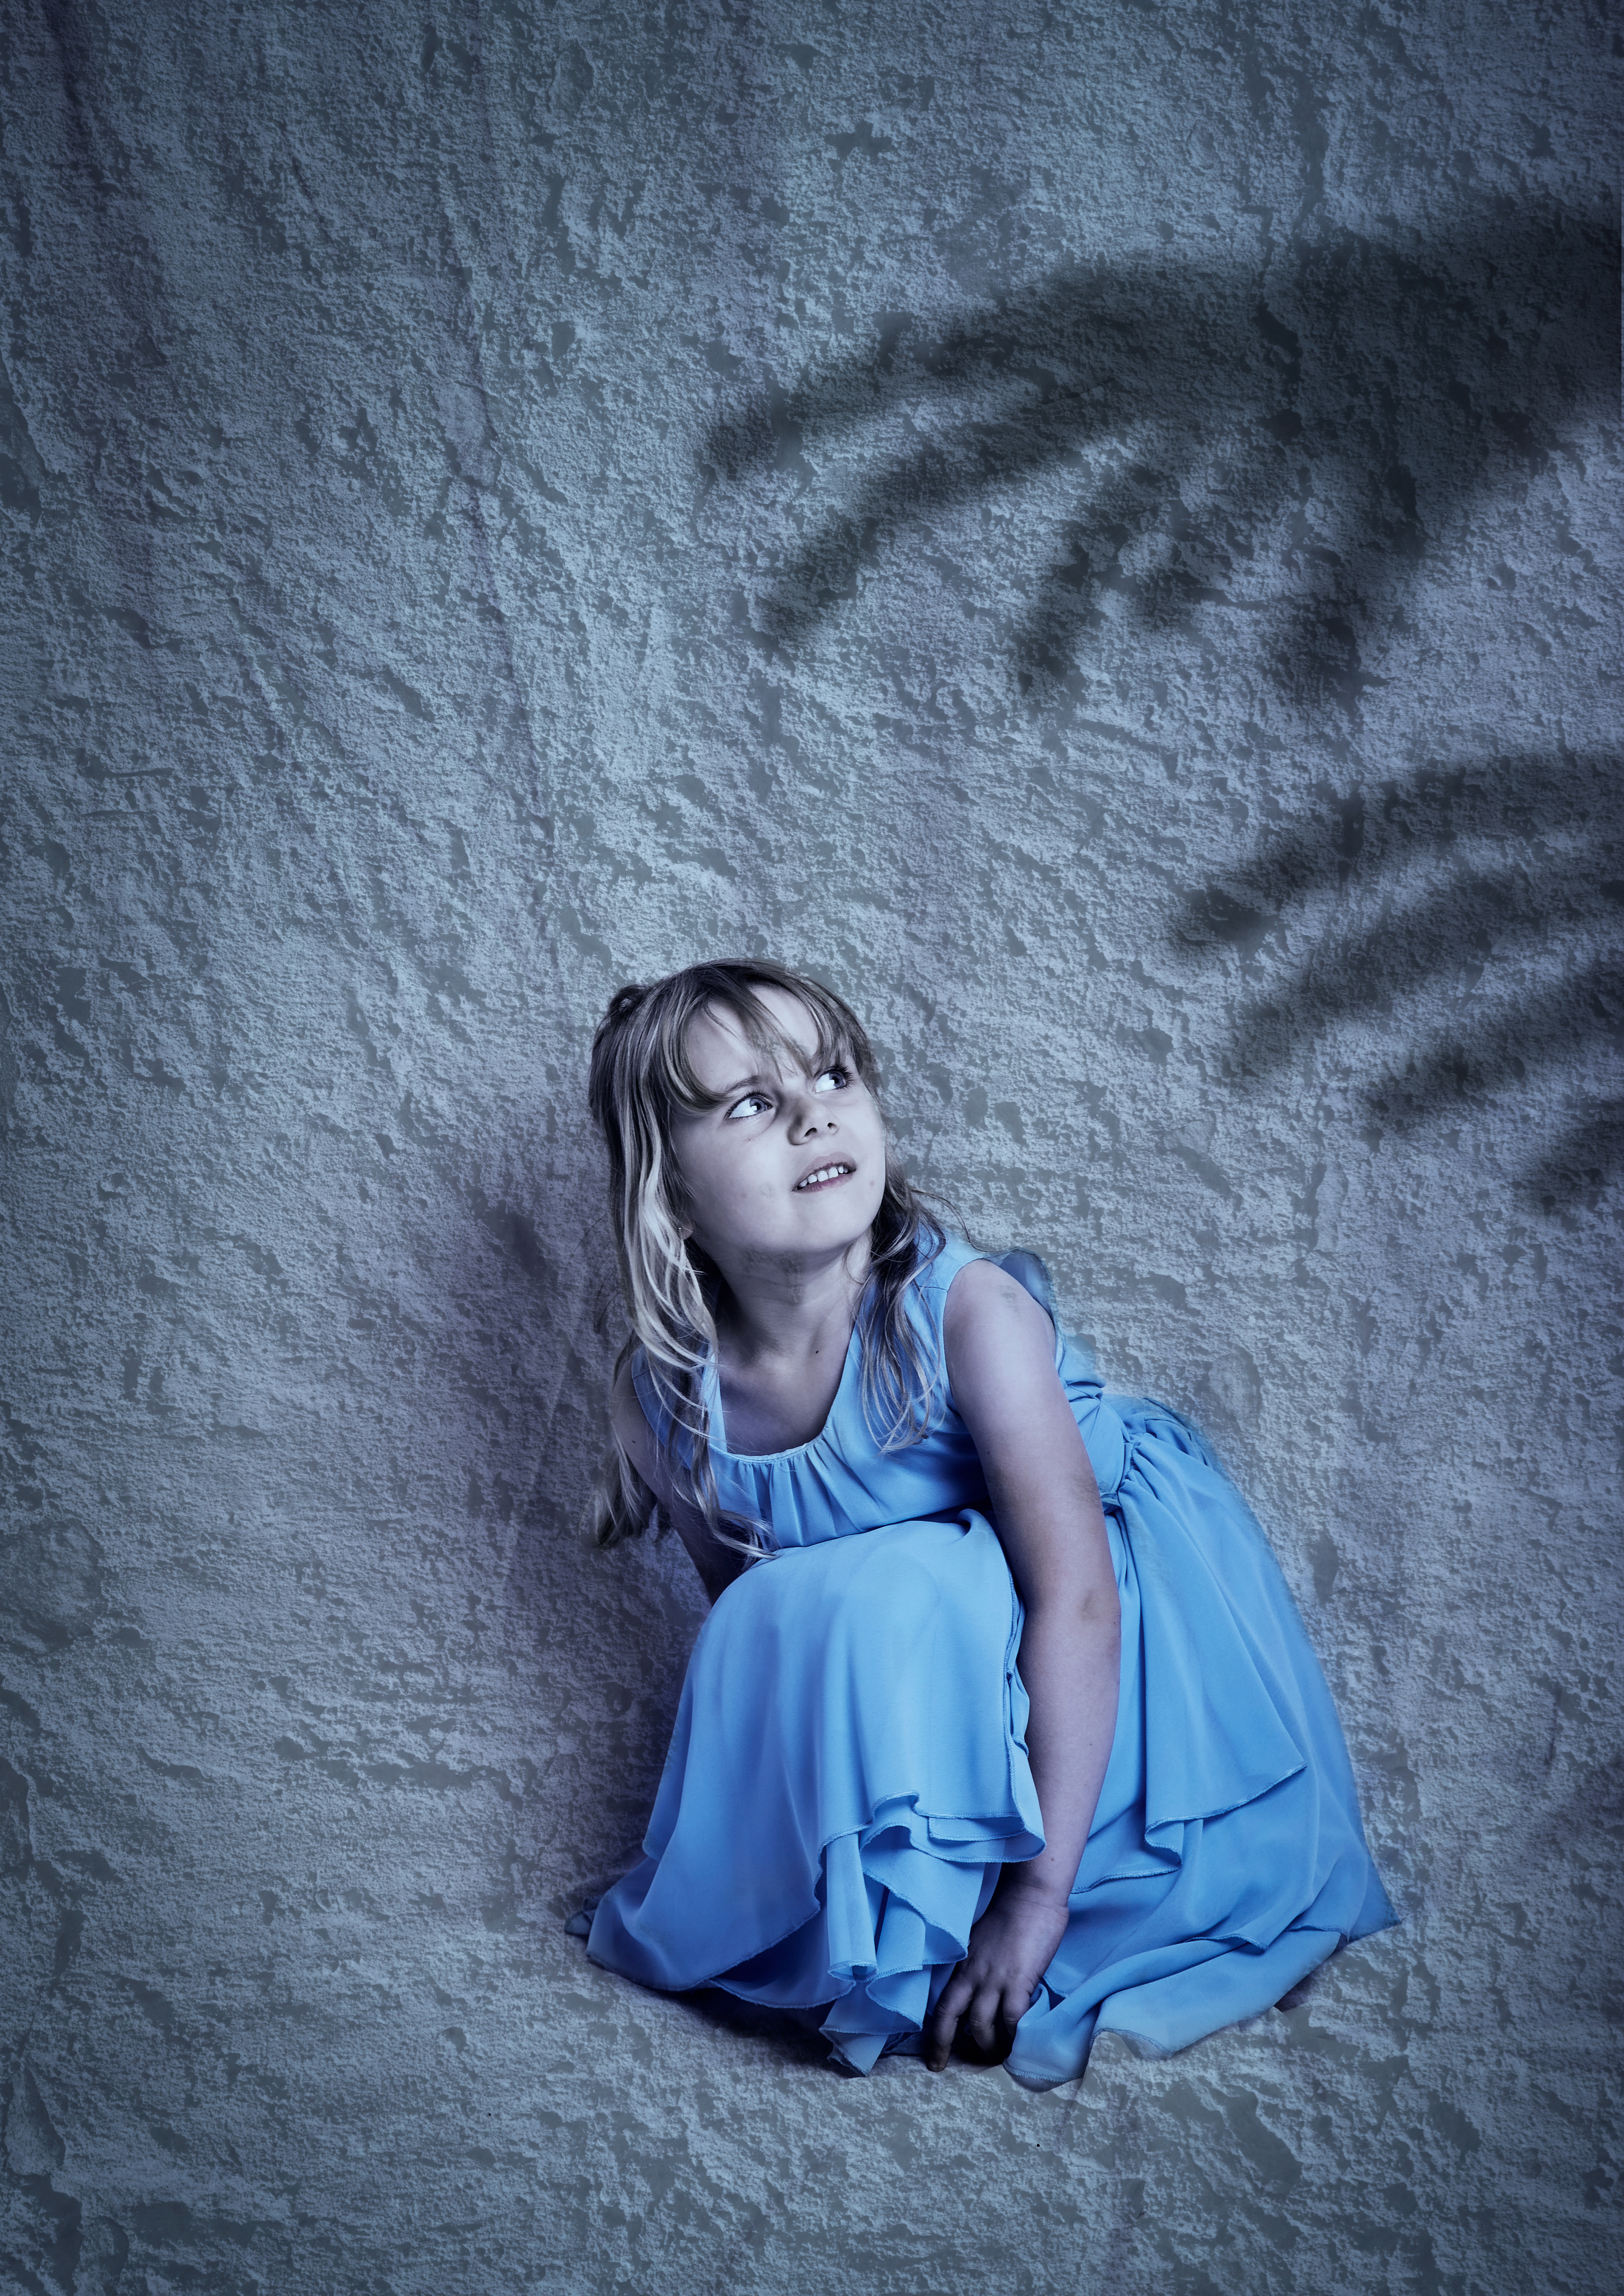
In my living room 'studio' I hung a white cloth from the ceiling, draping it along the floor to create a seamless background. Using an off camera flash from the right and an LED light on the left, I asked Francesca to crouch down and look over her shoulders with a scared look on her face. As always, she was very obliging.
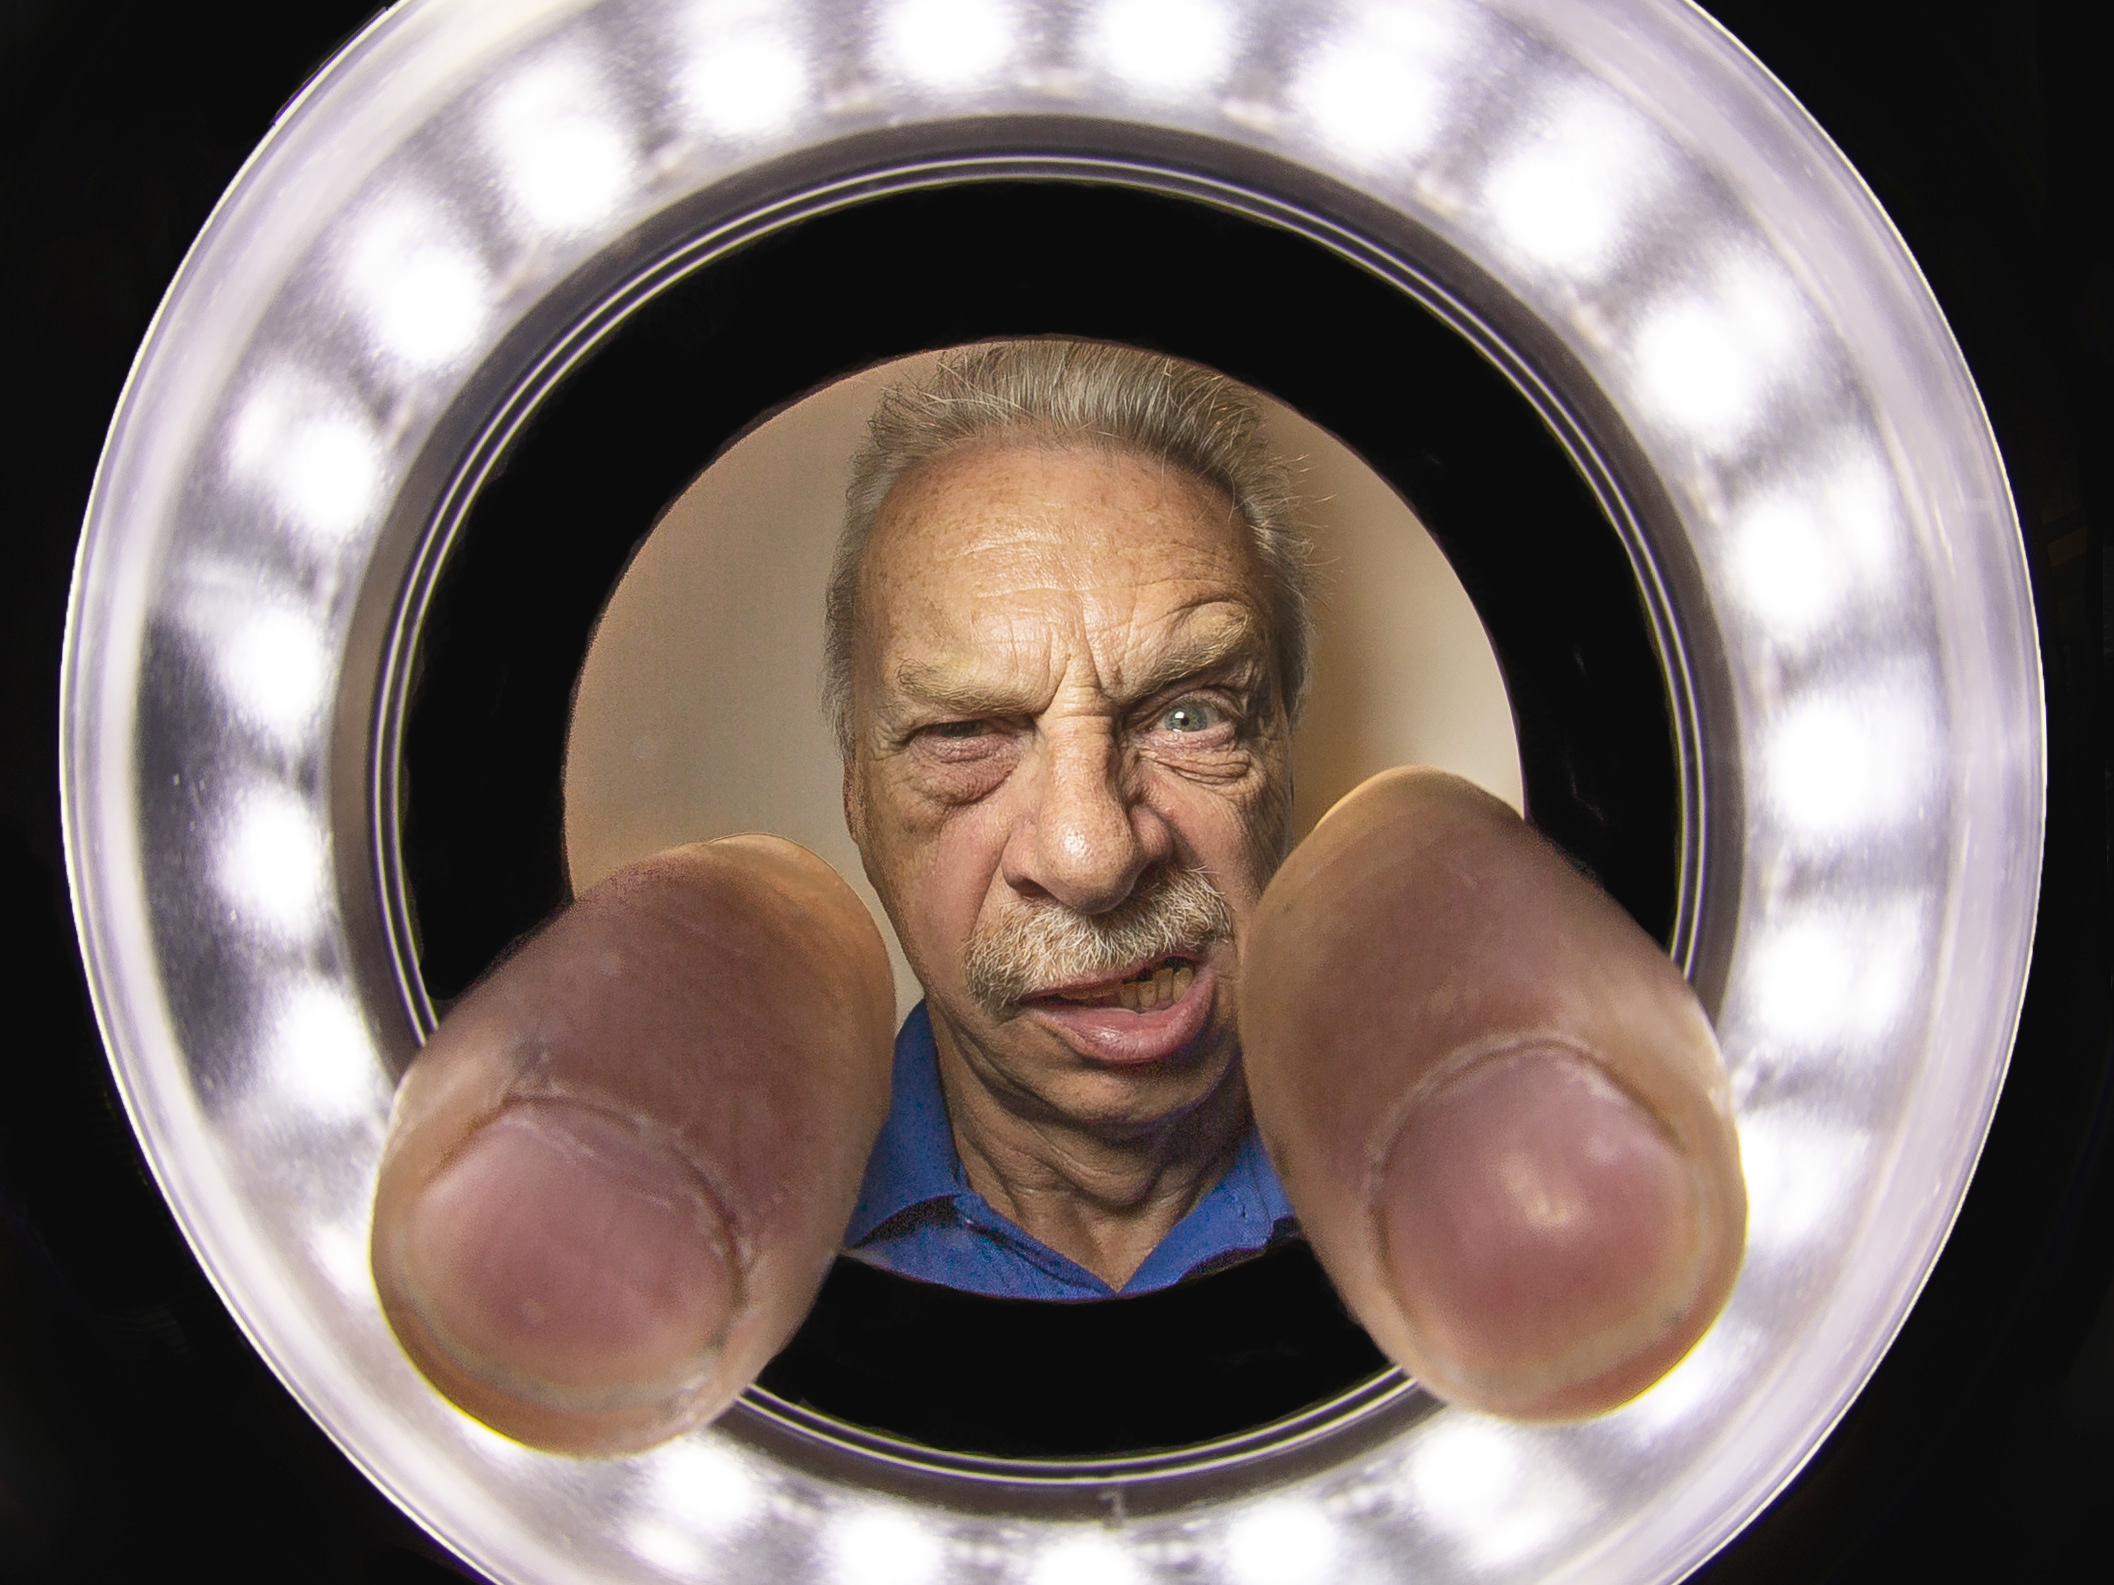
My long suffering assistant (AKA husband), held his hands out menacingly between the flash gun and the scene in order to create the shadows.
In the post processing stage I added a texture for the crumpled look, a heavy vignette, darkened the shadows for greater contrast, and added a blue cast to get the night-time feel.
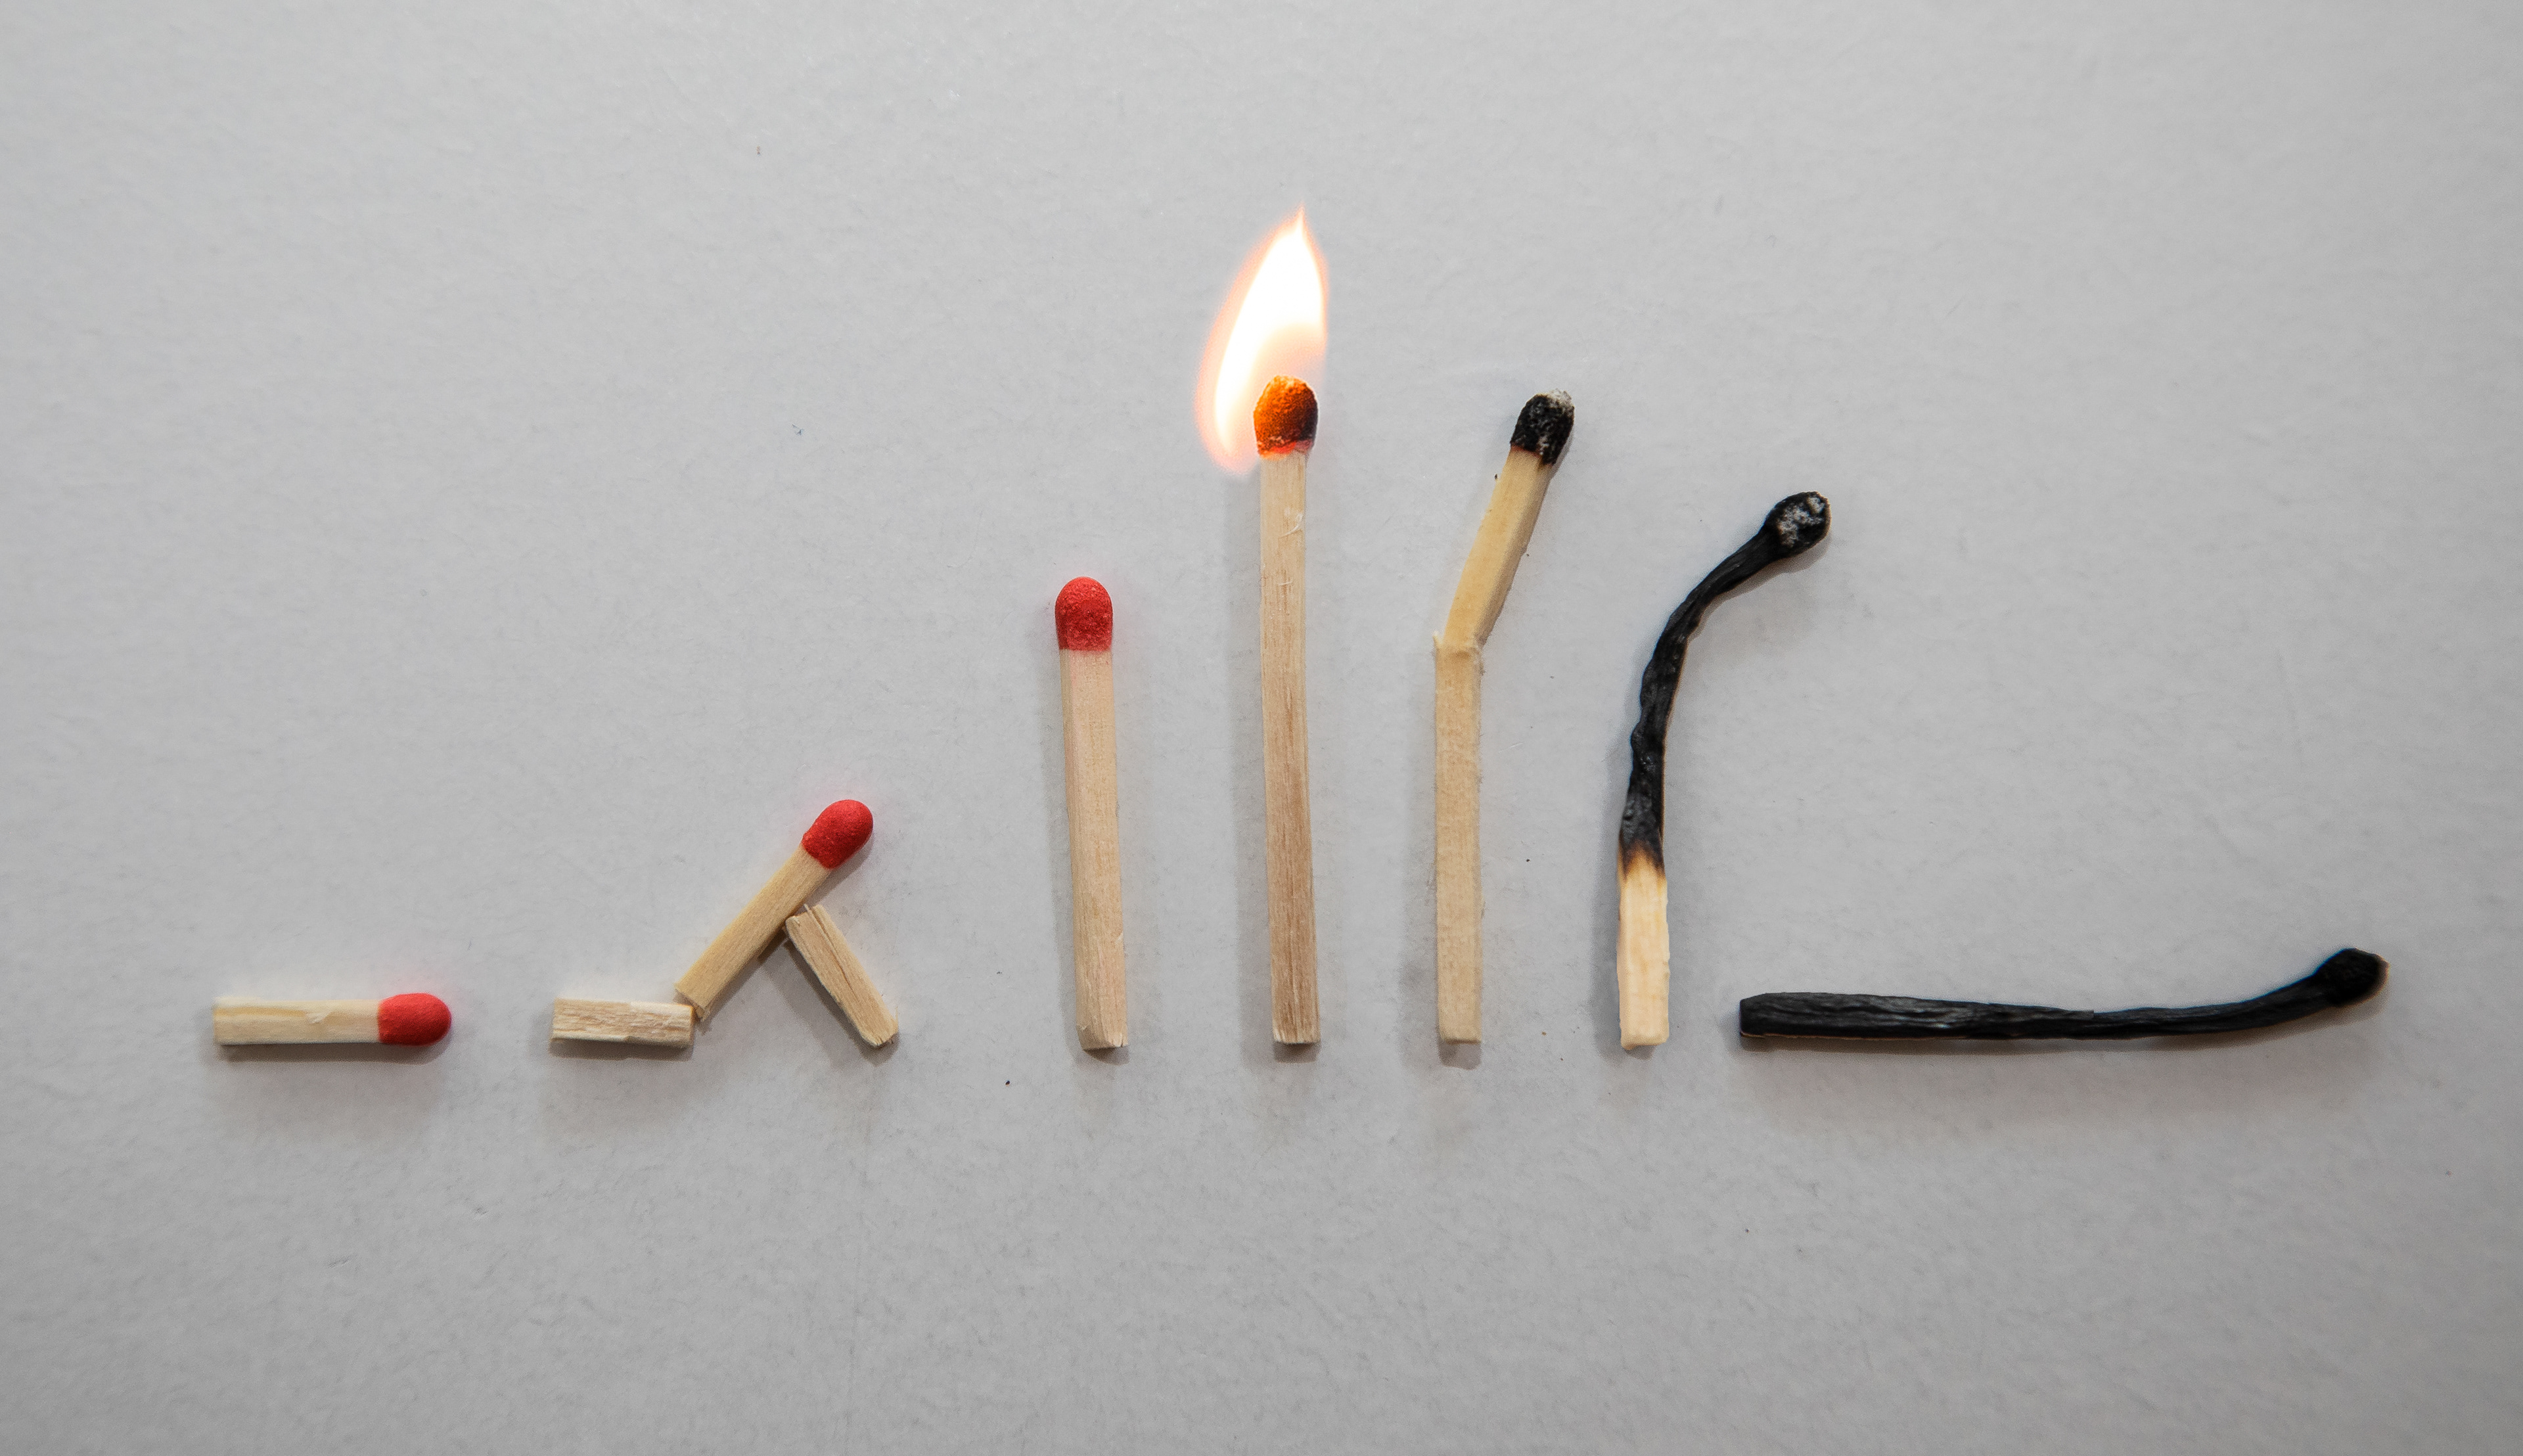
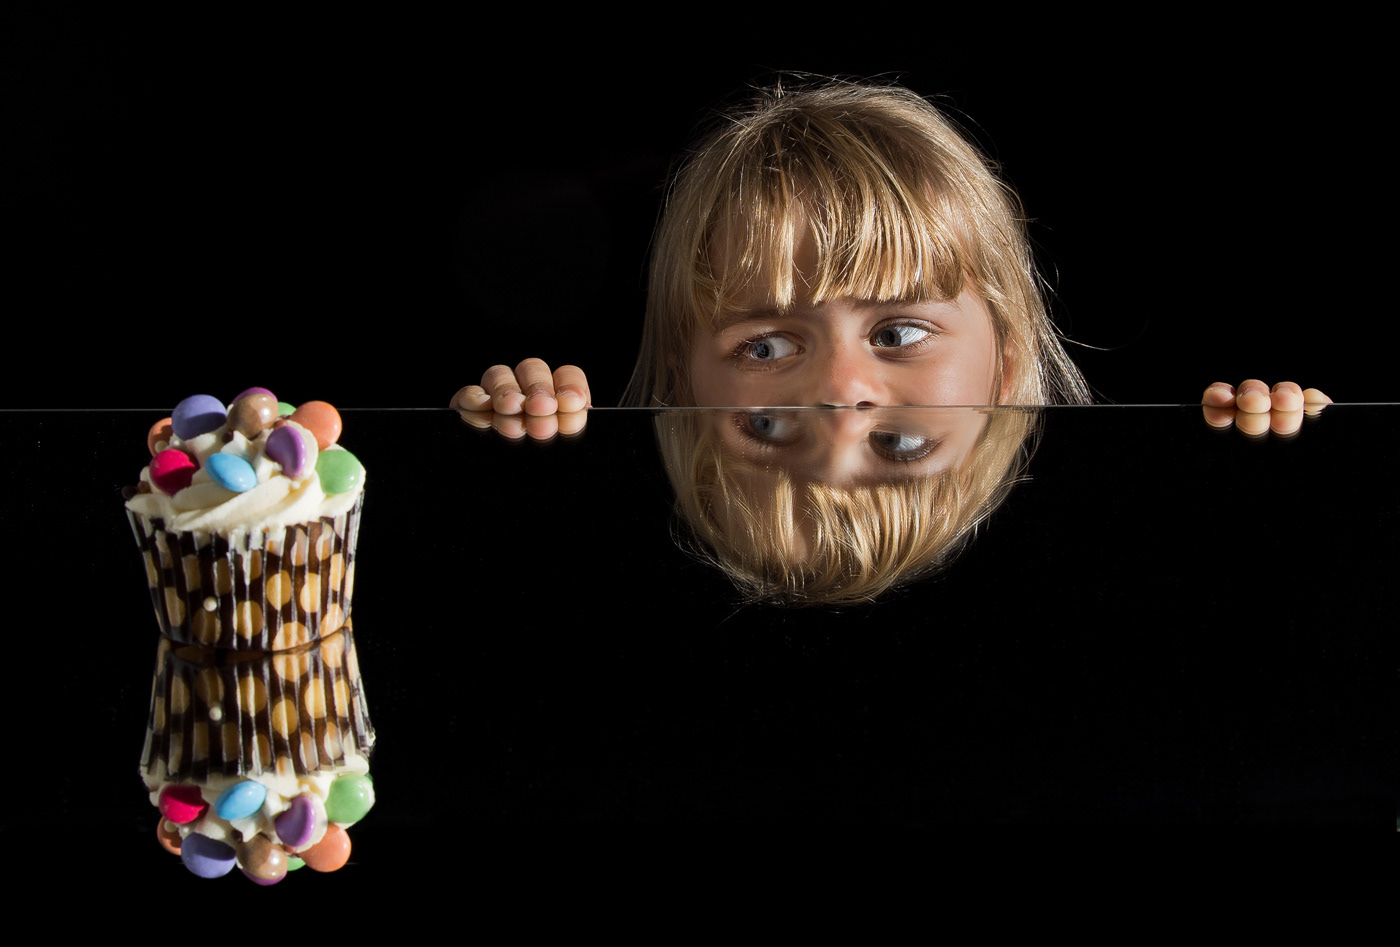
The seven stages of life

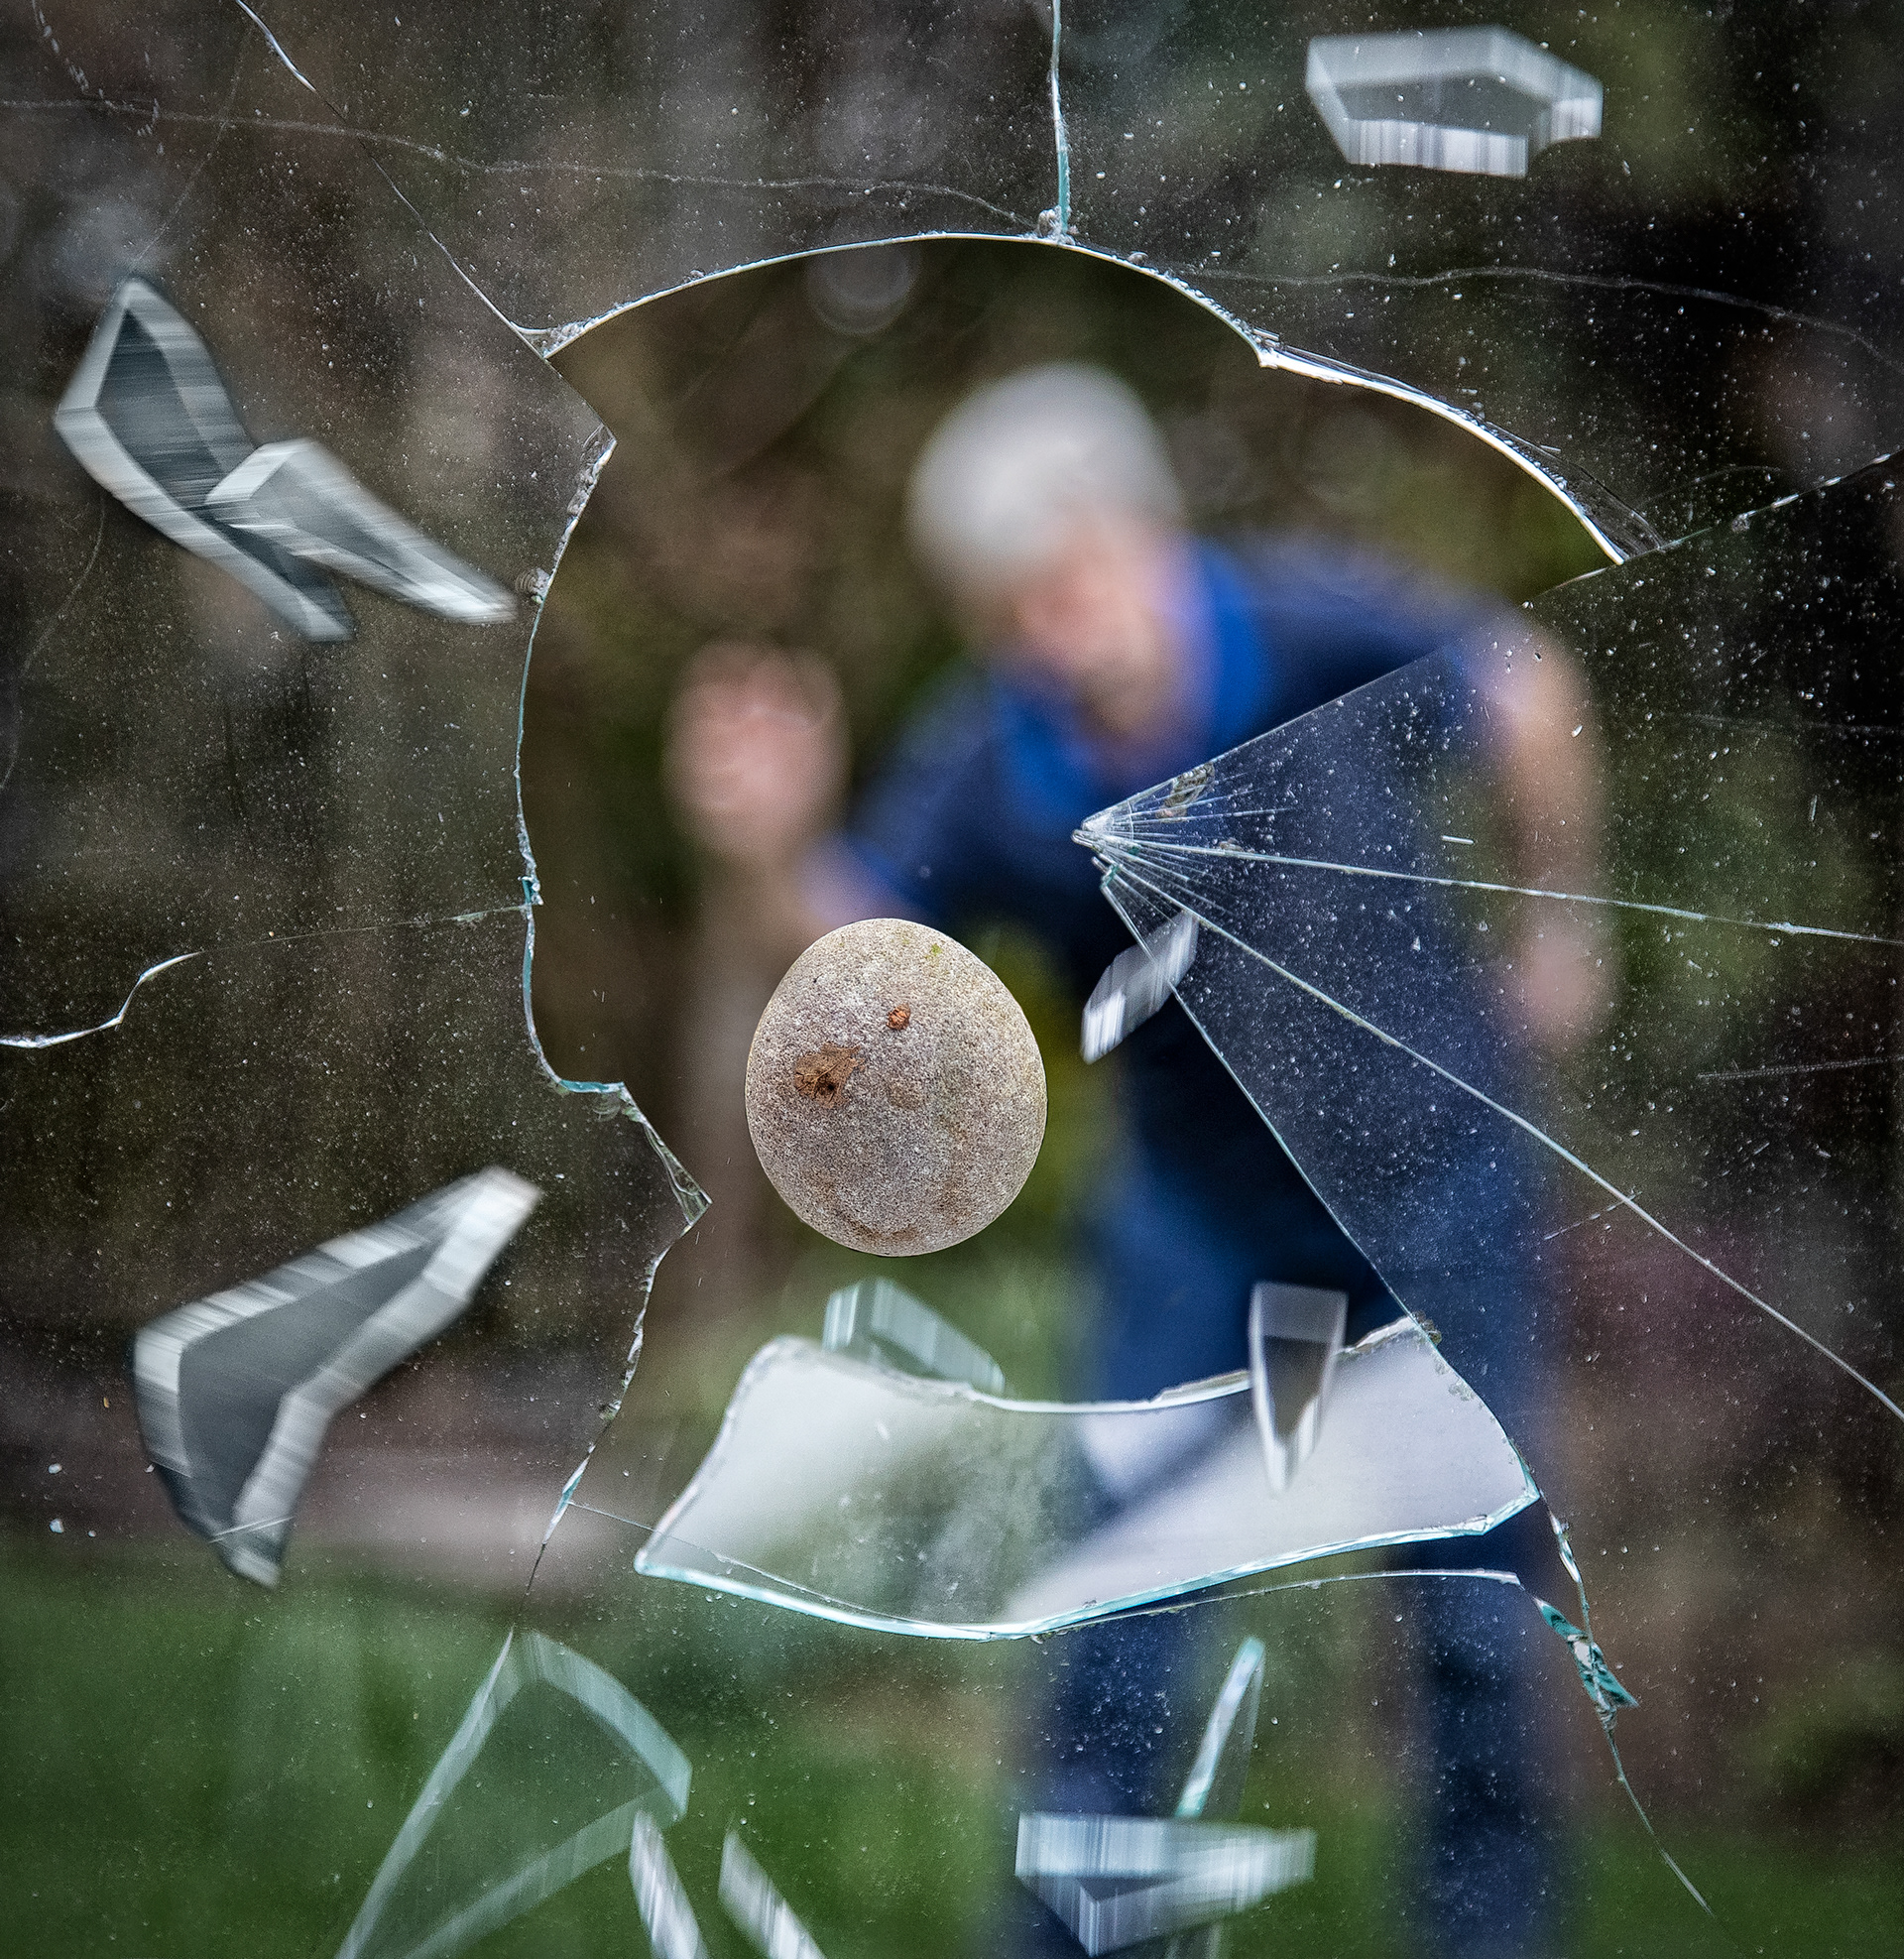
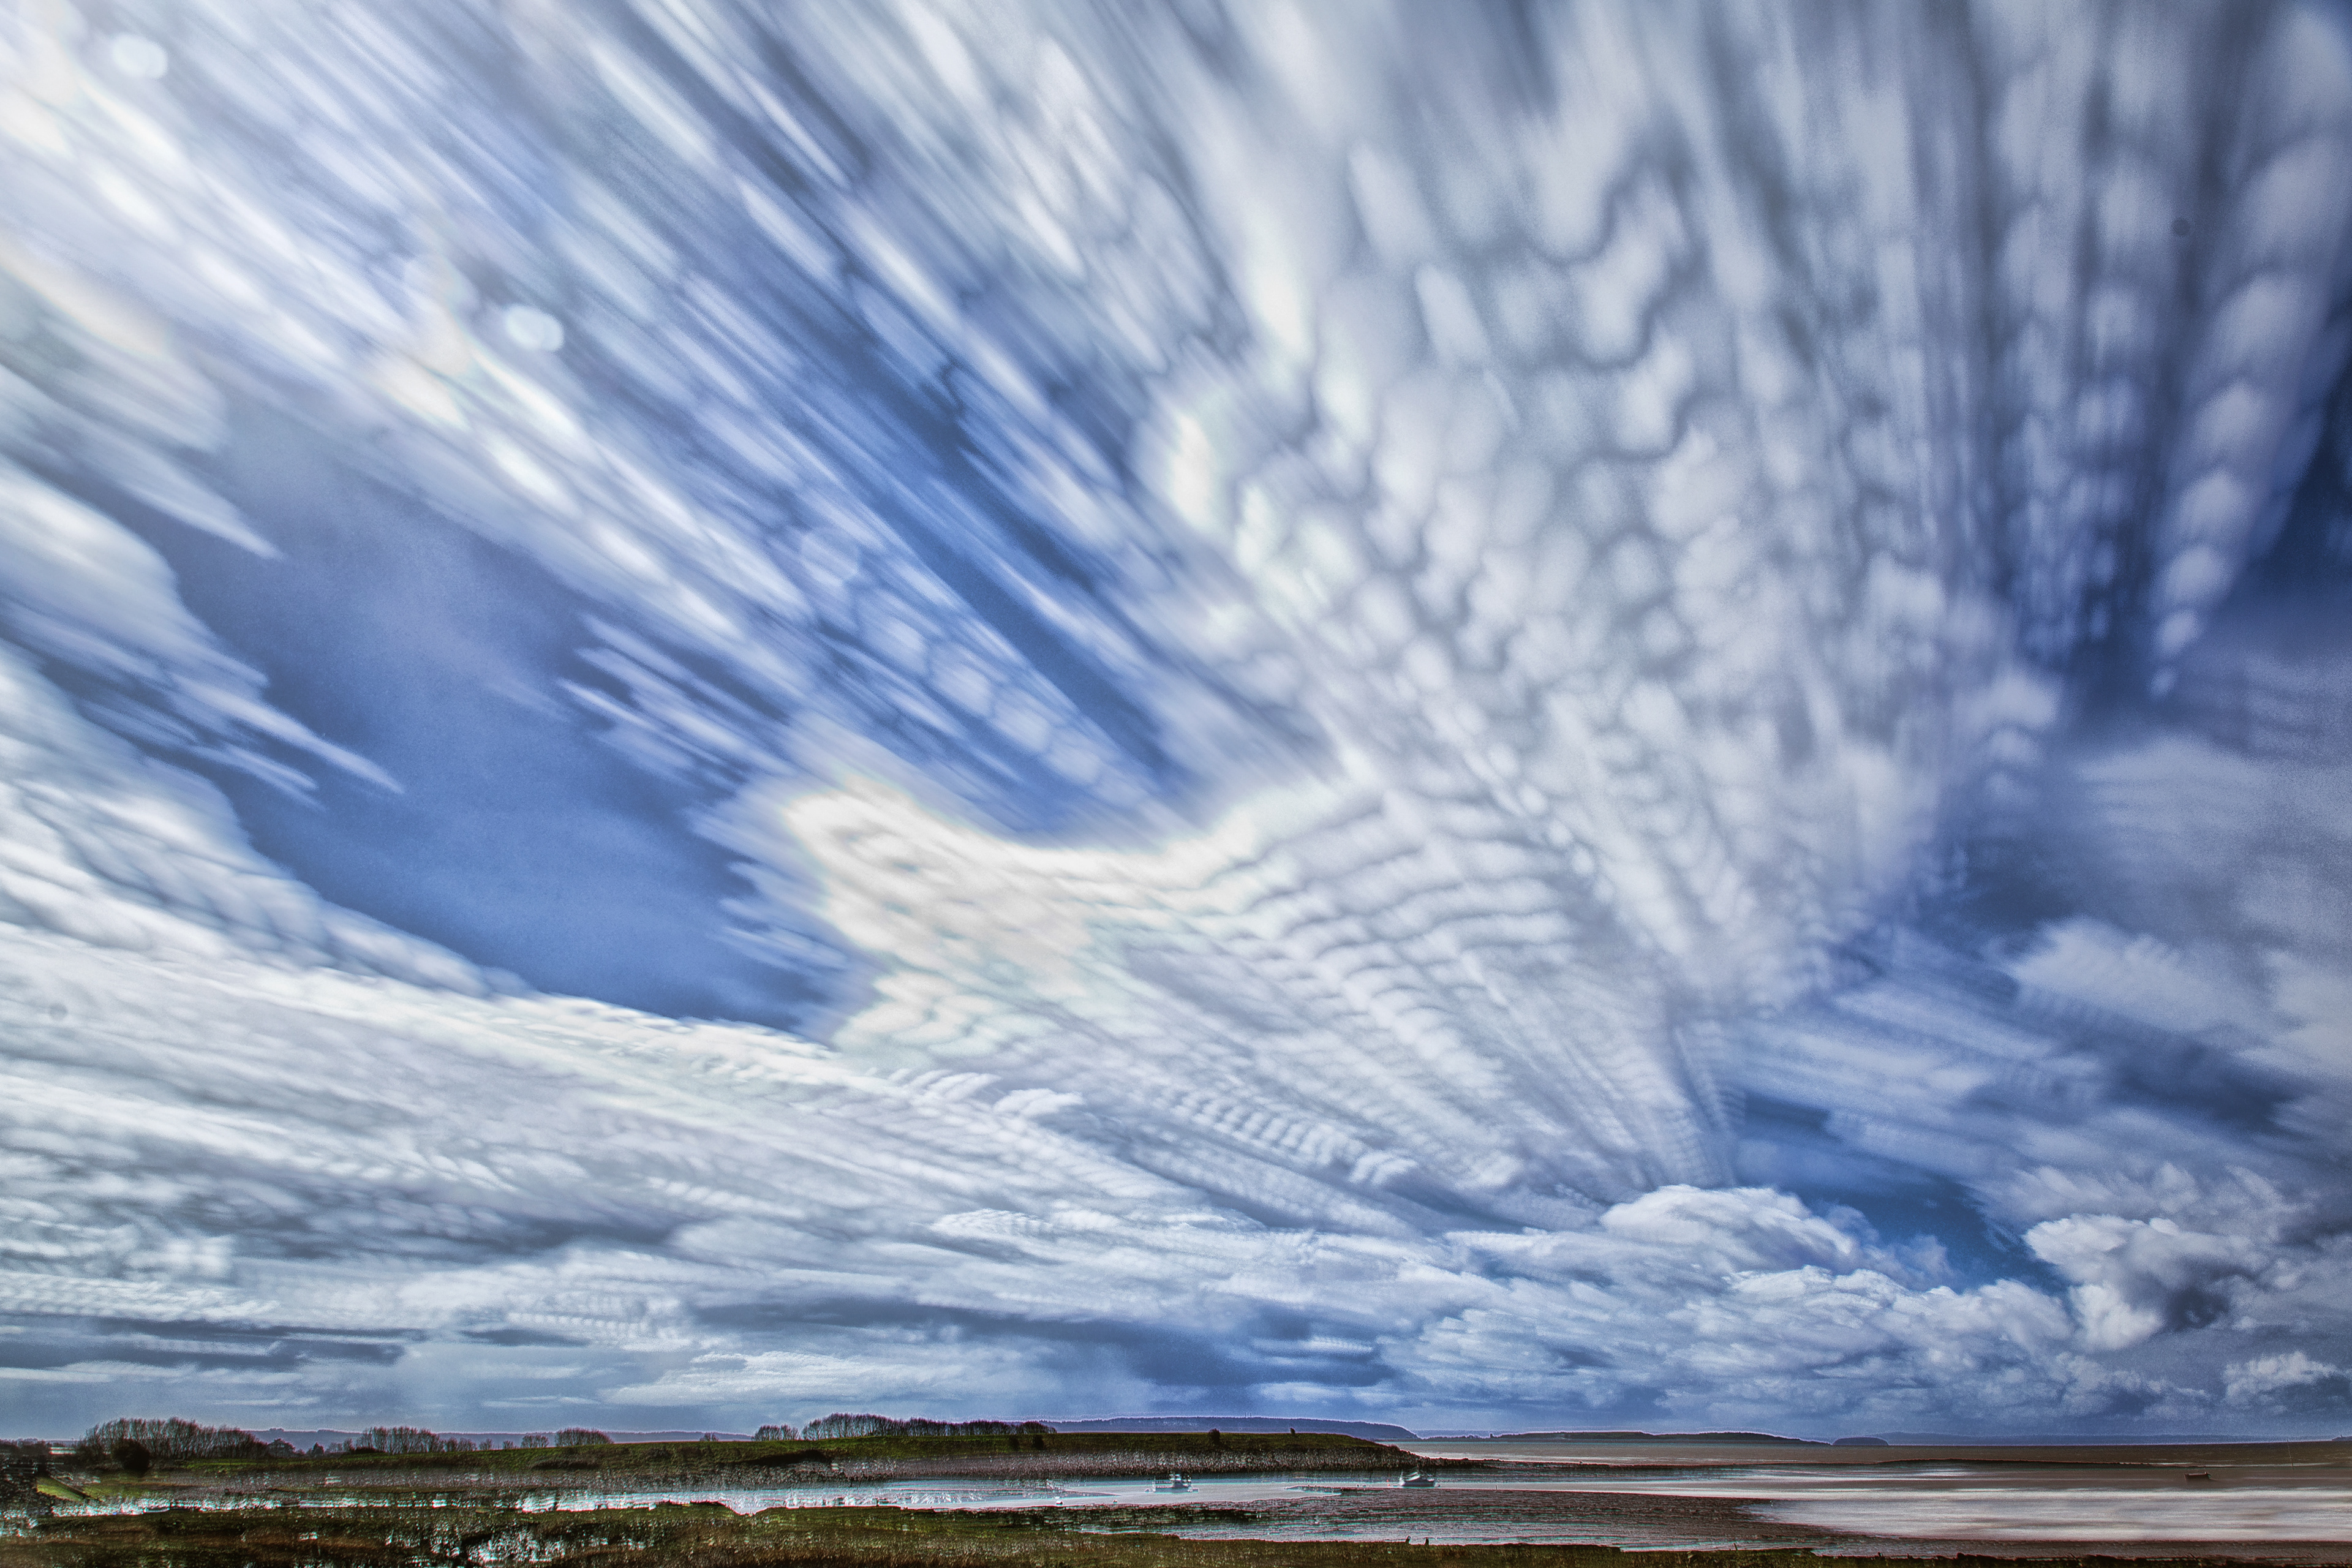
It looks like rain
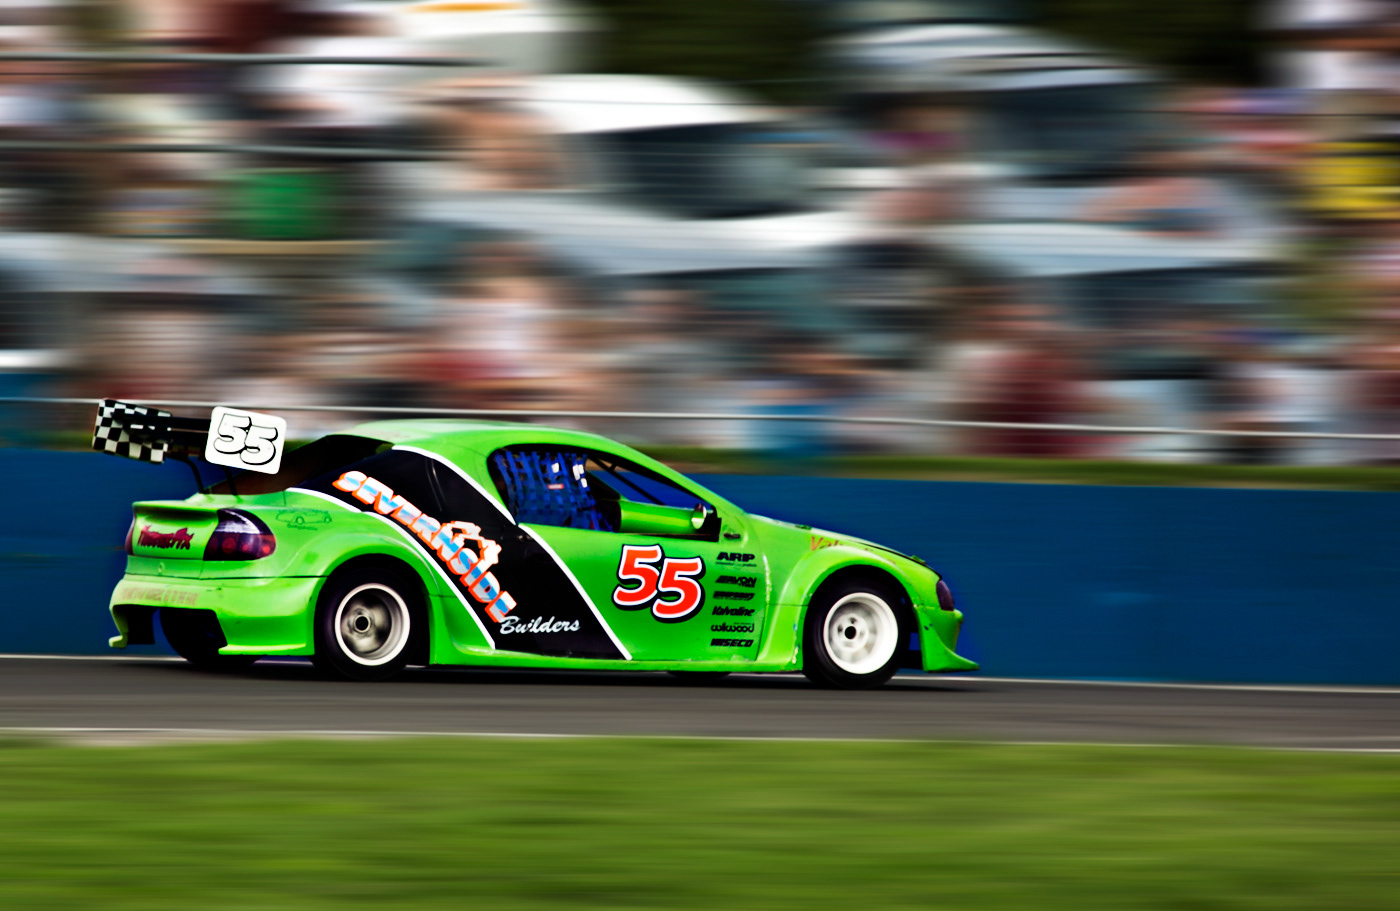
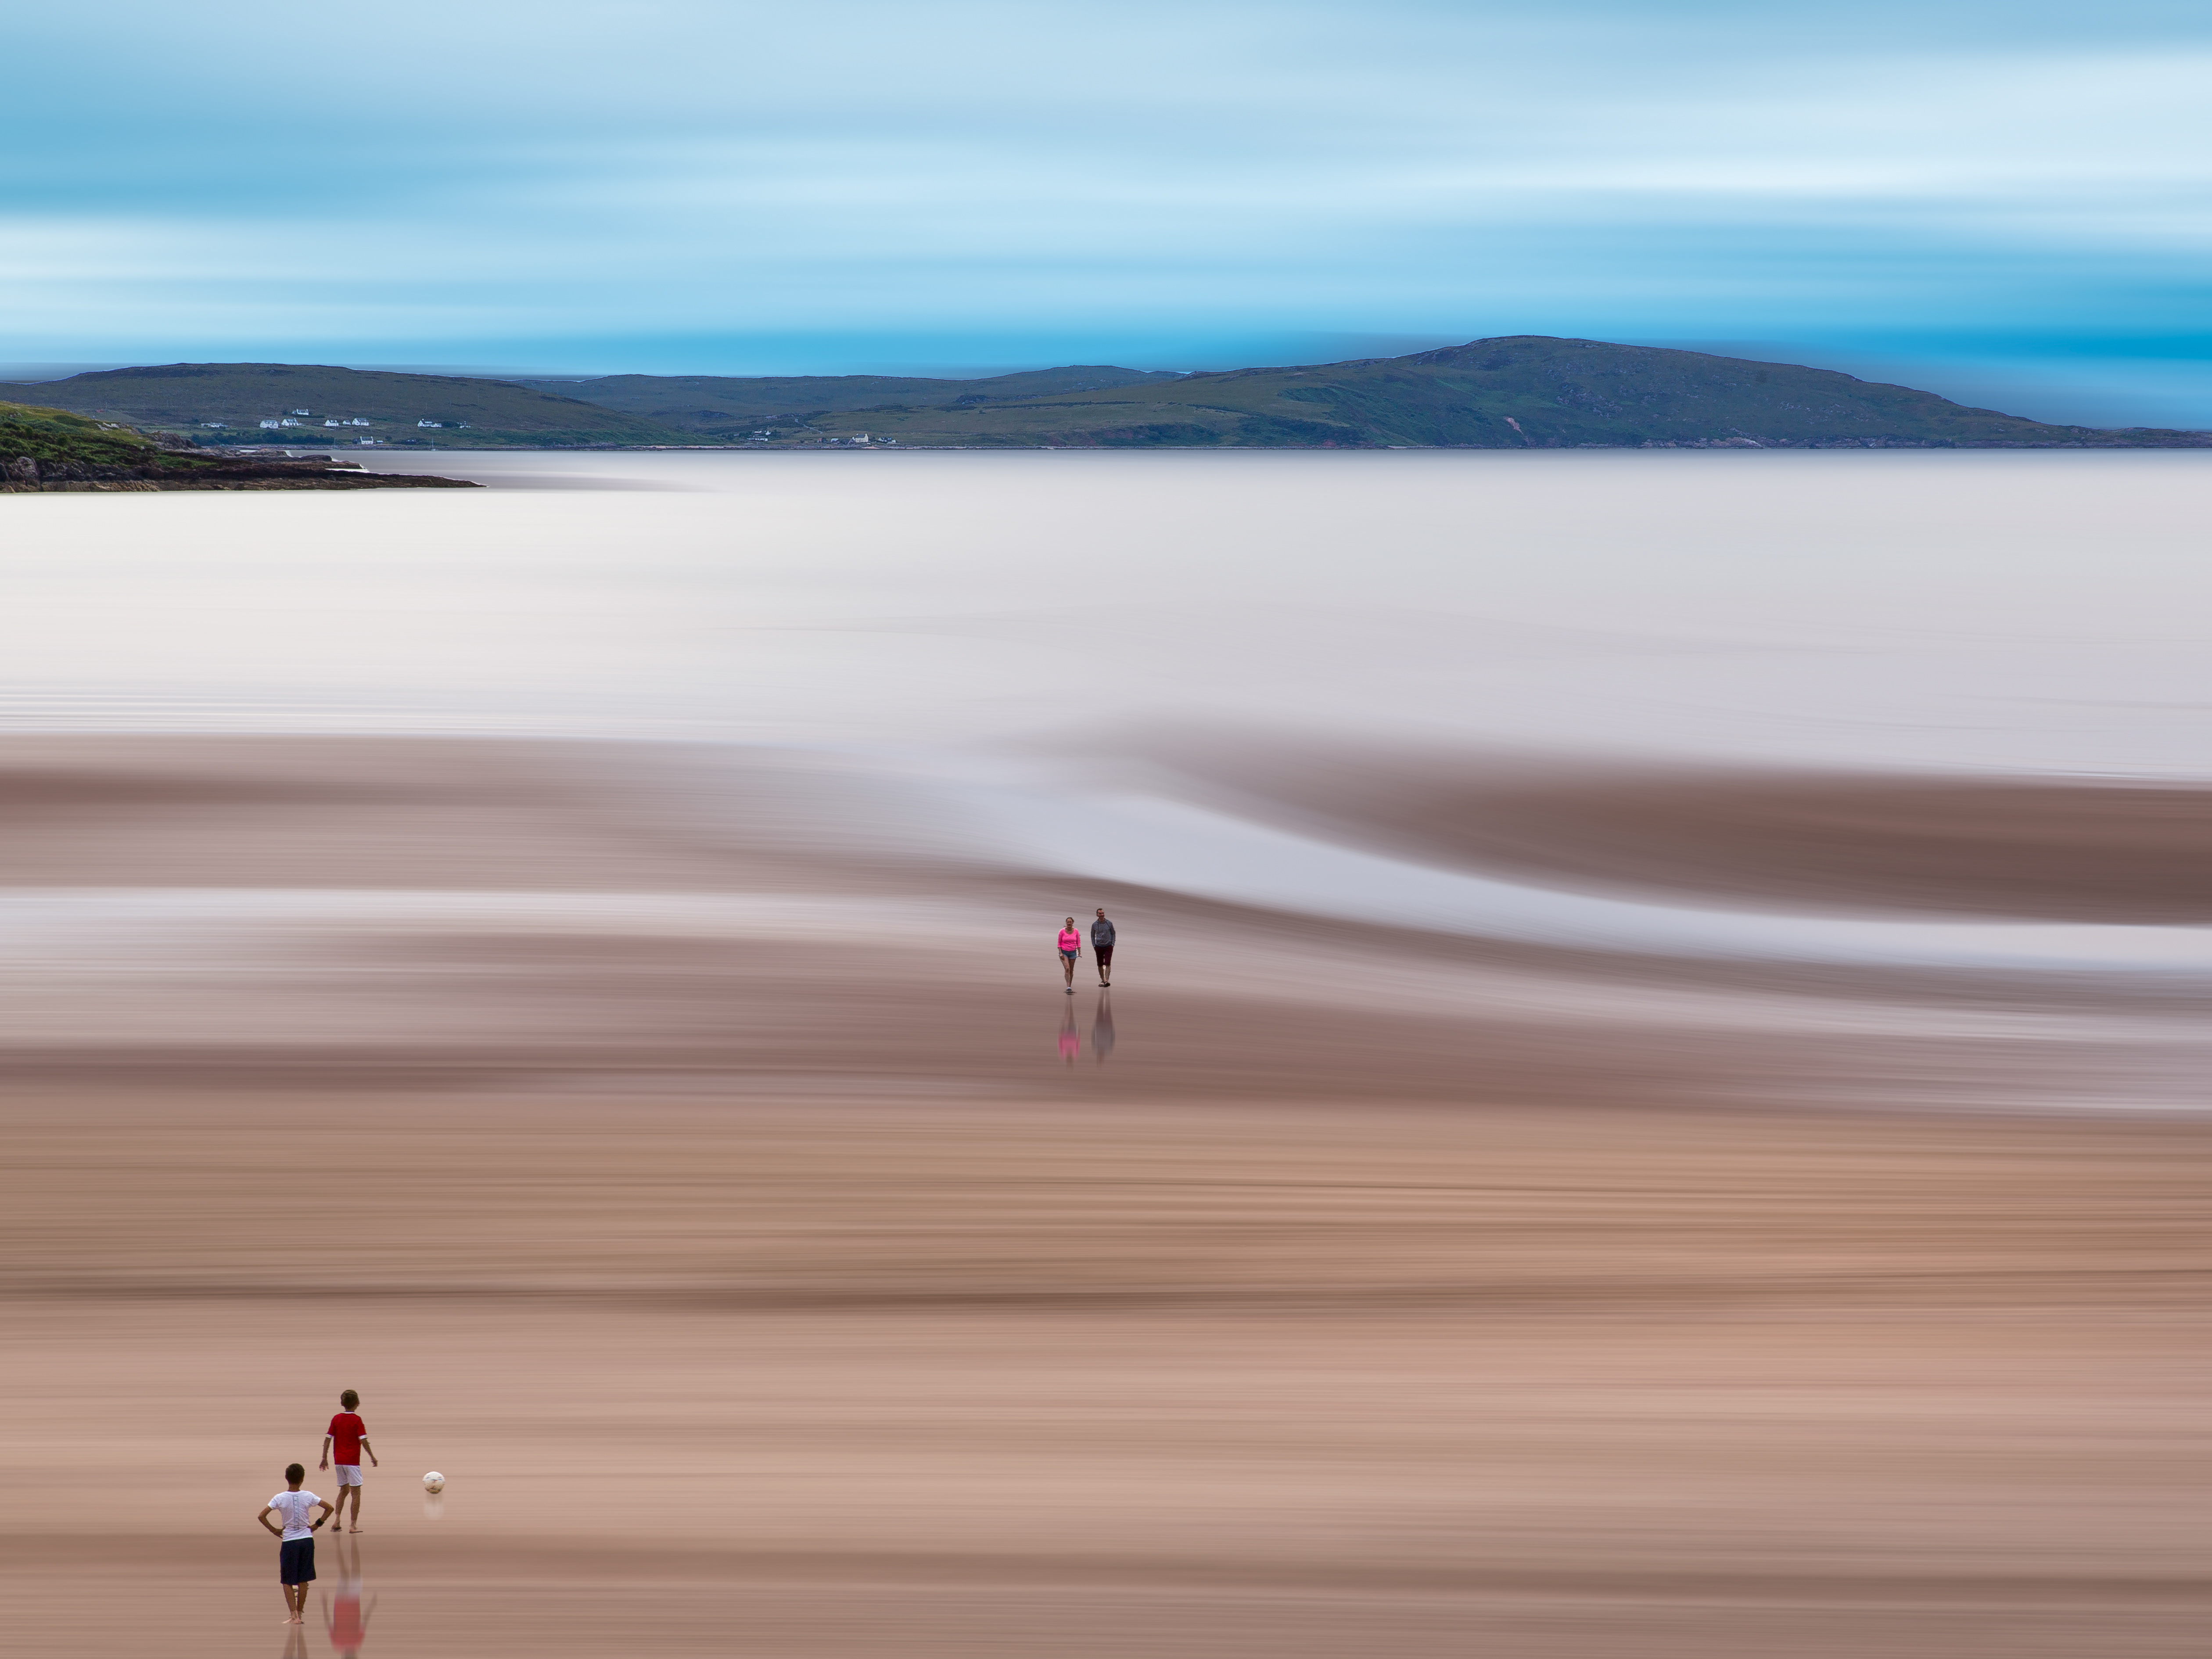
Panning

Light painting

The magic of books
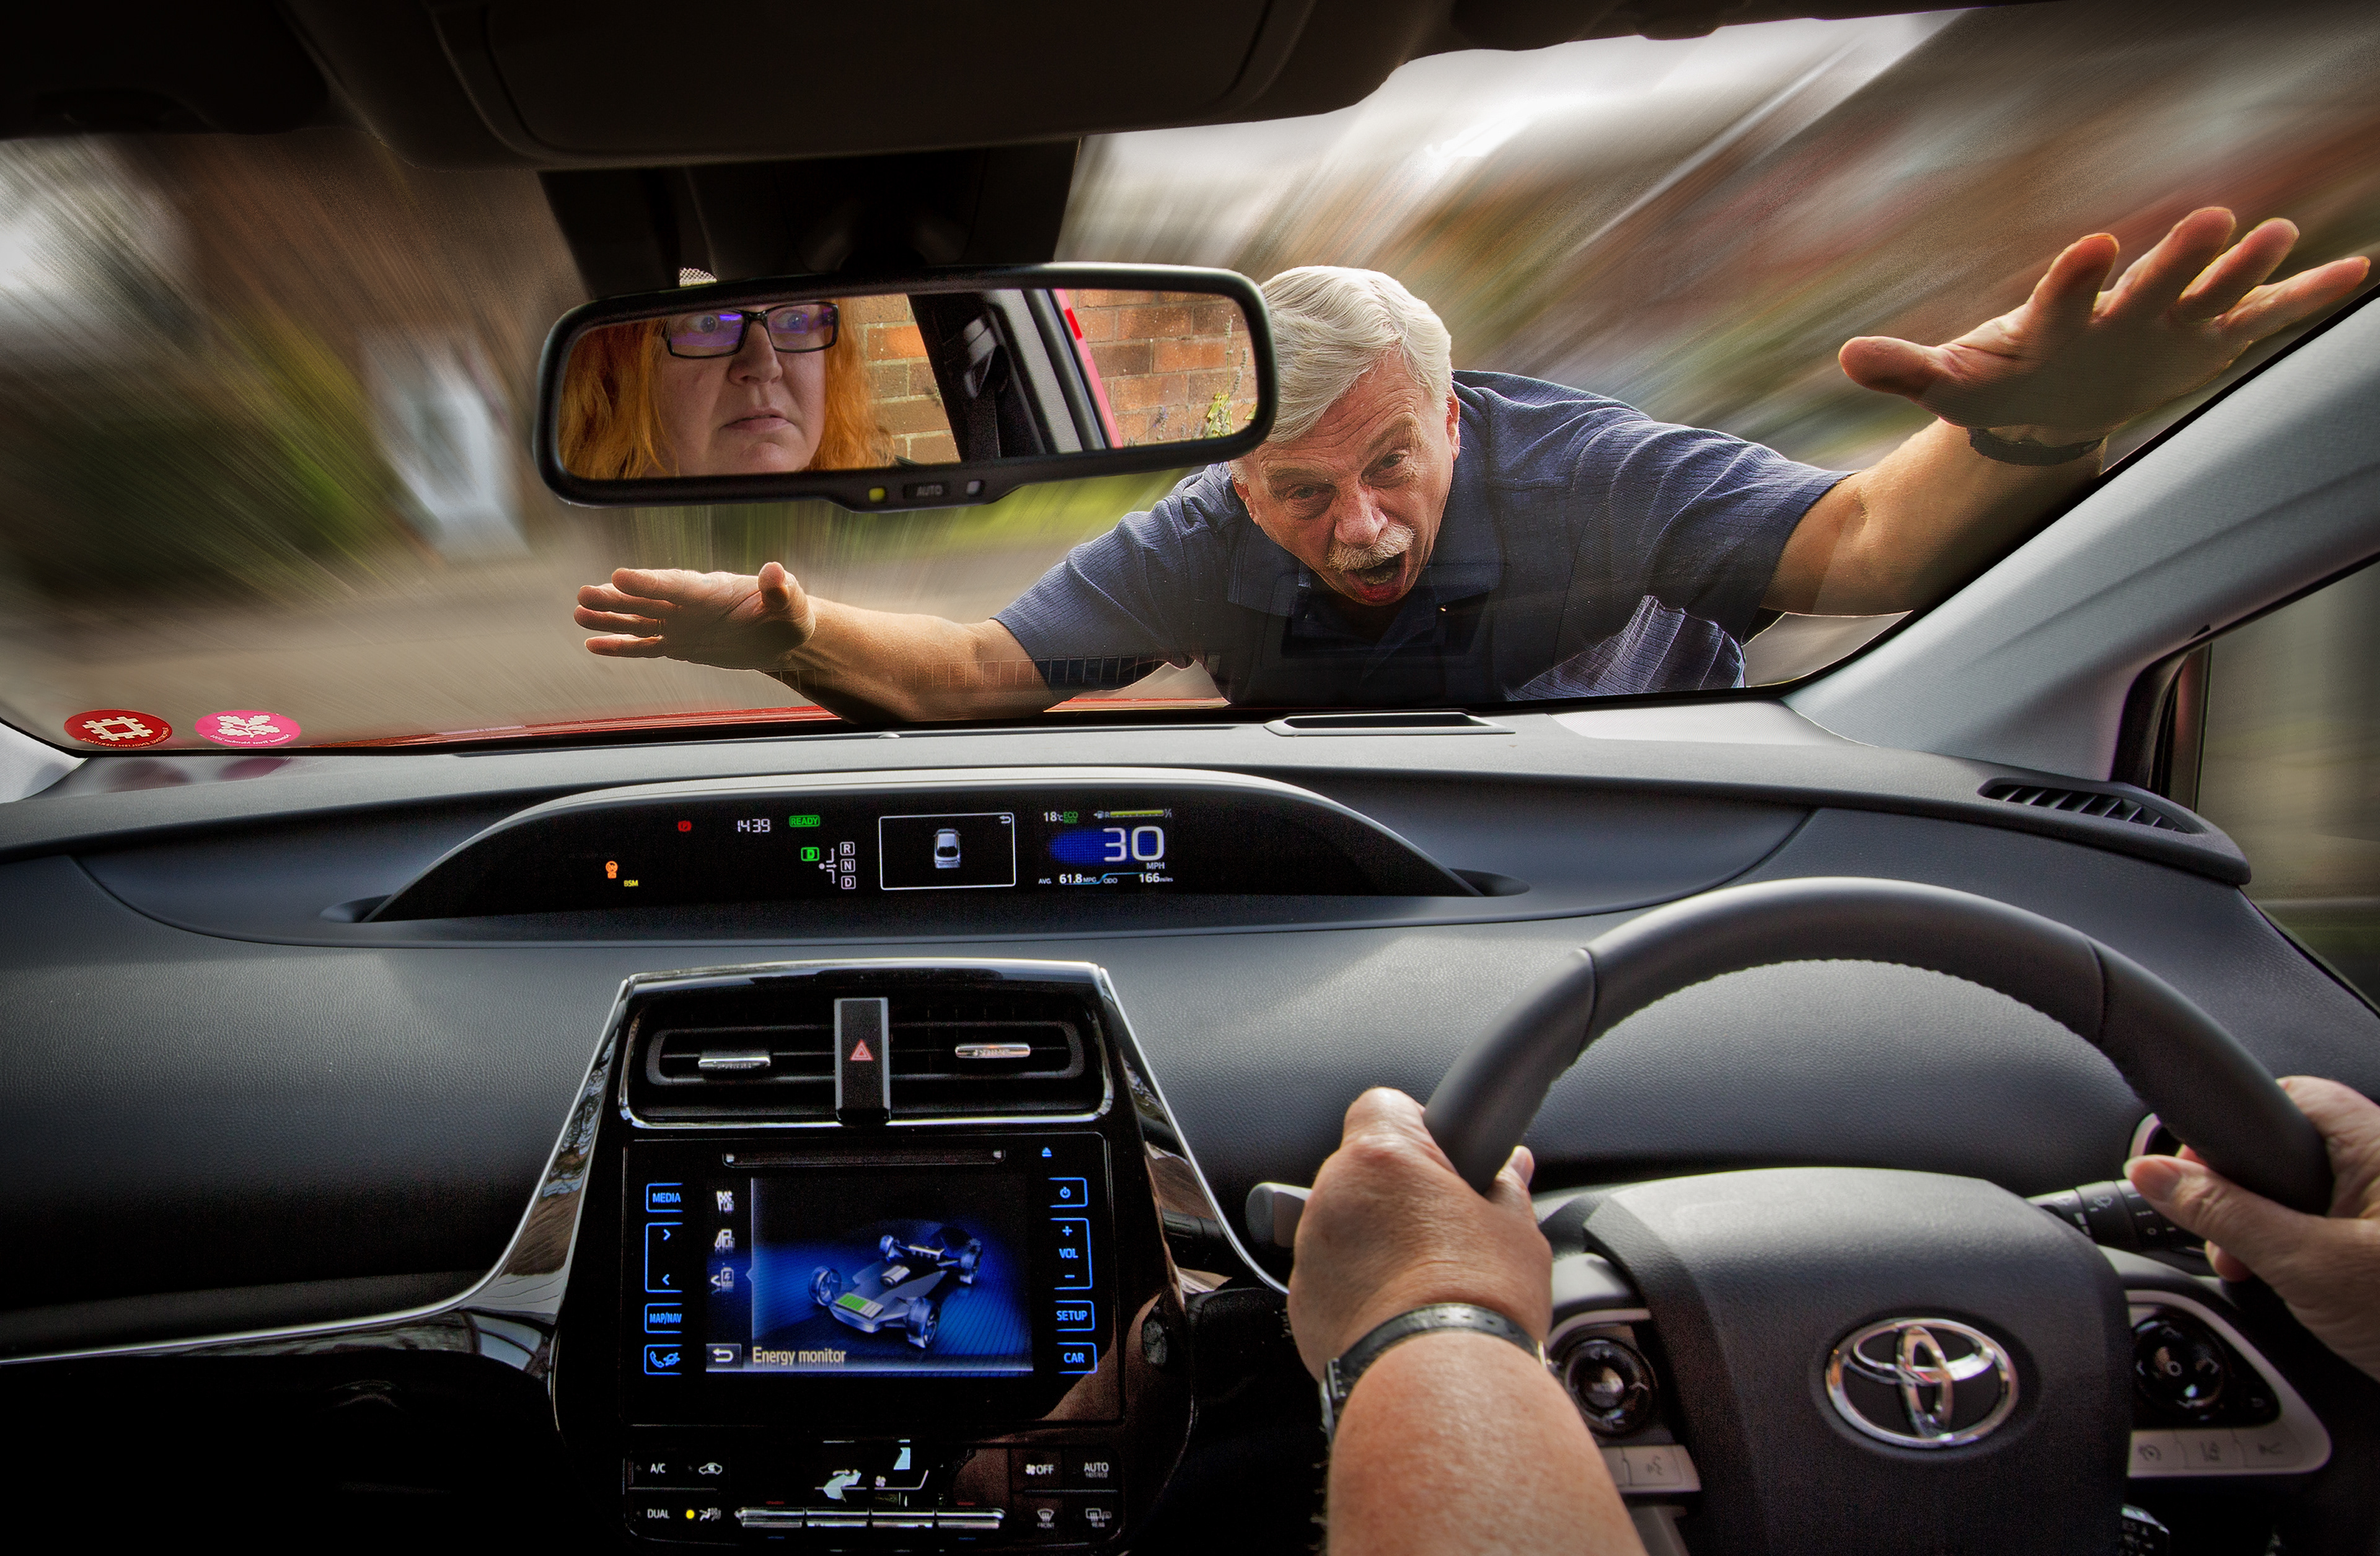
My husband gets so obsessive about his car
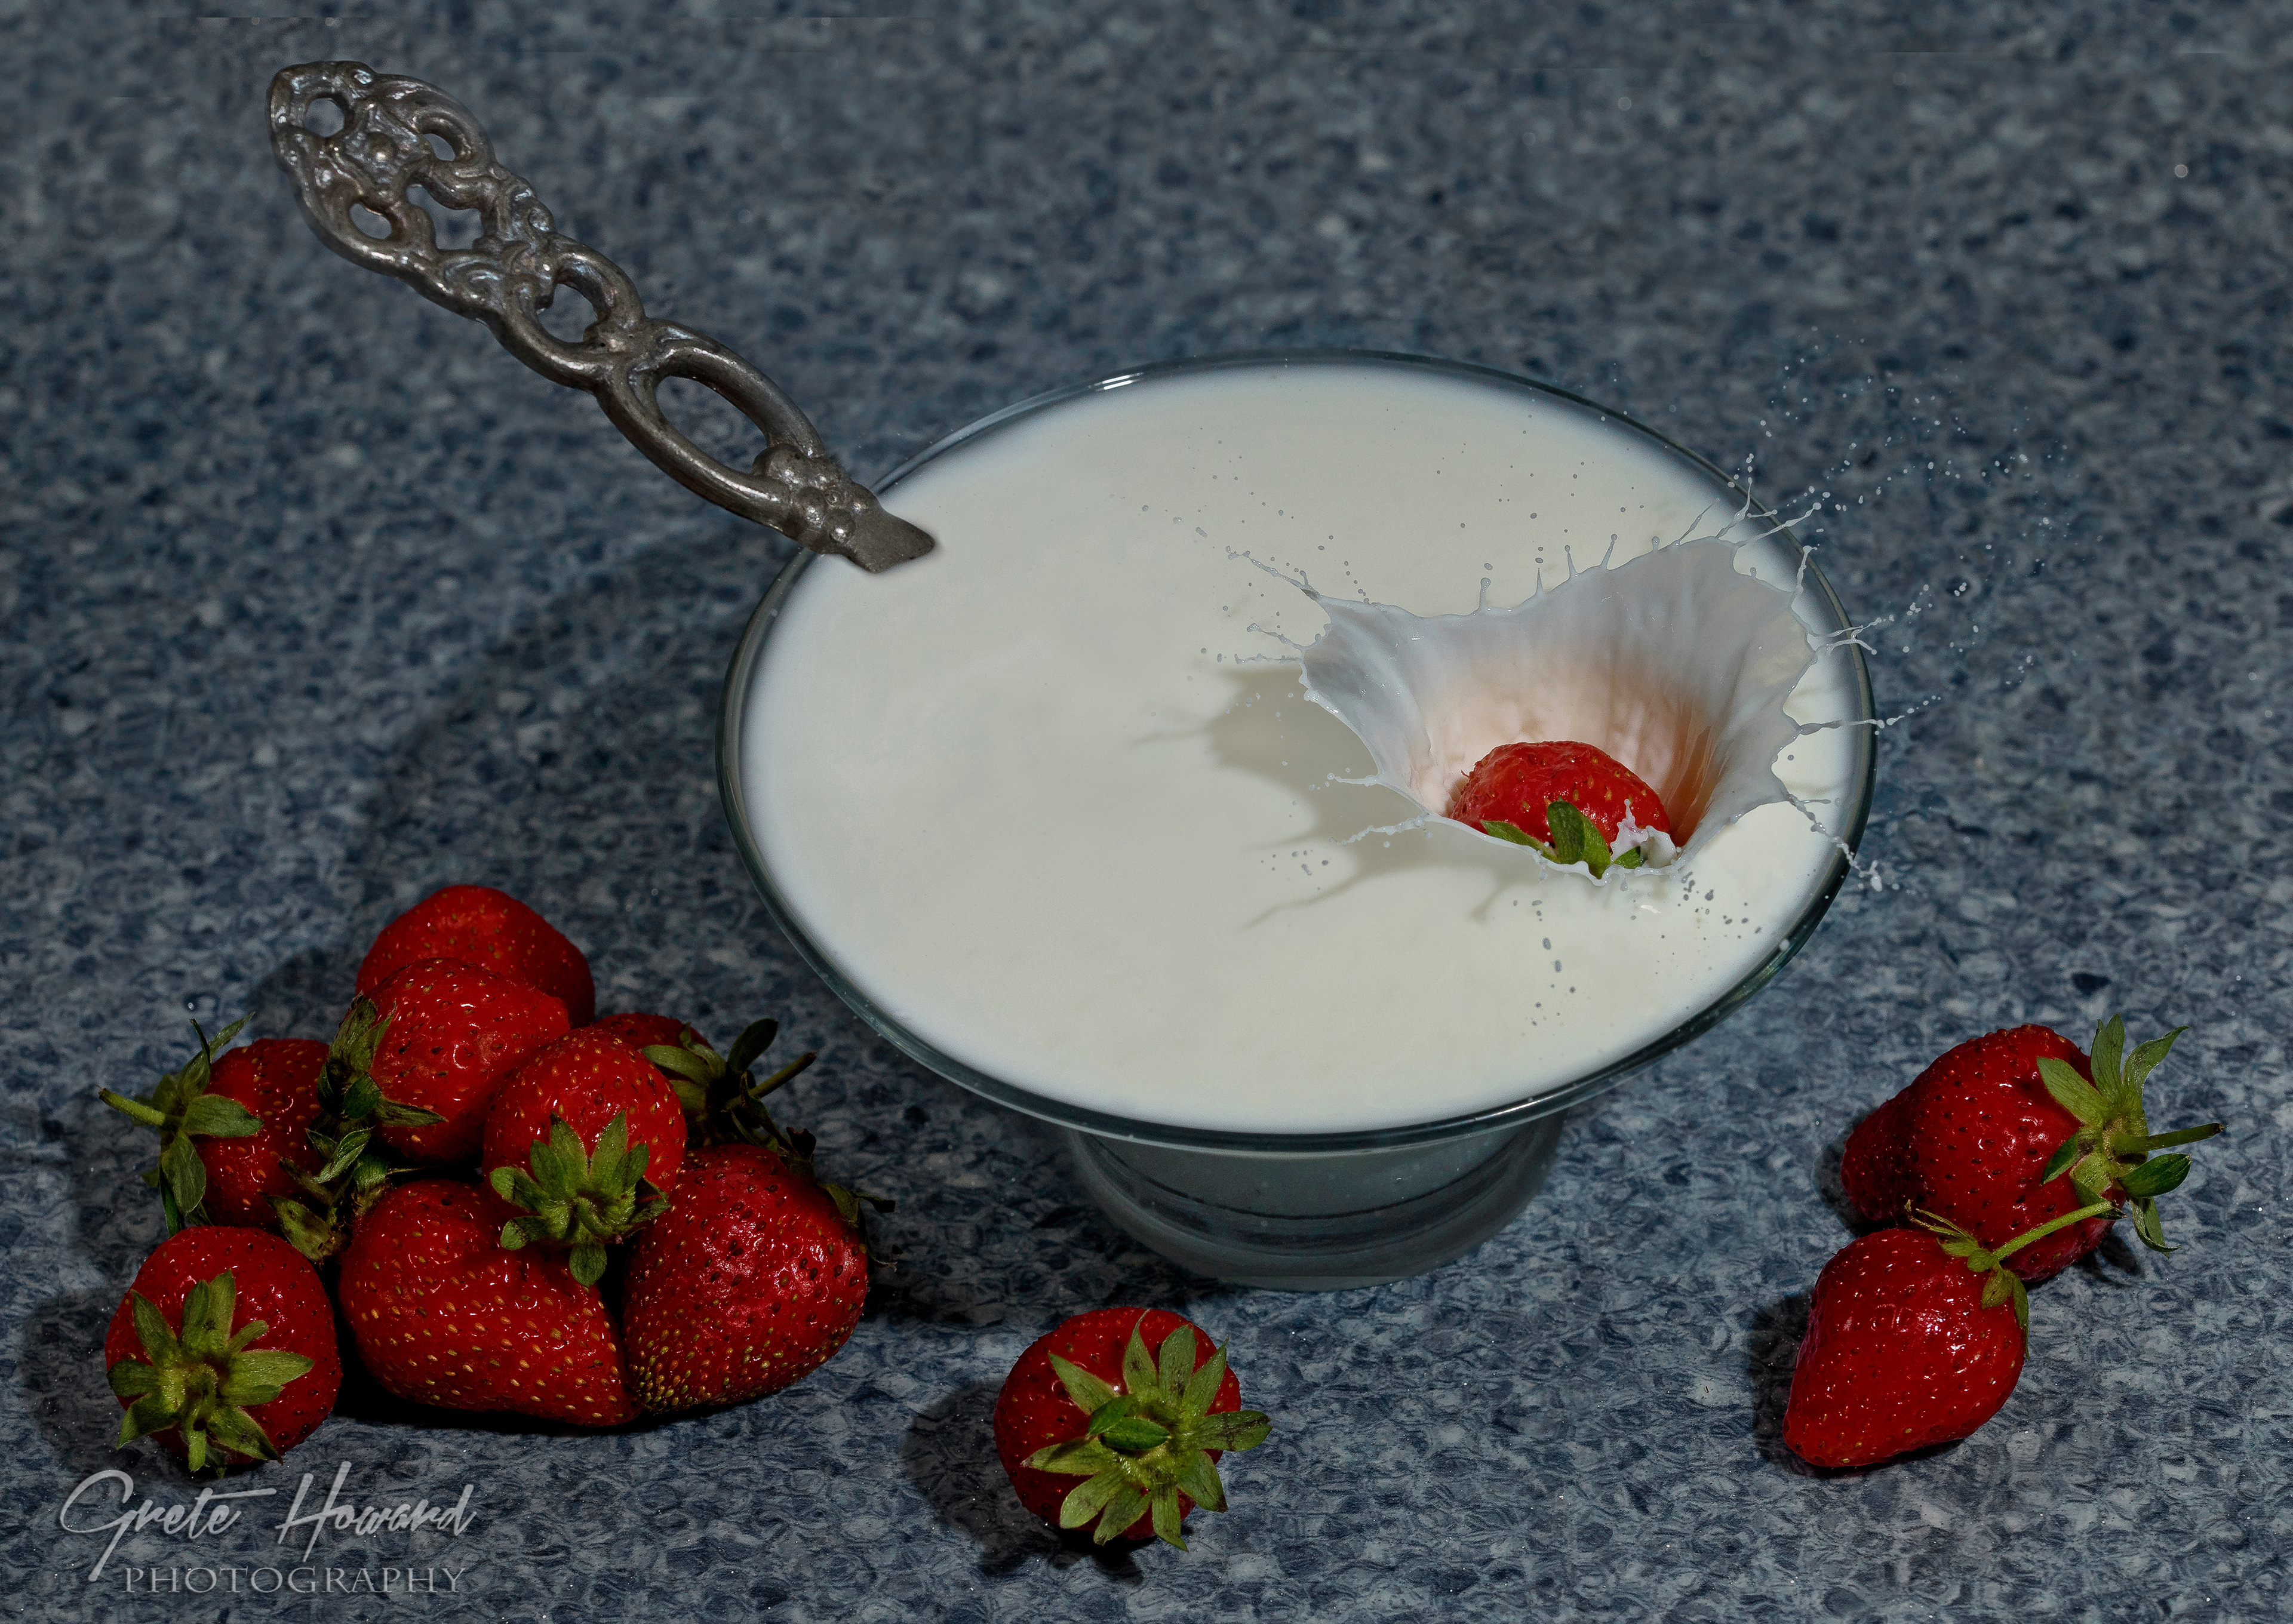
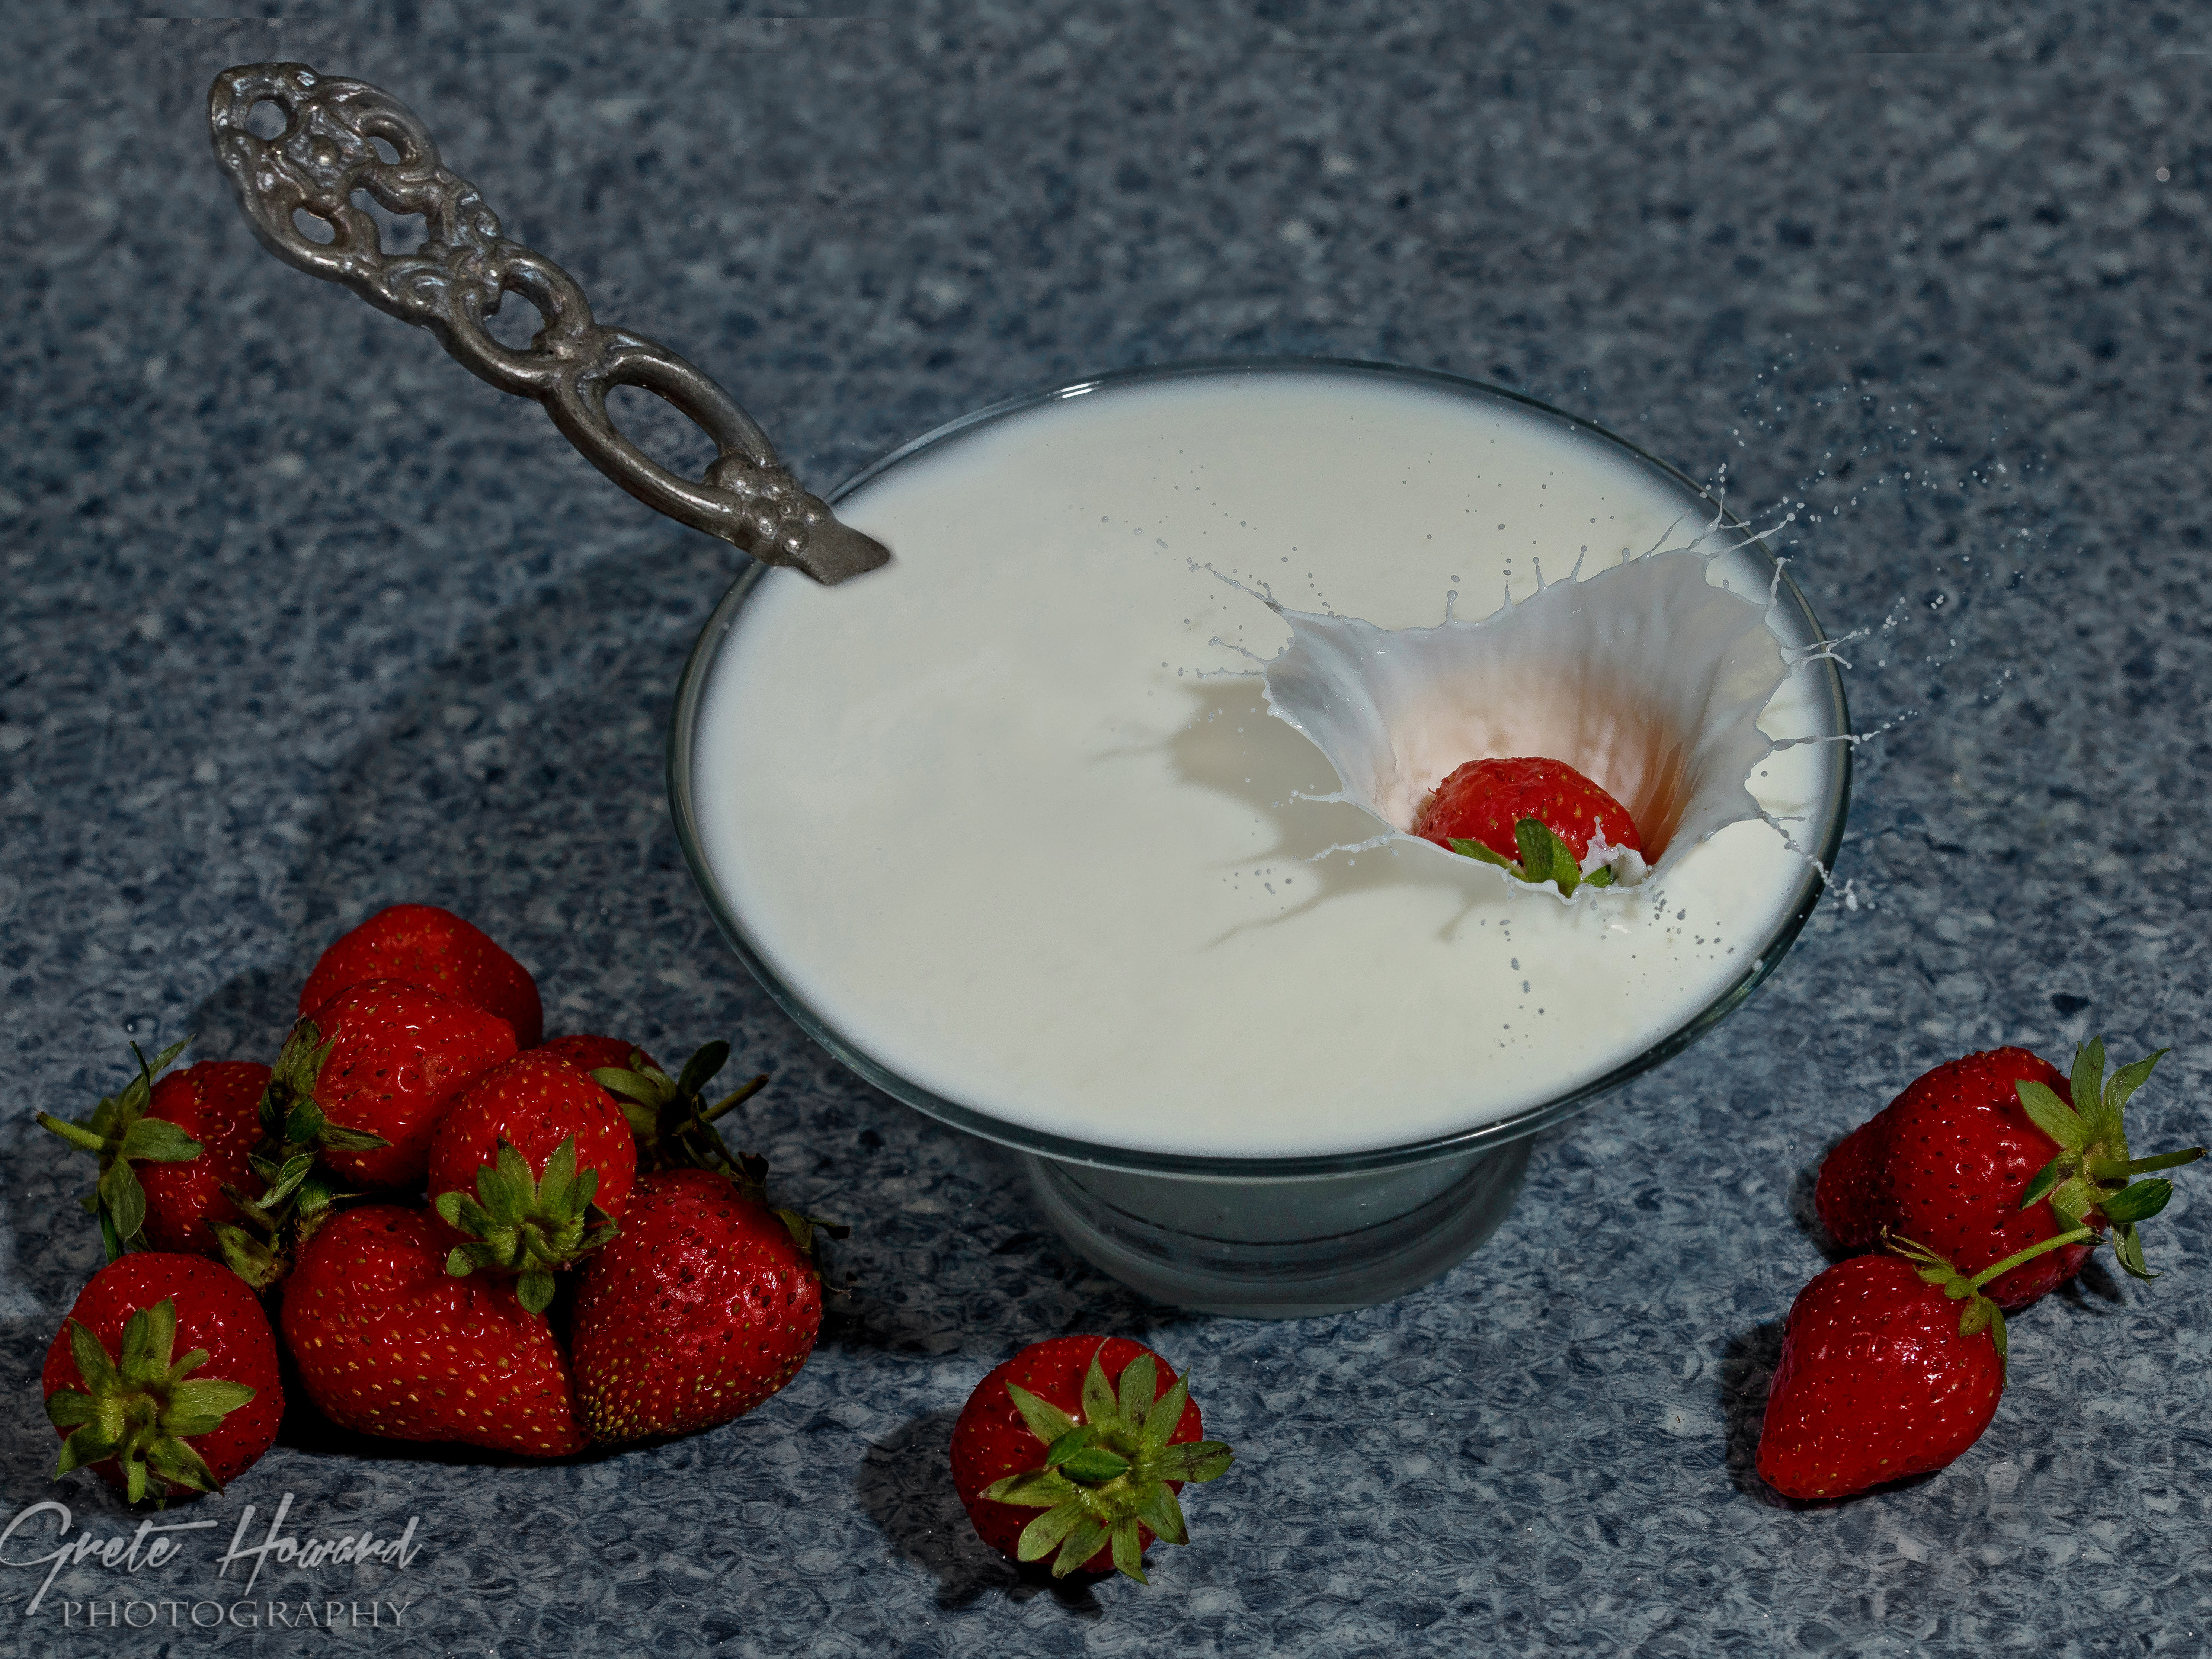
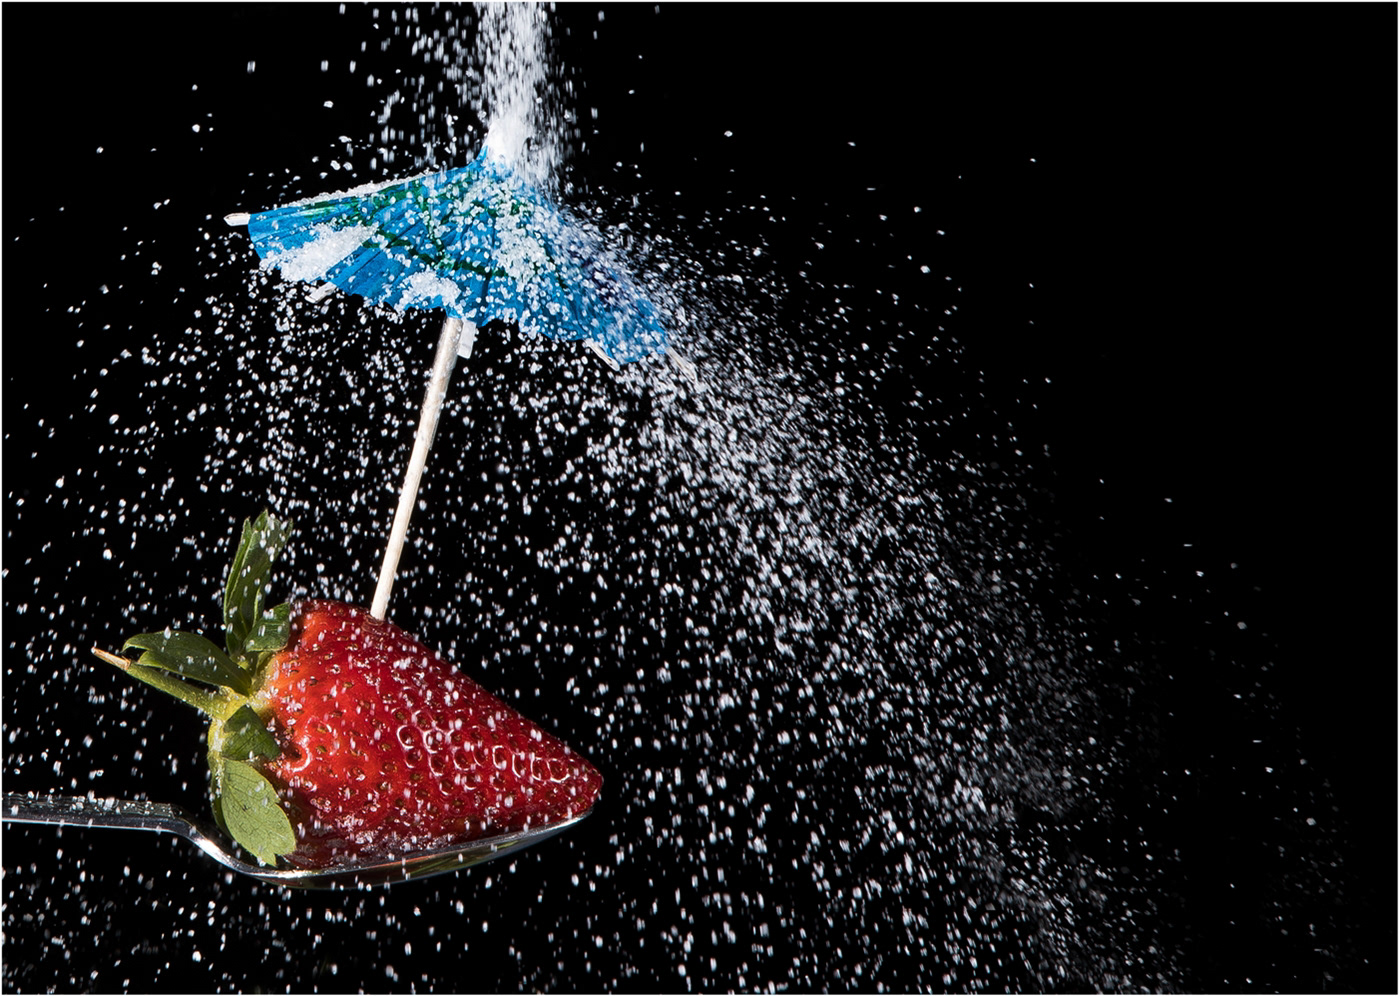
Strawberries and cream anyone?
You can read the whole process of creating this image here.
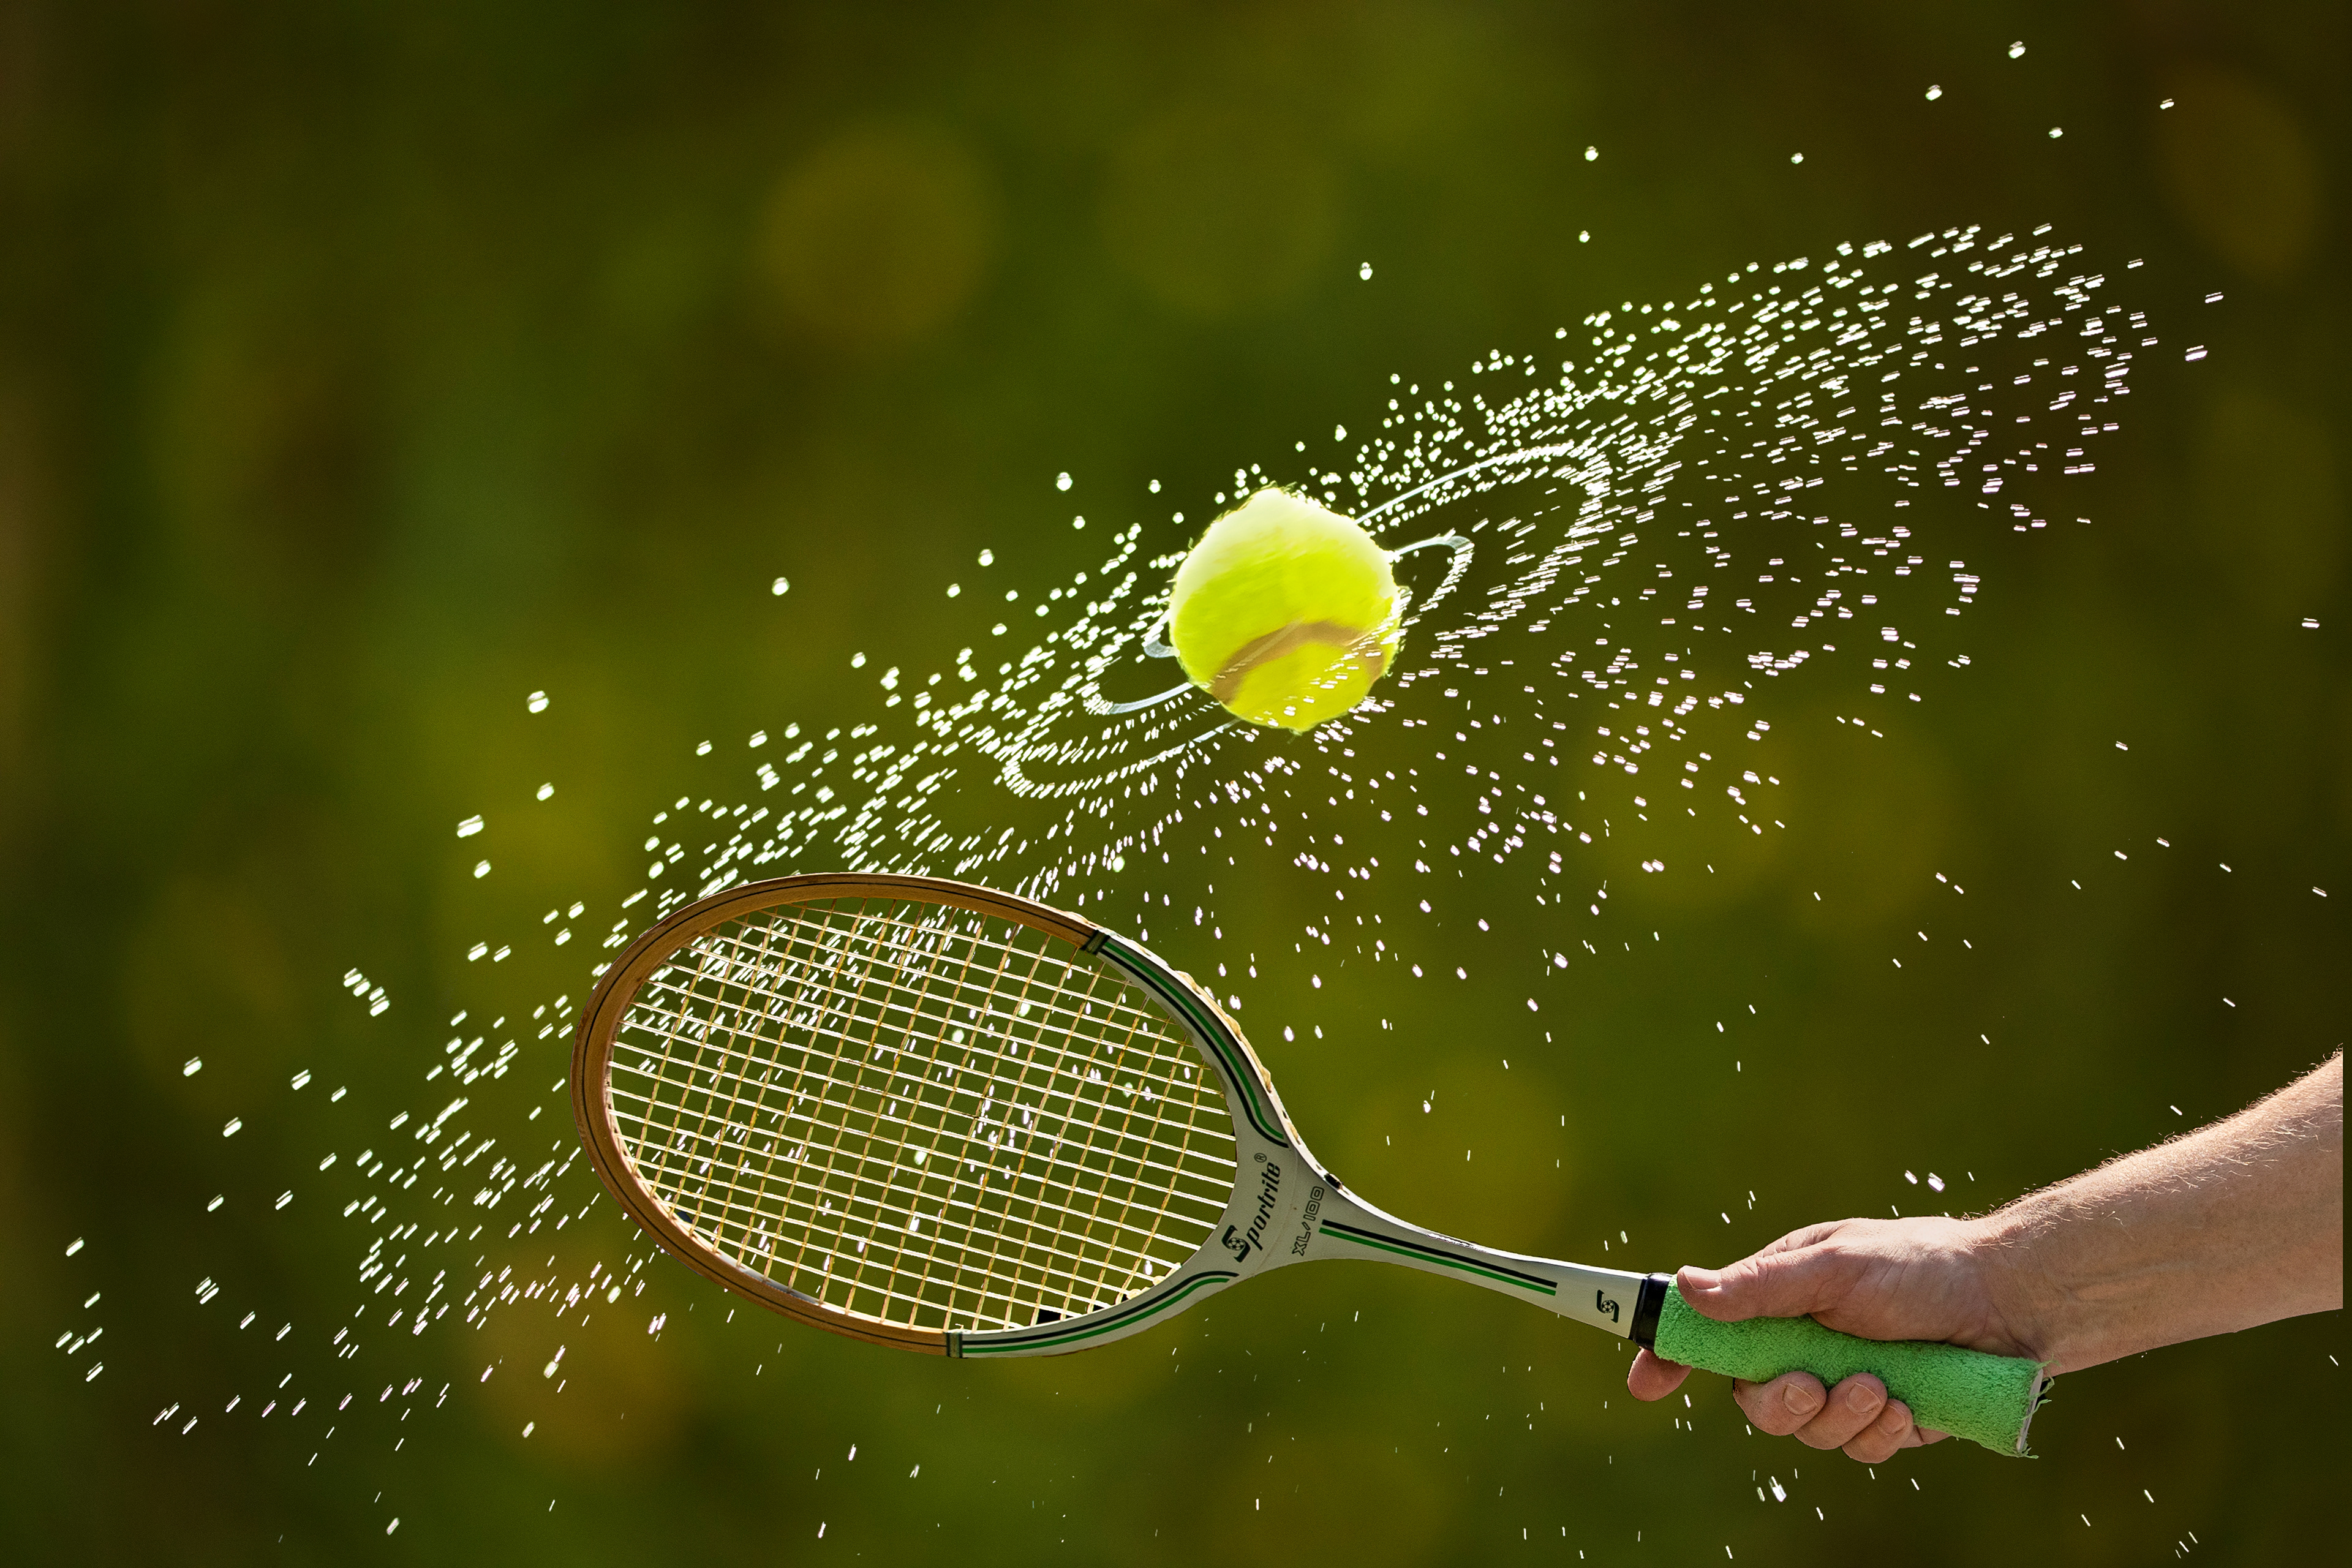
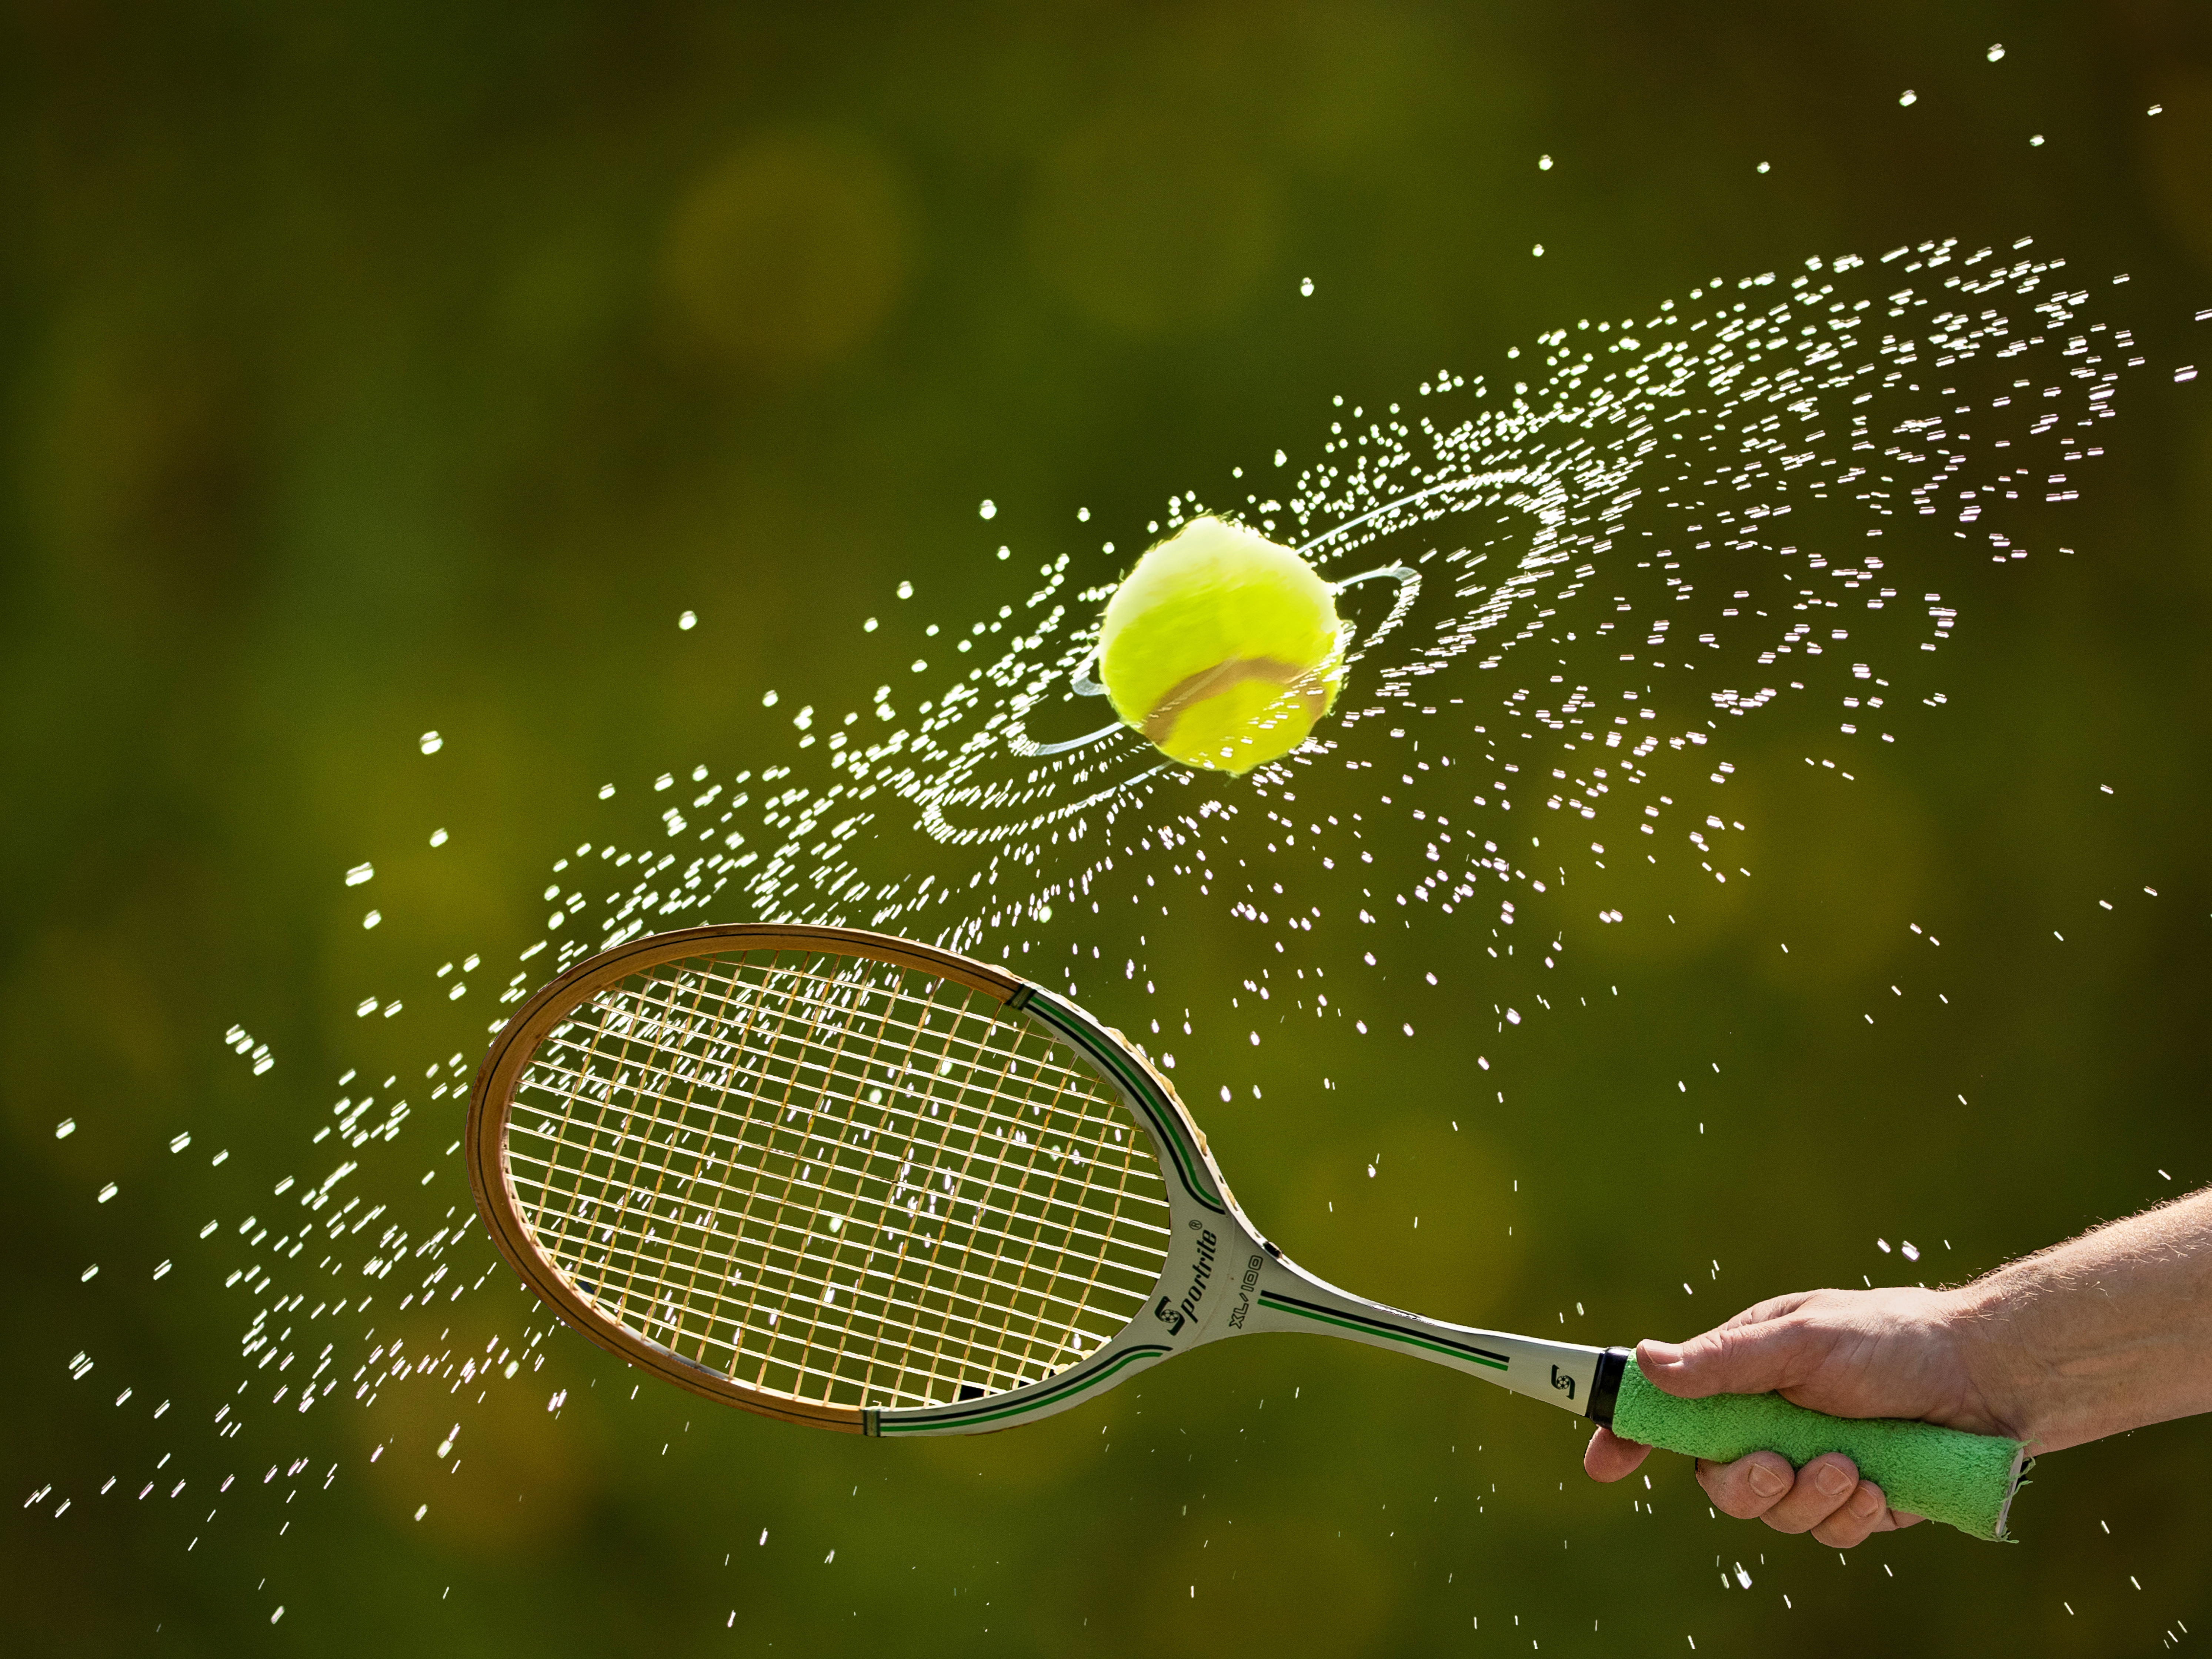
Anyone for tennis?
Pop over to the BLOG entry to see how I created this.
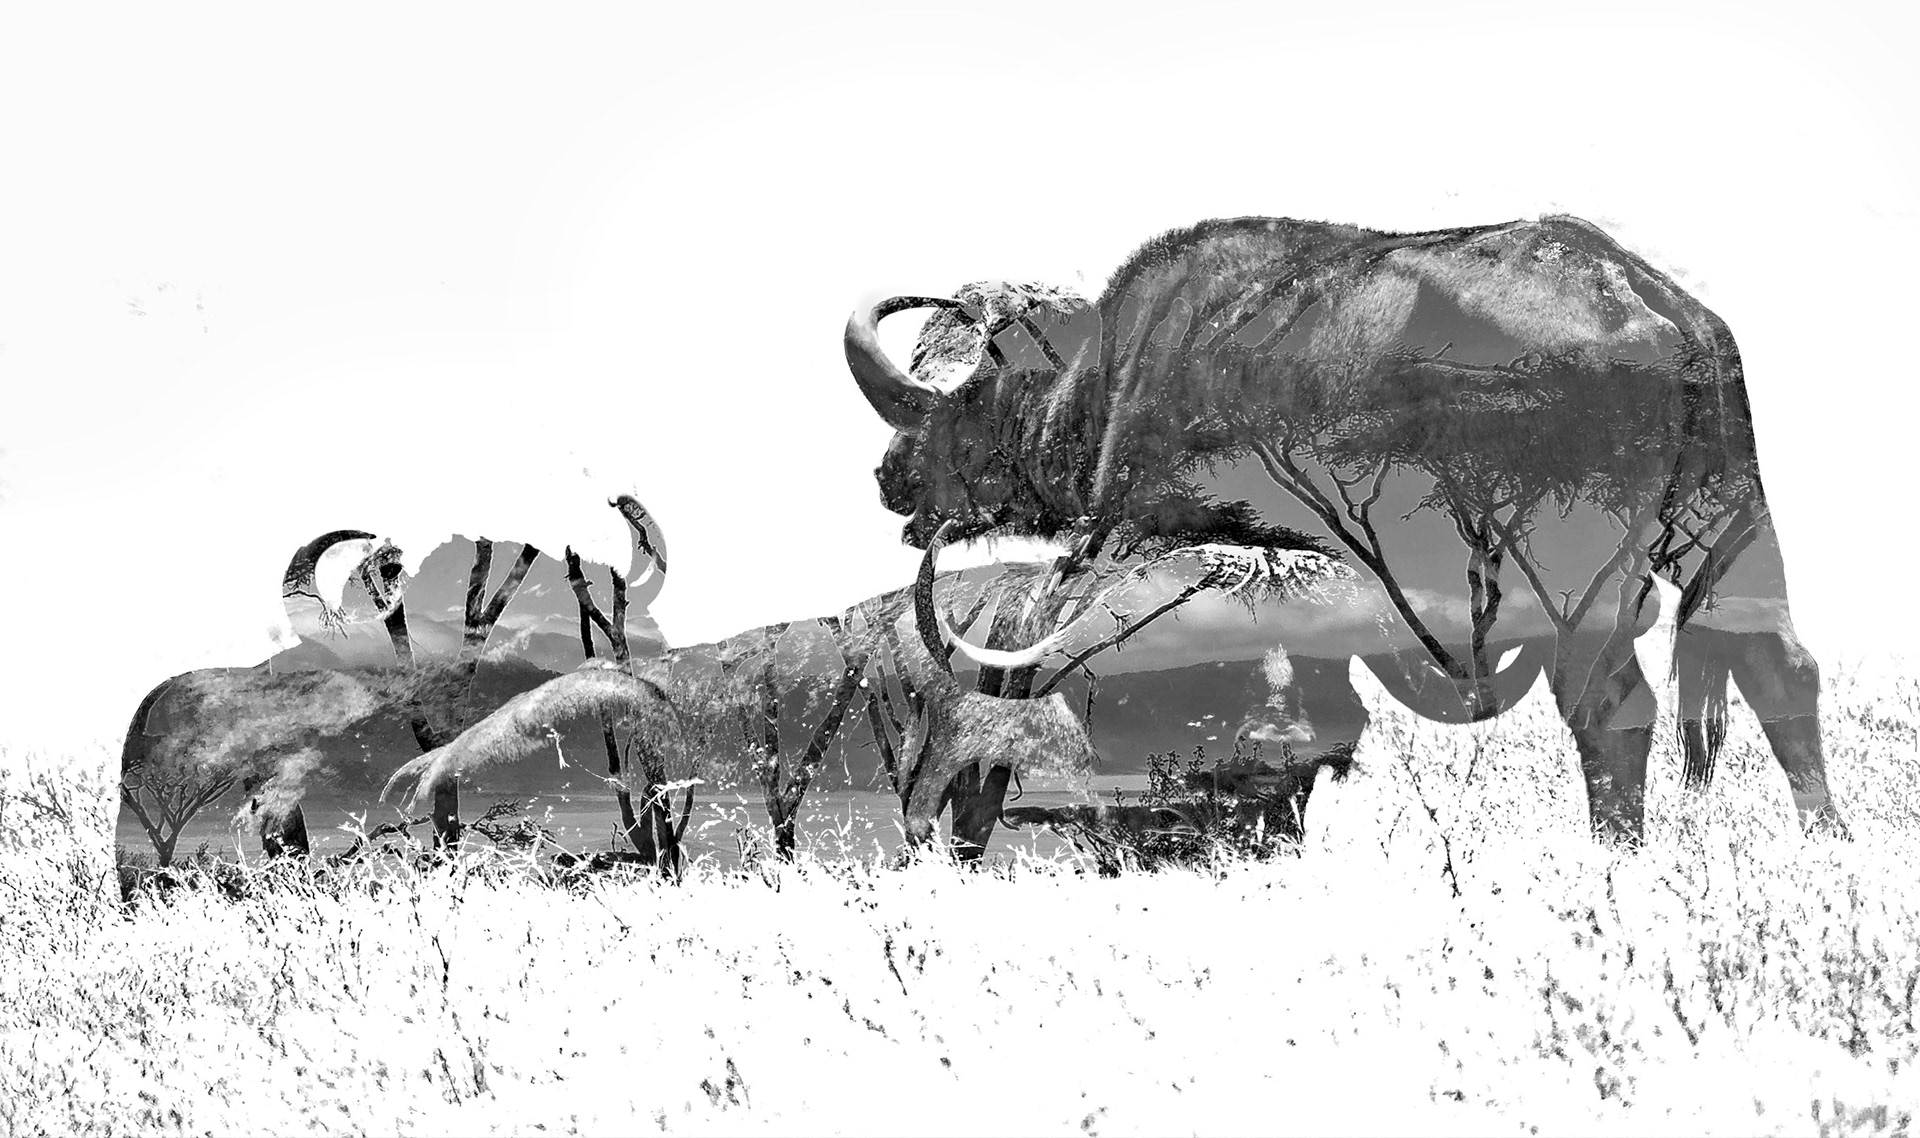
Double exposure
Two images from Ngorongoro Crater in Tanzania layered in Photoshop
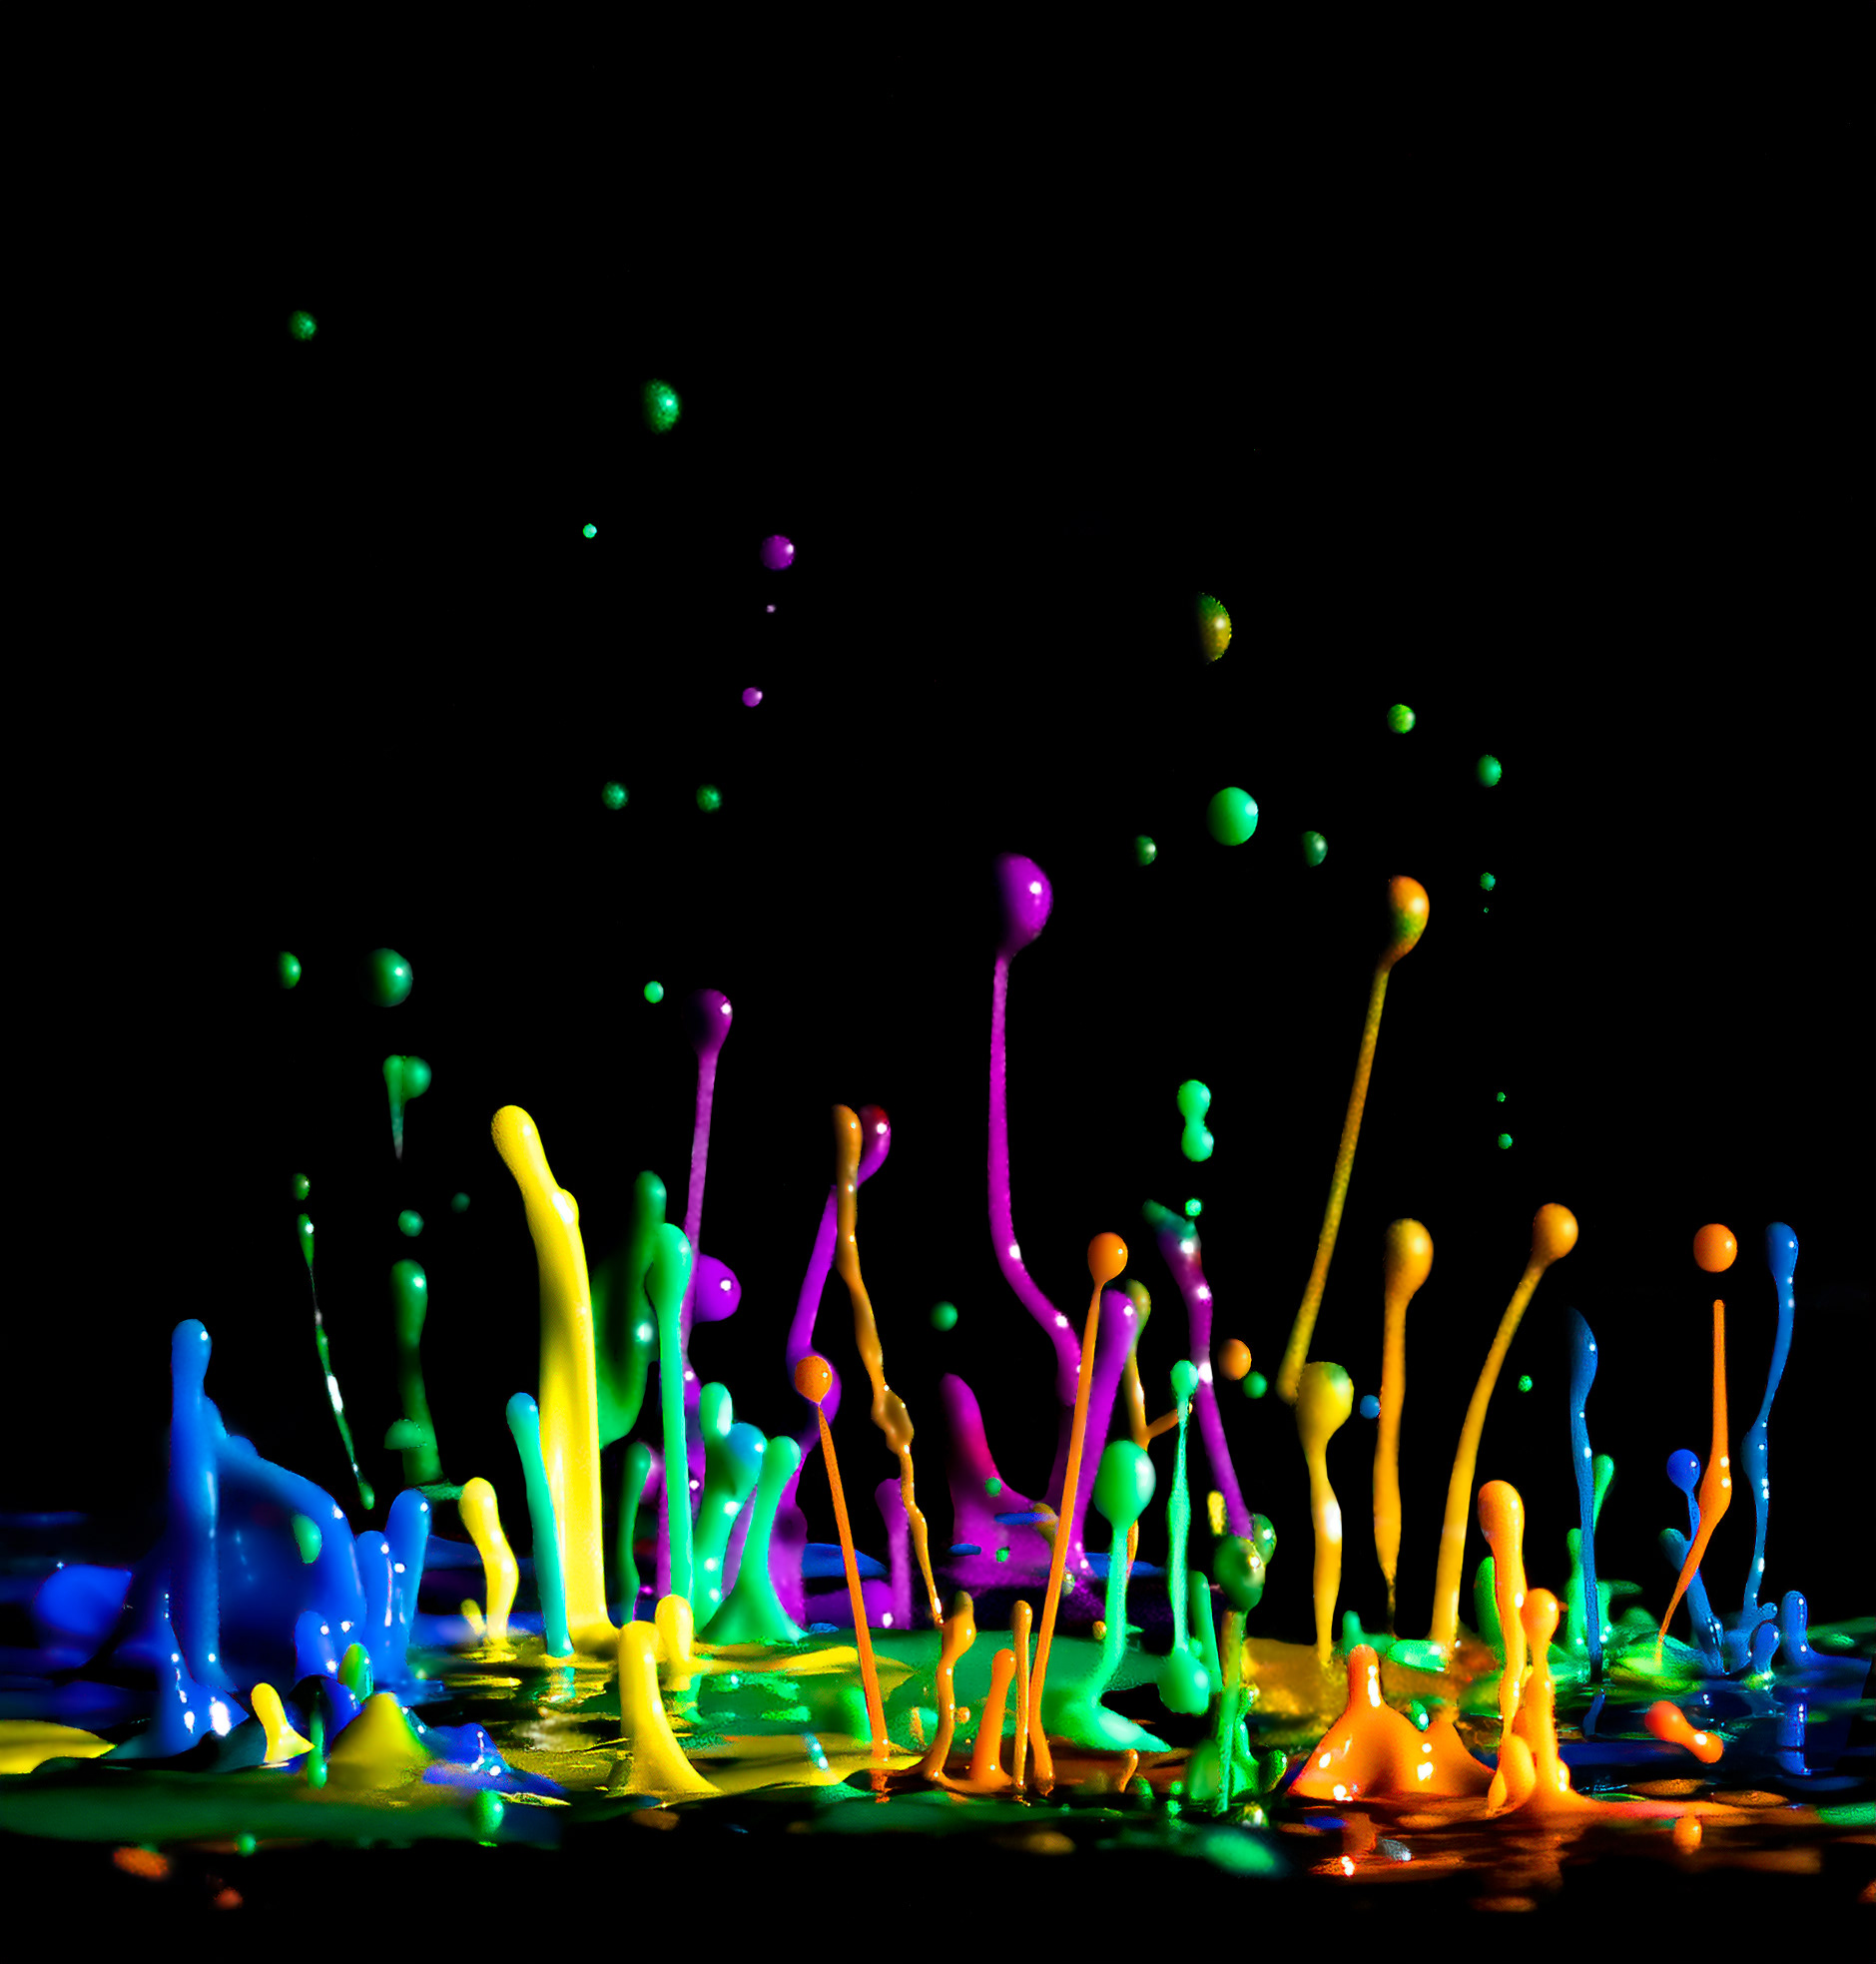
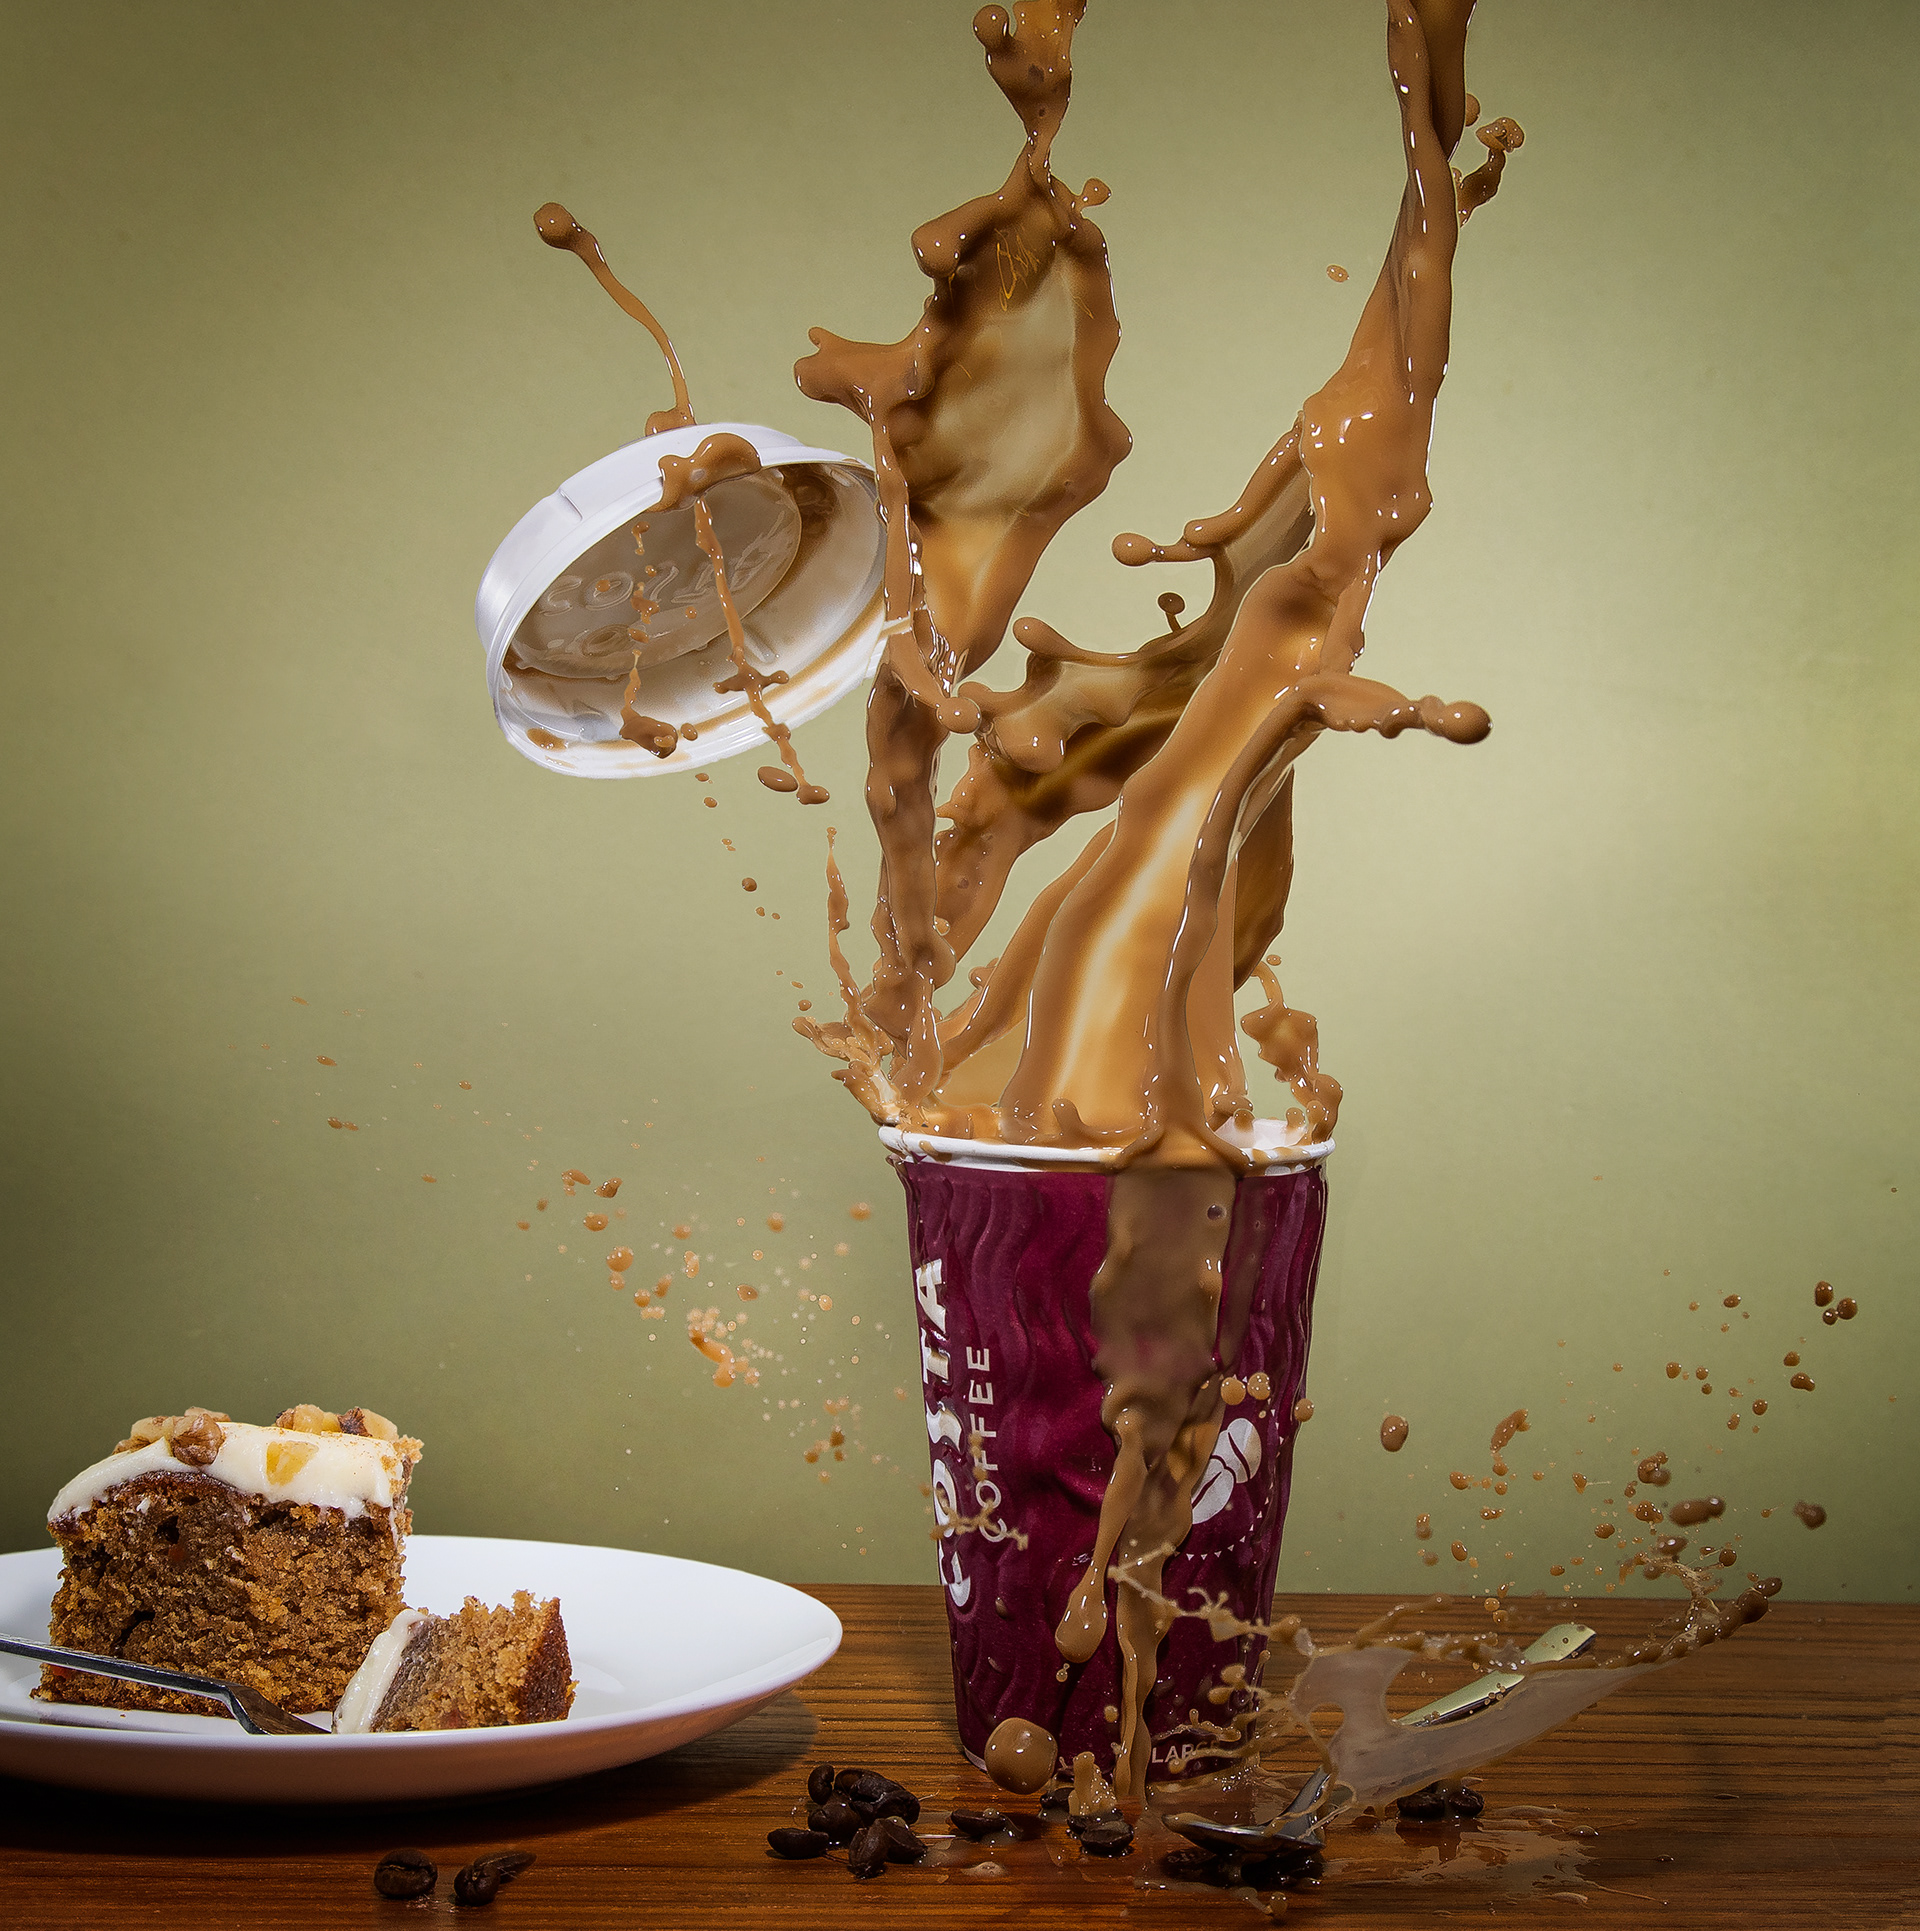
Bouncing paint
Find out how I created this image in my BLOG.
The LSH is always useful to have on hand should something go wrong. Like the washing machine.
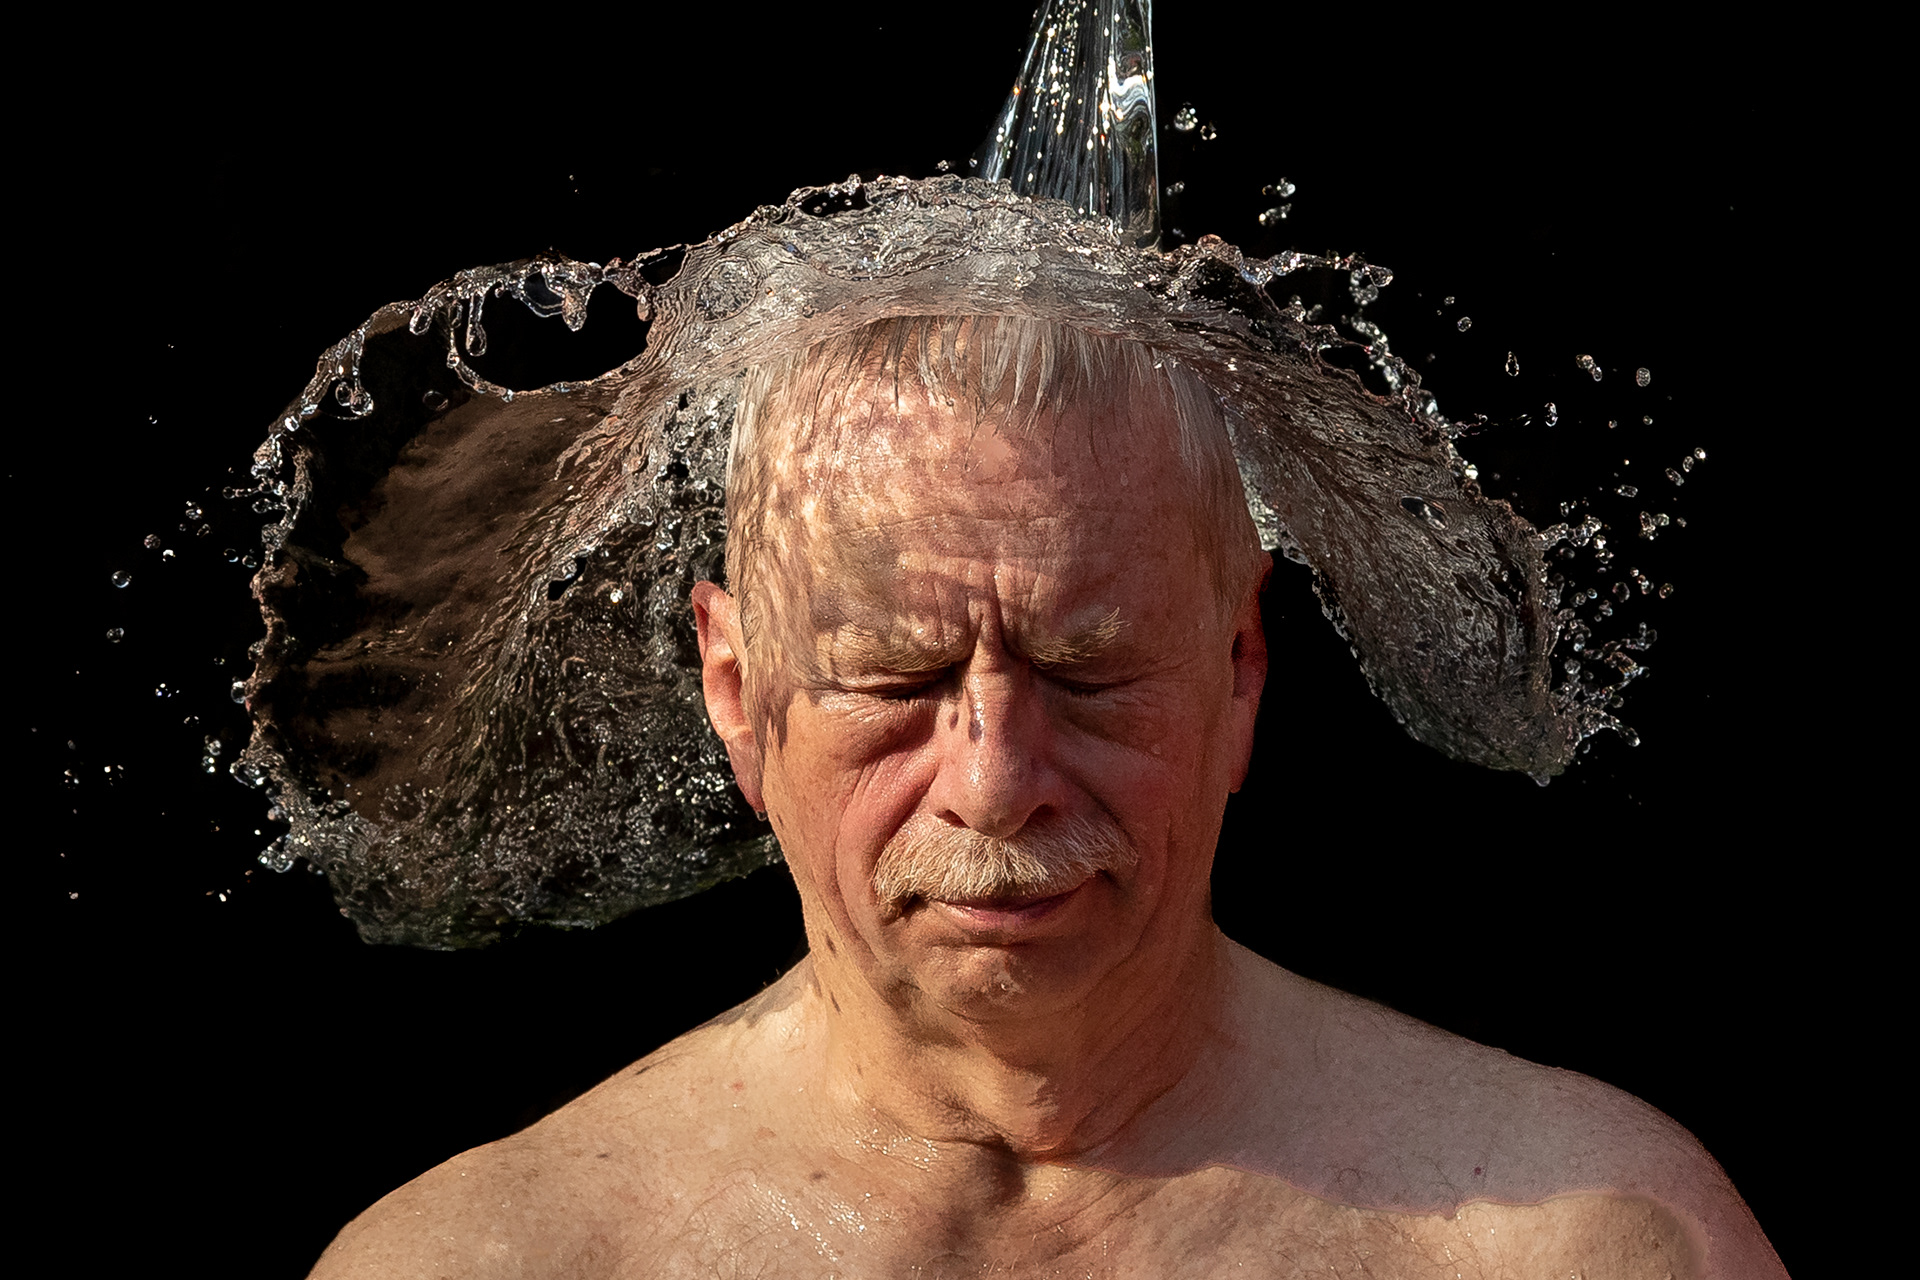
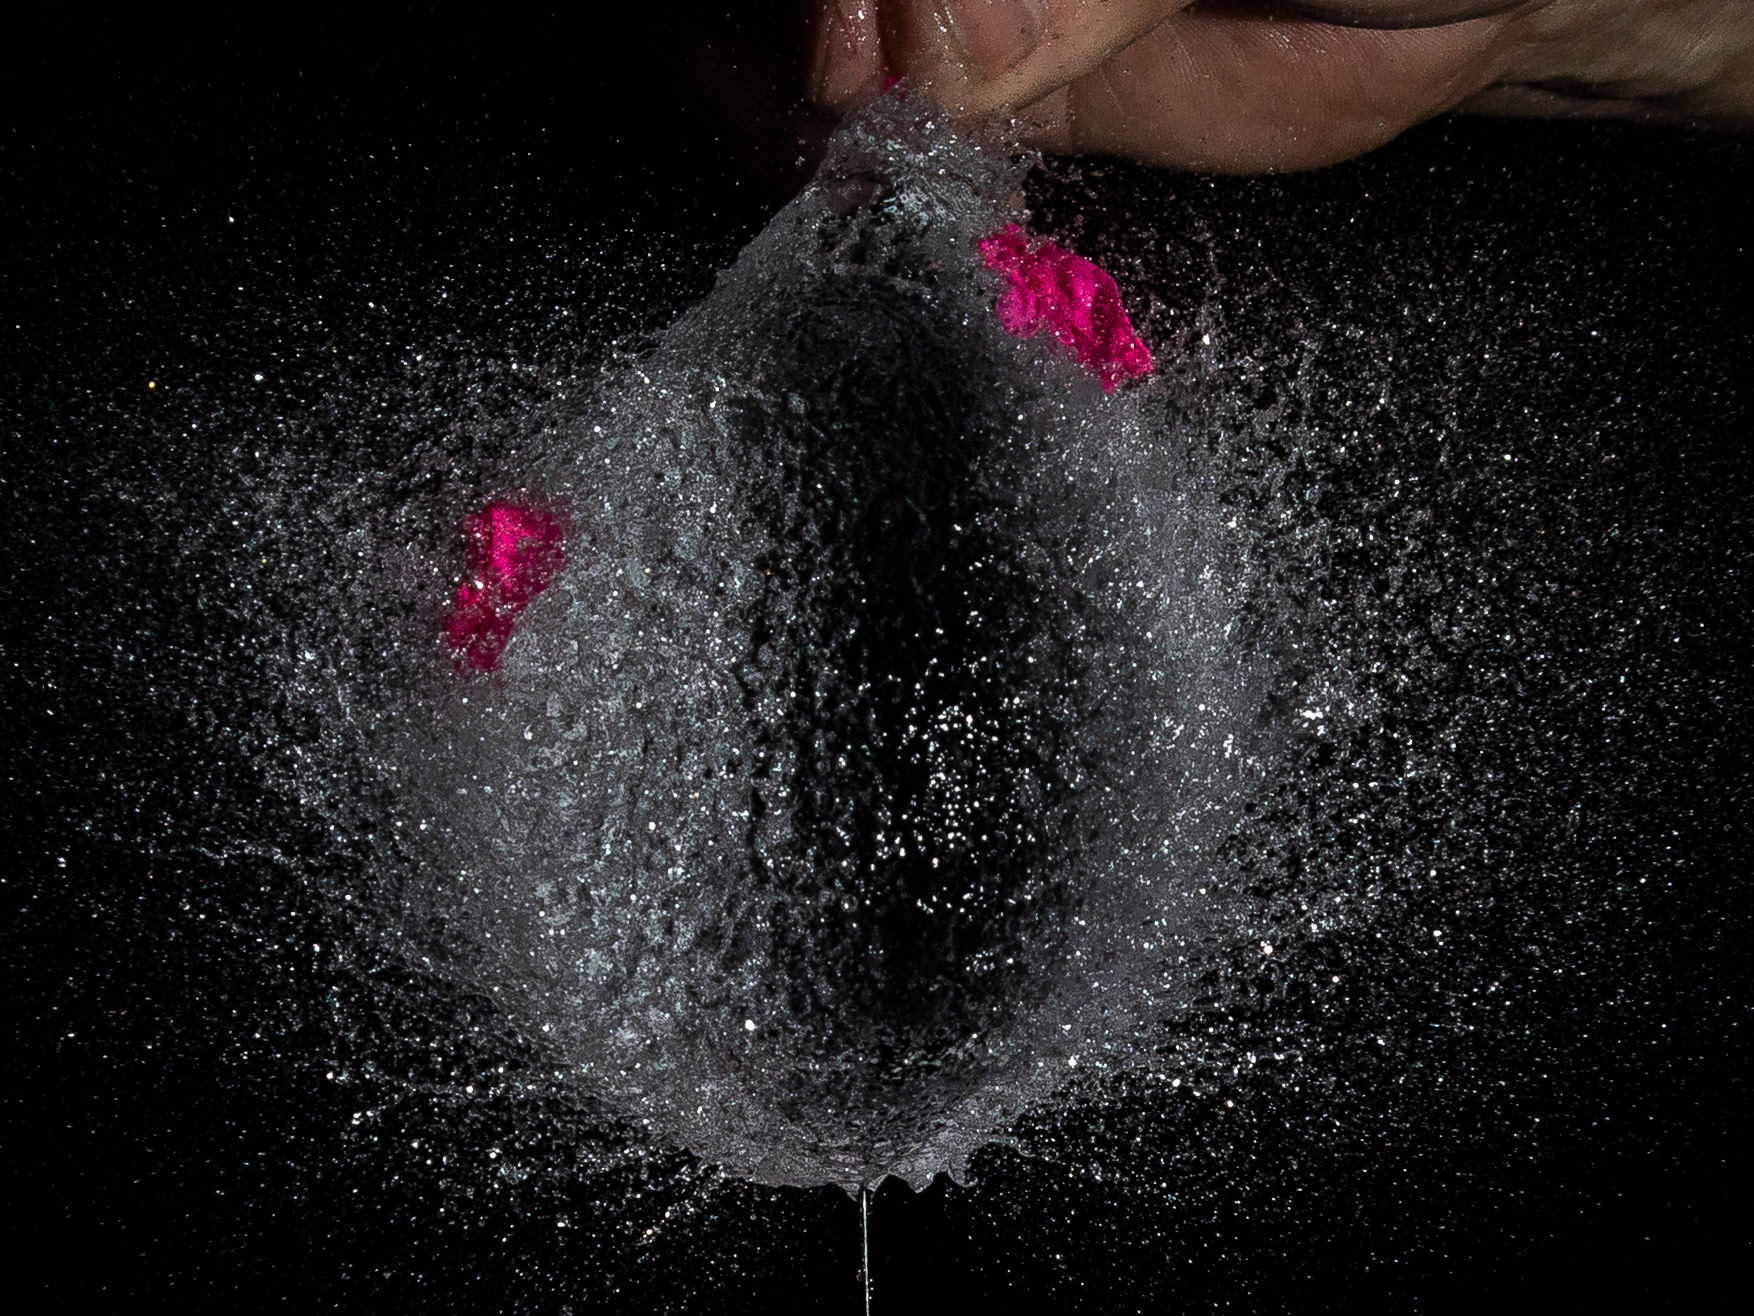
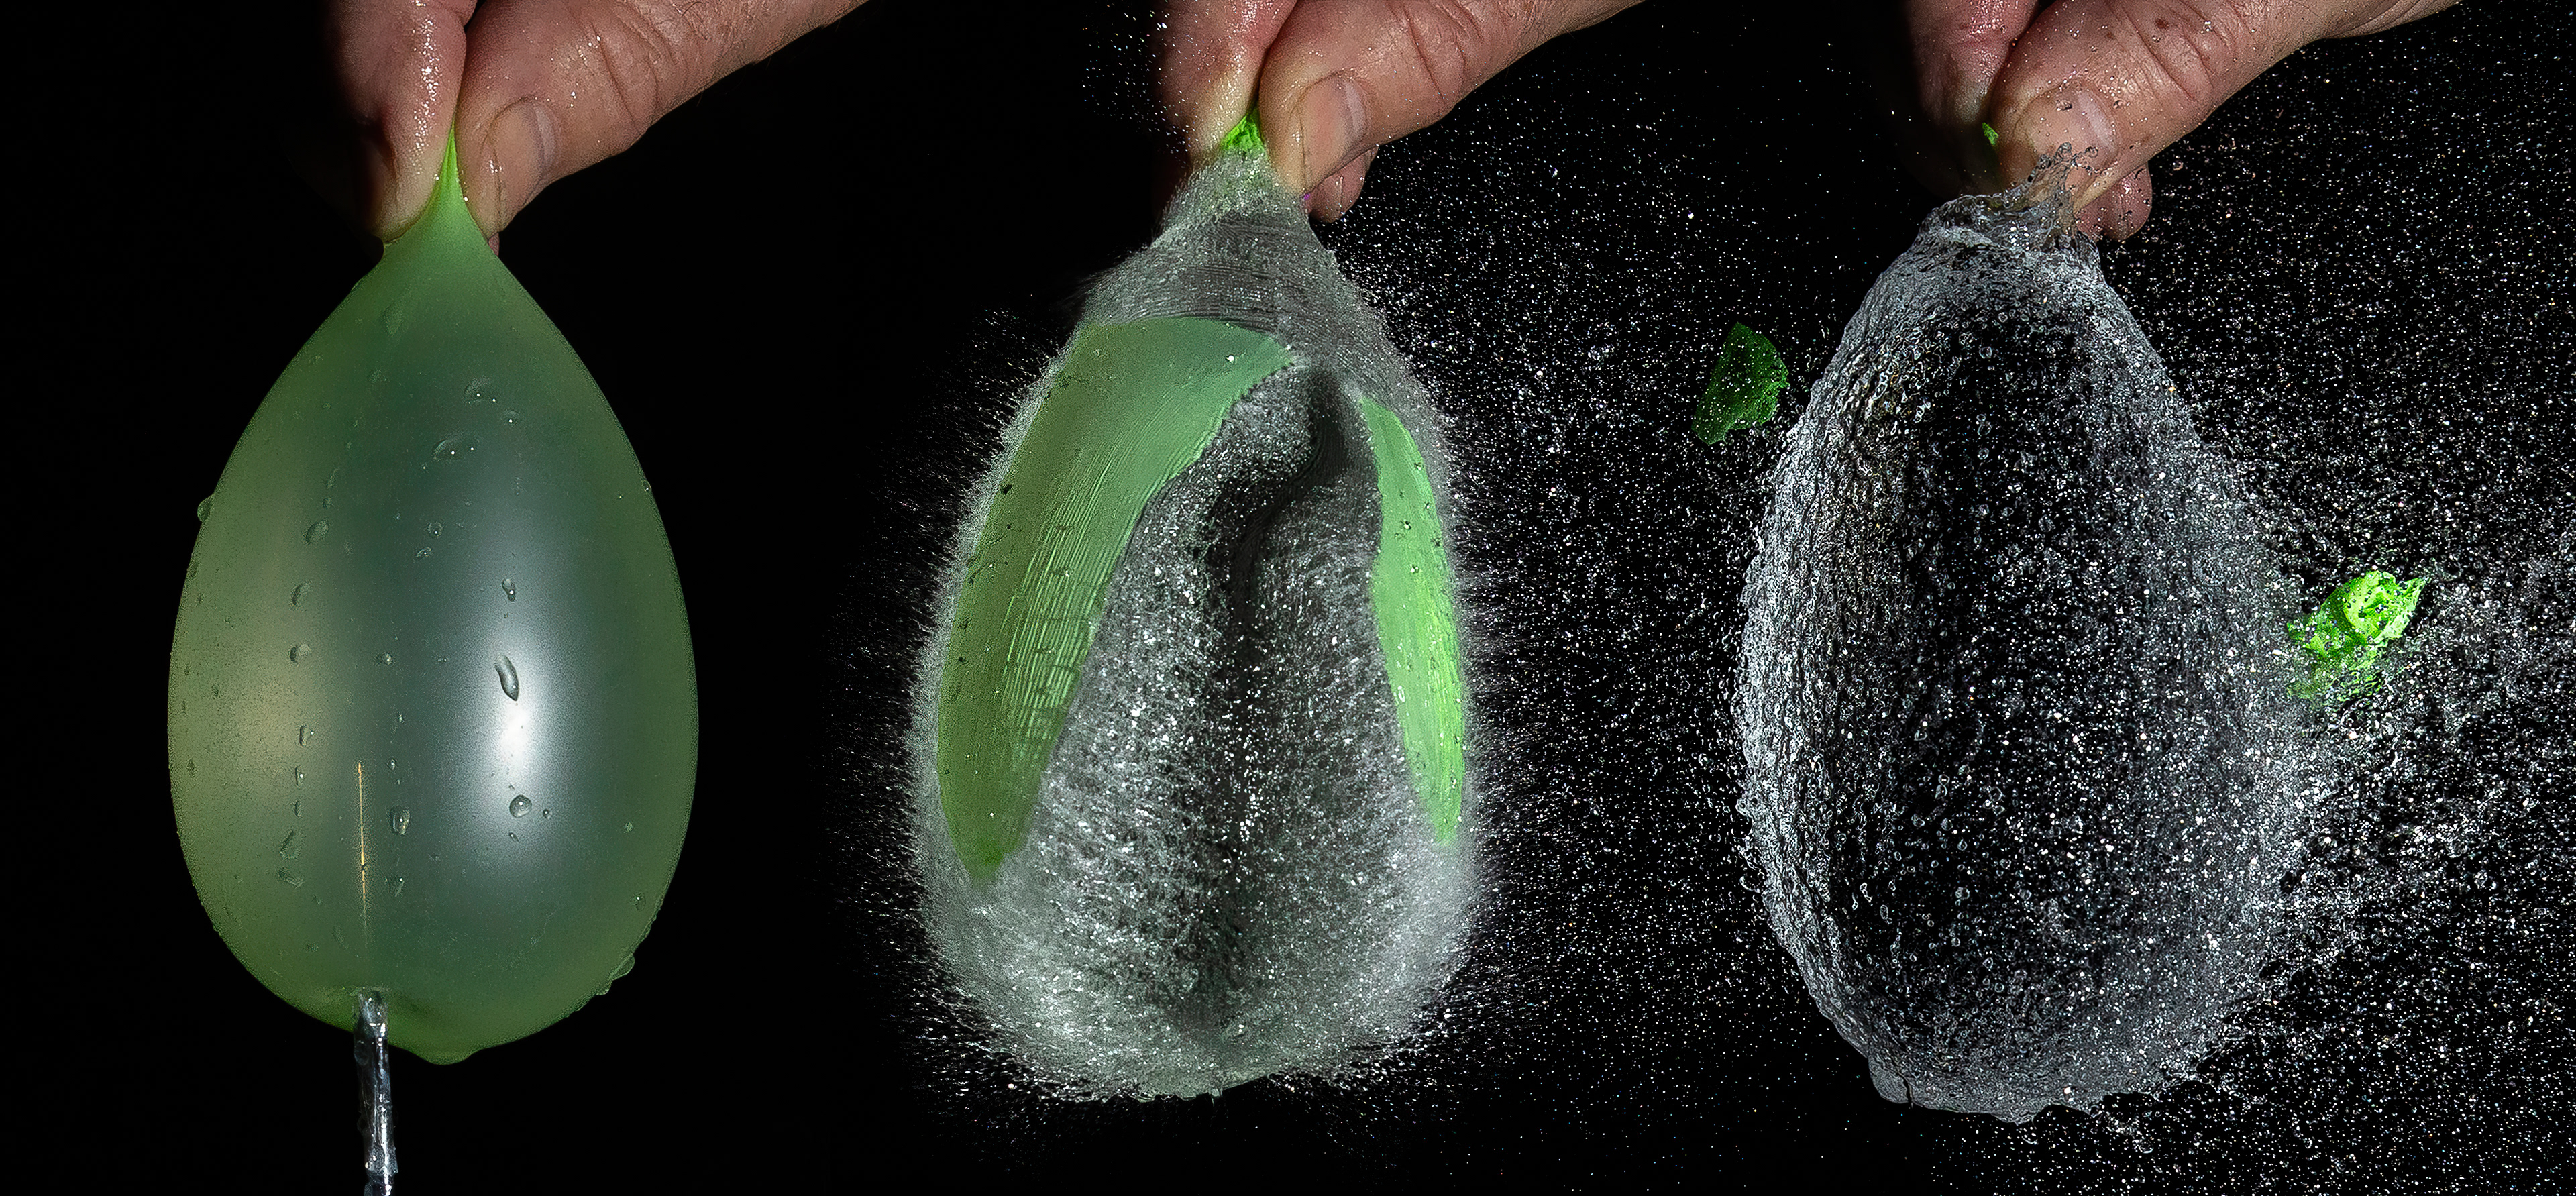
How do I repay him for everything he does for me? Throw buckets of water over him, of course.
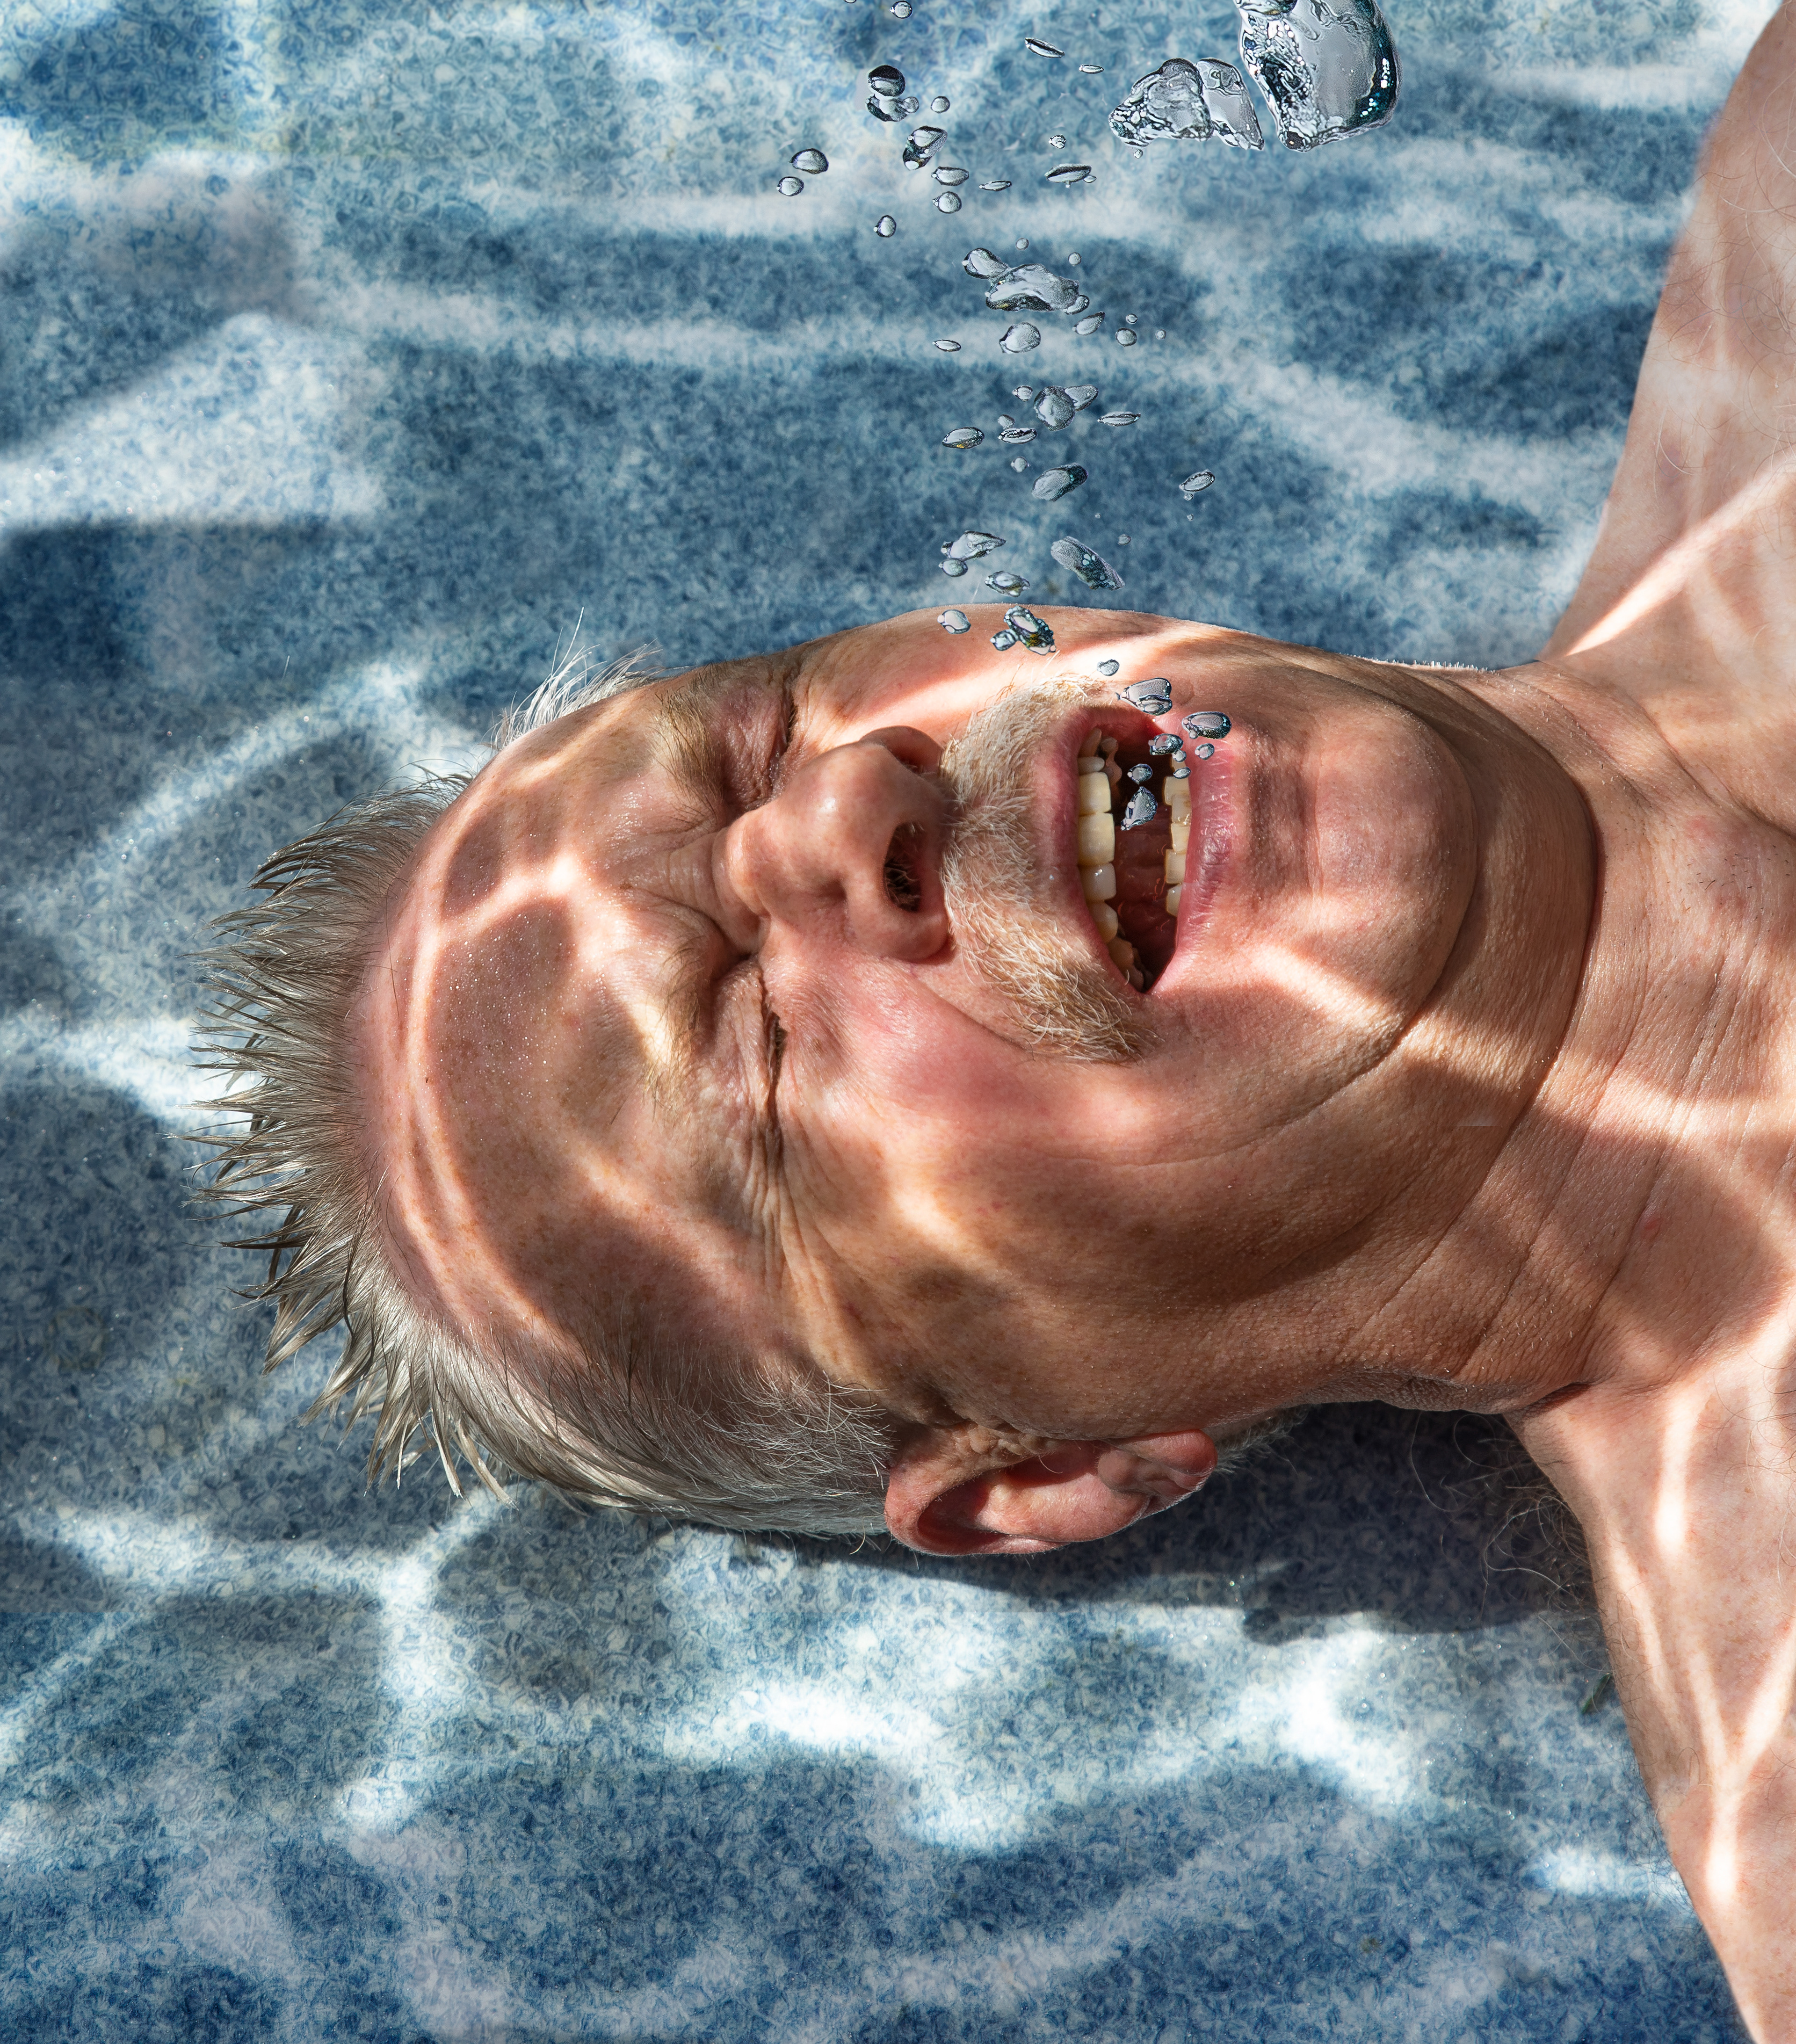
Or I simply drown him
Full explanation here.
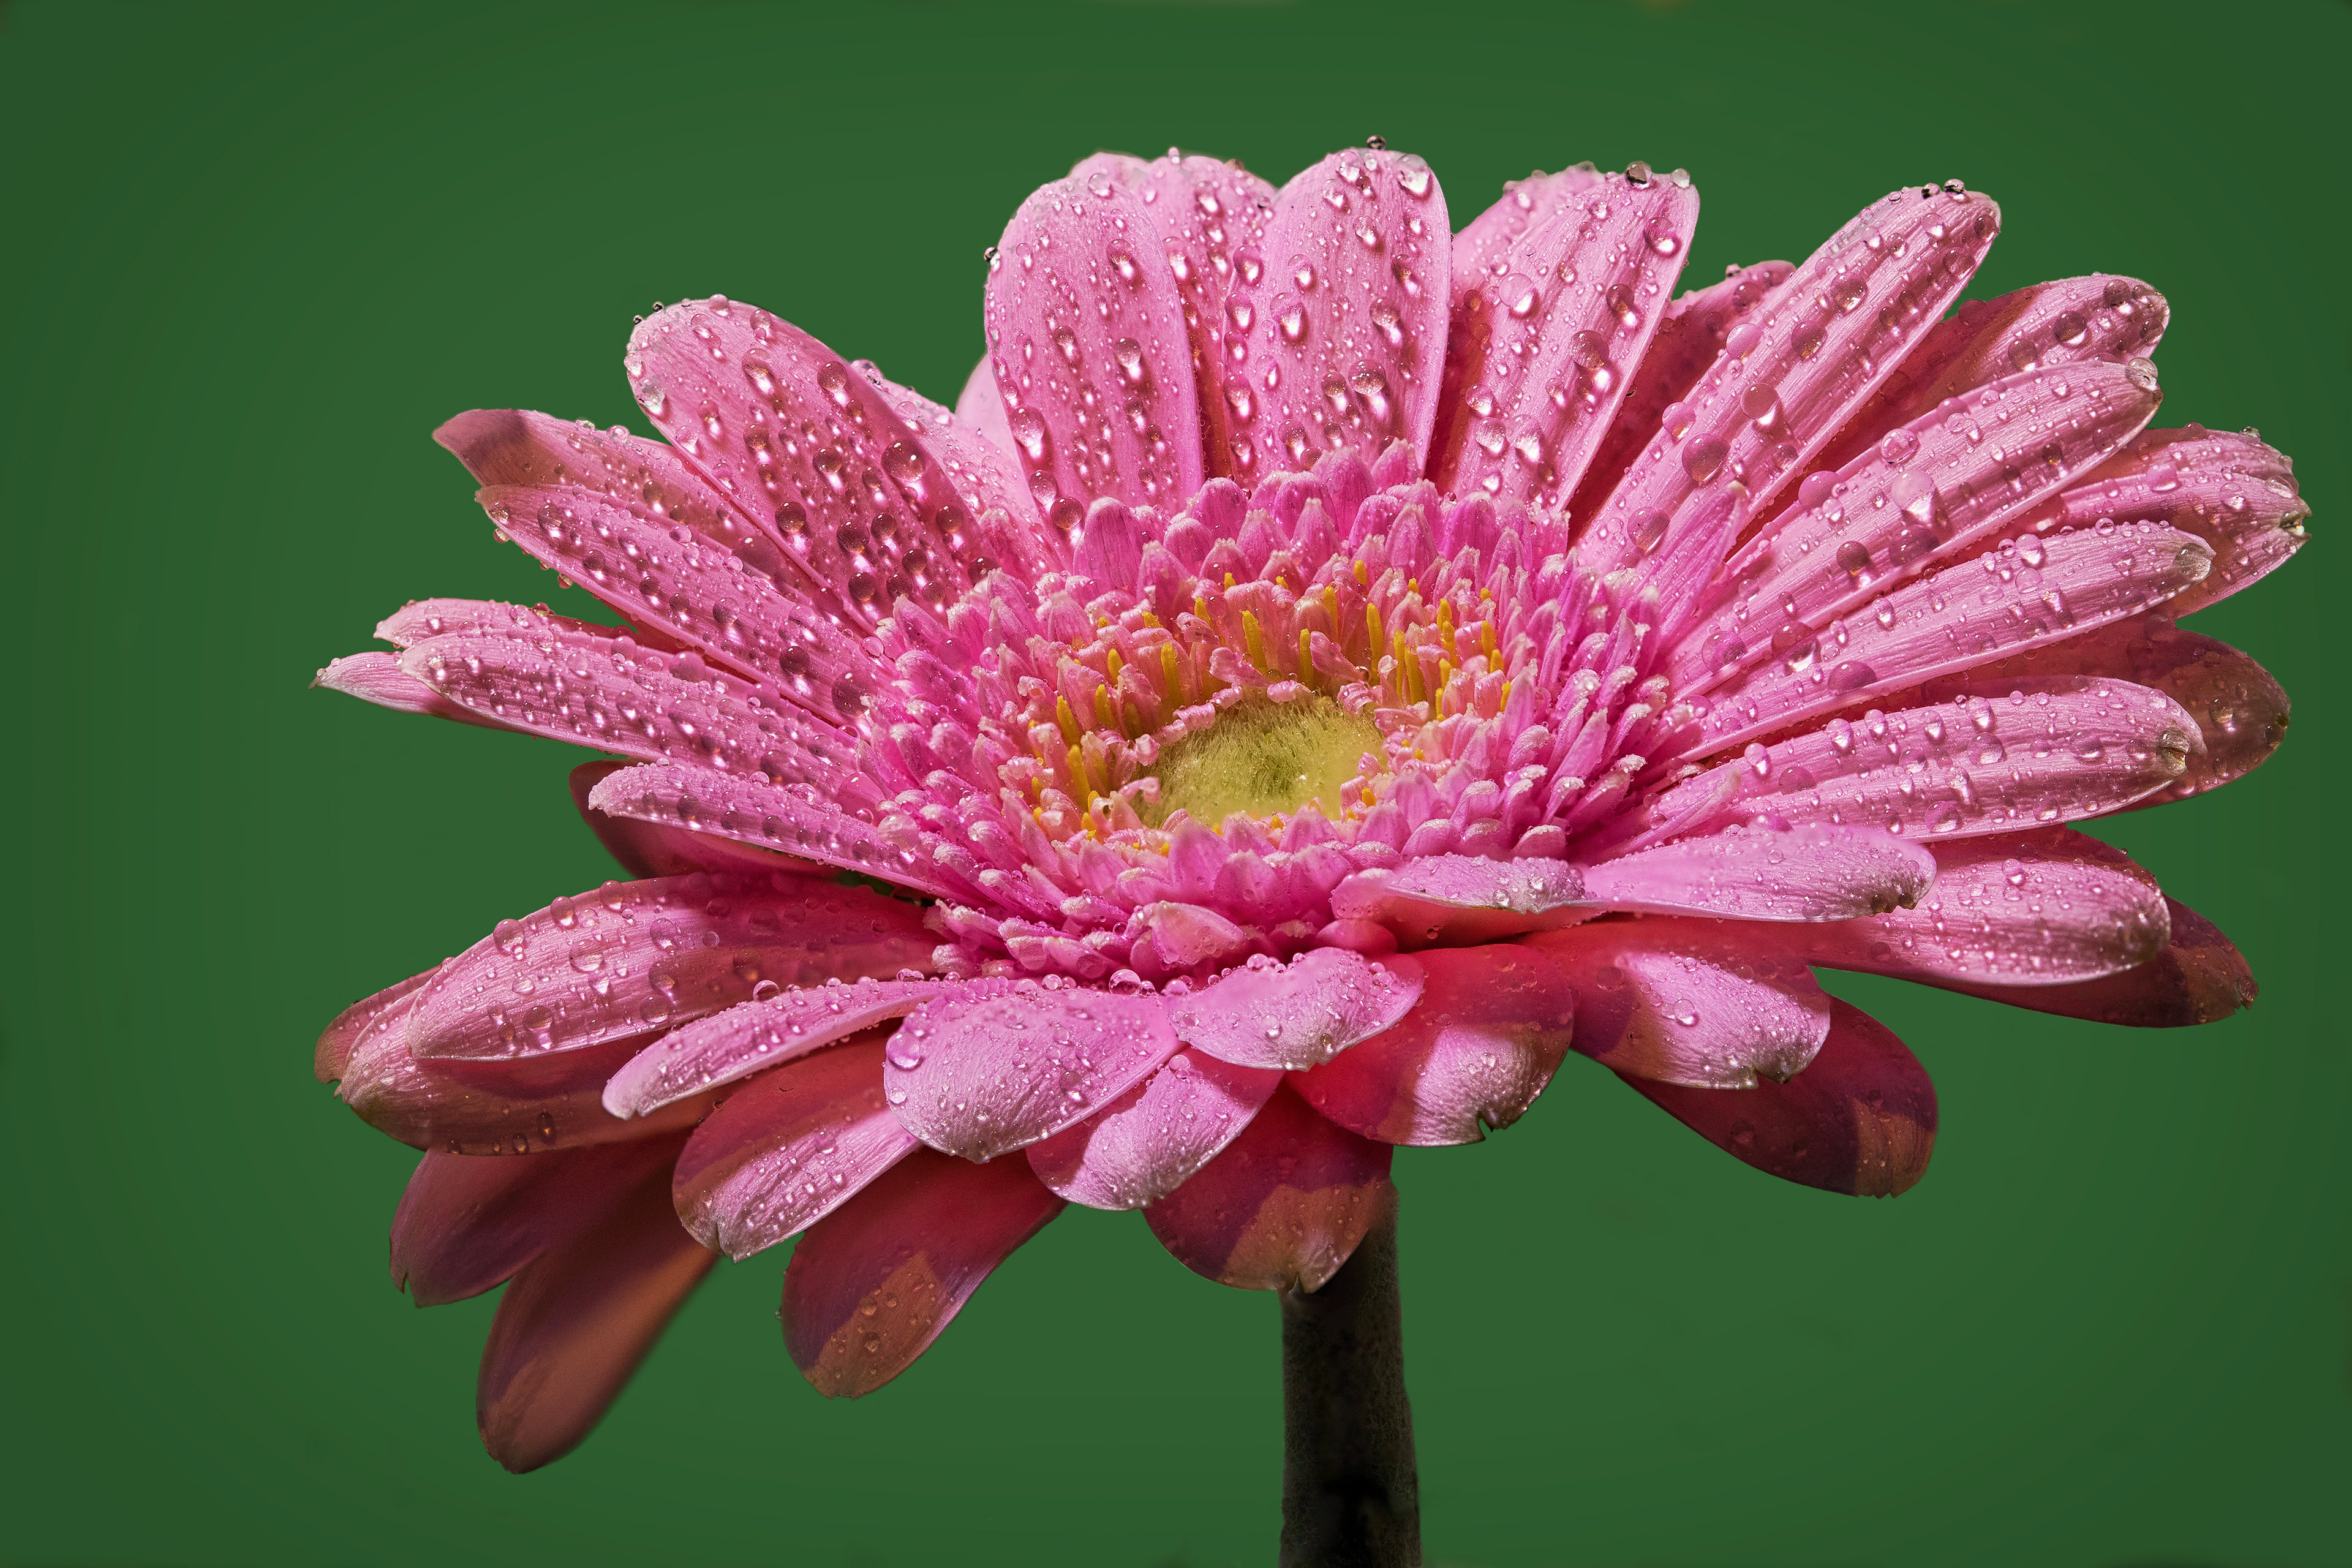
Focus stacking
Seven images were combined to ensure every part of this gerbena was in focus.
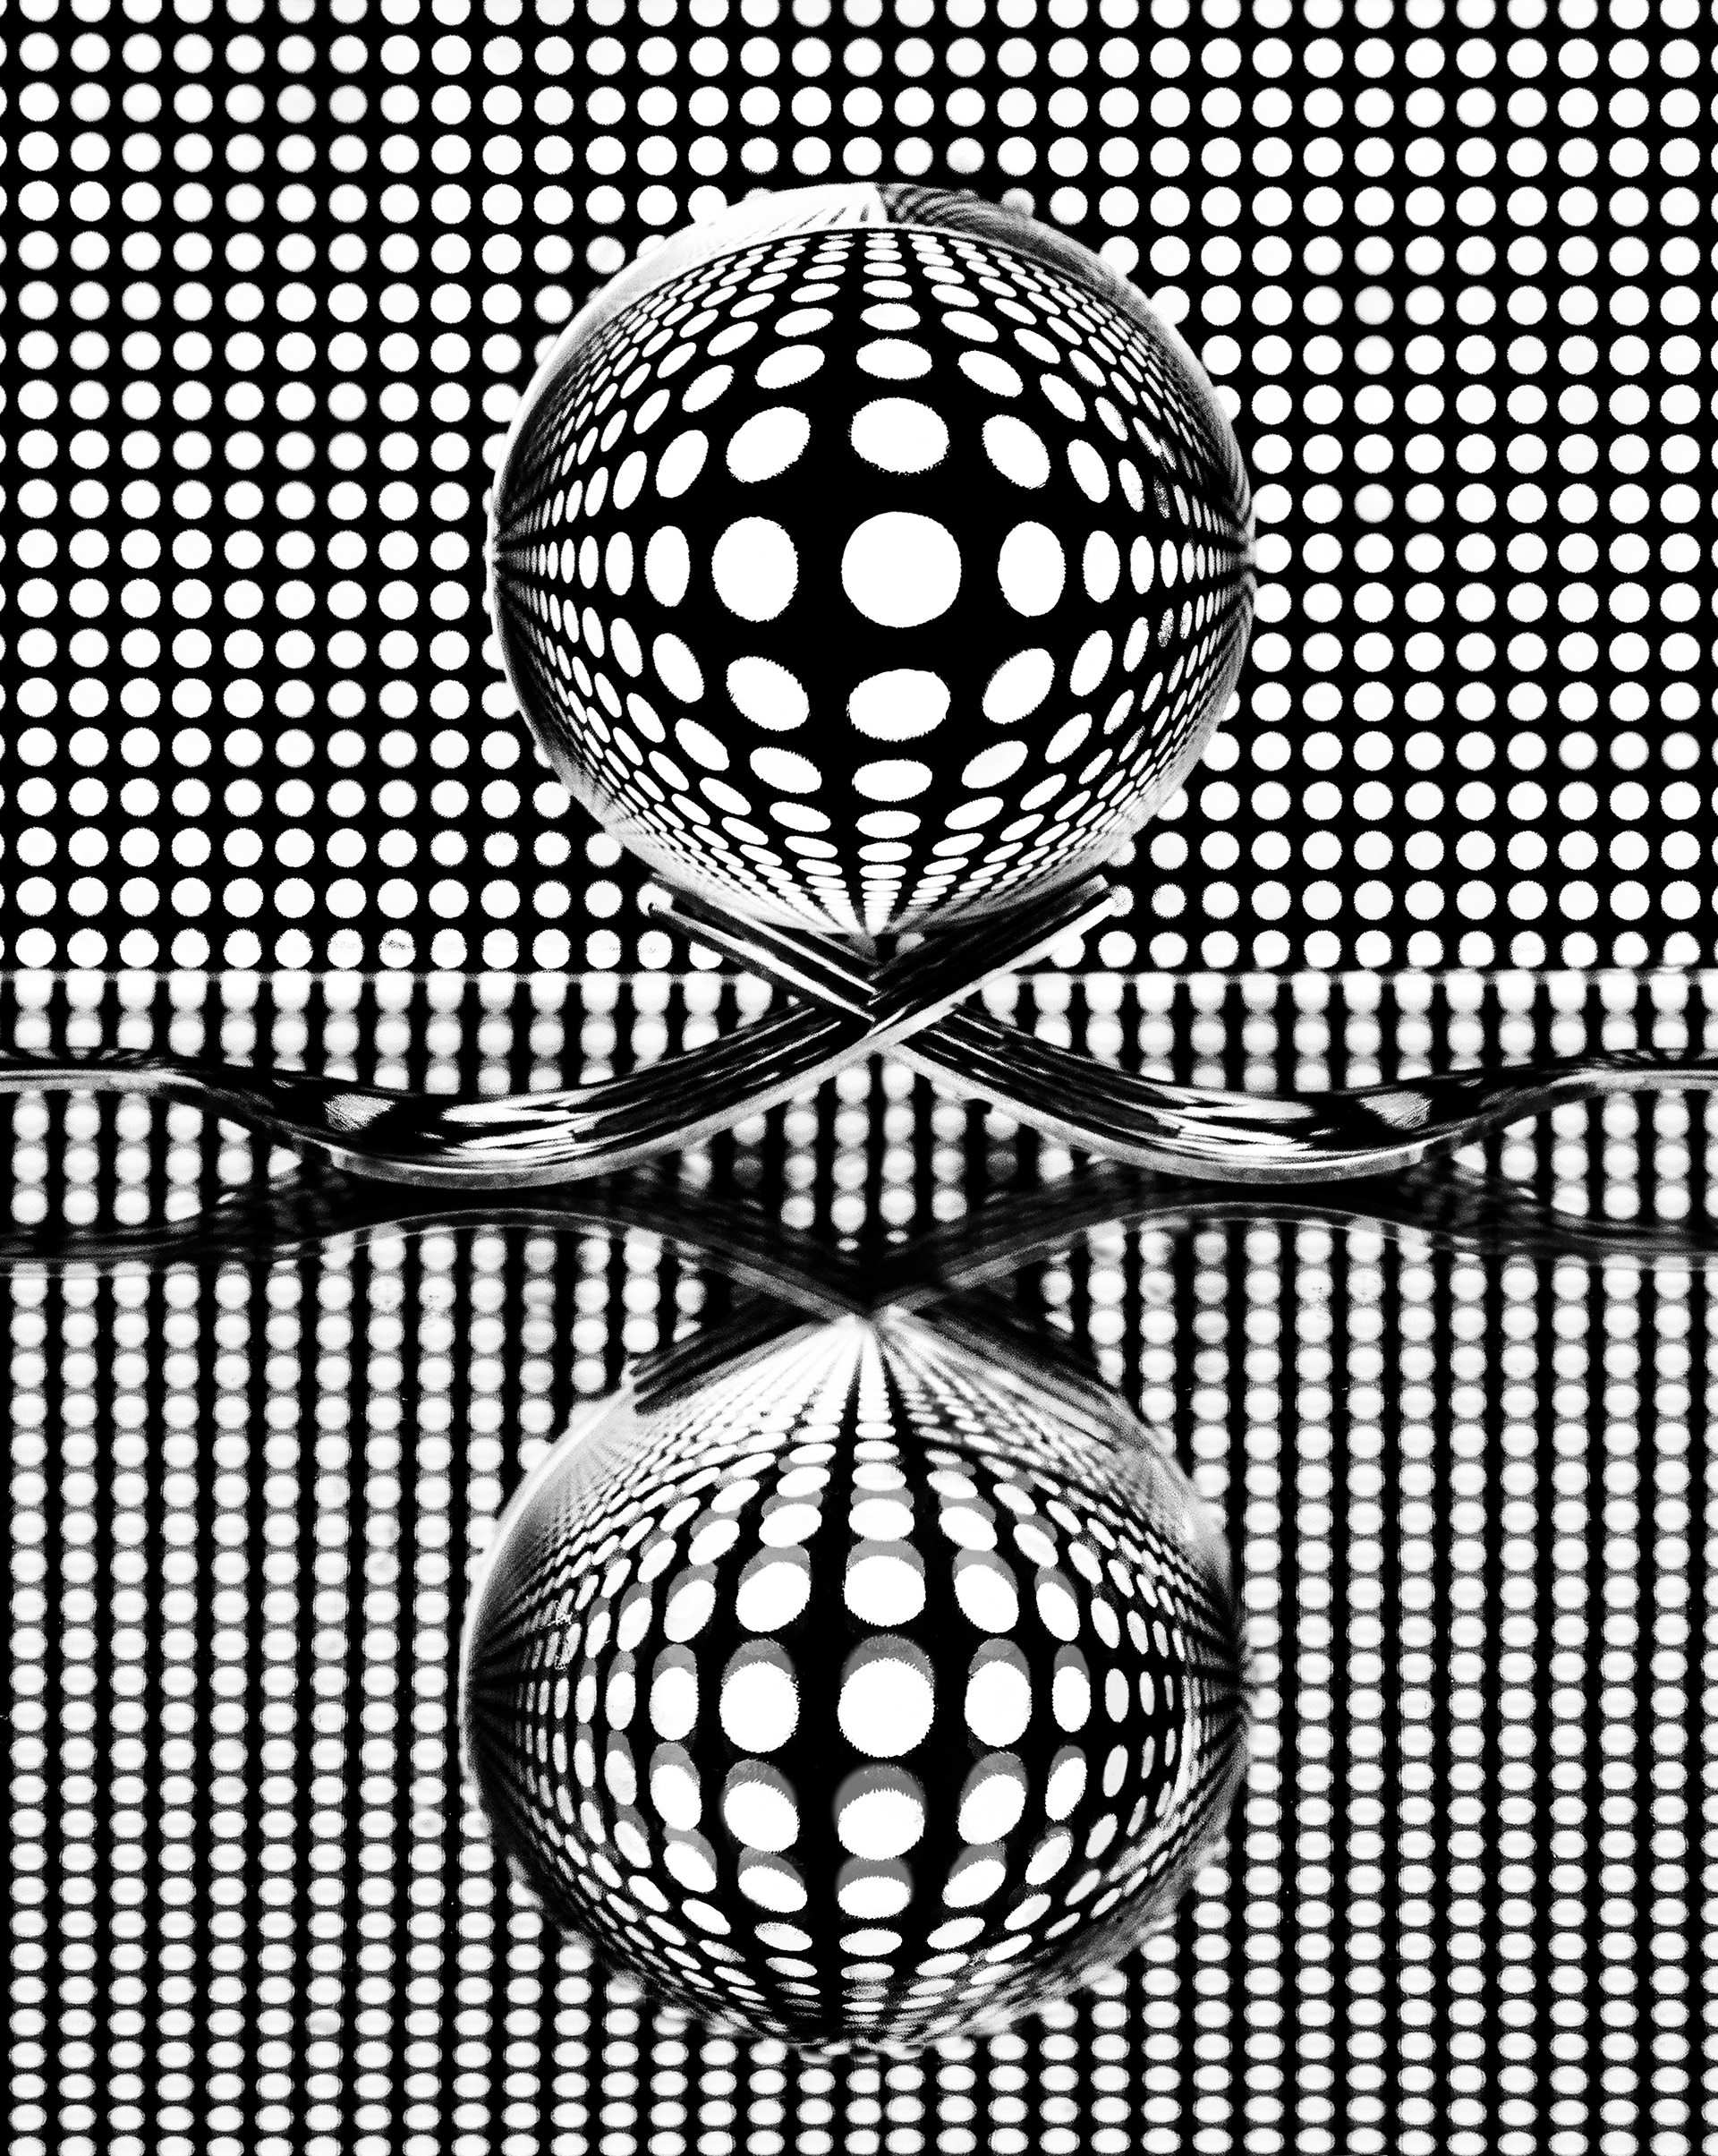
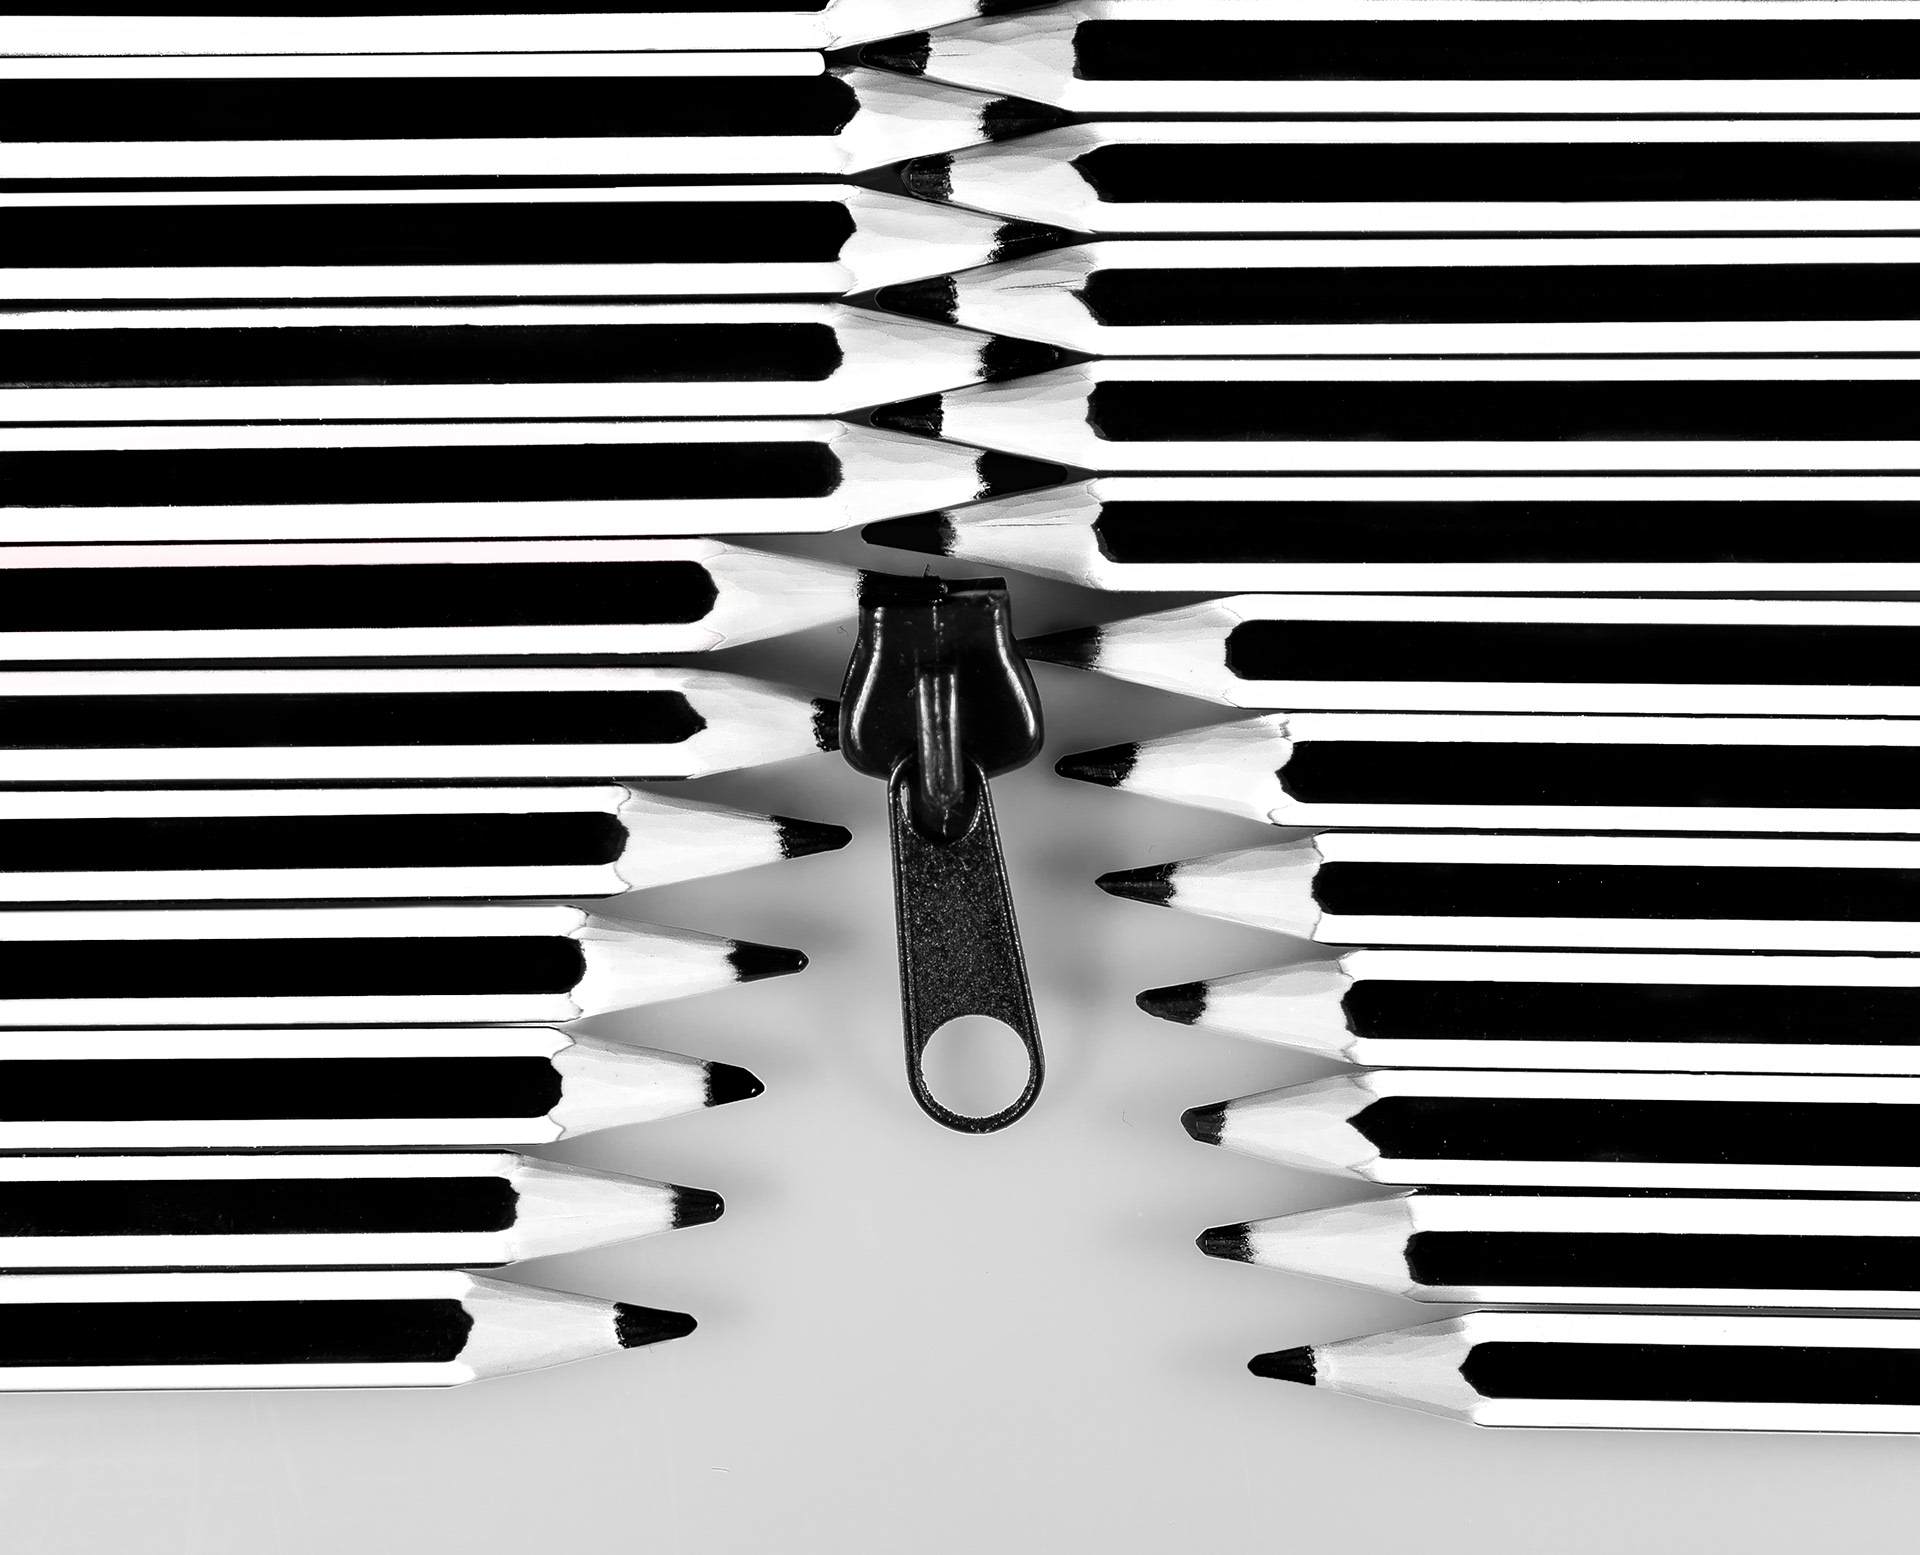
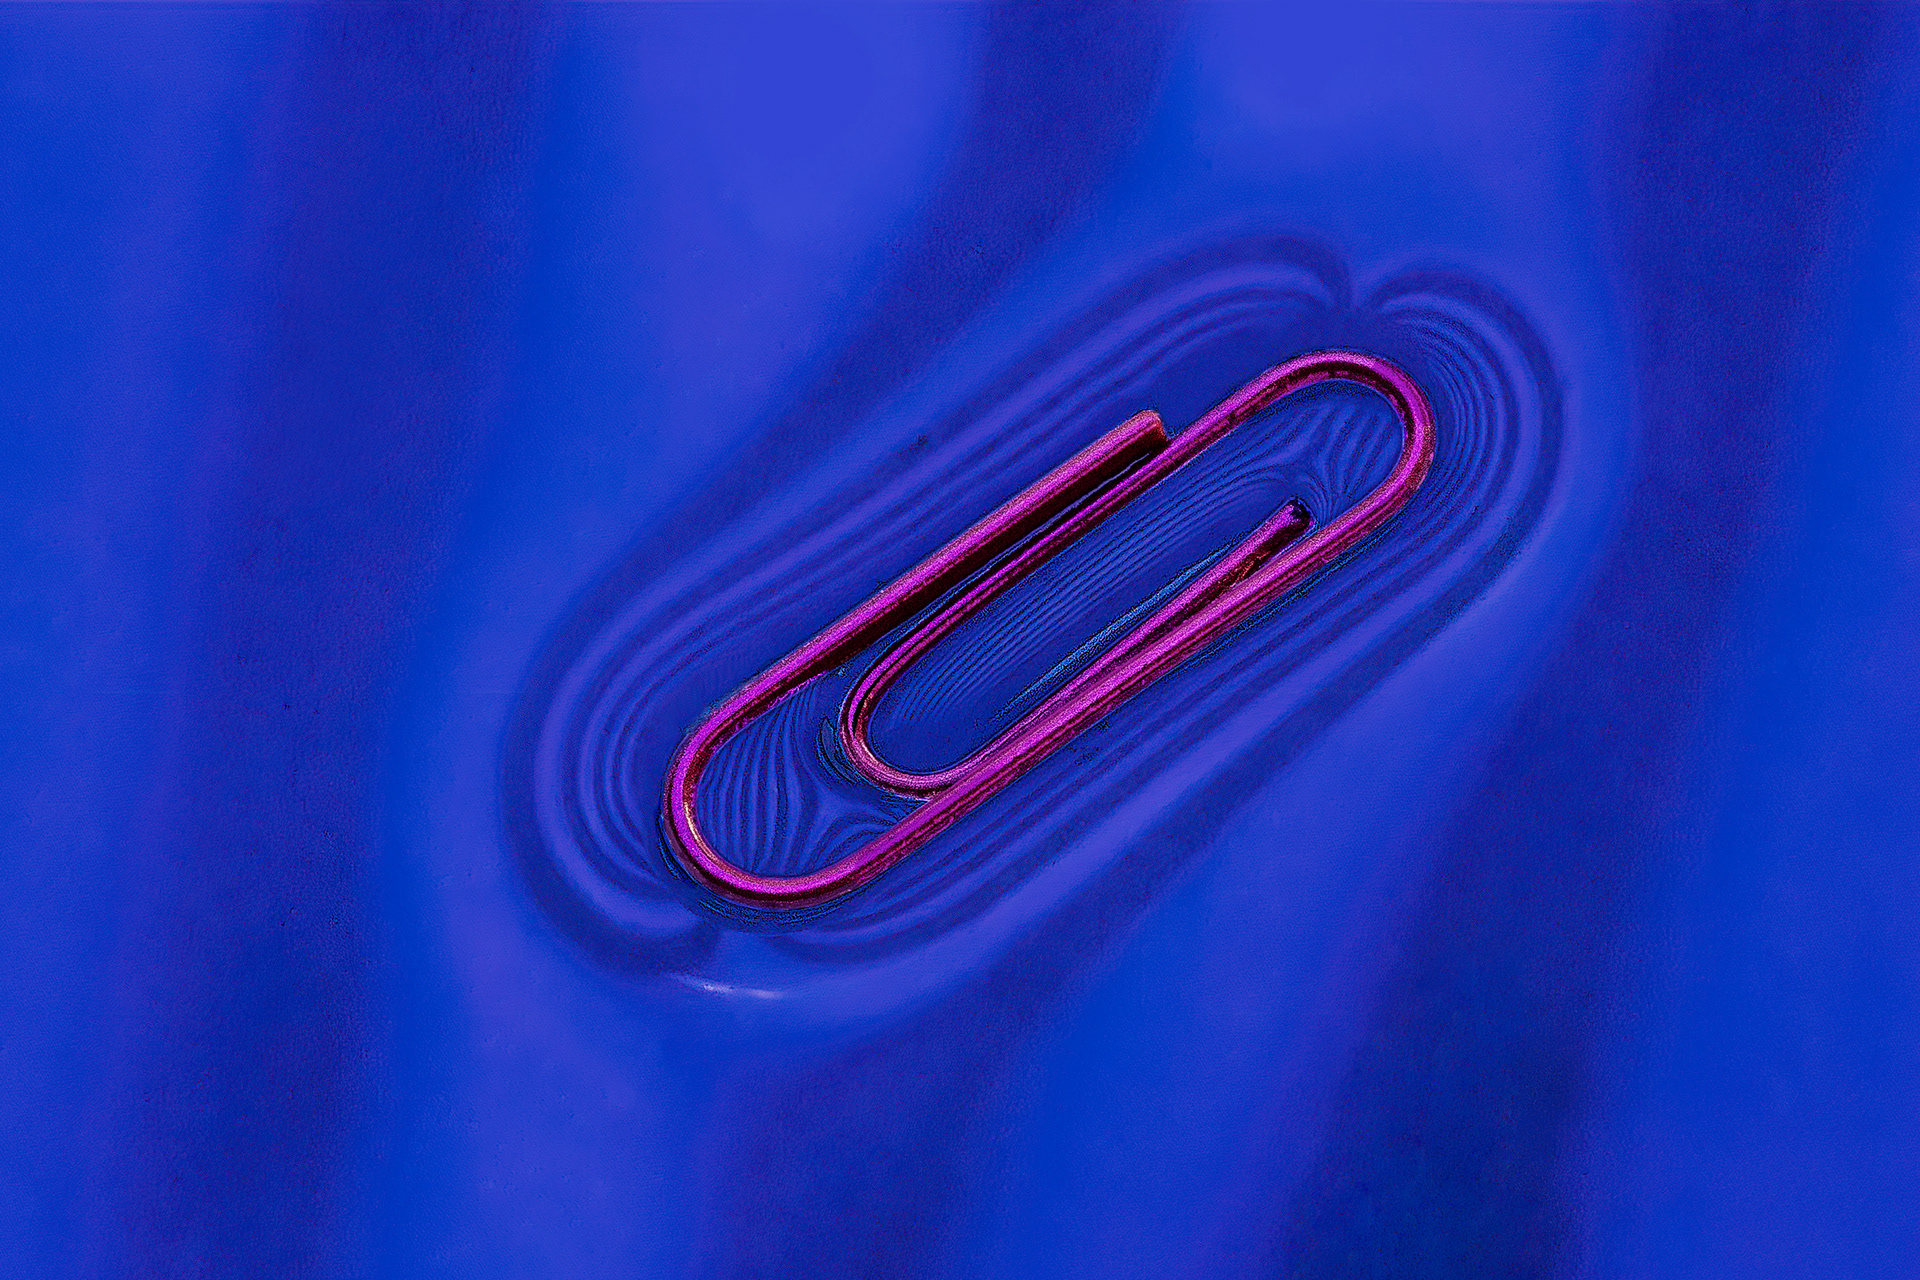
One crystal ball, one mirror, two forks, one sheet of wrapping paper.
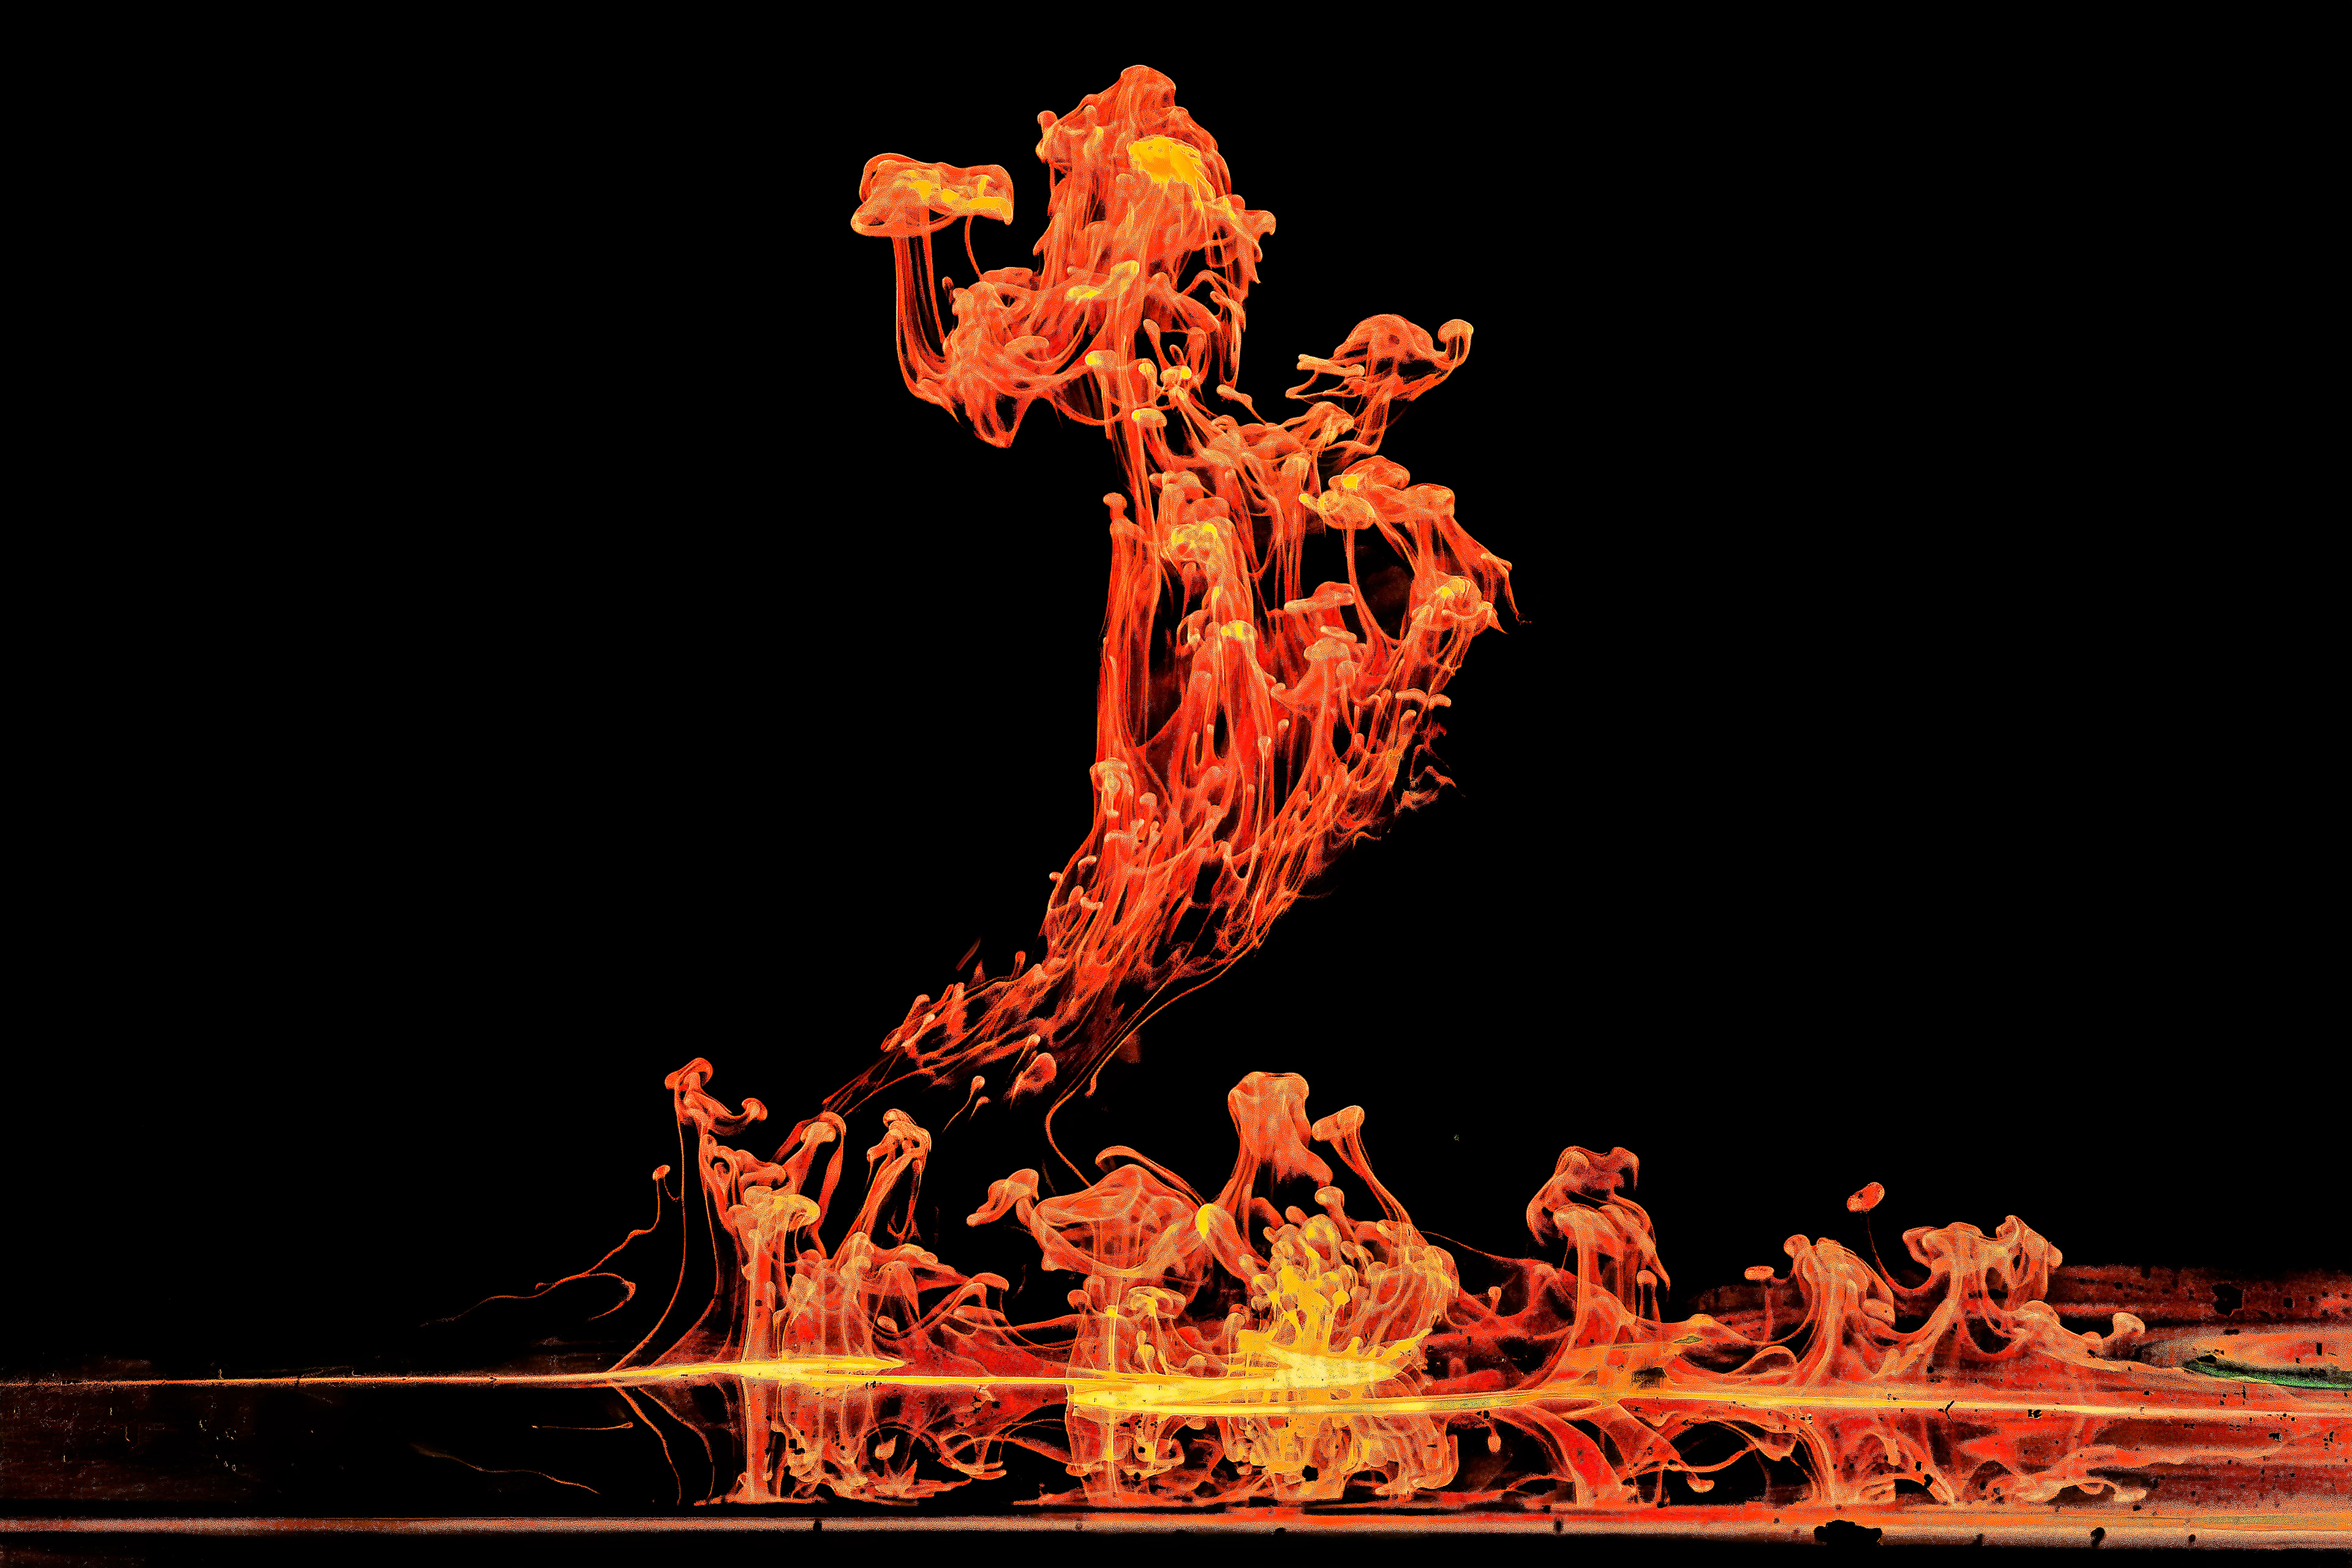
Blue ink dropped in clean water in a fish tank, image turned upside down and inverted in Photoshop.
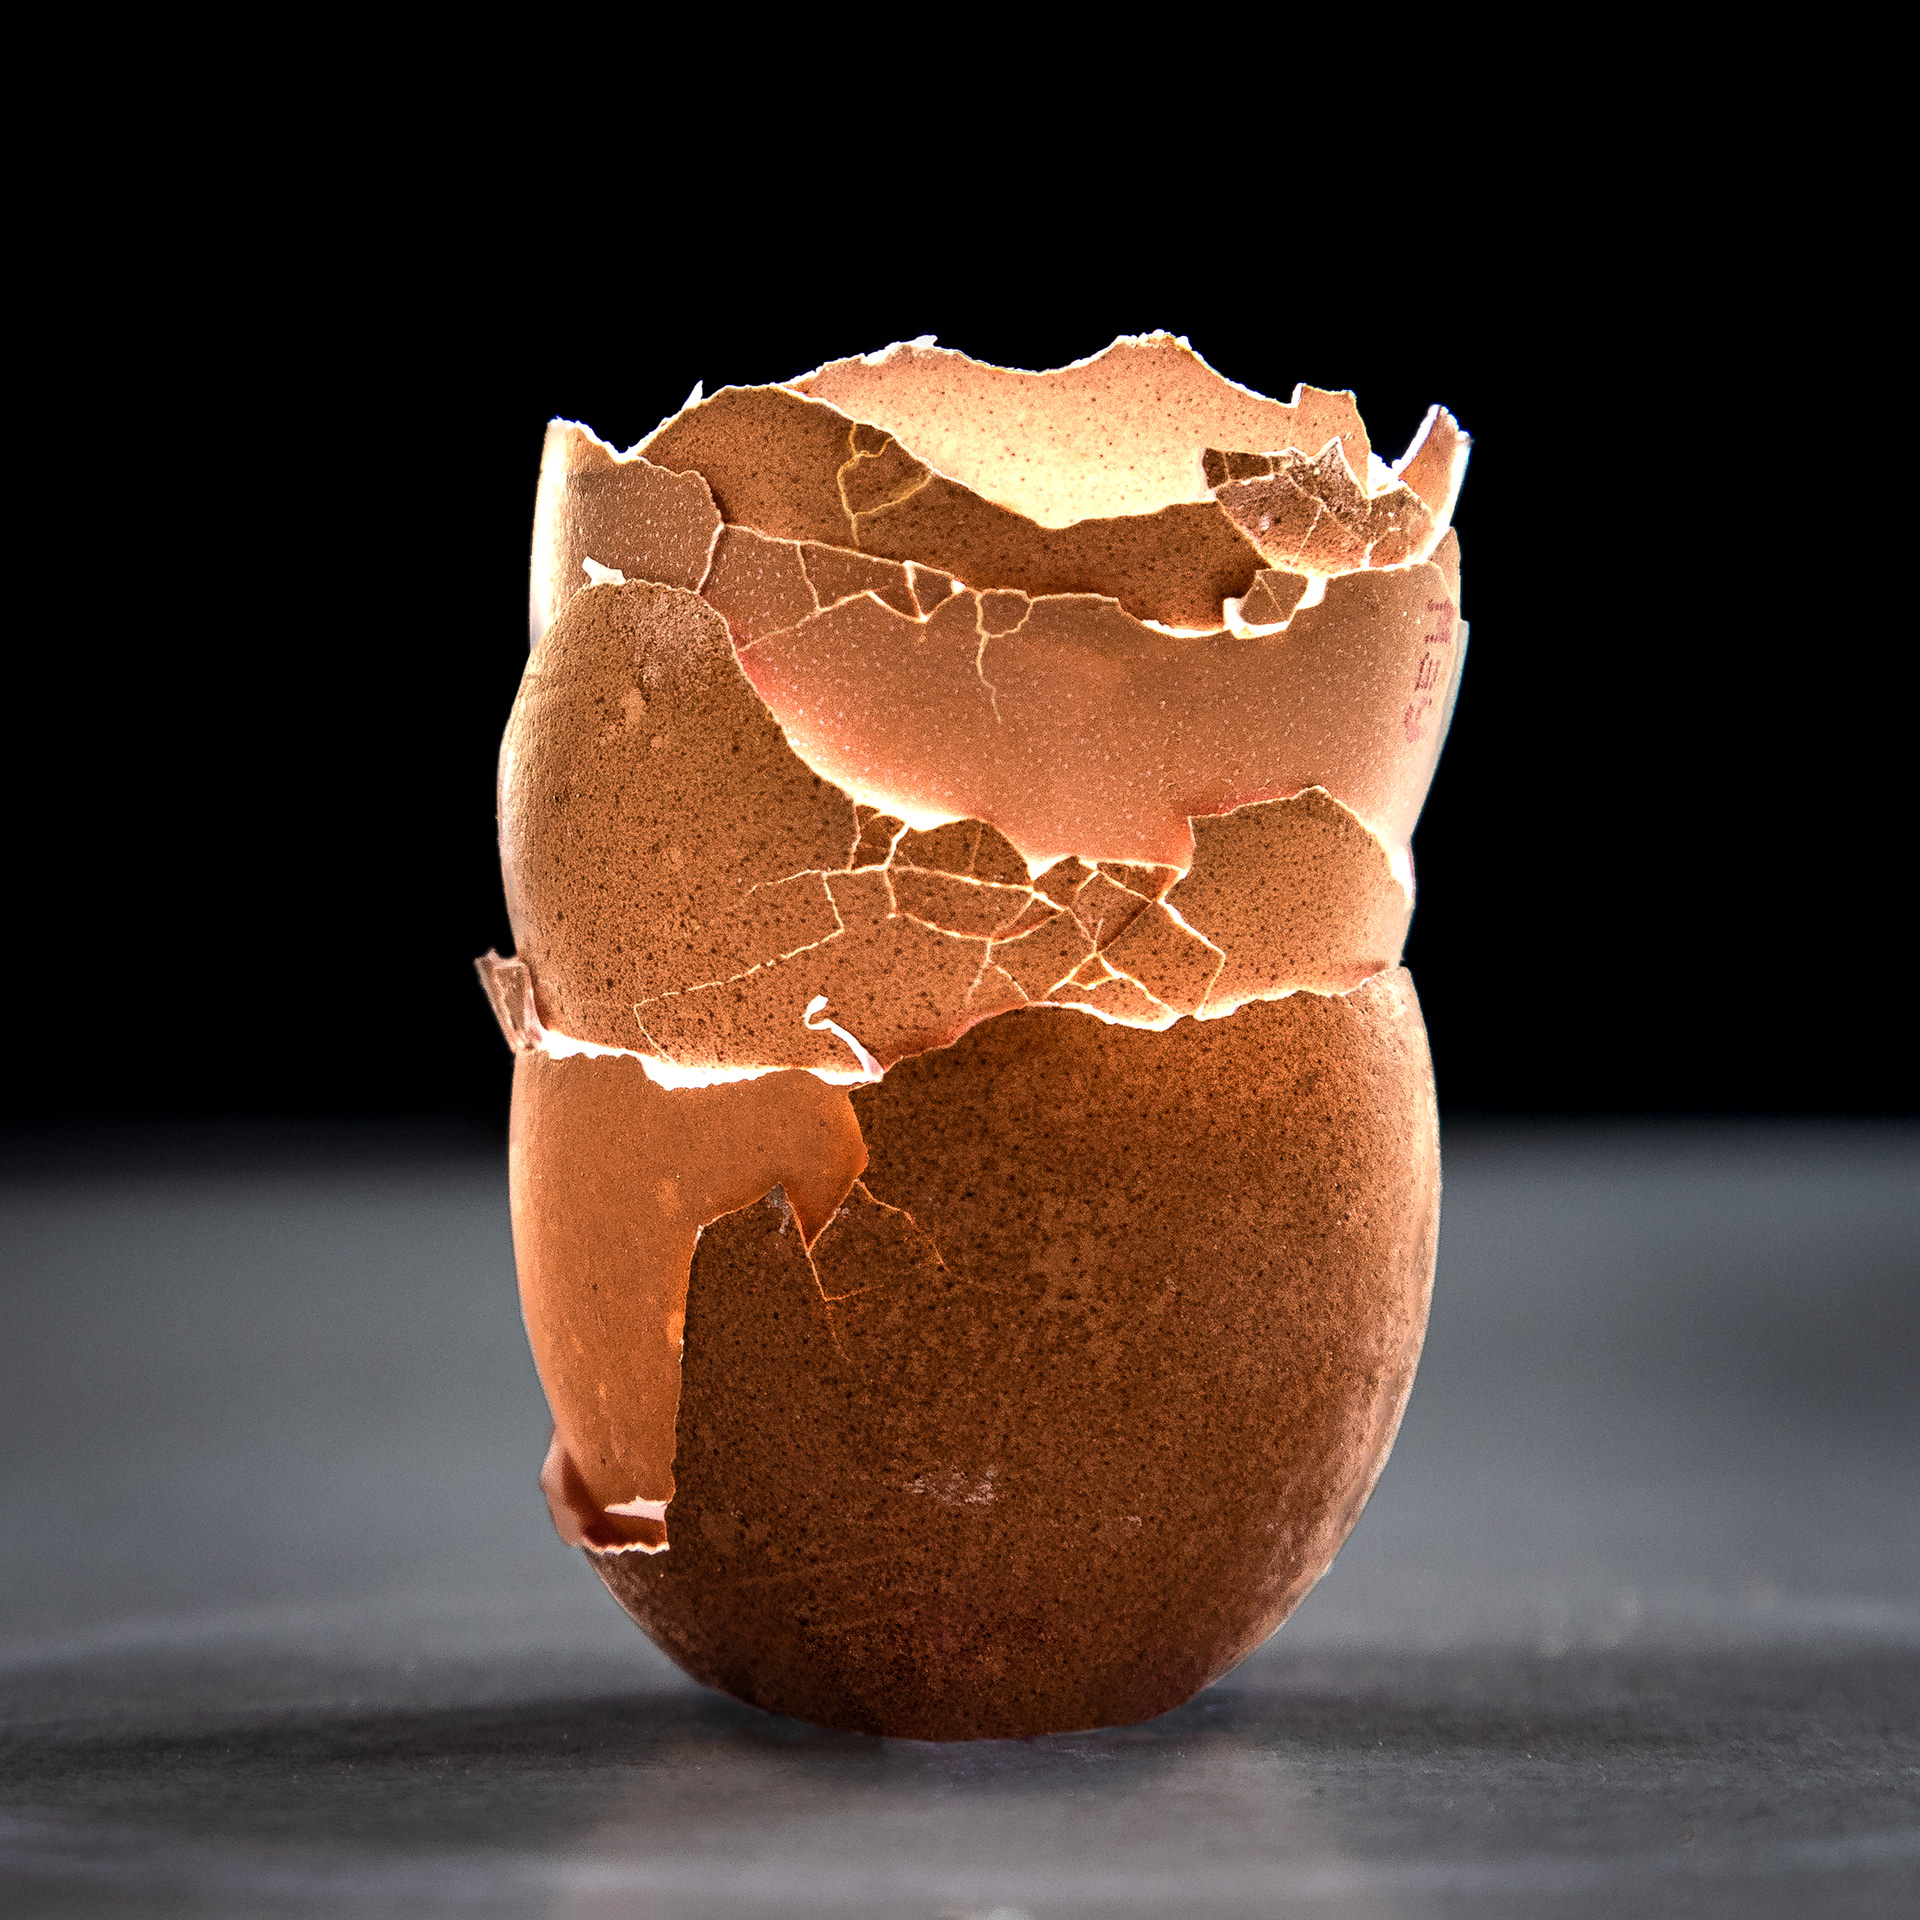
The Eggshell Project
You can read more about it here.

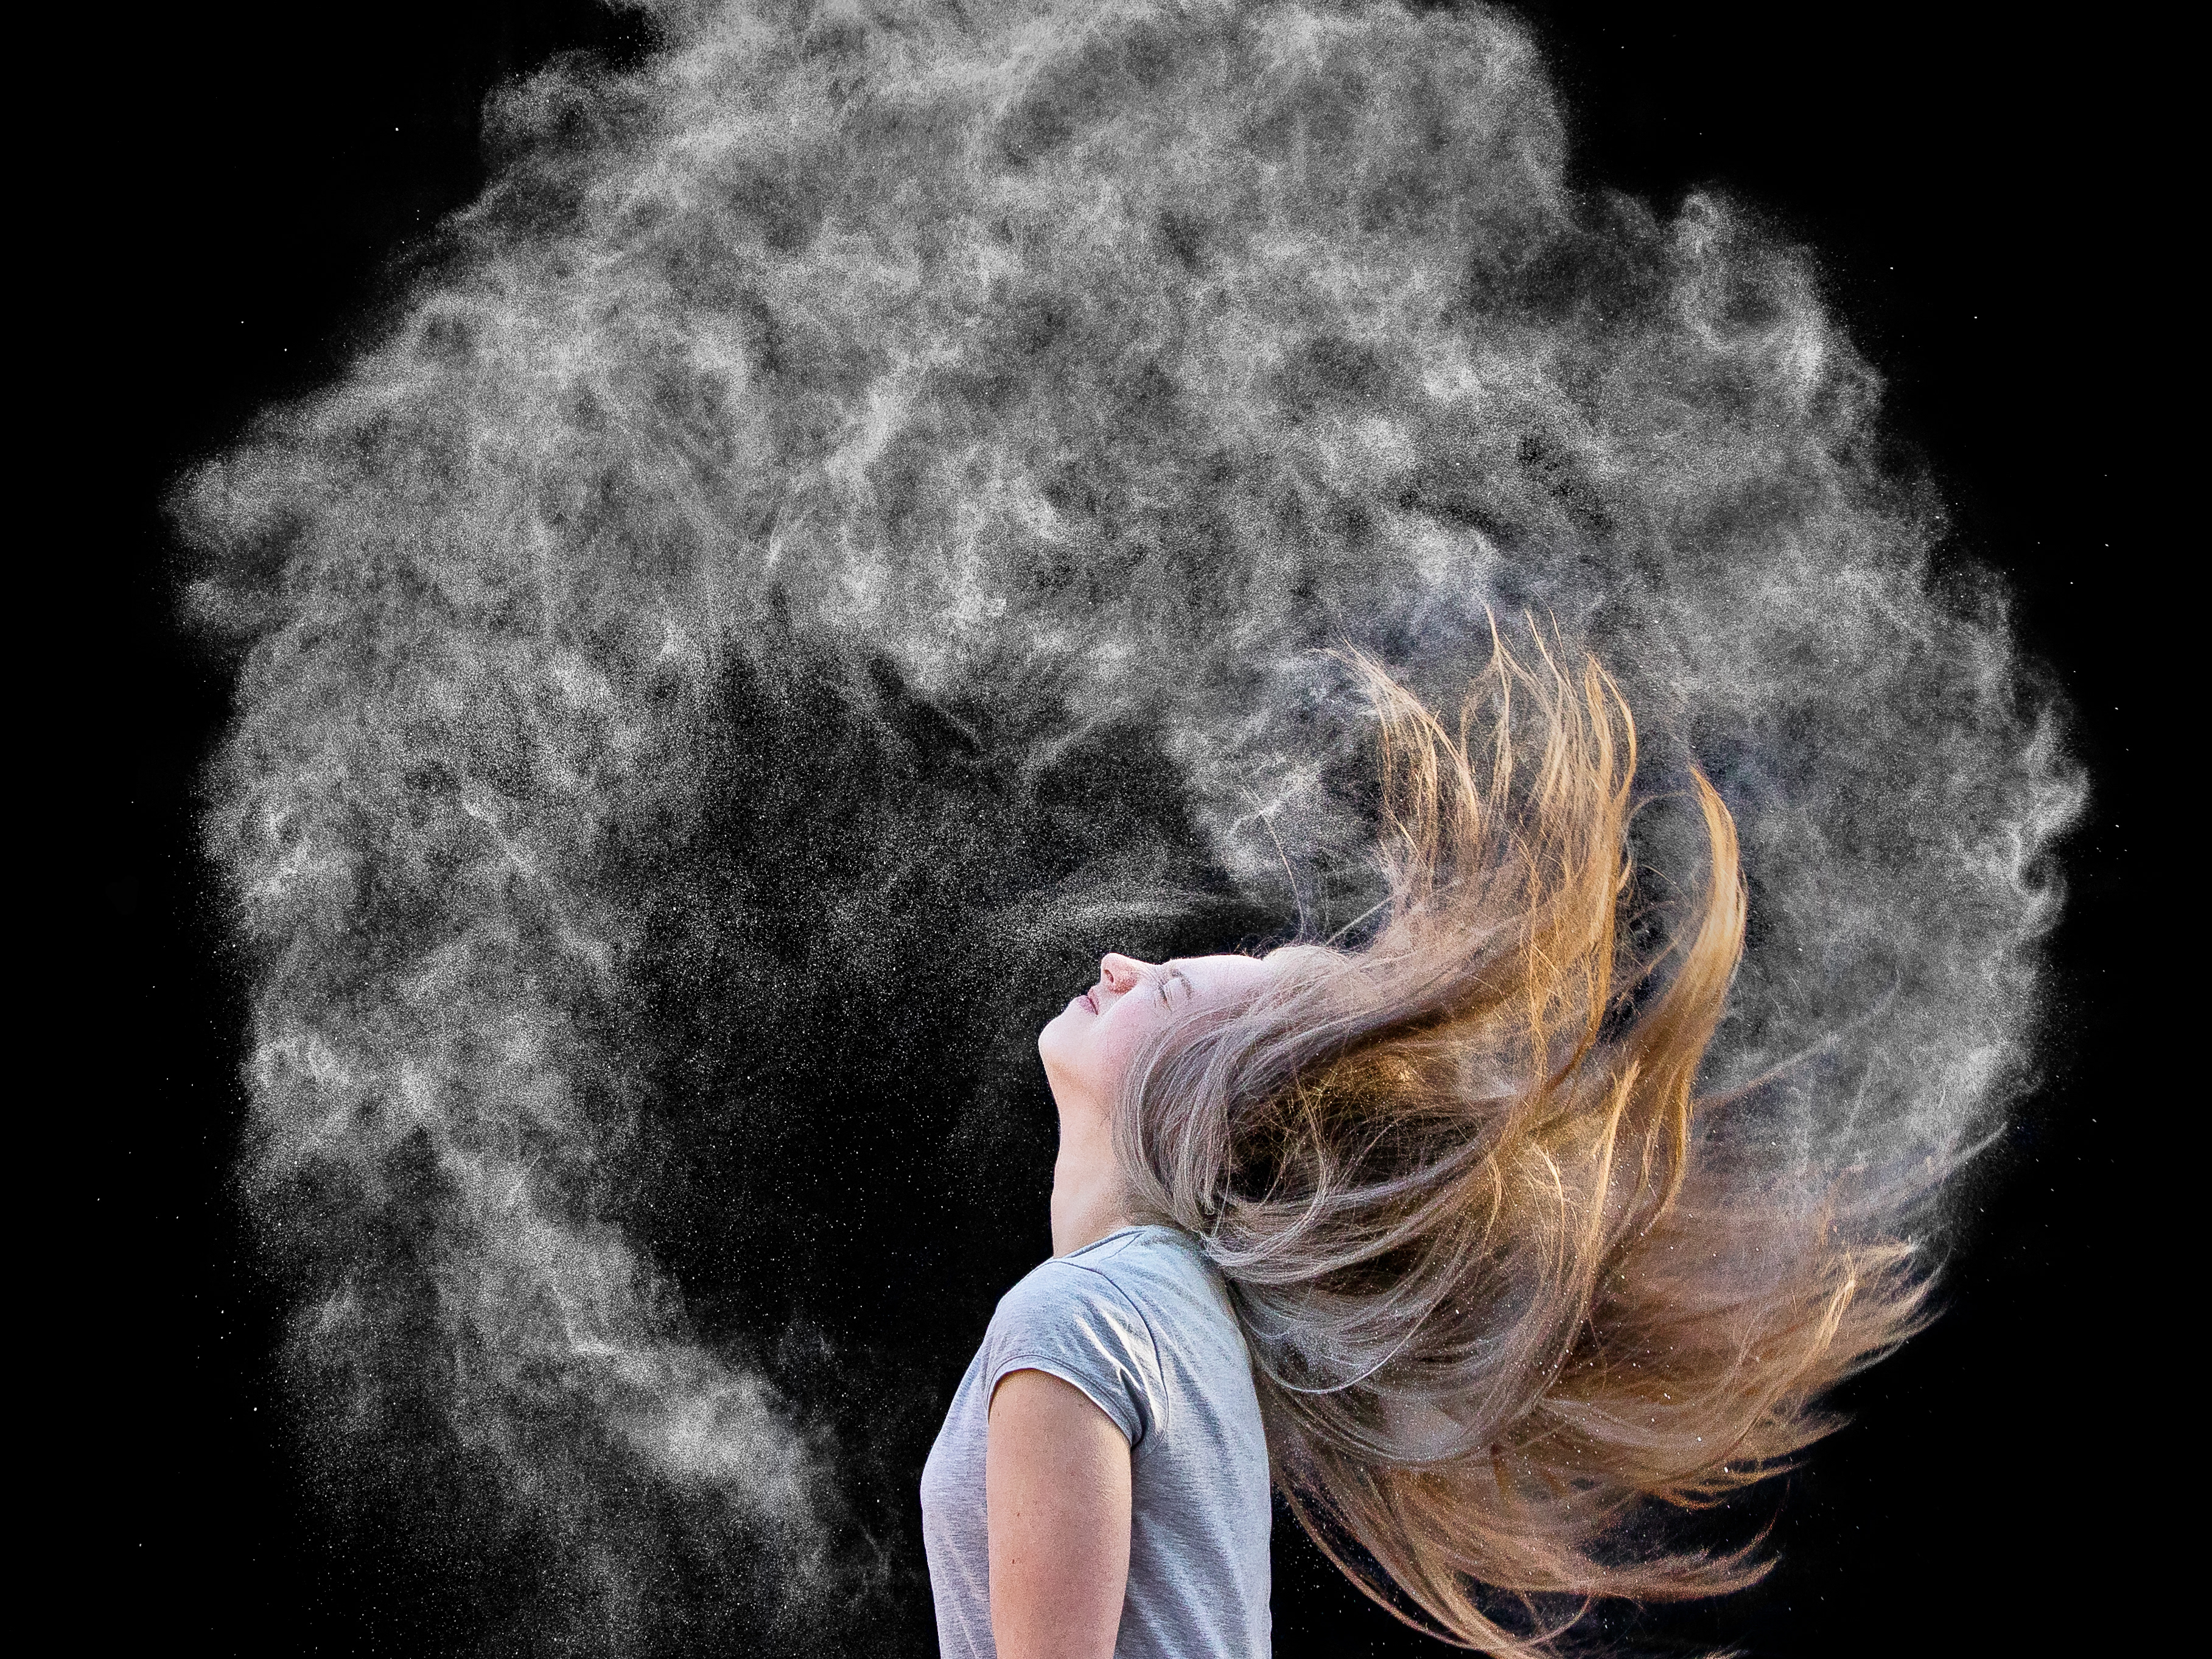
Pop over to my BLOG to find out how I created this image.
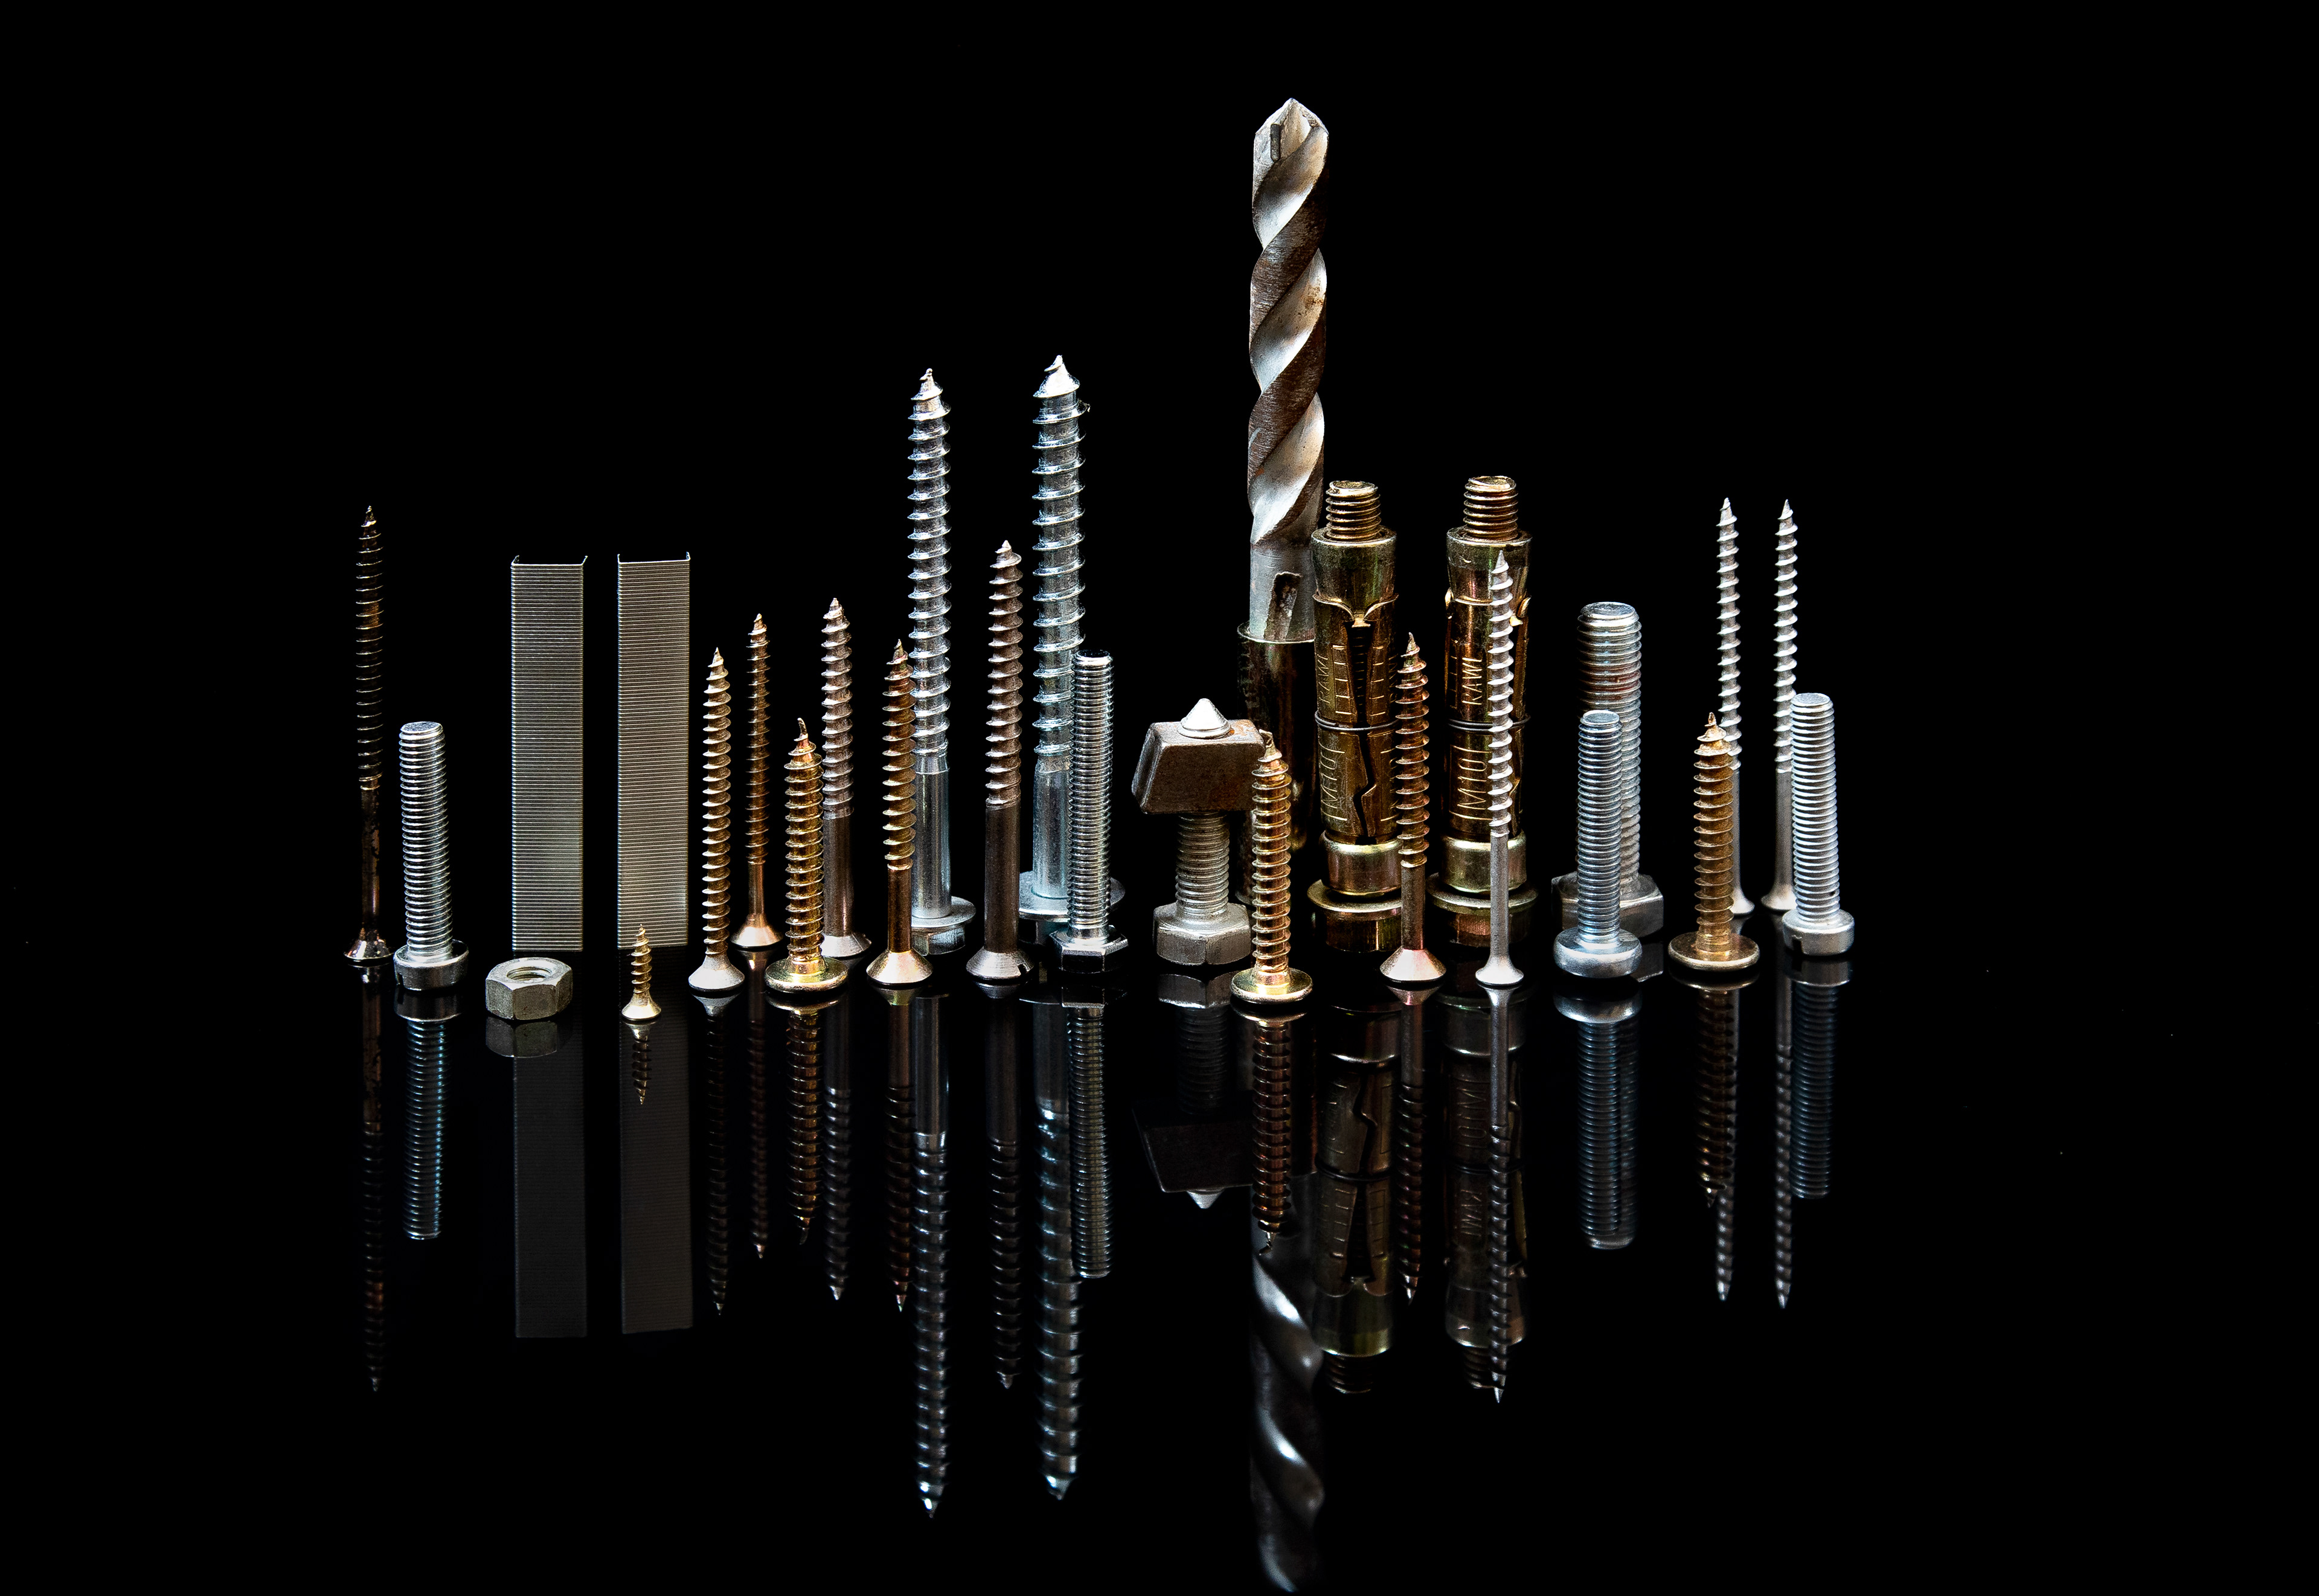
Screw the skyscrapers